For 1990-2009 cars only
Removal Procedure
- Disable SIR. Refer to Disabling the SIR System in SIR.
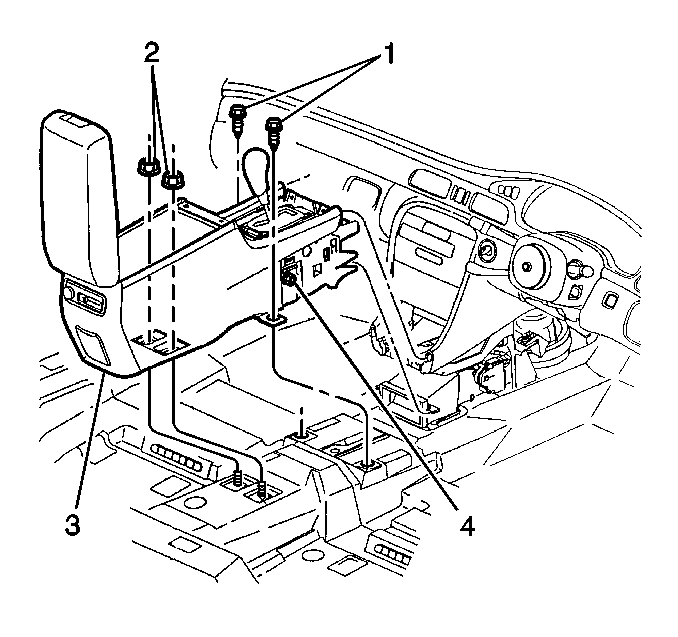
- Remove the console (3). Refer to Console Replacement .
- Remove left insulator panel. Refer to Instrument Panel Insulator Panel Replacement .
- Remove the side window air outlet ducts. Refer to Side Window Air Outlet Replacement .
- Remove the right and left windshield garnish molding. Refer to Windshield Pillar Garnish Molding Replacement in Interior Trim.
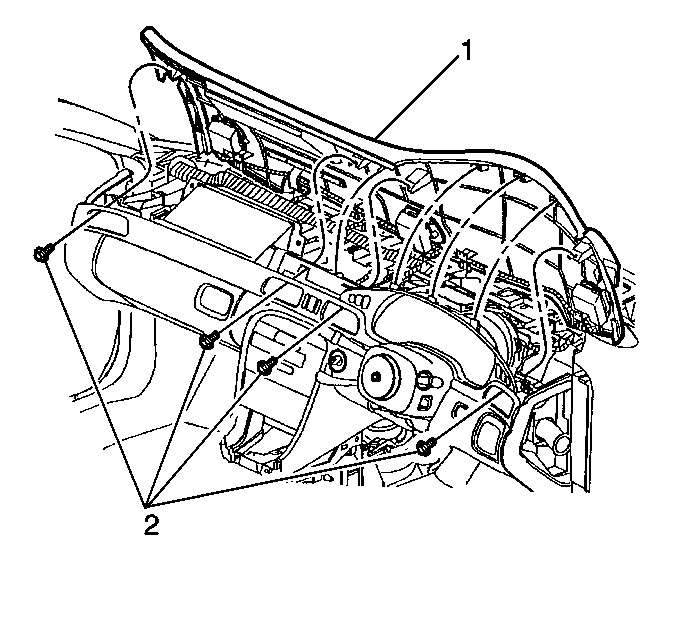
- Remove the IP upper trim pad (1). Refer to Instrument Panel Upper Trim Pad Replacement .
- Remove the passenger side SIR inflator module from the vehicle. Refer to Inflatable Restraint Instrument Panel Module Replacement in SIR.
- Remove the left IP trim plate. Refer to Instrument Panel Accessory Trim Plate Replacement .
- Remove the IP cluster. Refer to Instrument Cluster Replacement .
- Remove the IP center trim plate. Refer to Instrument Panel Center Trim Panel Replacement .
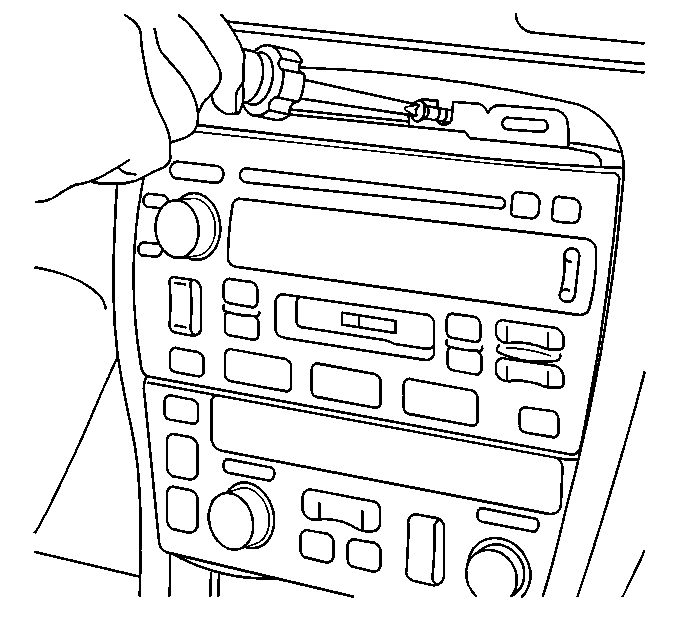
- Remove the radio and heater control. Refer to Radio Replacement in Entertainment.
- Remove the lap cooler duct. Refer to Lap Cooler Duct Replacement .
- Remove the knee bolster. Refer to Knee Bolster Replacement .
- Remove the steering column. Refer to Steering Column Replacement in Steering Wheel and Column Tilt.
- Remove fog lamp switch. Refer to Fog Lamp Switch Replacement in Lighting System.
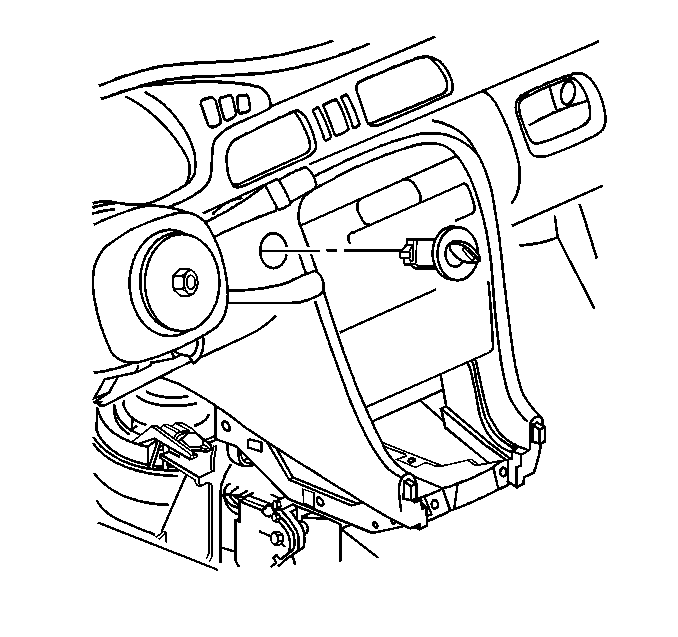
- Remove the trunk/fuel door release. Refer to Fuel/Rear Compartment Release Switch Replacement .
- Remove the ignition switch from the IP. Refer to Ignition and Start Switch Replacement .
- Remove the IP compartment from the IP. Refer to Instrument Panel Compartment Replacement .
- Remove the IP retaining screws from the ends of the retainer.
- Remove fasteners from IP retainer. One fastener is located in the opening for the fuel/rear compartment release switch.
- Remove the retaining bolts from the IP retainer to lower support bracket.
- Partially remove the IP retainer from the carrier.
- Disconnect the inside air temperature sensor electrical connector.
- Remove the inside temperature sensor from the IP retainer. Refer to Inside Air Temperature Sensor Replacement in HVAC System with A/C.
- Remove the right IP trim plate from the IP carrier. Refer to Instrument Panel Accessory Trim Plate Replacement .


Guide wiring through openings.
Complete IP retainer removal from vehicle.
Installation Procedure
- Install the right IP trim plate to the IP carrier. Refer to Instrument Panel Accessory Trim Plate Replacement .
- Install the inside temperature sensor to the IP retainer. Refer to Inside Air Temperature Sensor Replacement in HVAC System with A/C.
- Partially install the IP retainer to the carrier.
- Guide the wiring through the IP retainer openings.
- Install the retaining bolts to the IP retainer to the lower support bracket.
- Install IP retainer to the carrier, feed wiring through openings as removed.
- Install the fasteners to the IP retainer. One fastener is located in the opening for the fuel/rear compartment release switch.
- Install the IP retaining screws to the ends of the retainer.
- Install the IP compartment. Refer to Instrument Panel Compartment Replacement .
- Install the ignition switch. Refer to Ignition and Start Switch Replacement .
- Install the trunk/fuel door release. Refer to Fuel/Rear Compartment Release Switch Replacement .
- Install fog lamp switch. Refer to Fog Lamp Switch Replacement in Lighting System.
- Install the steering column. Refer to Steering Column Replacement in Steering Wheel and Column Tilt.
- Install the knee bolster. Refer to Knee Bolster Replacement .
- Install the lap cooler duct. Refer to Lap Cooler Duct Replacement .
- Install the radio and heater control. Refer to Radio Replacement in Entertainment.
- Install the IP center trim plate. Refer to Instrument Panel Center Trim Panel Replacement .
- Install the IP cluster. Refer to Instrument Cluster Replacement .
- Install the left IP trim plate to the IP carrier. Refer to Instrument Panel Accessory Trim Plate Replacement .
- Install the passenger side SIR inflator module. Refer to Inflatable Restraint Instrument Panel Module Replacement in SIR.
- Install the IP upper trim pad. Refer to Instrument Panel Upper Trim Pad Replacement .
- Install right and left windshield garnish molding. Refer to Windshield Pillar Garnish Molding Replacement in Interior Trim.
- Install the side window air outlets ducts. Refer to Side Window Air Outlet Replacement .
- Install left insulator panel. Refer to Instrument Panel Insulator Panel Replacement .
- Install the console (3). Refer to Console Replacement .
- Enable SIR. Refer to Enabling the SIR System in SIR.
Connect the inside air temperature sensor electrical connector.
Align the IP retainer to the carrier complete installation.


