Removal Procedure
- Align front wheels facing straight ahead.
- Discharge fuel system pressure. Refer to Fuel Pressure Relief.
- Disconnect the cable from negative battery terminal. Refer to Battery Negative Cable Disconnection and Connection.
- Remove the front wheels.
- Remove the engine under left cover.
- Remove the engine under right cover.
- Drain the engine coolant. Refer to Cooling System Draining and Filling.
- Drain the transfer case.
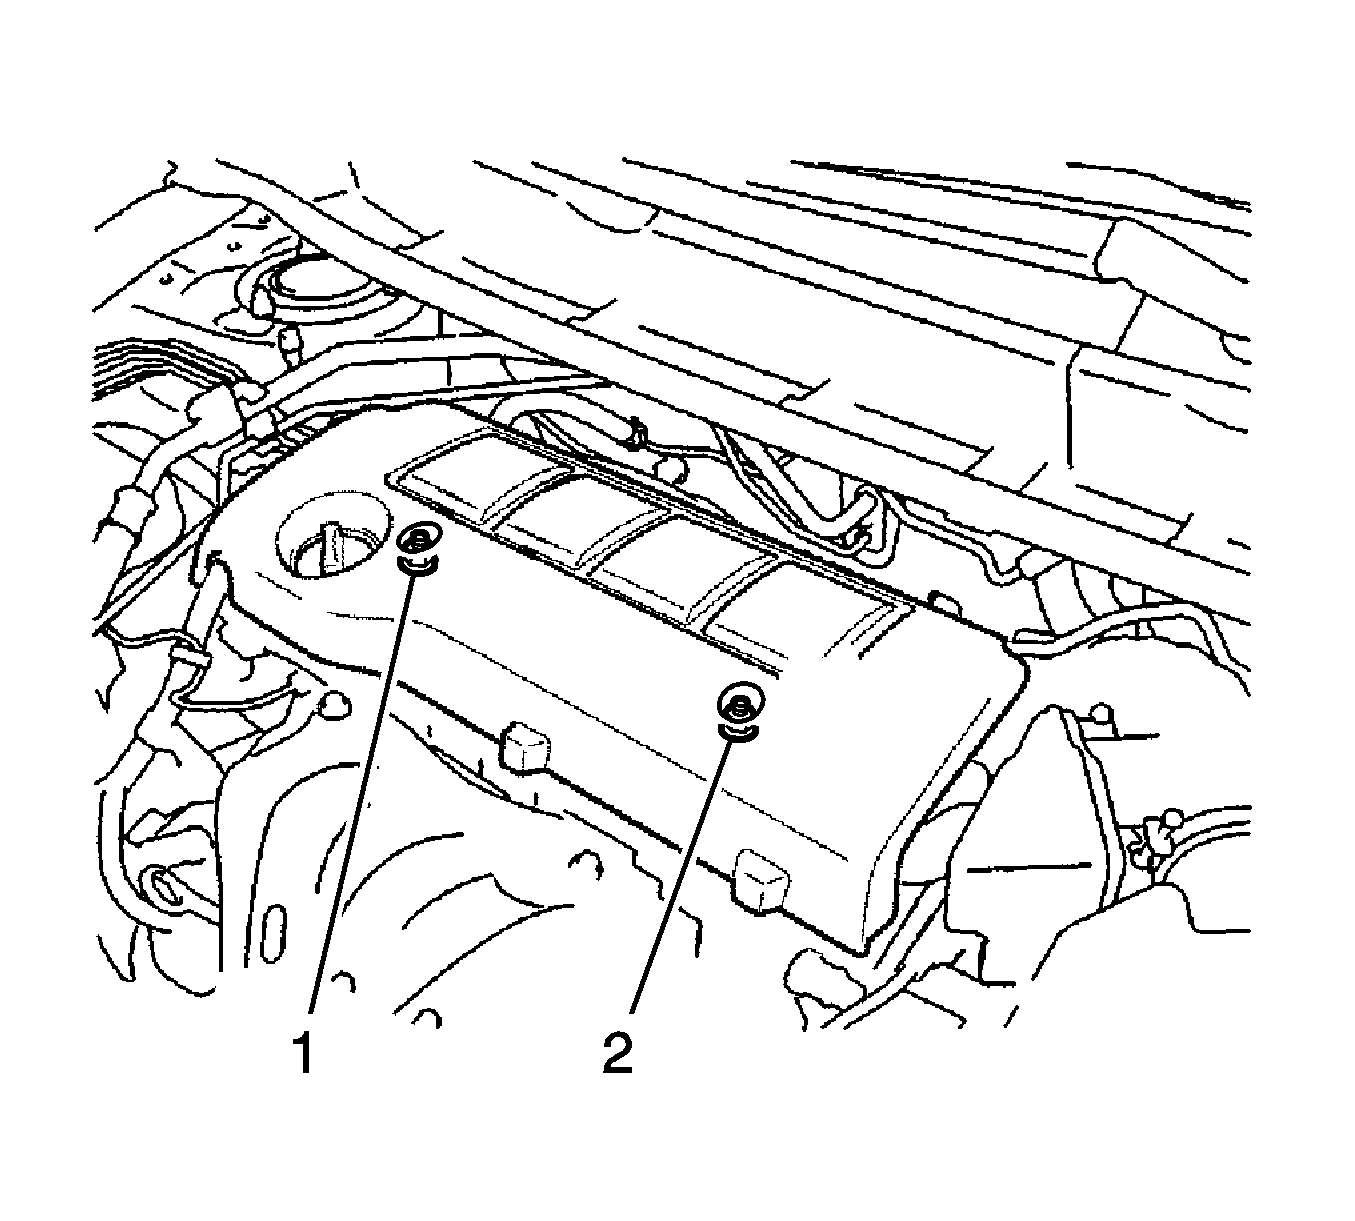
- Remove the 2 nuts (1, 2) and the engine cover.
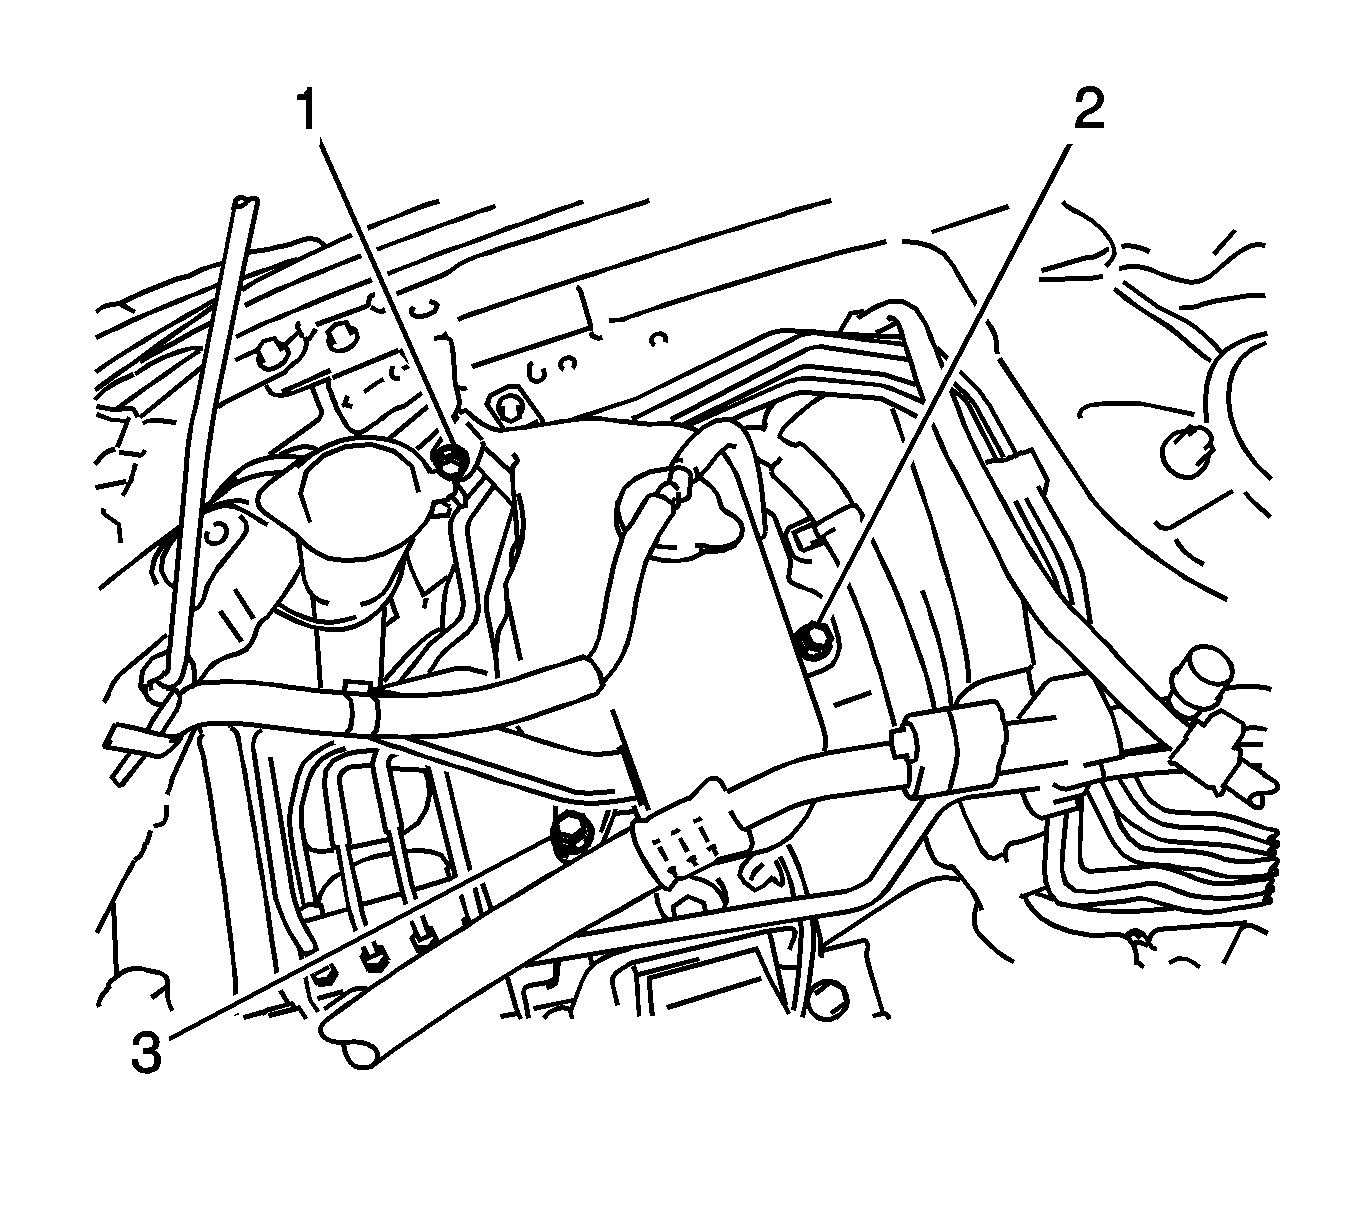
- Separate the 3 bolts (1, 2, 3) and radiator reserve tank assembly.
- Remove air cleaner cap with hose.
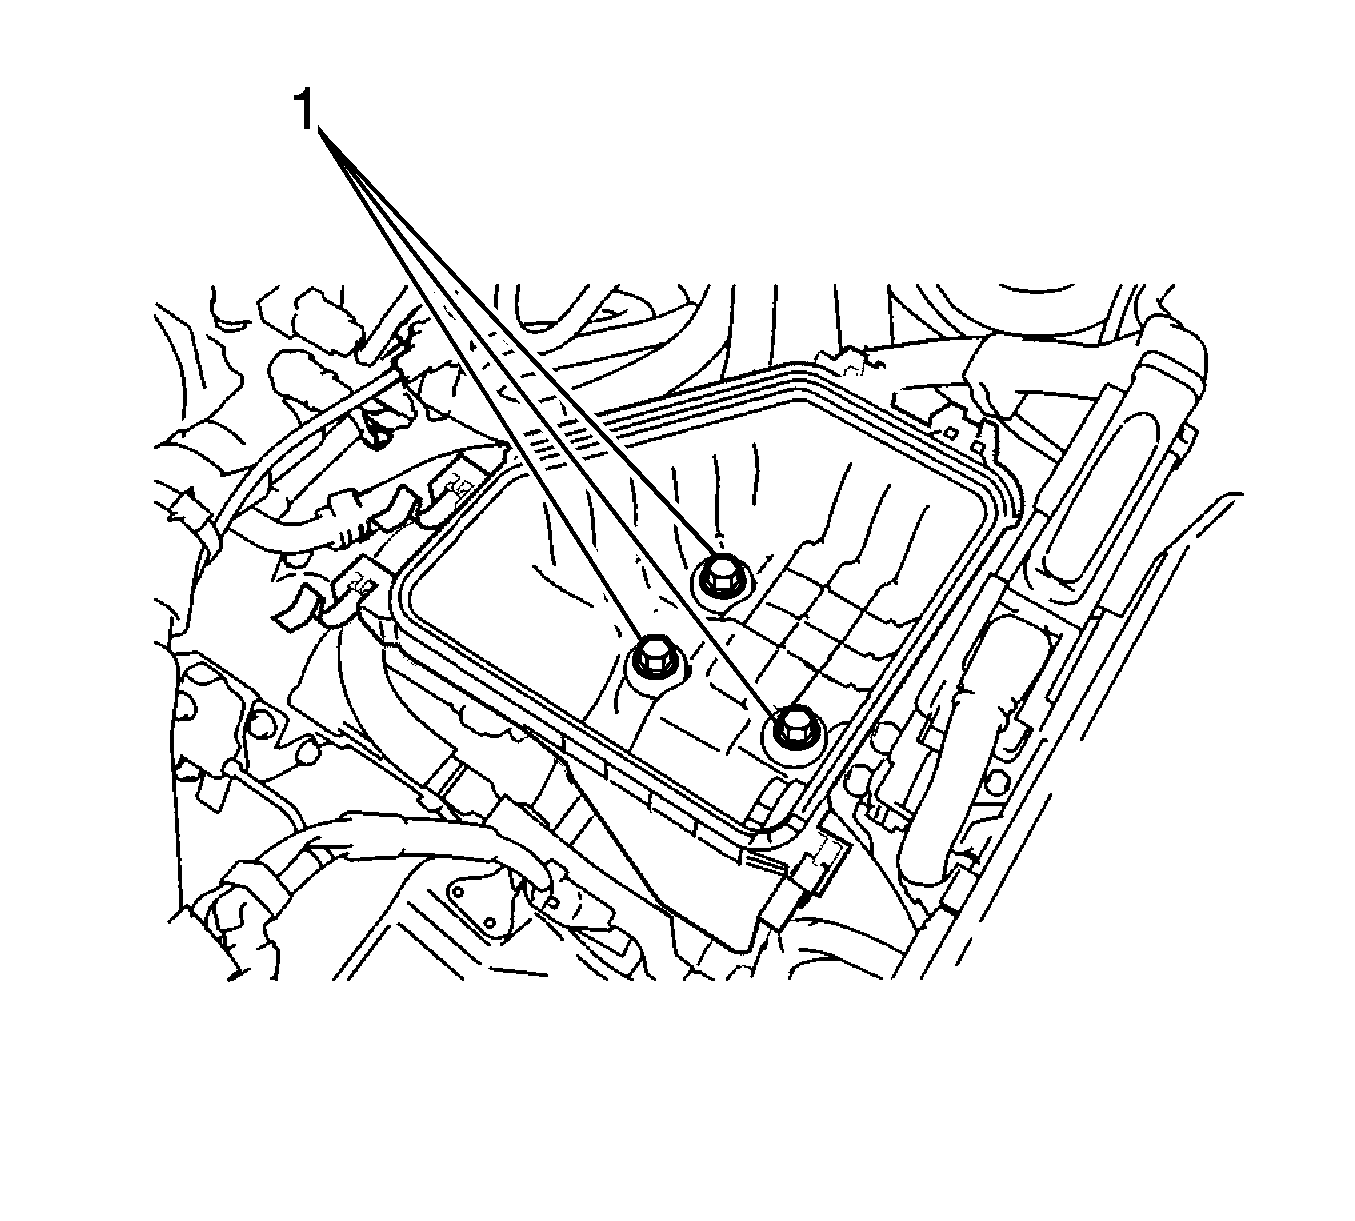
- Remove the 3 bolts (1) and air cleaner case.
- Remove the bolt (2), nut (1) and battery clamp.
- Remove the battery and battery insulator.
- Separate the 2 wire harness clamps from the battery carrier.
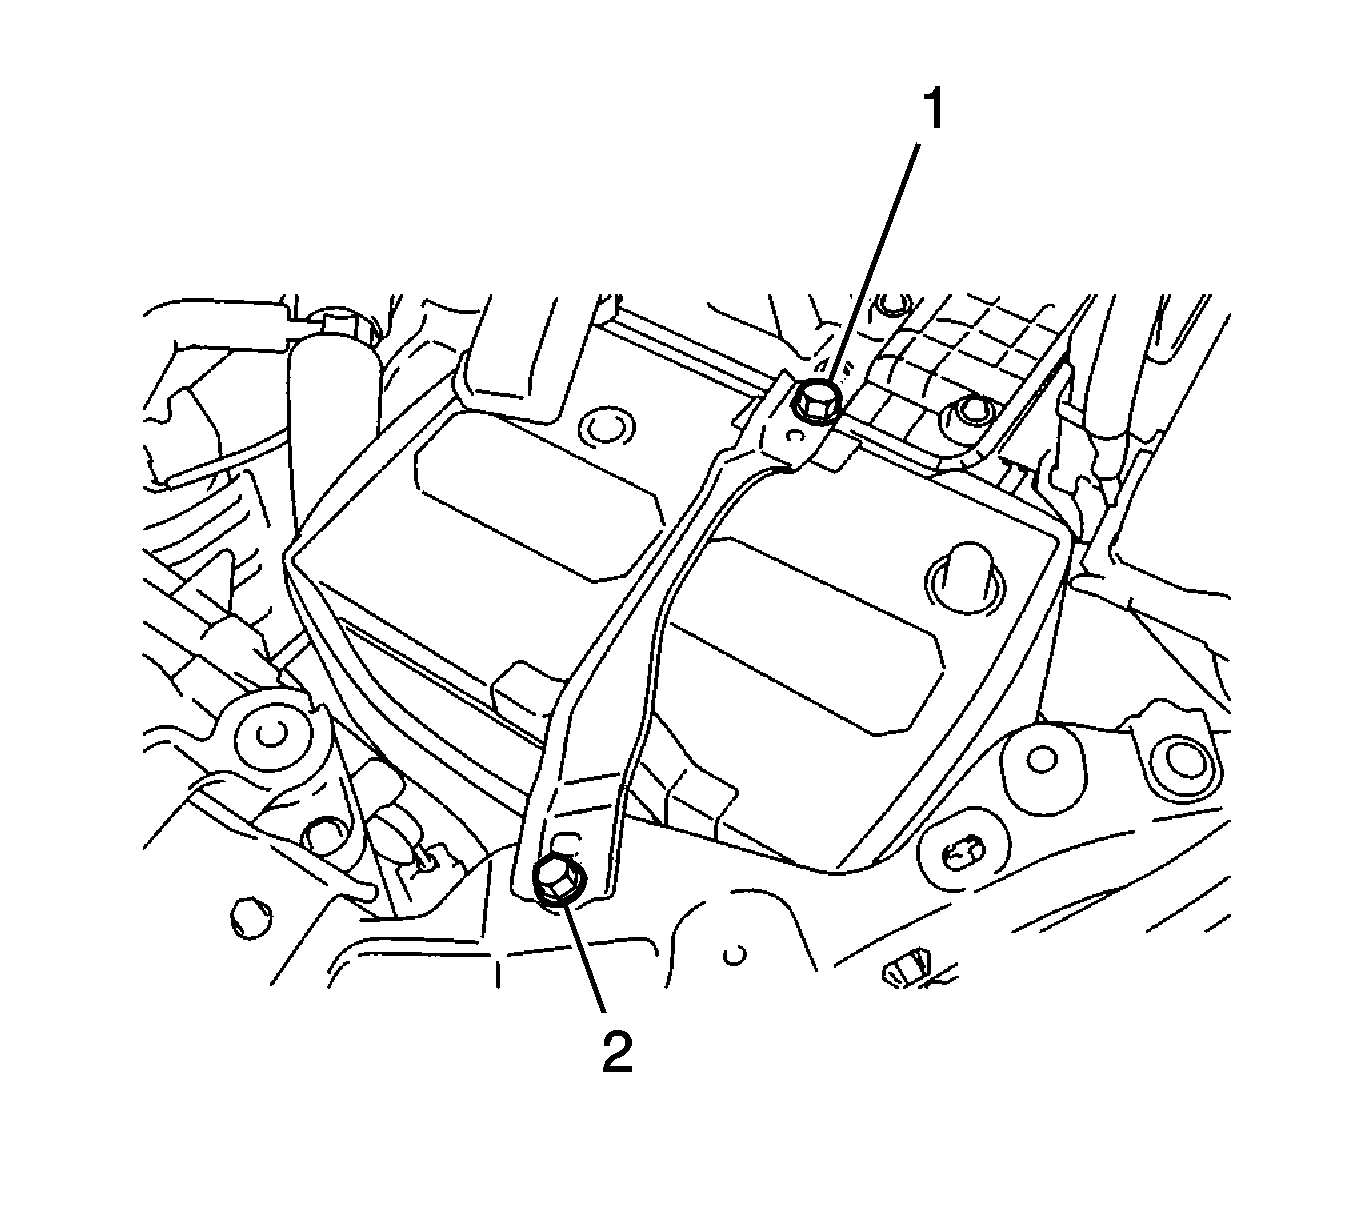
- Remove the 4 bolts (1, 2) and battery carrier.
- Separate wire harness.
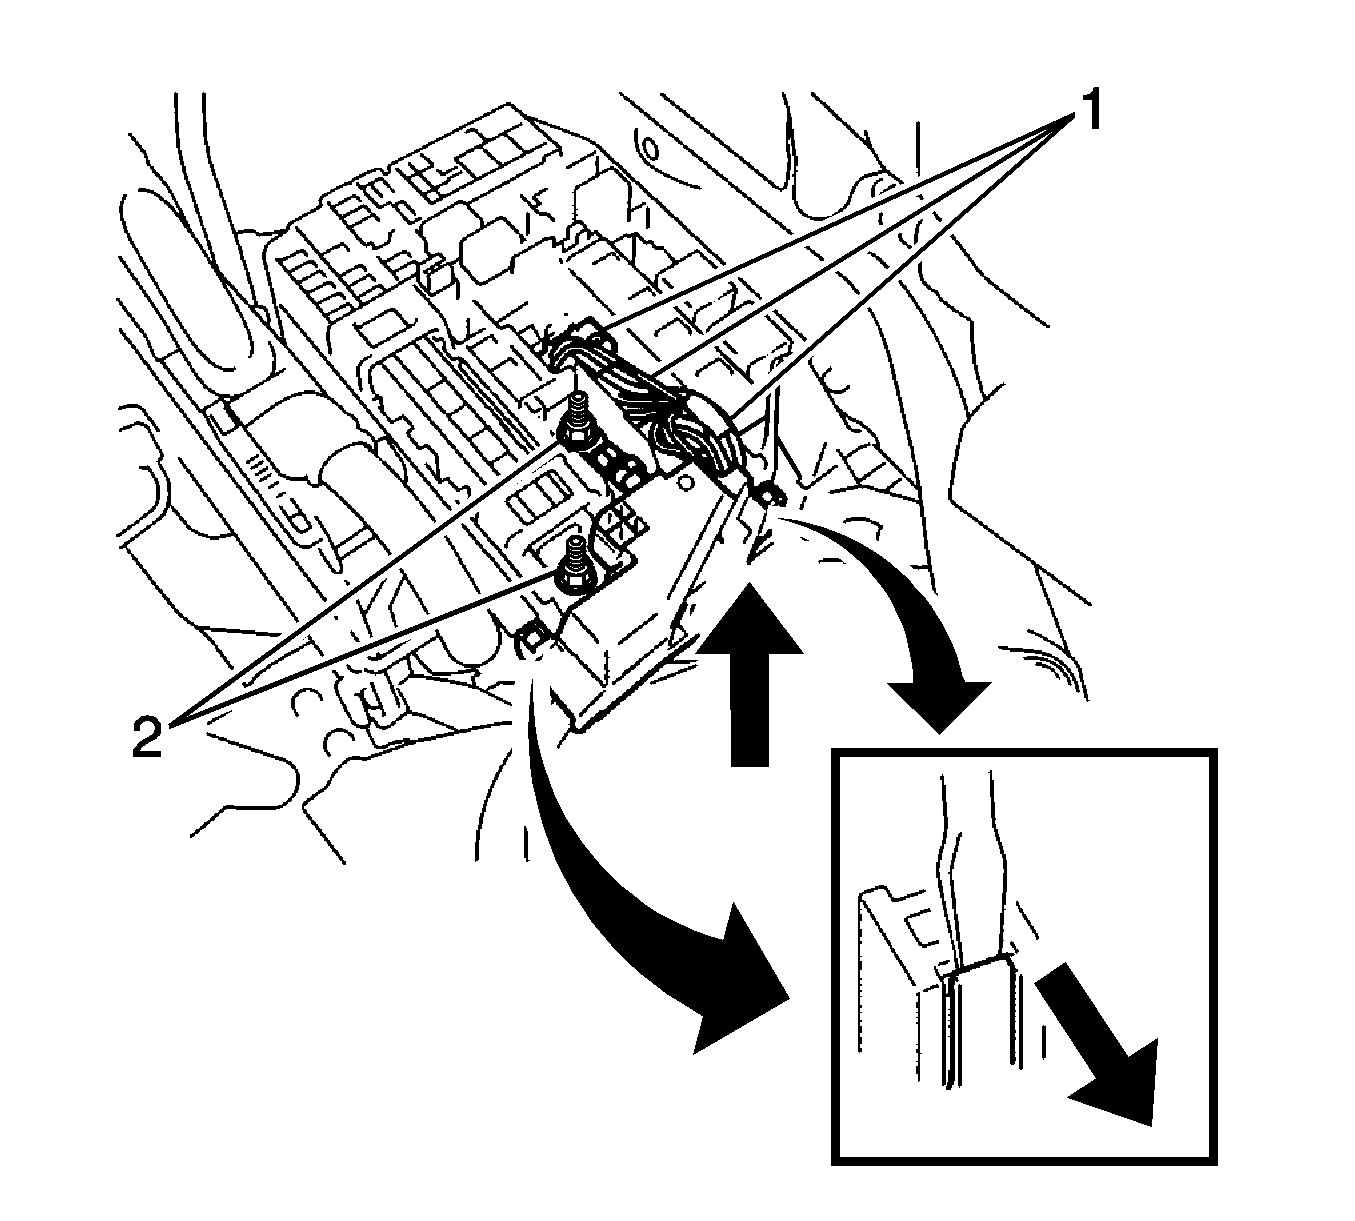
- Disconnect the 3 connectors (1) from the engine room relay block.
- Remove the 2 nuts (2) from the engine room relay block.
- Using a screwdriver, unlock the 2 claws.
- Pull the engine room relay block upward.
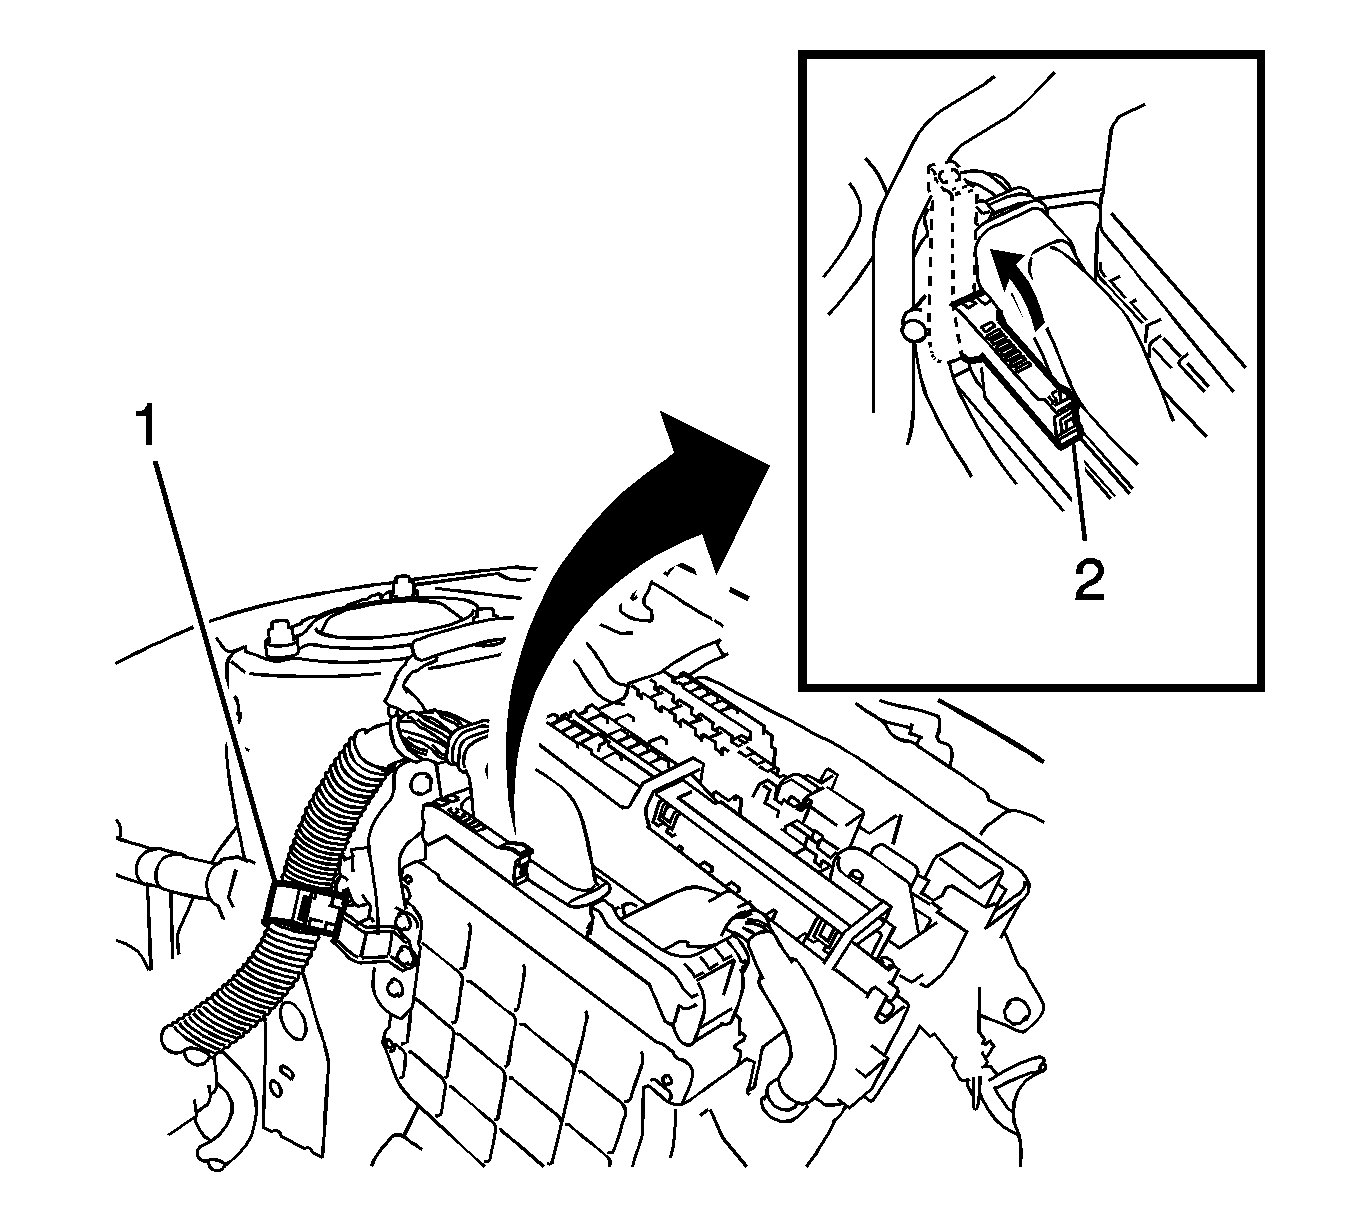
- Pull up the lever and disconnect the ECM connector.
- Disconnect the harness clamp (1).
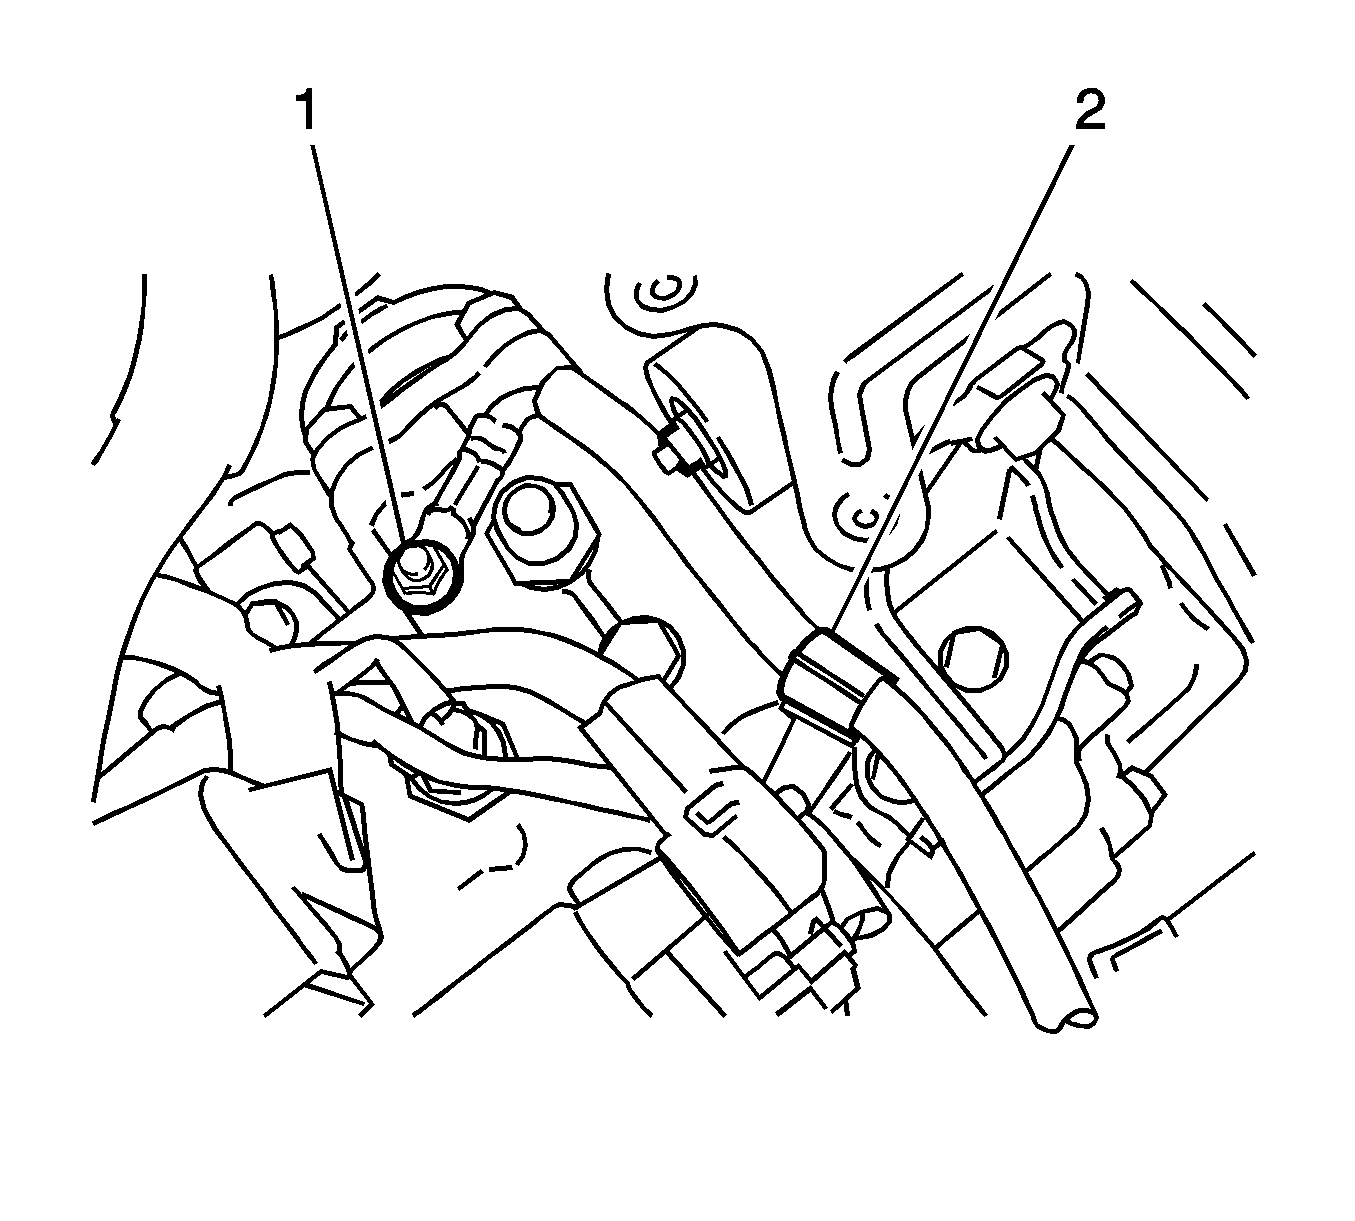
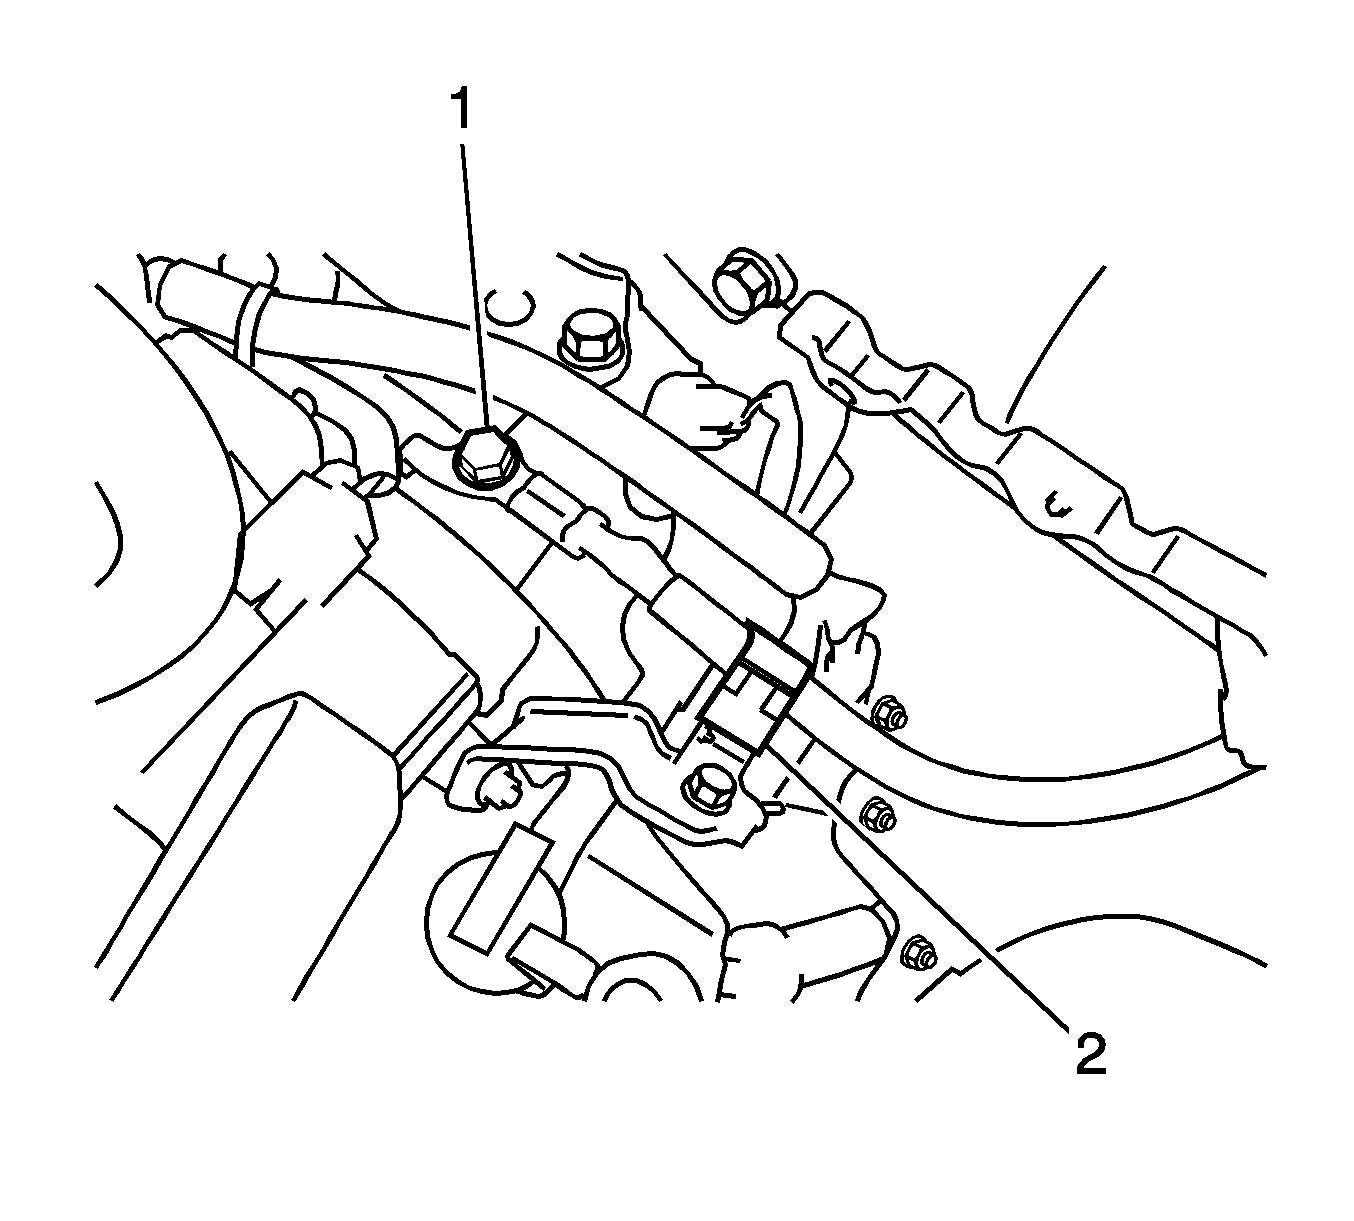
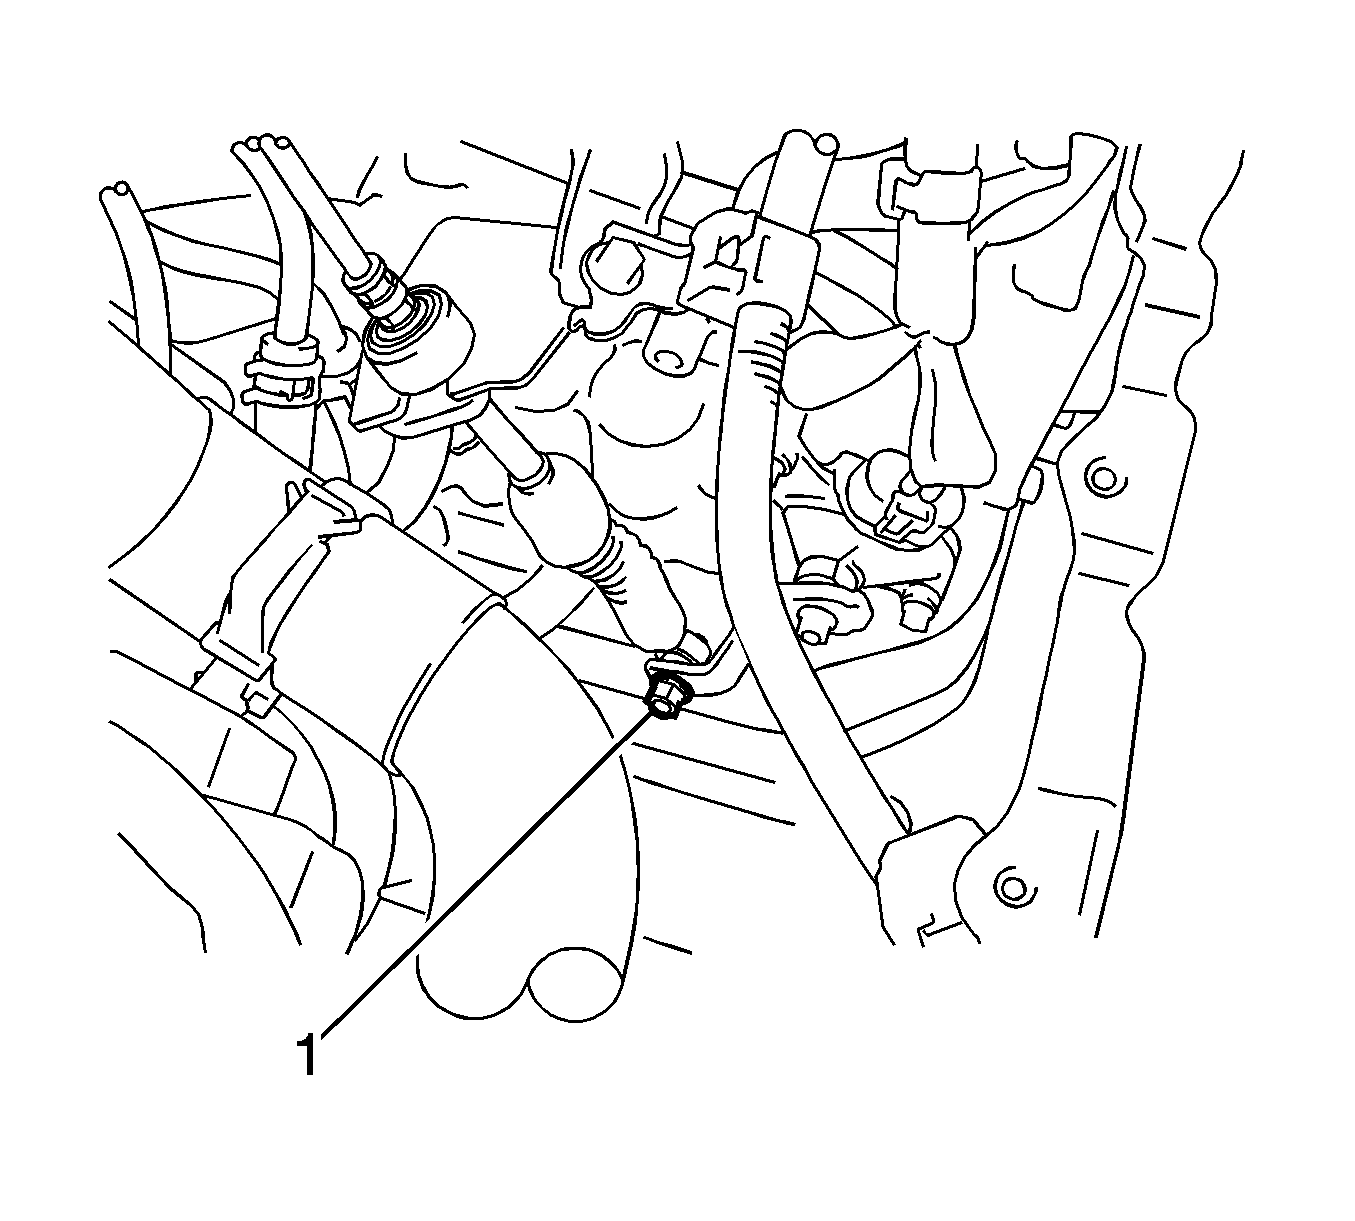
- Remove the bolt, clamp (2) and disconnect the ground cable (1) (for Manual Transaxle).
- Remove the bolt, clamp (2) and disconnect the ground cable (1) (for Automatic Transaxle).
- Remove the V-ribbed belt. Refer to Drive Belt Replacement.
- Remove the generator assembly. Refer to Generator Replacement
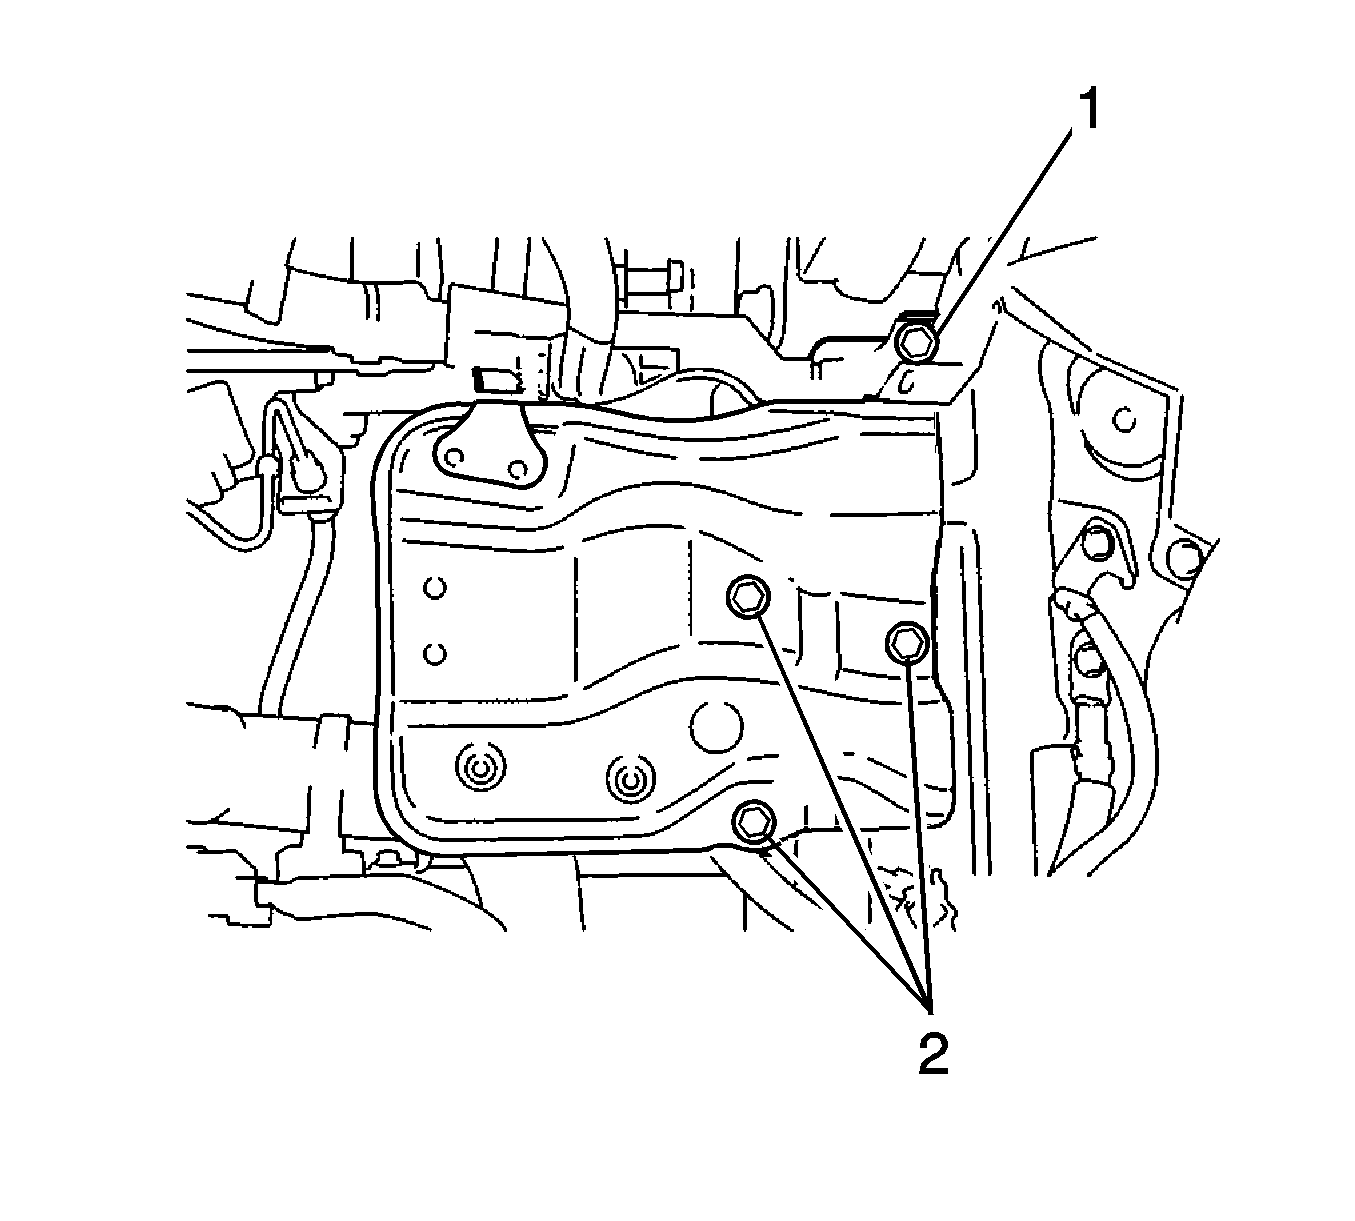
- Remove the 2 bolts and 2 nuts.
- Using a TORX socket wrench (E8), remove the 2 stud bolts and compressor assembly (with Air Conditioning System) with pulley.
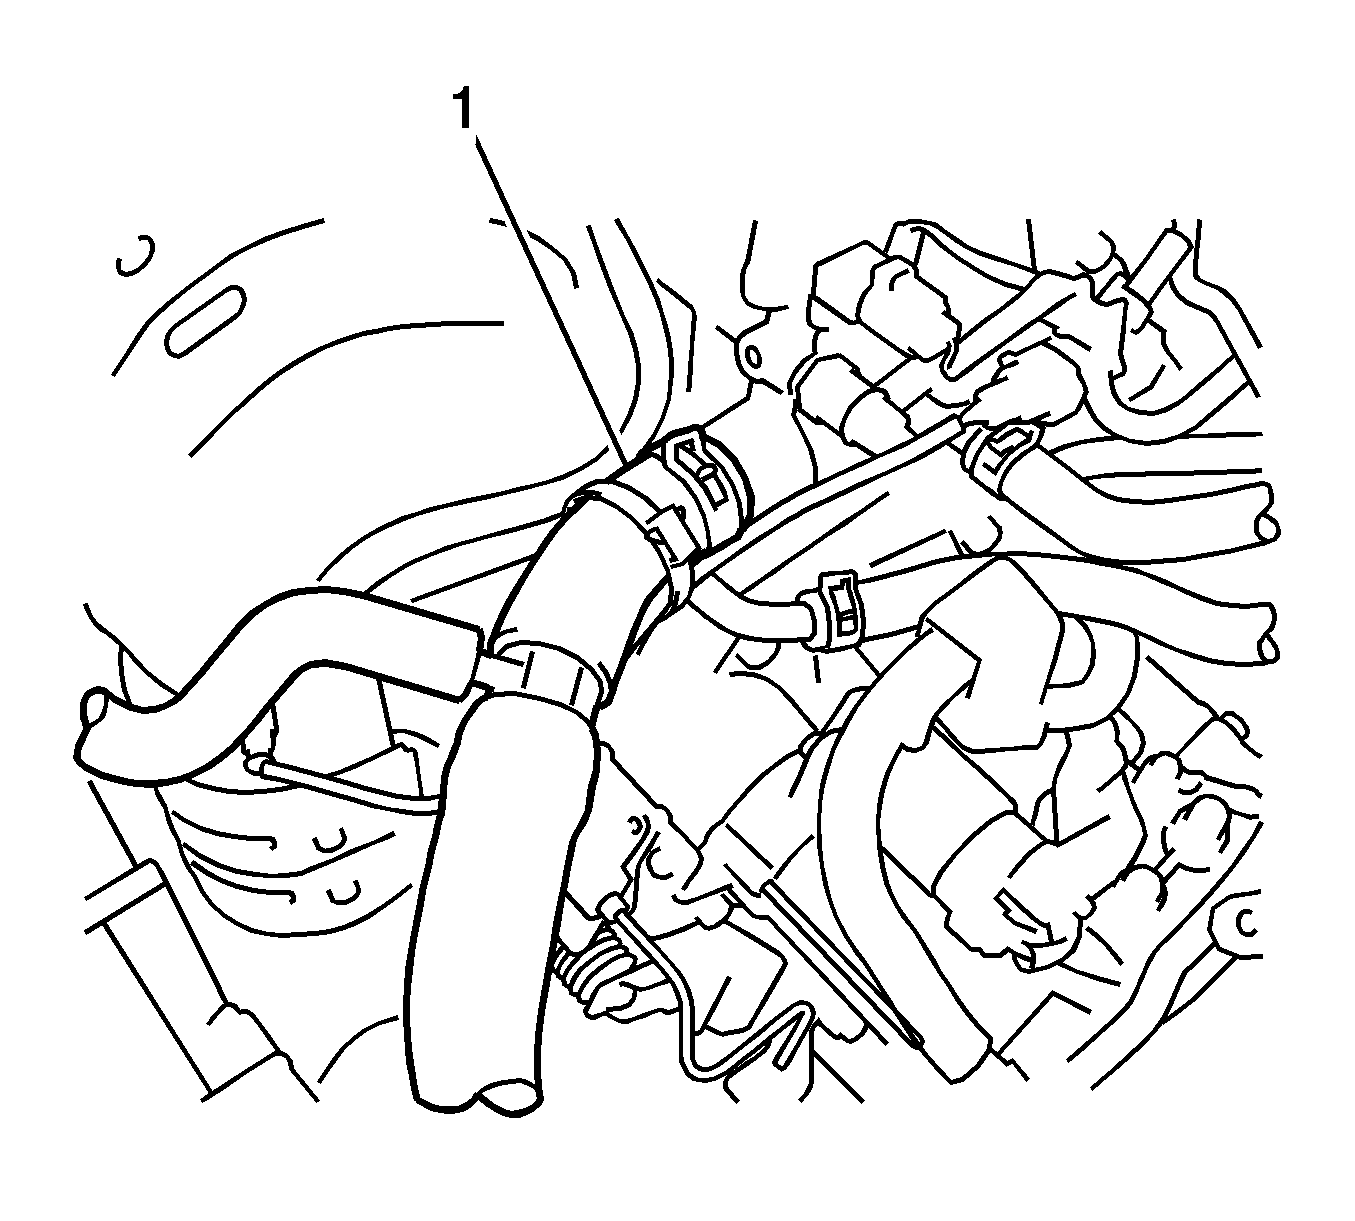
- Disconnect the lower radiator hose (1) from the inlet water.
- Disconnect the upper radiator hose (1) from the cylinder head.
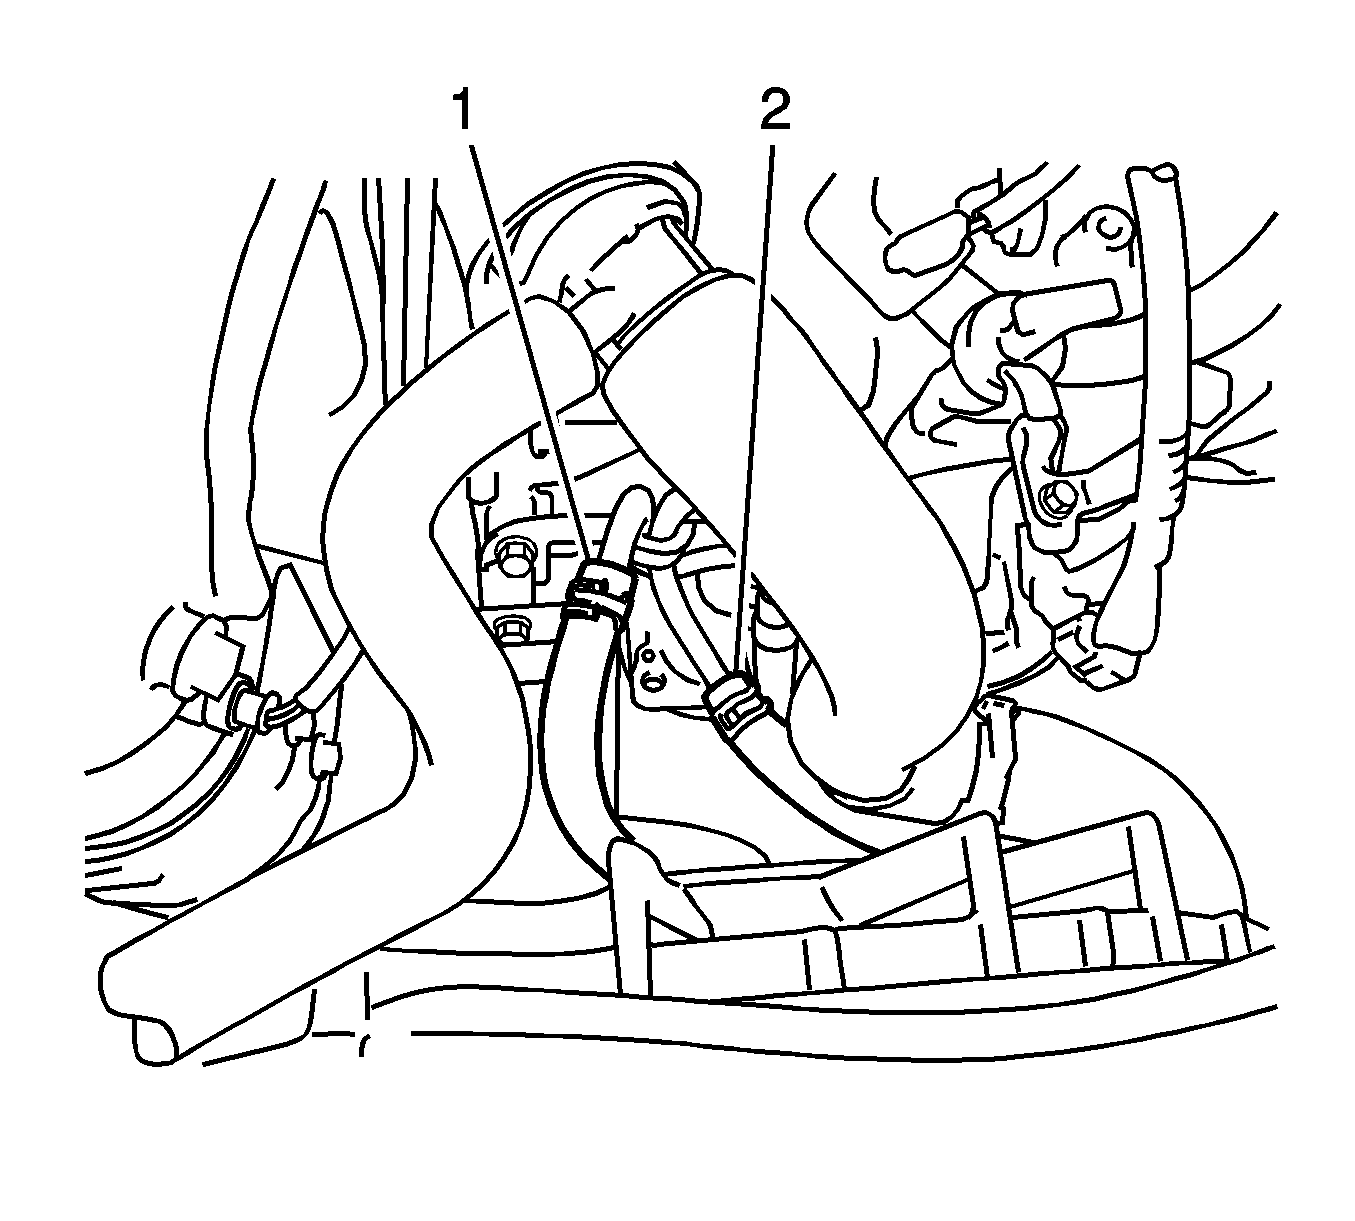
- Disconnect the 2 oil cooler hoses (1, 2) (for Automatic Transaxle).
- Disconnect the breather hose (for Automatic Transaxle)
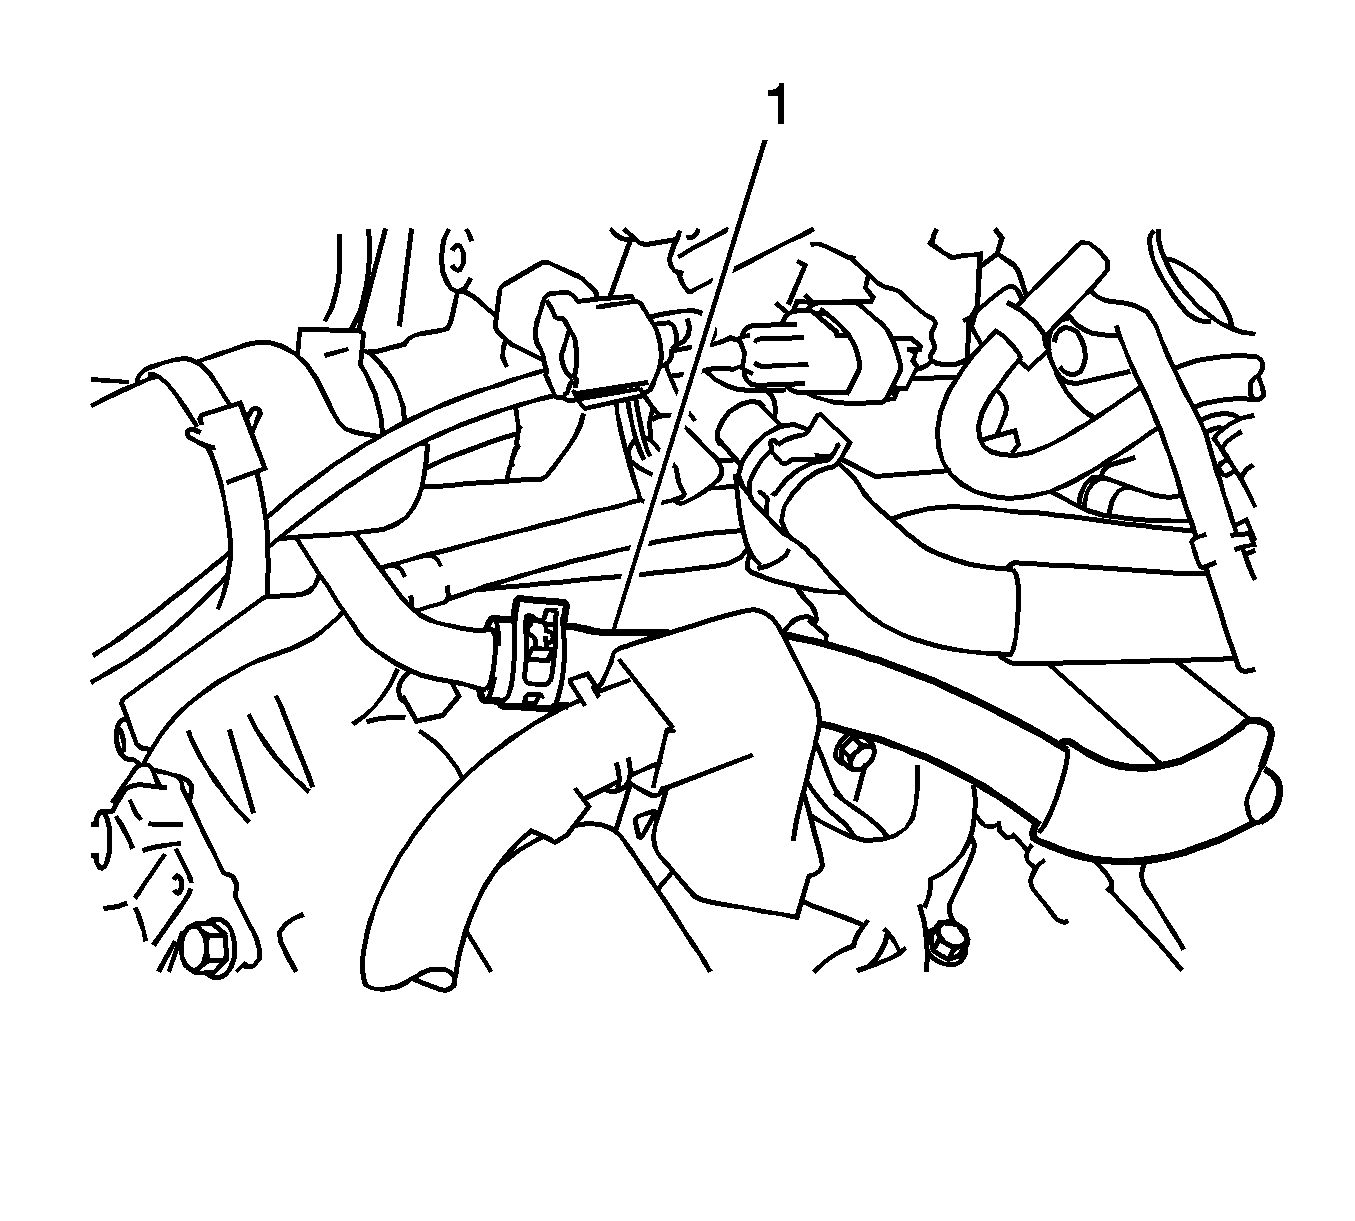
- Disconnect the outlet heater water hose (1).
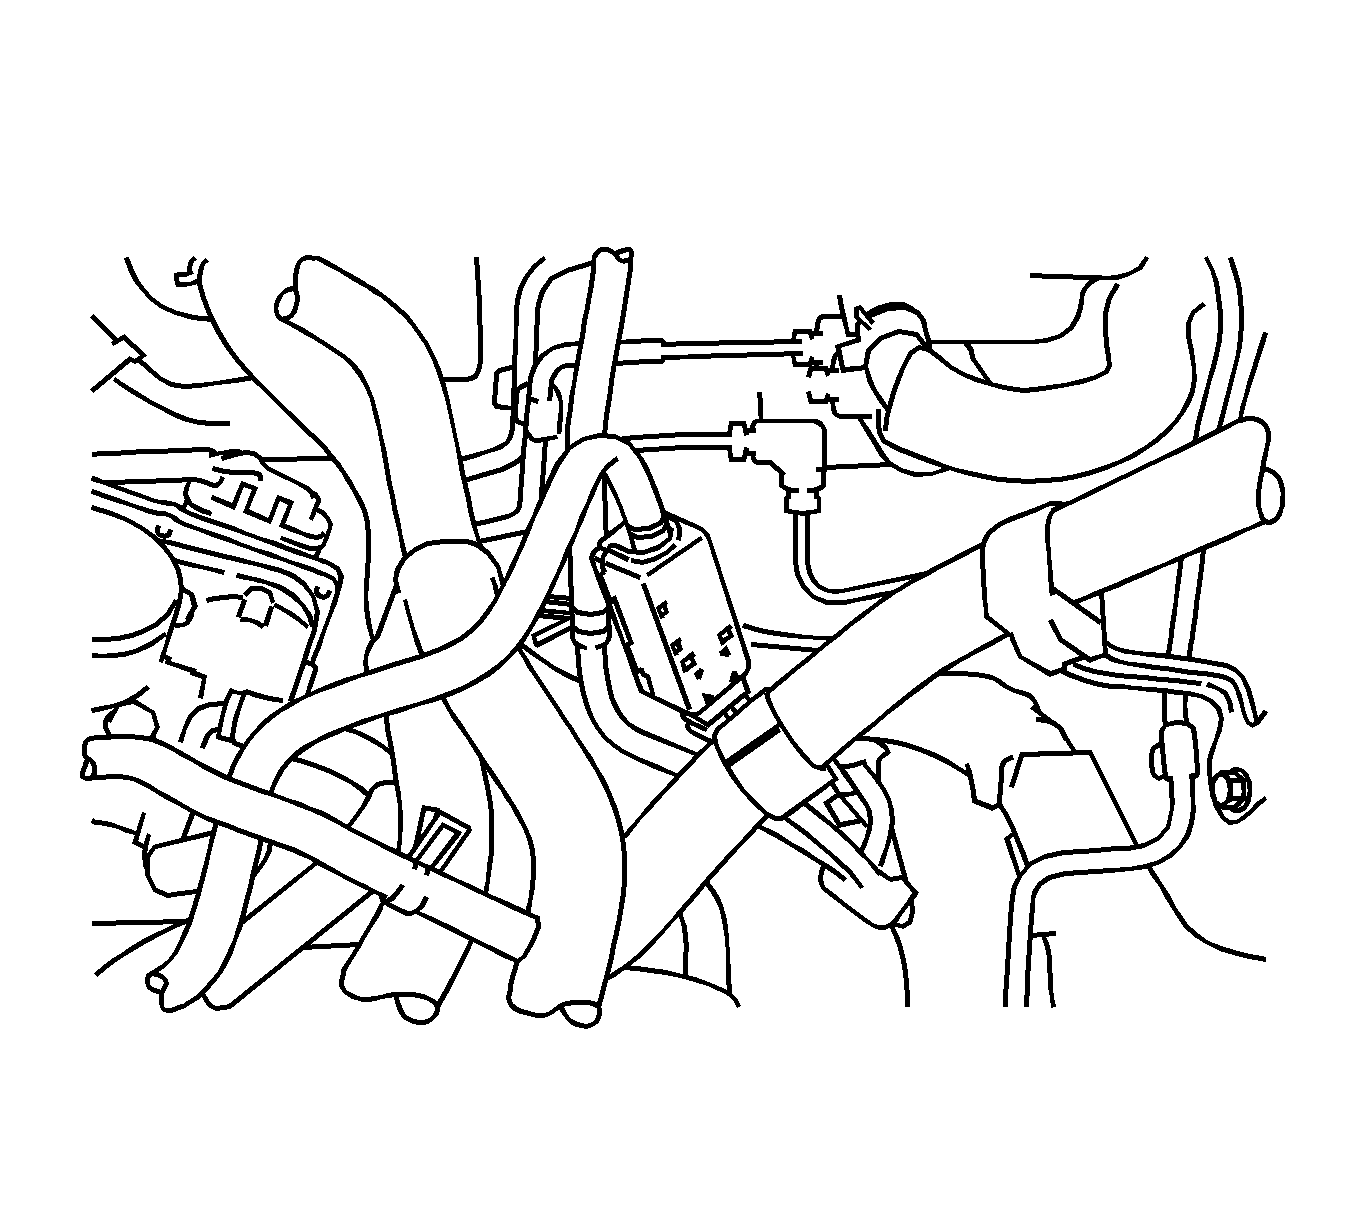
- Disconnect the inlet heater water hose.
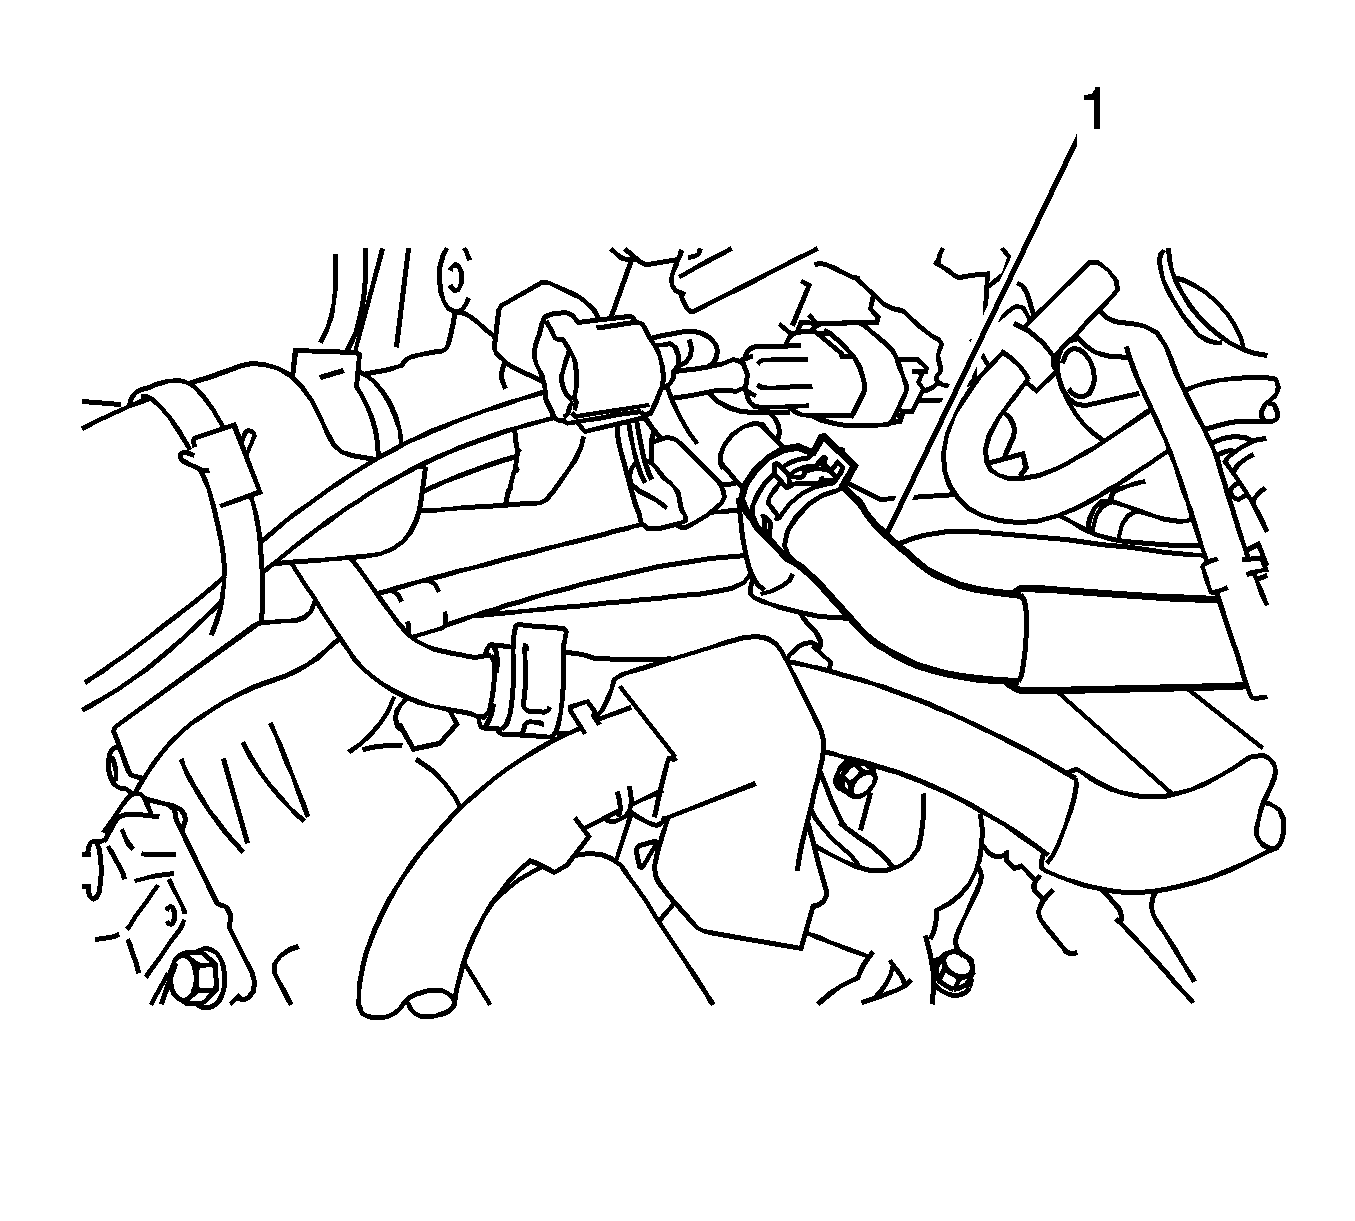
- Release the claw and remove the fuel pipe clamp.
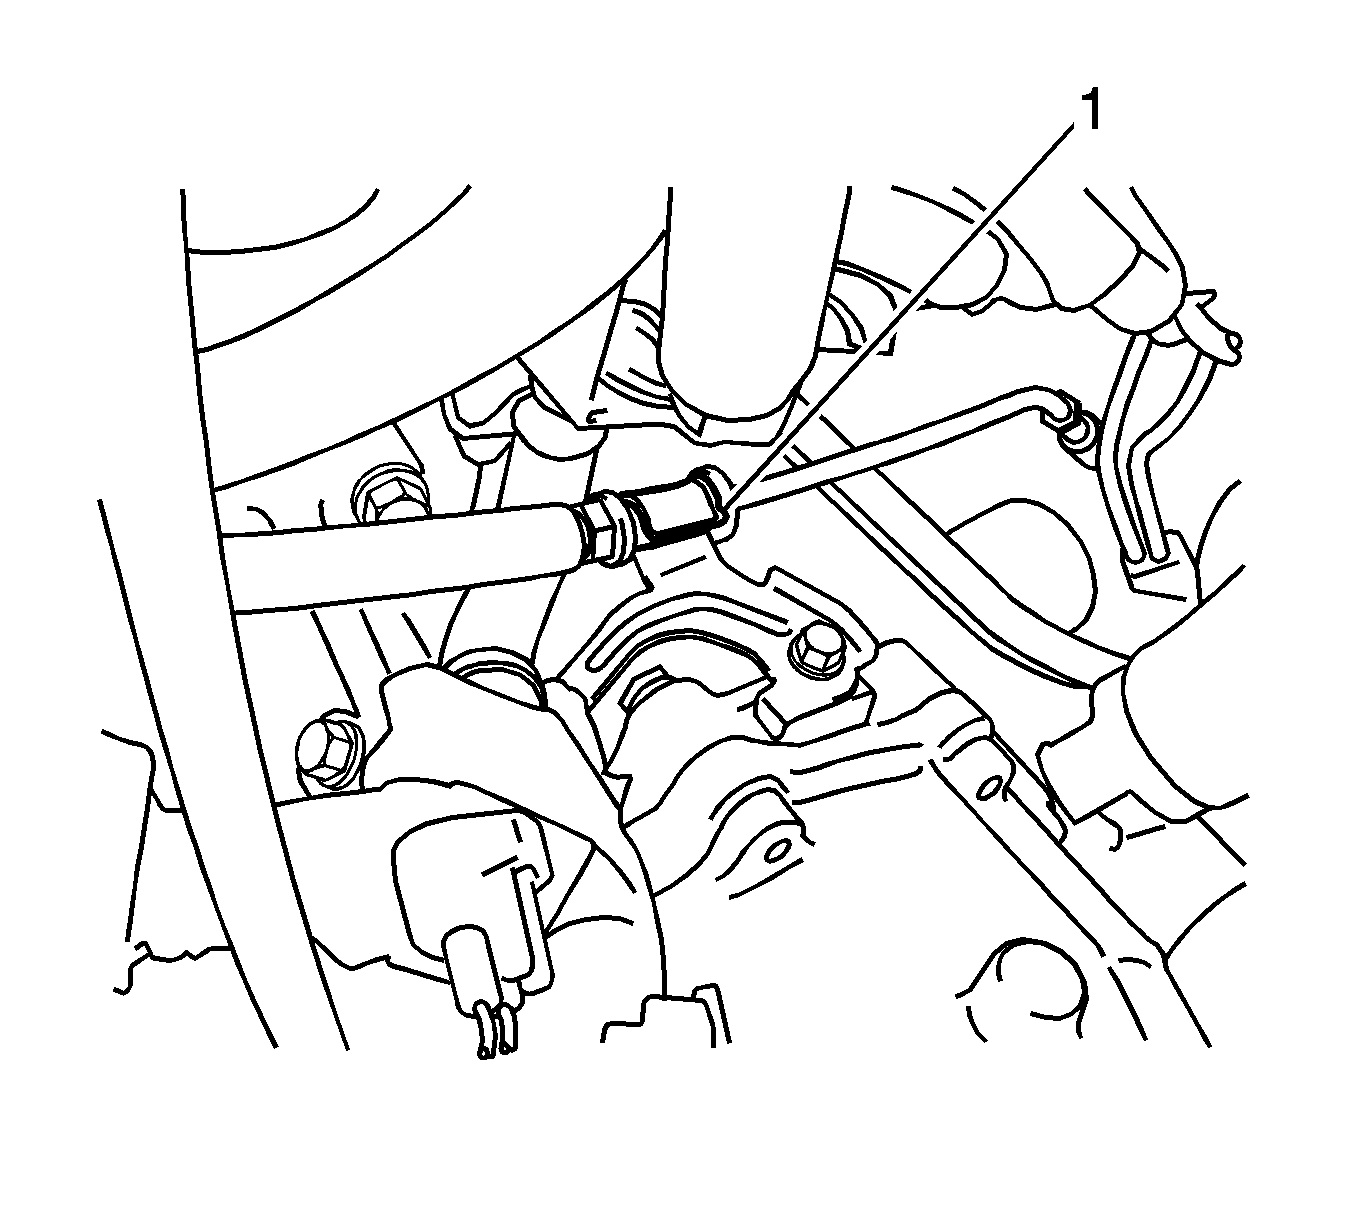
- Pinch the retainer (1) as illustrated, then pull the fuel tube connector out of the pipe.
- Disconnect the union to connector tube hose (1).
- Separate the clutch release cylinder assembly (for Manual Transaxle).
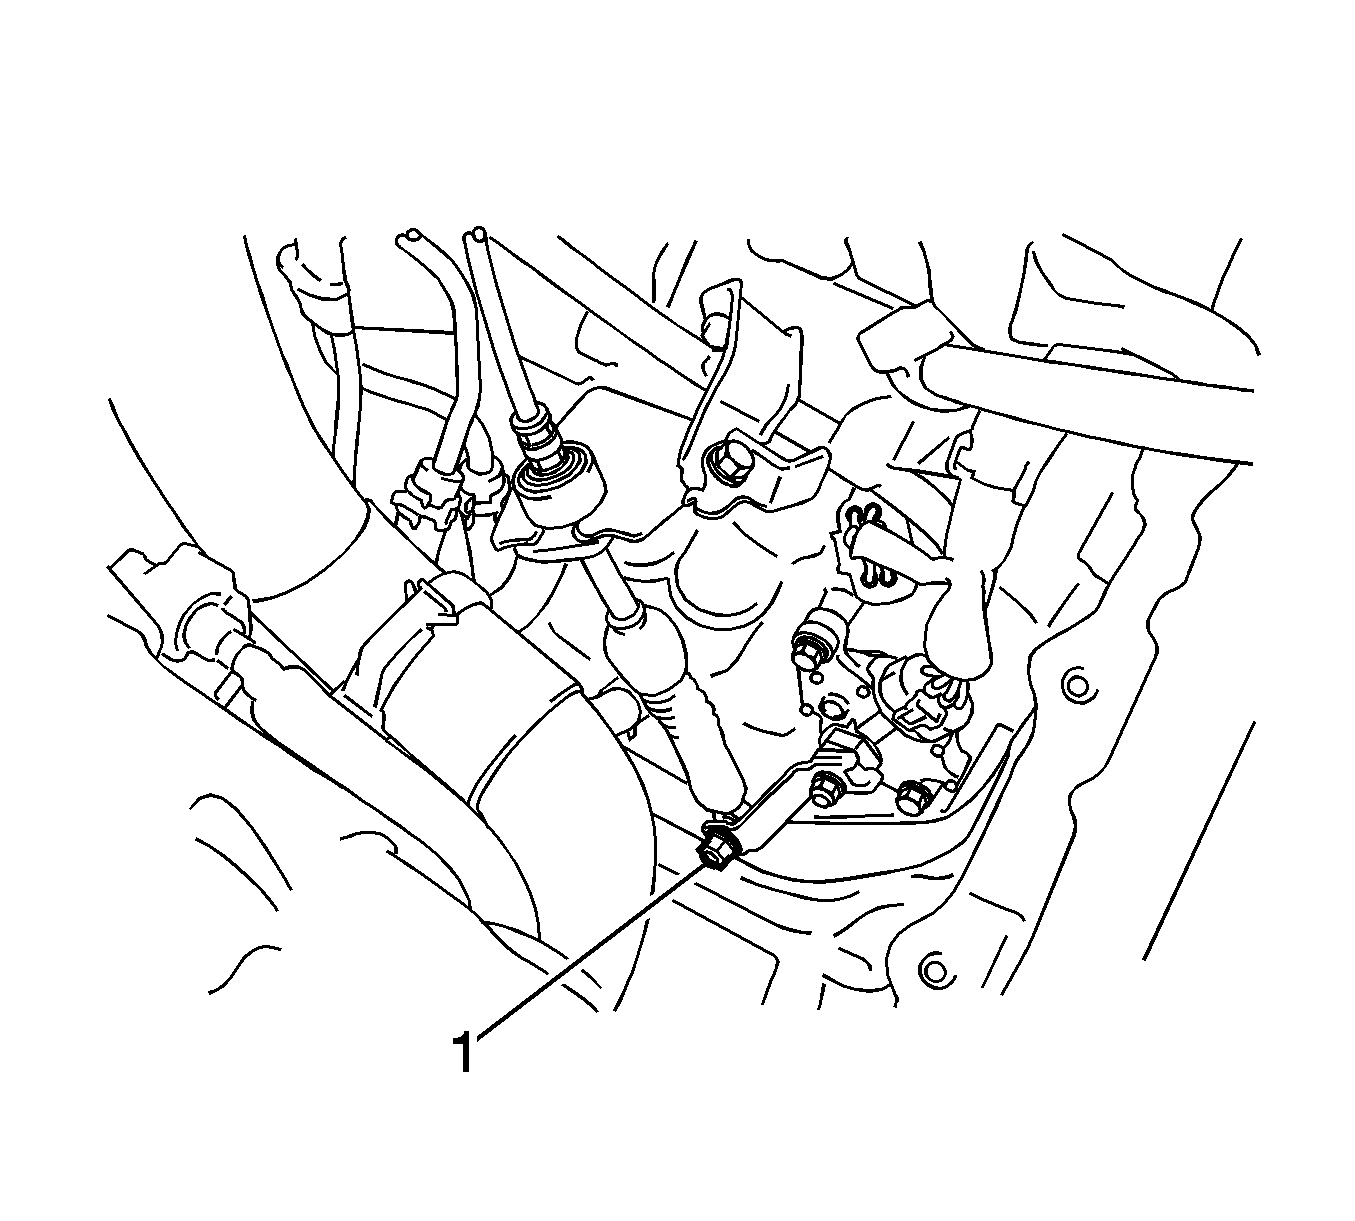
- U250E Automatic Transaxle--Remove the nut (1) and disconnect the control cable assembly and the control shaft lever from the transmission.
- Remove the clip and disconnect the transmission control cable assembly from the control cable bracket.
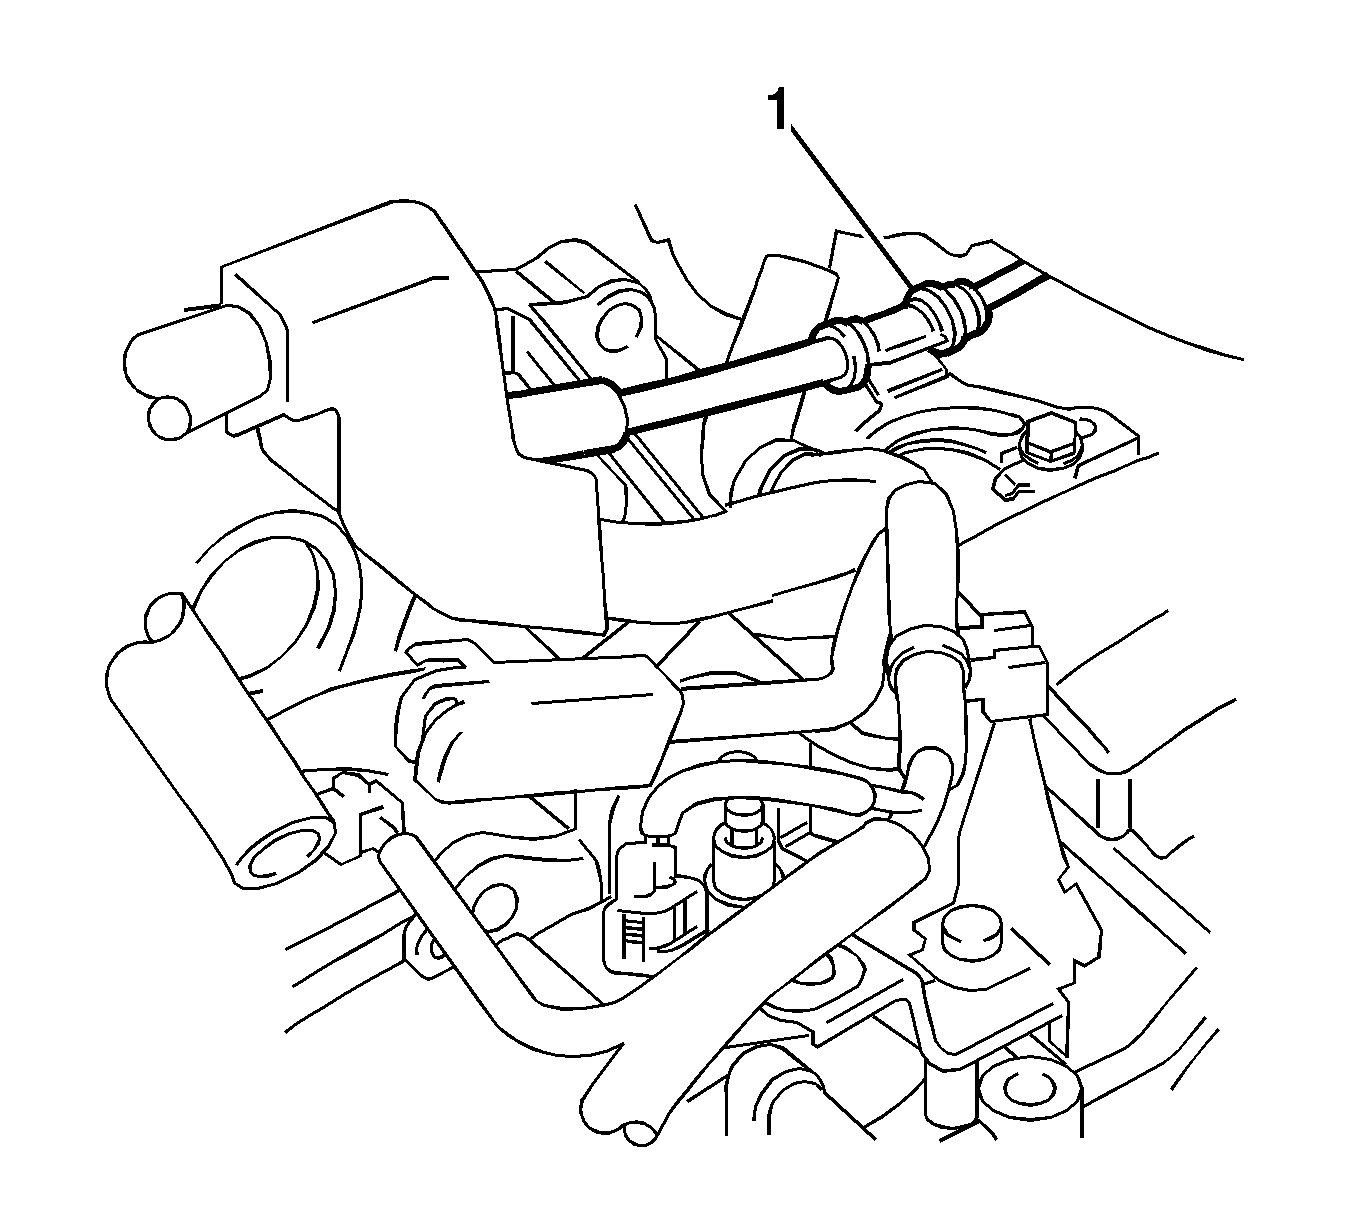
- Disconnect the control cable assembly (1) from the control cable bracket.
- U140F Automatic Transaxle--Remove the nut (1) and disconnect the control cable assembly and the control shaft lever from the transmission.
- Remove the clip and disconnect the transmission control cable assembly from the control cable bracket.
- Disconnect the control cable assembly (1) from the control cable bracket.
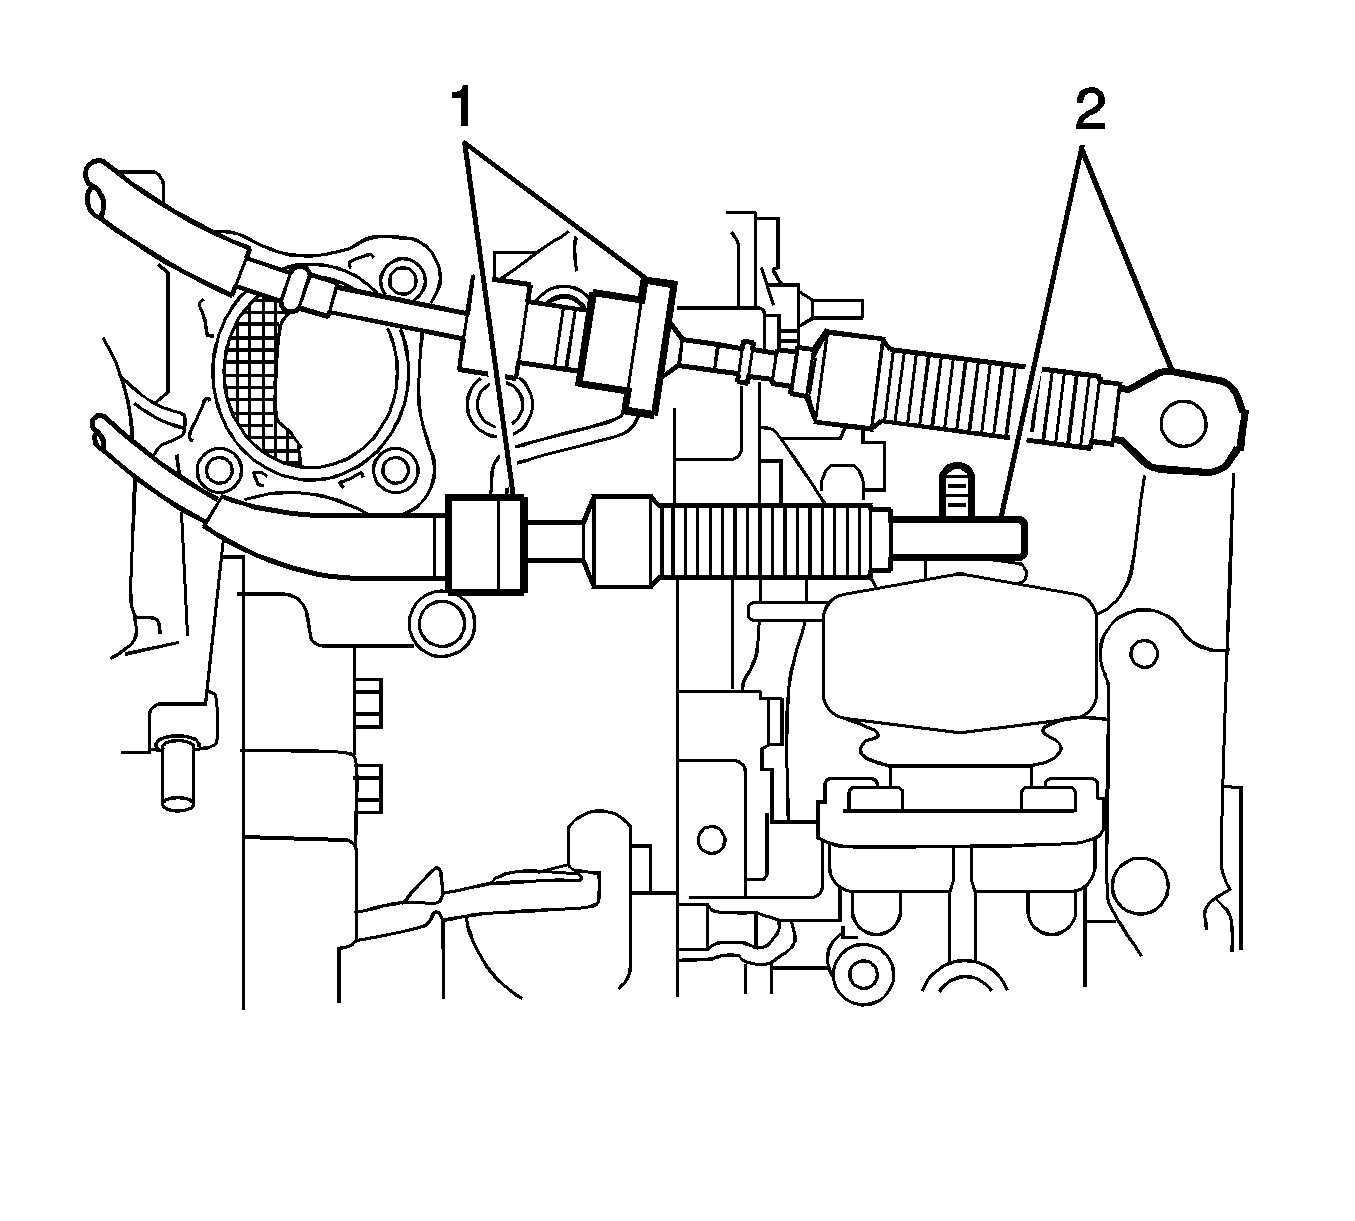
- E351 Manual Transaxle: Remove the 2 clips (1) and disconnect the 2 transmission control cables (2) from the control cable bracket 1.
- Secure the steering wheel.
- Remove the column hole cover silencer sheet.
- Separate the steering intermediate shaft assembly.
- Separate the steering column hole cover sub-assembly.
- Remove the catalytic converter assembly. Refer to Catalytic Converter Replacement.
- Remove the front exhaust pipe assembly. Refer to Front Pipe Replacement.
- Remove the propeller with the center bearing shaft assembly (for 4WD). Refer to Propeller Shaft Replacement
- Remove the front axle shaft left nut.
- Remove the front axle shaft right nut.
- Separate the left tie rod end assembly.
- Separate the right tie rod end assembly.
- Separate the left front stabilizer link assembly.
- Separate the right front stabilizer link assembly.
- Separate the left front lower suspension arm sub-assembly.
- Separate the right front lower suspension arm sub-assembly.
- Separate the left steering knuckle with axle hub.
- Put matchmarks (1) on the drive shaft and axle hub.
- Using a plastic-faced hammer, disconnect the left front axle assembly.
- Separate the right steering knuckle with axle hub.
- Set the engine assembly with transaxle on the engine lifter.
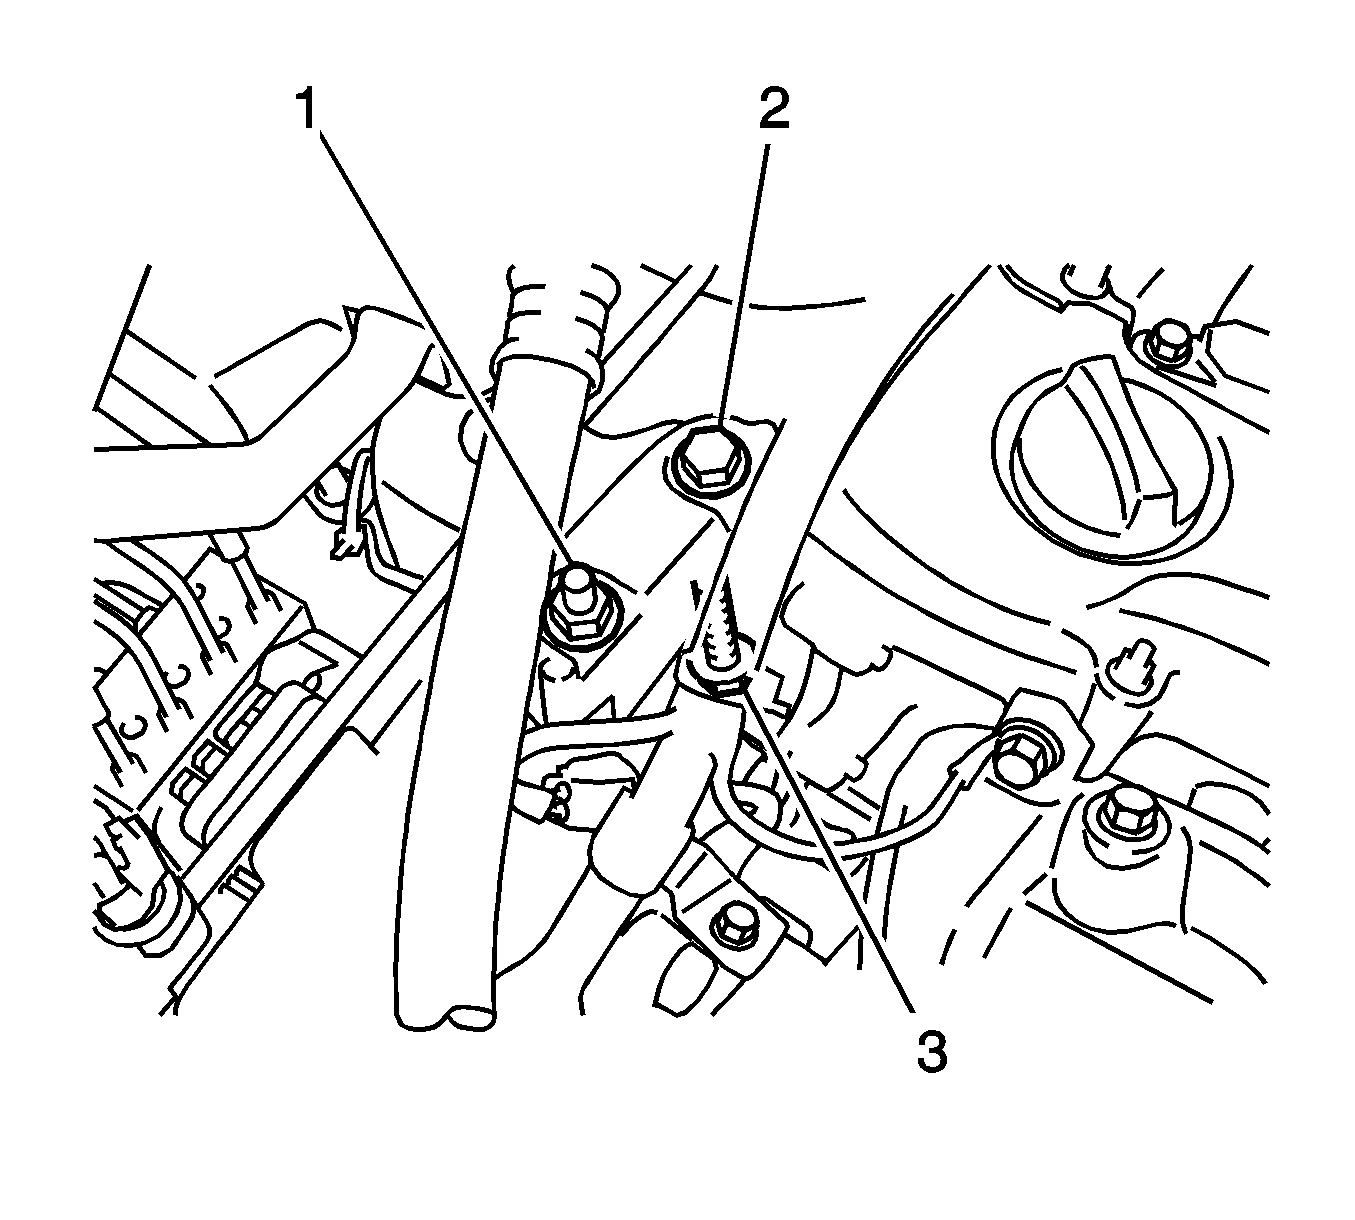
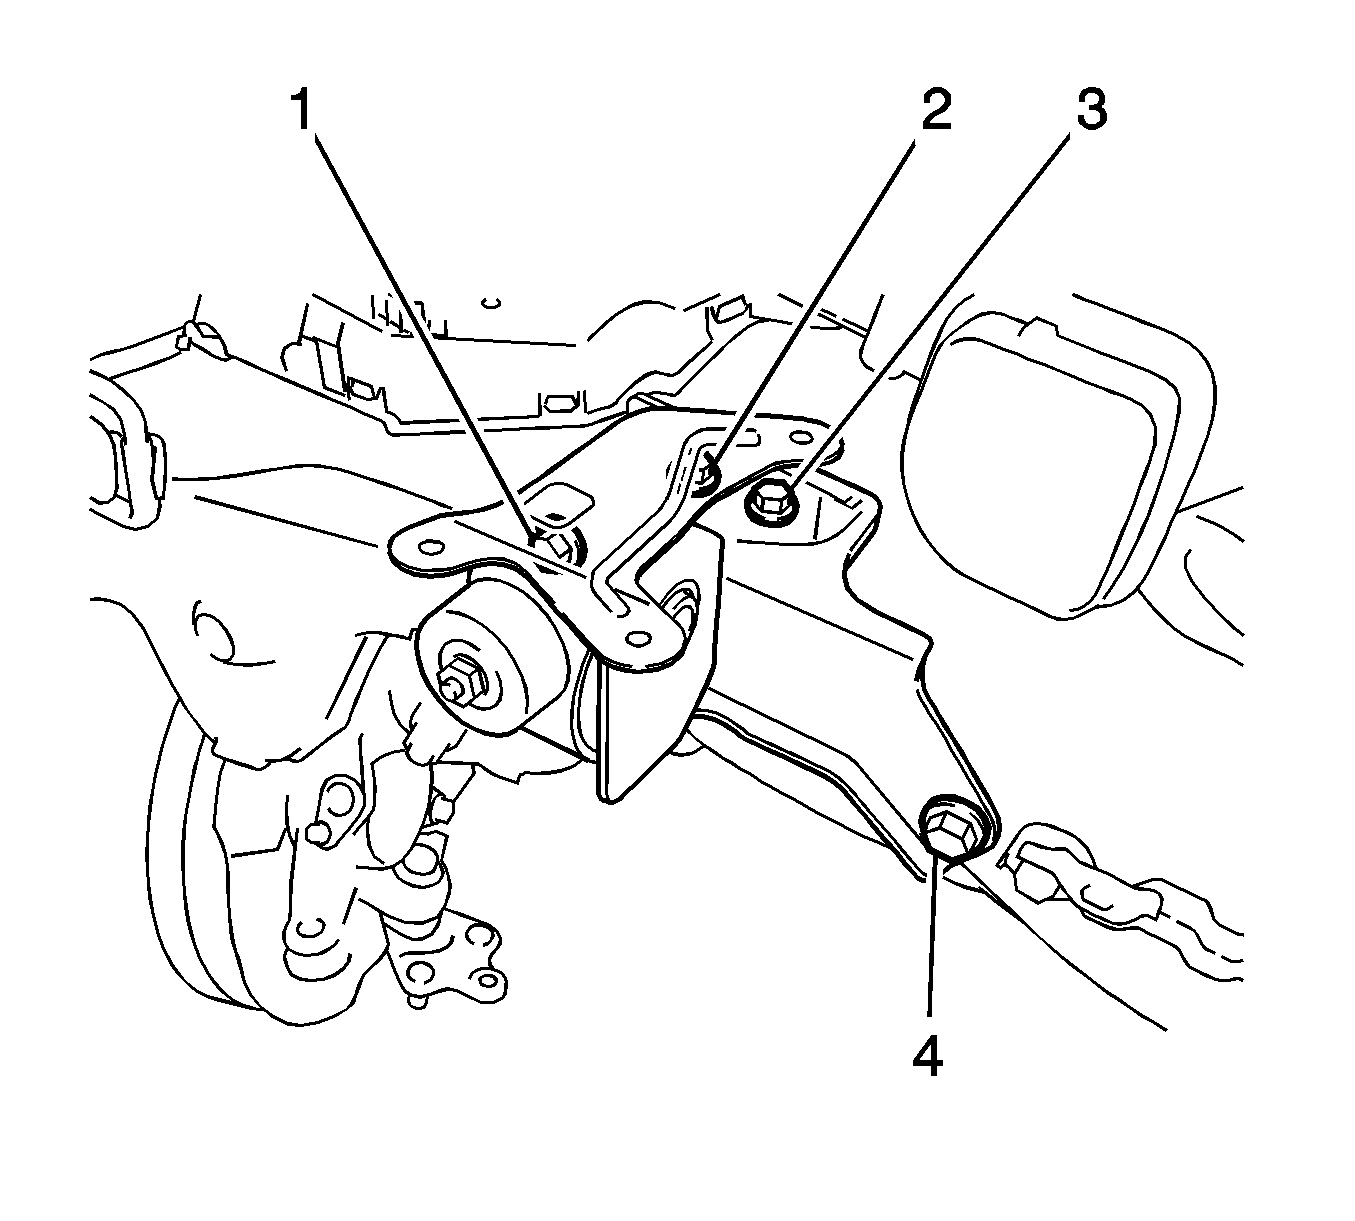
- Remove the bolt (2) and 2 nuts (1, 3), and separate the right engine mounting insulator.
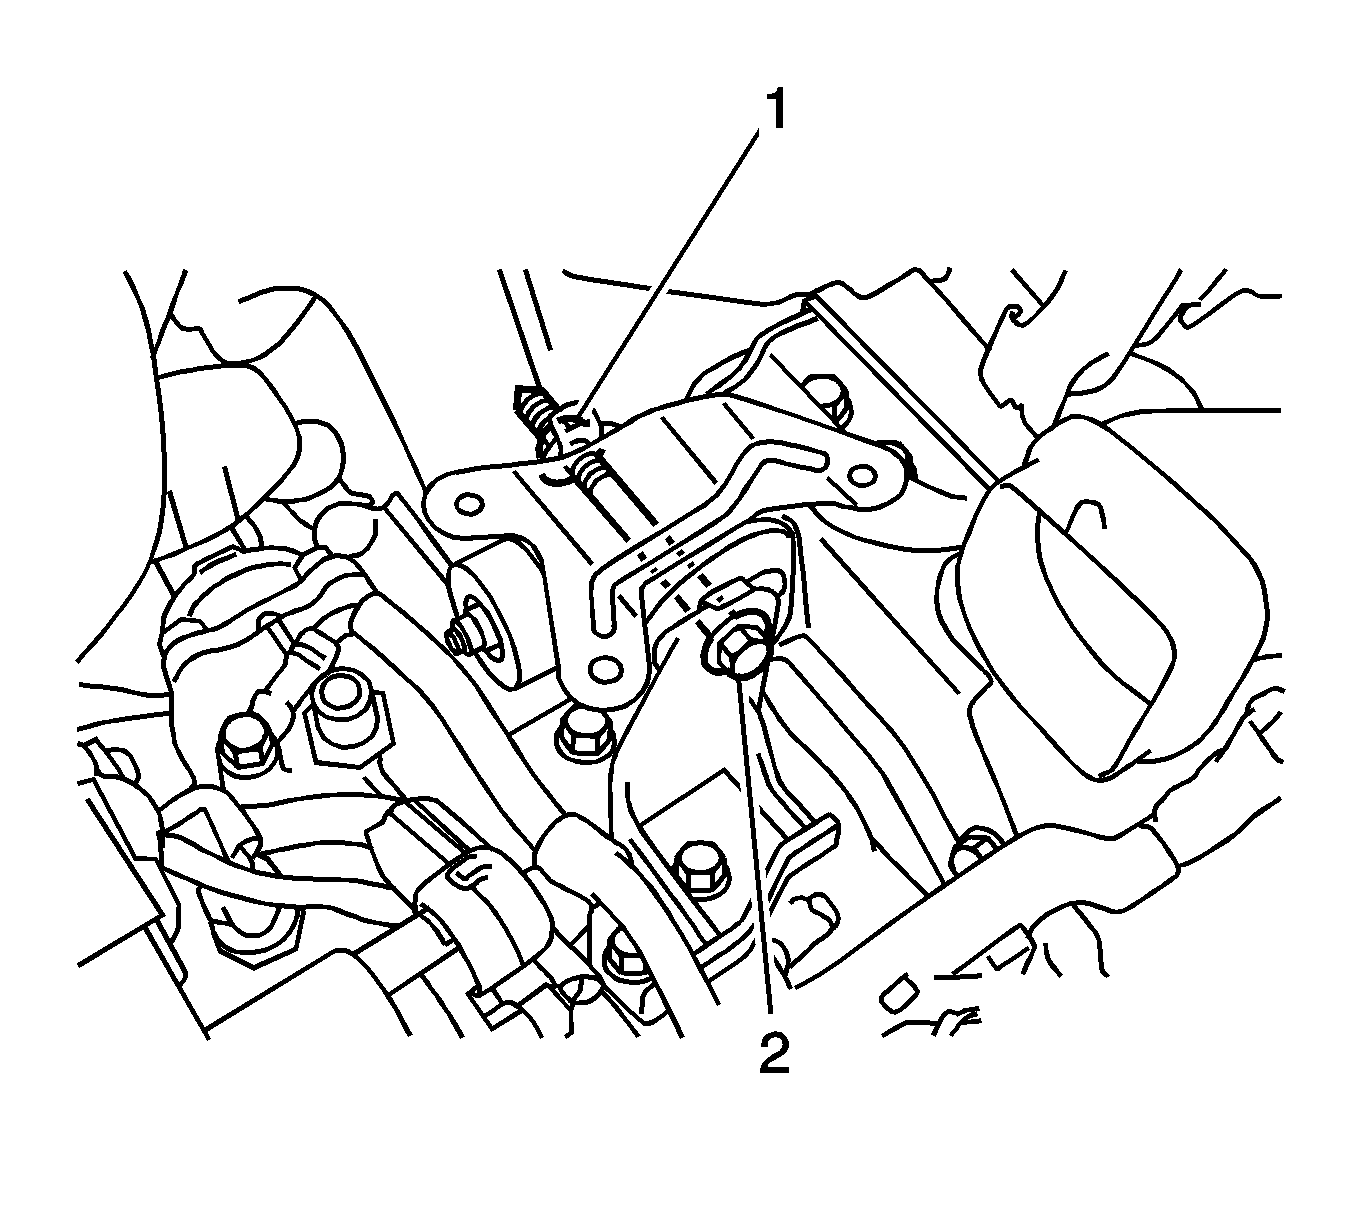
- Remove the through bolt (2) and nut (1), and separate the left engine mounting insulator.
- Carefully remove the engine with transaxle from the vehicle.
- Remove the front suspension crossmember mounting bolts. Refer to Front Suspension Crossmember Replacement
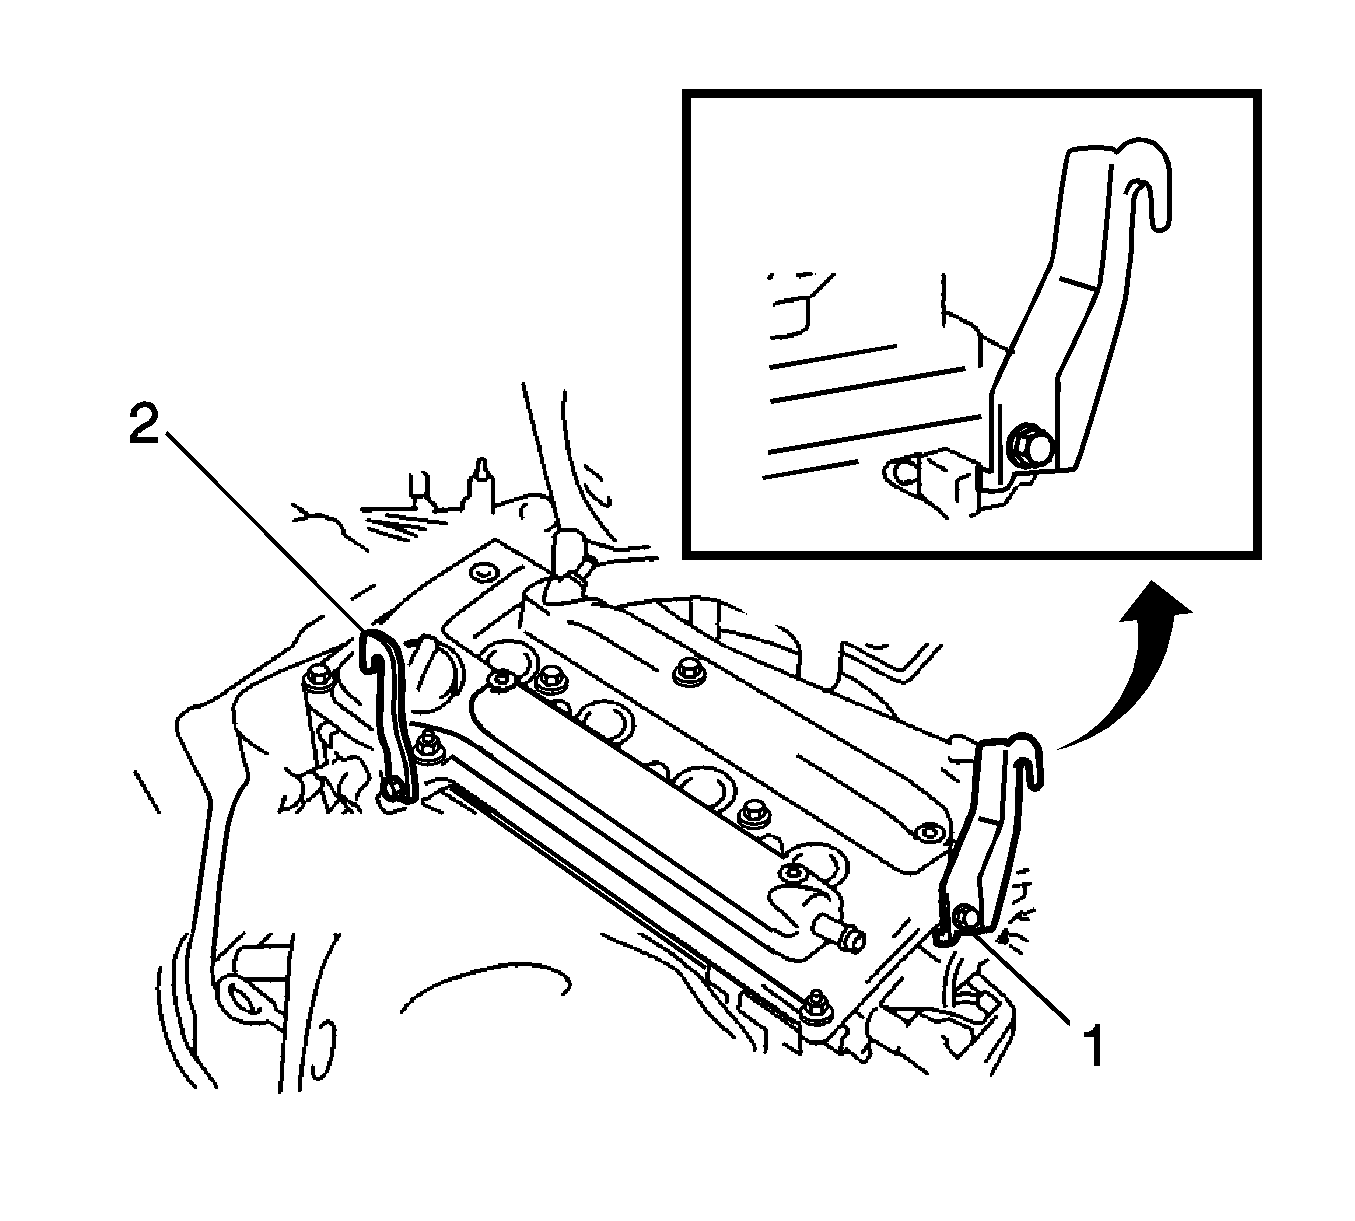
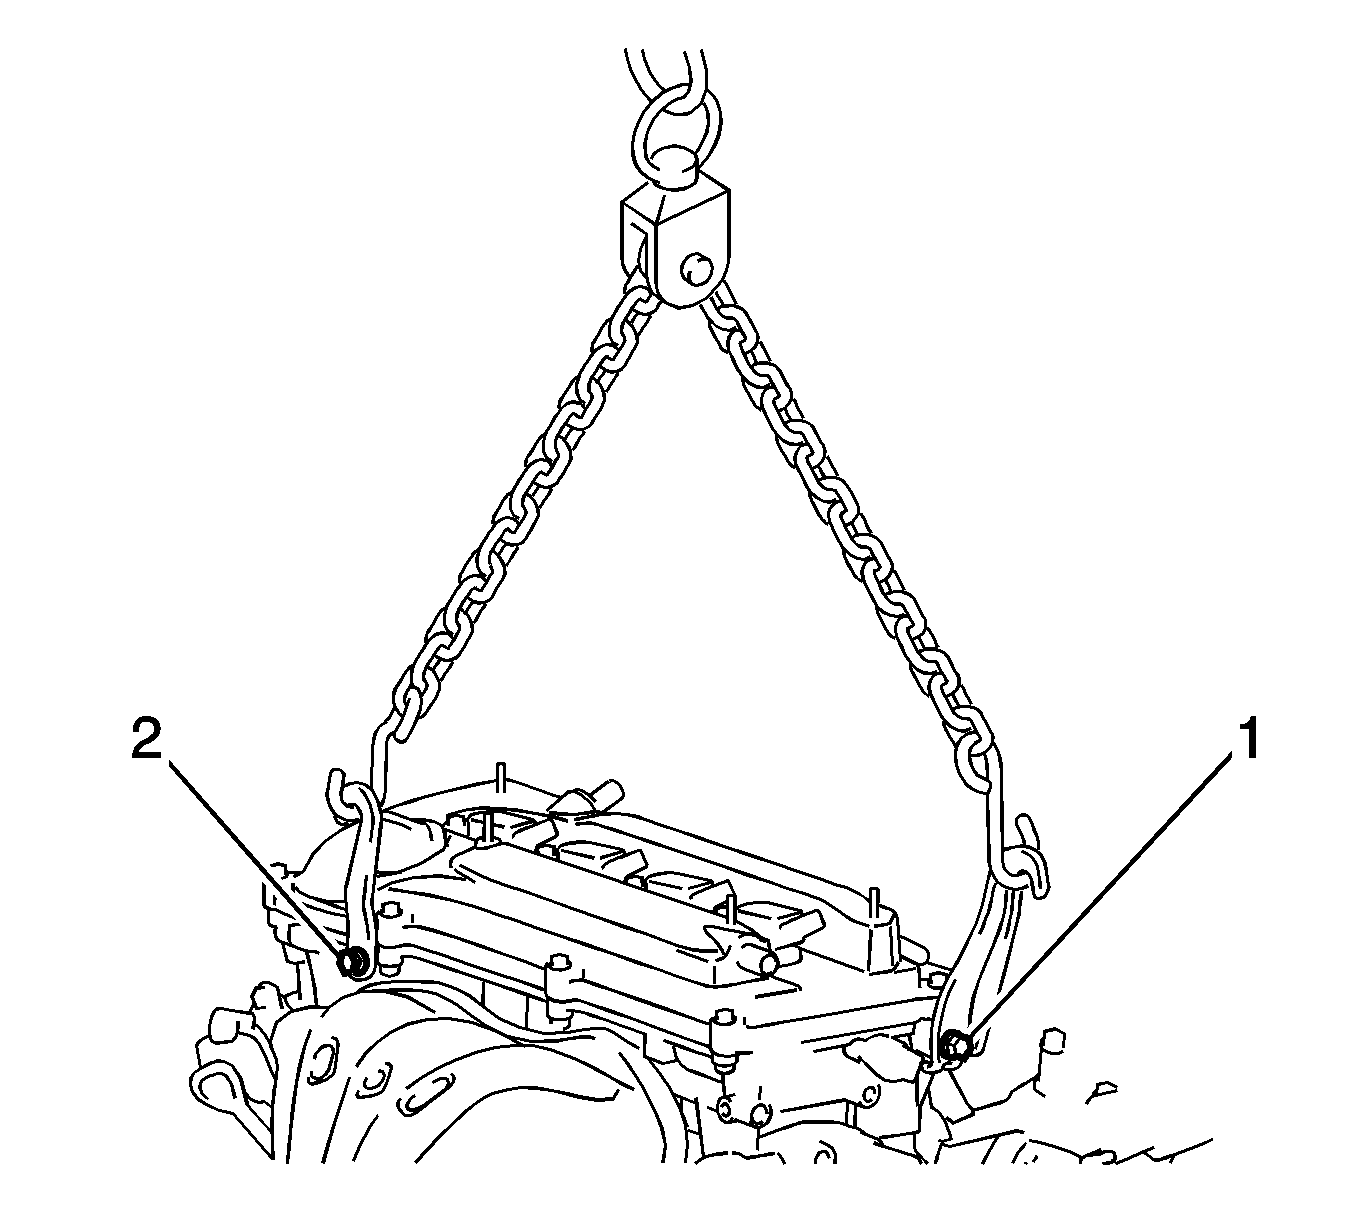
- Install the suitable engine hangers (1) with the new bolts as shown in the illustration and tighten to 38 N·m (28 lb ft).
- Using an engine sling device (1, 2) and a chain block, suspend the engine assembly with transaxle.
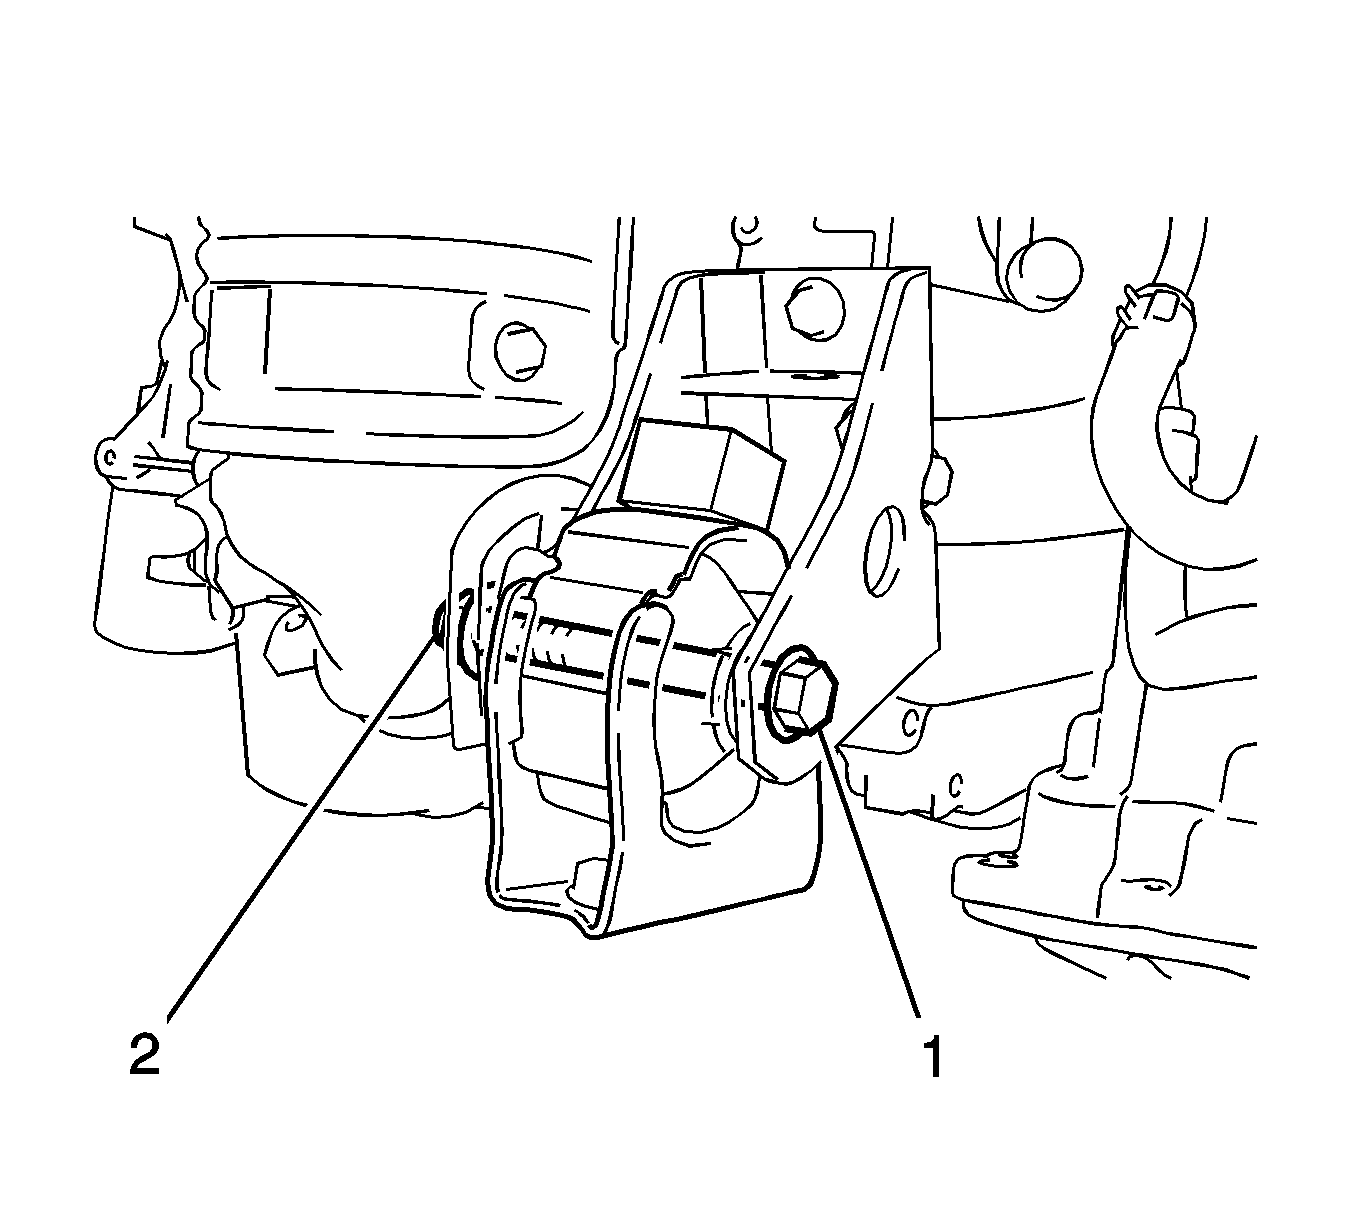
- Remove the through bolt (1) and nut (2), and separate the front engine mounting insulator.
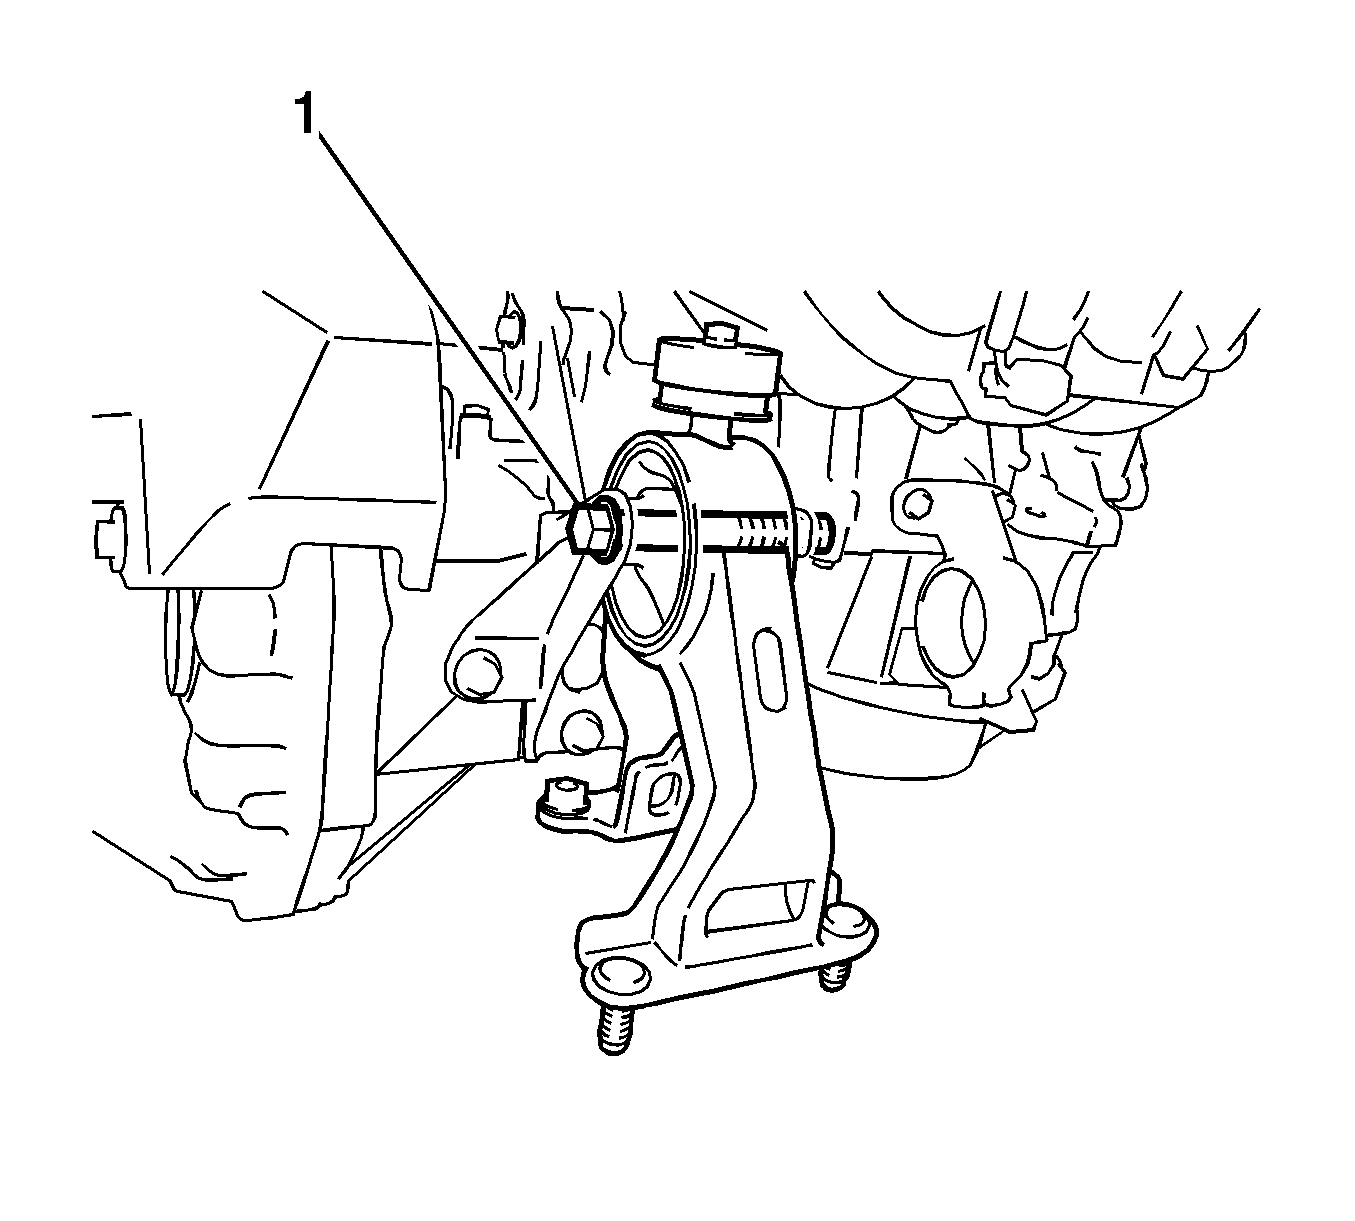
- Remove the through bolt (1) and separate the rear engine mounting insulator (for 2WD).
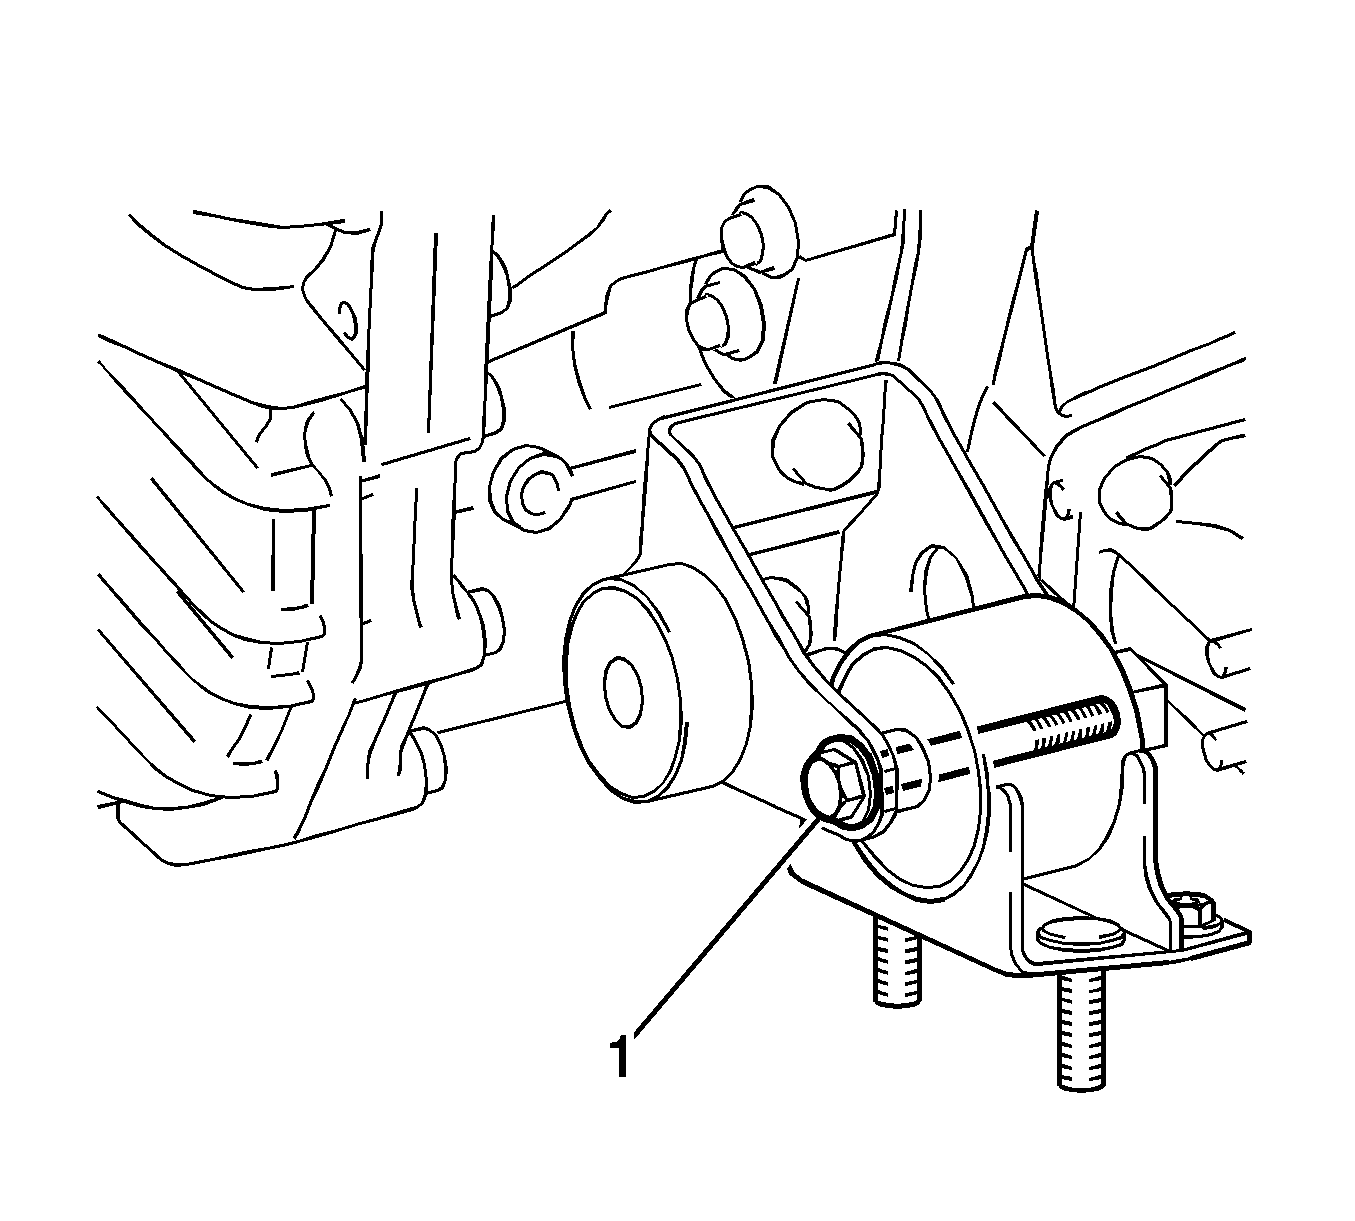
- Remove the through bolt (1) and separate the rear engine mounting insulator (for 4WD).
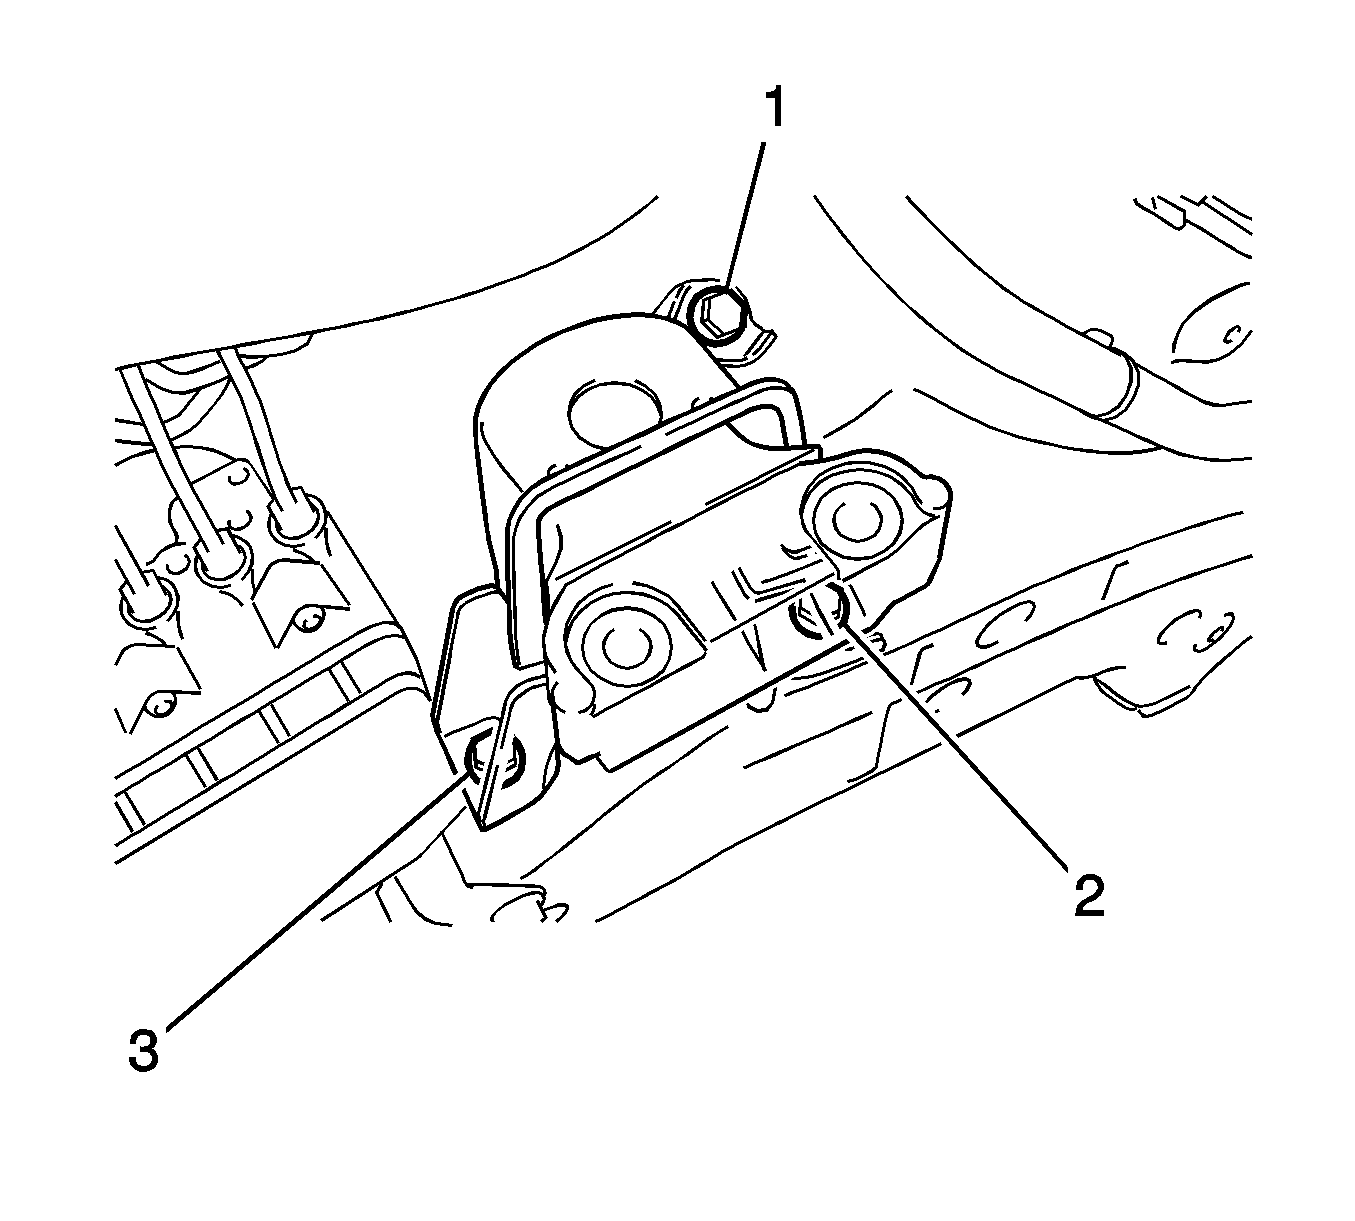
- Remove the 4 bolts (1-4) and left engine mounting insulator.
- Remove the 3 bolts (1-3) and right engine mounting insulator sub-assembly.
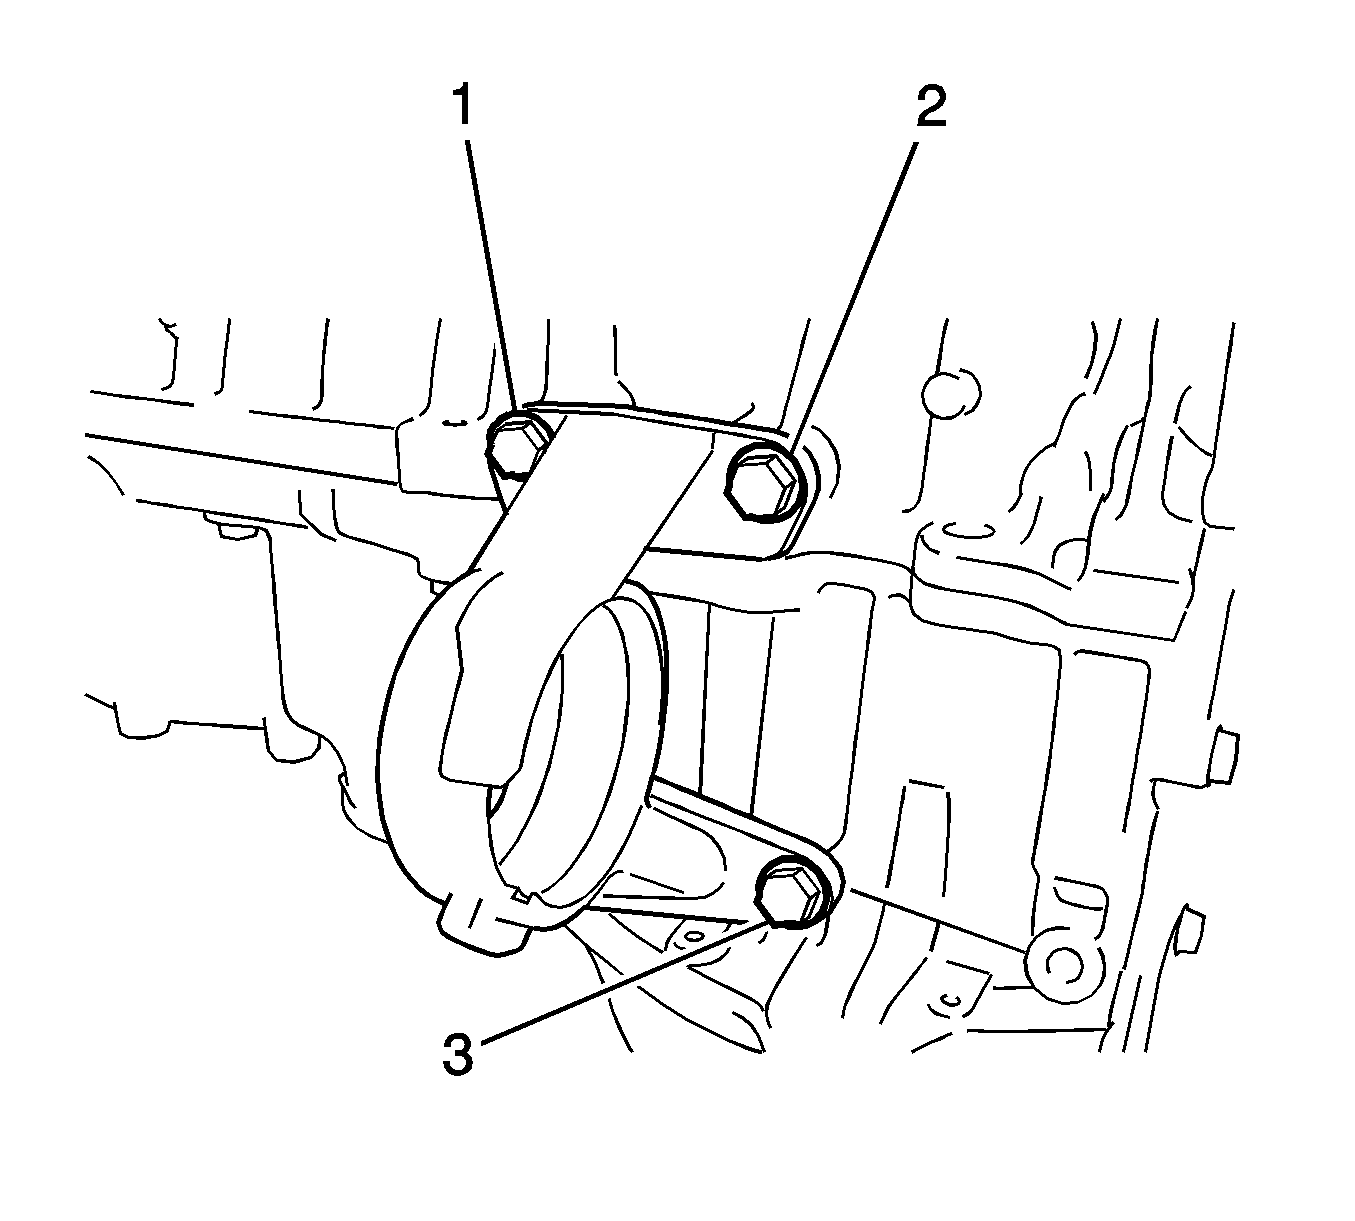
- Remove the 3 bolts (1-3) and drive shaft bearing bracket (for 2WD).
- Remove the starter assembly.
- Remove the manual transaxle assembly.
- Separate the transaxle assembly. Refer to Transmission Replacement for the MVA 4 speed transmission, Transmission Replacement for the MVD 5 speed transmission or Transmission Replacement for the MVC 5 speed transmission.
- Remove the clutch cover assembly (for manual transaxle).
- Remove the clutch disc assembly (for manual transaxle).
- Remove the flywheel assembly (for manual transaxle).
- Remove the drive plate and ring gear assembly (for automatic transaxle).
- Remove the engine wire harness.
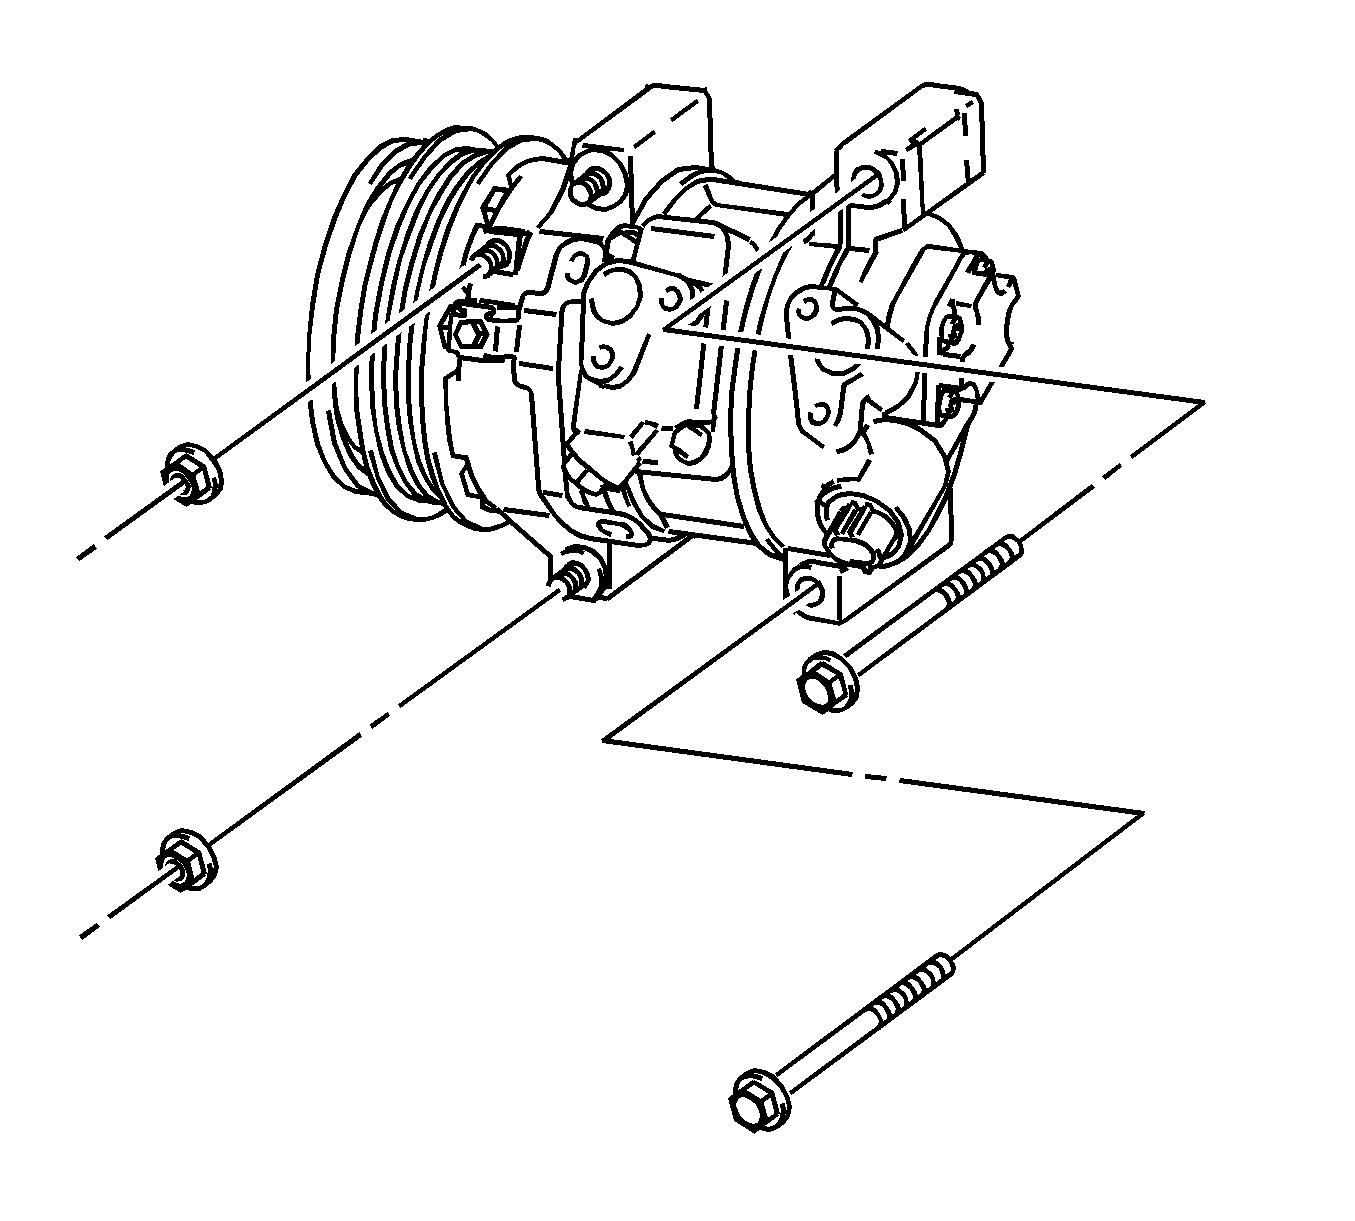
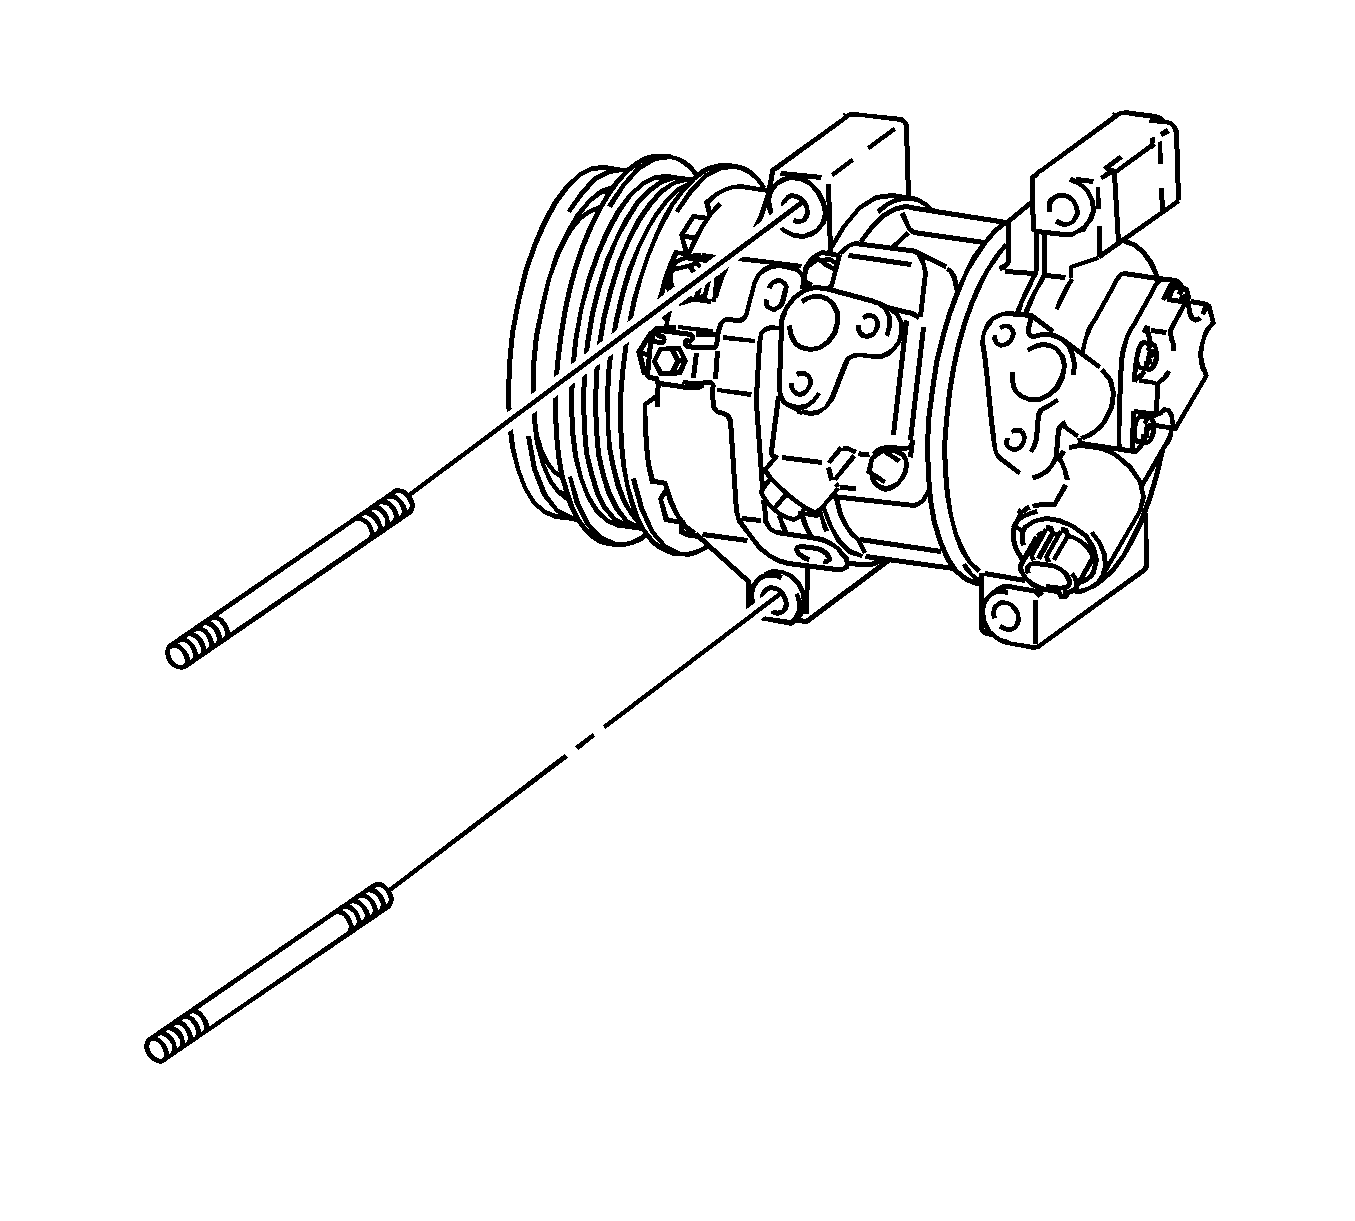
Note: Secure the compressor and hoses off to the side instead of discharging the A/C system.
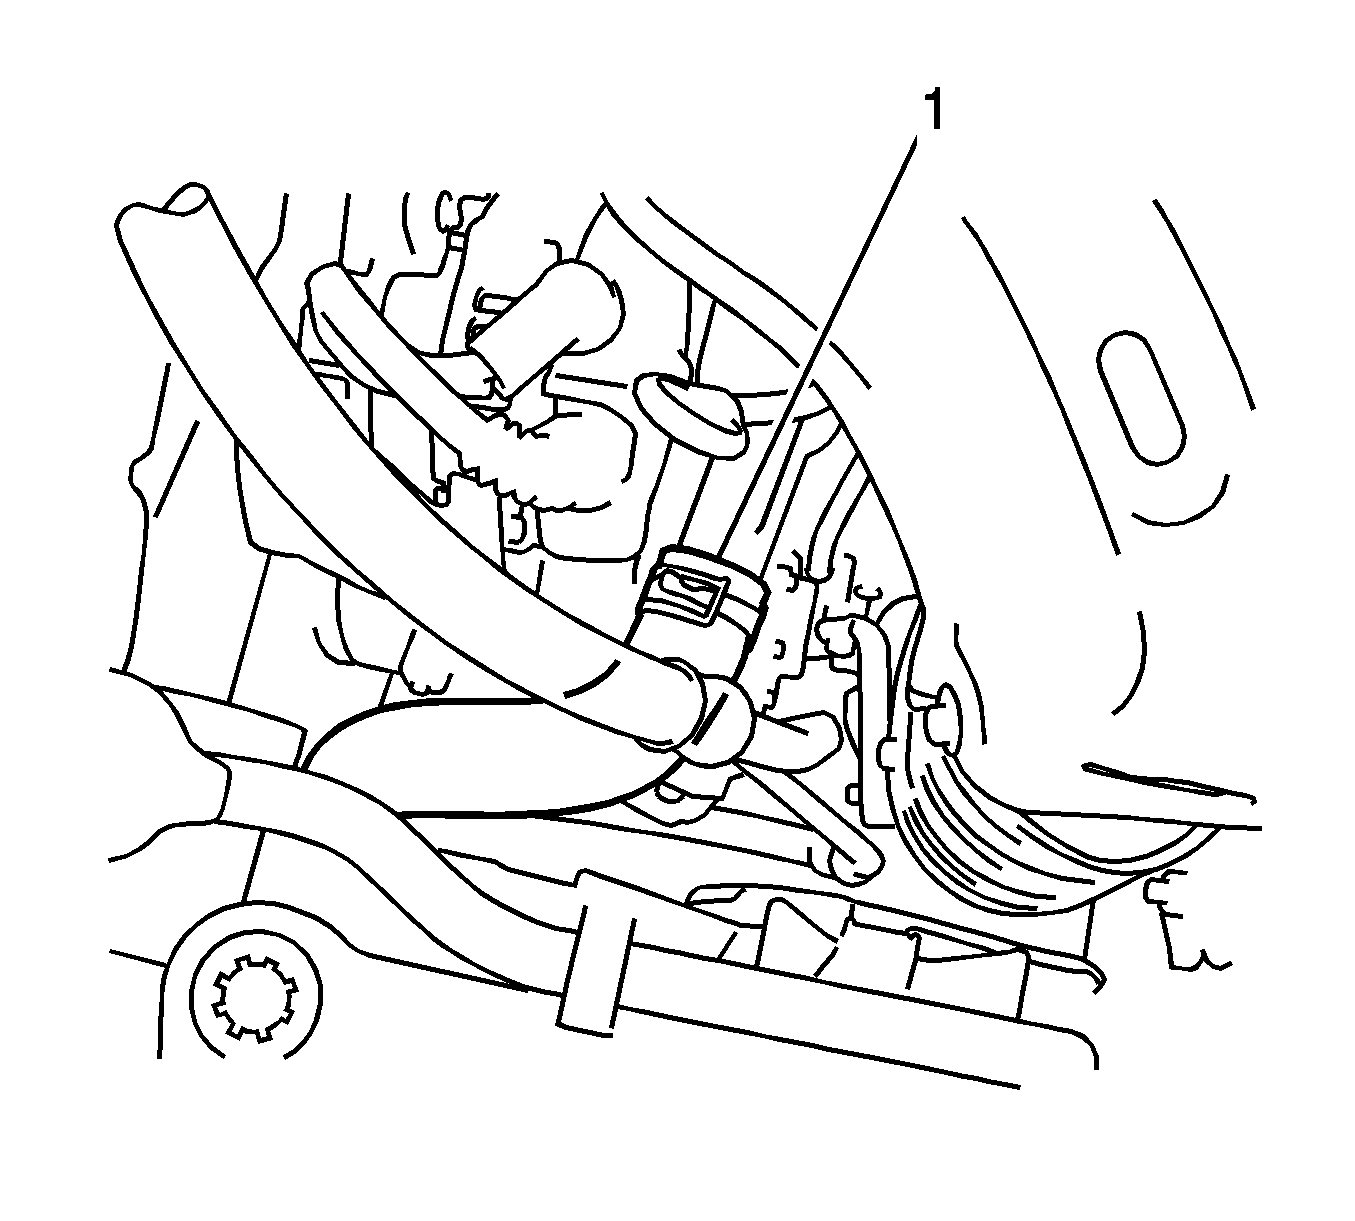
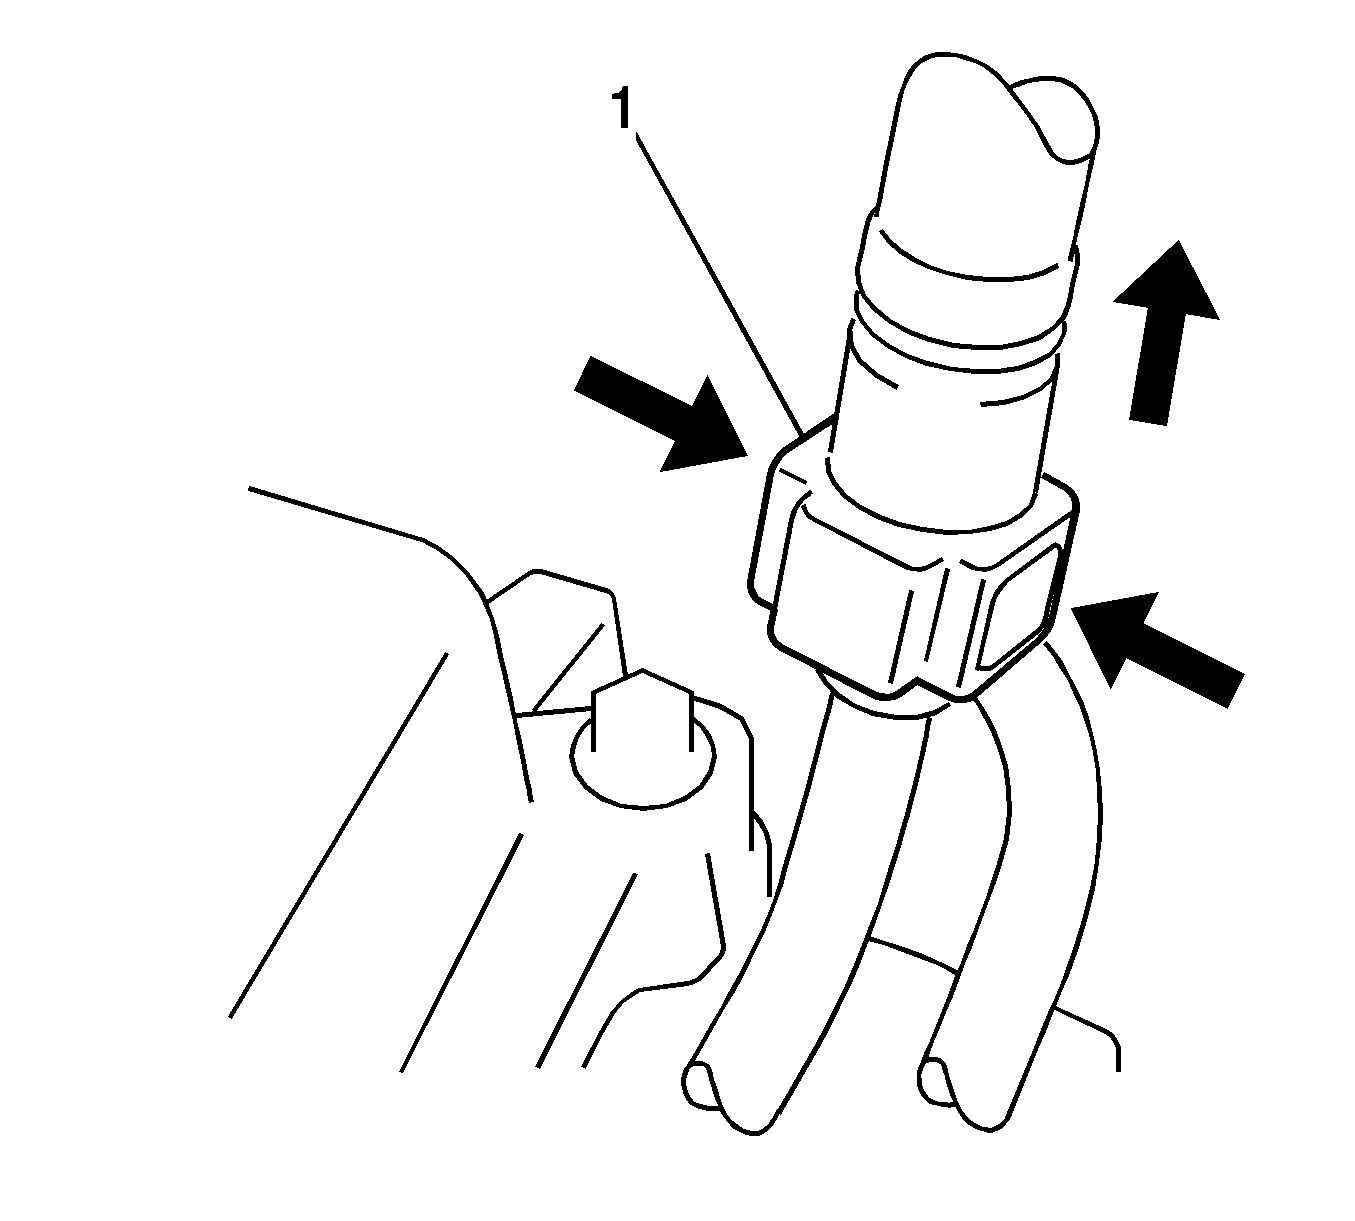
Note: Remove any dirt or foreign matter from the fuel tube connector before performing this work. Do not allow any scratches or foreign matter on the parts when disconnecting, as the fuel tube connector has O-rings that seal the pipe. Perform this work by hand. Do not use any tools. Do not forcibly bend, kink or twist the nylon tube. Protect the disconnected parts by covering them with vinyl bags after disconnecting the fuel tube. If the fuel tube connector and pipe are stuck, push and pull to release them.
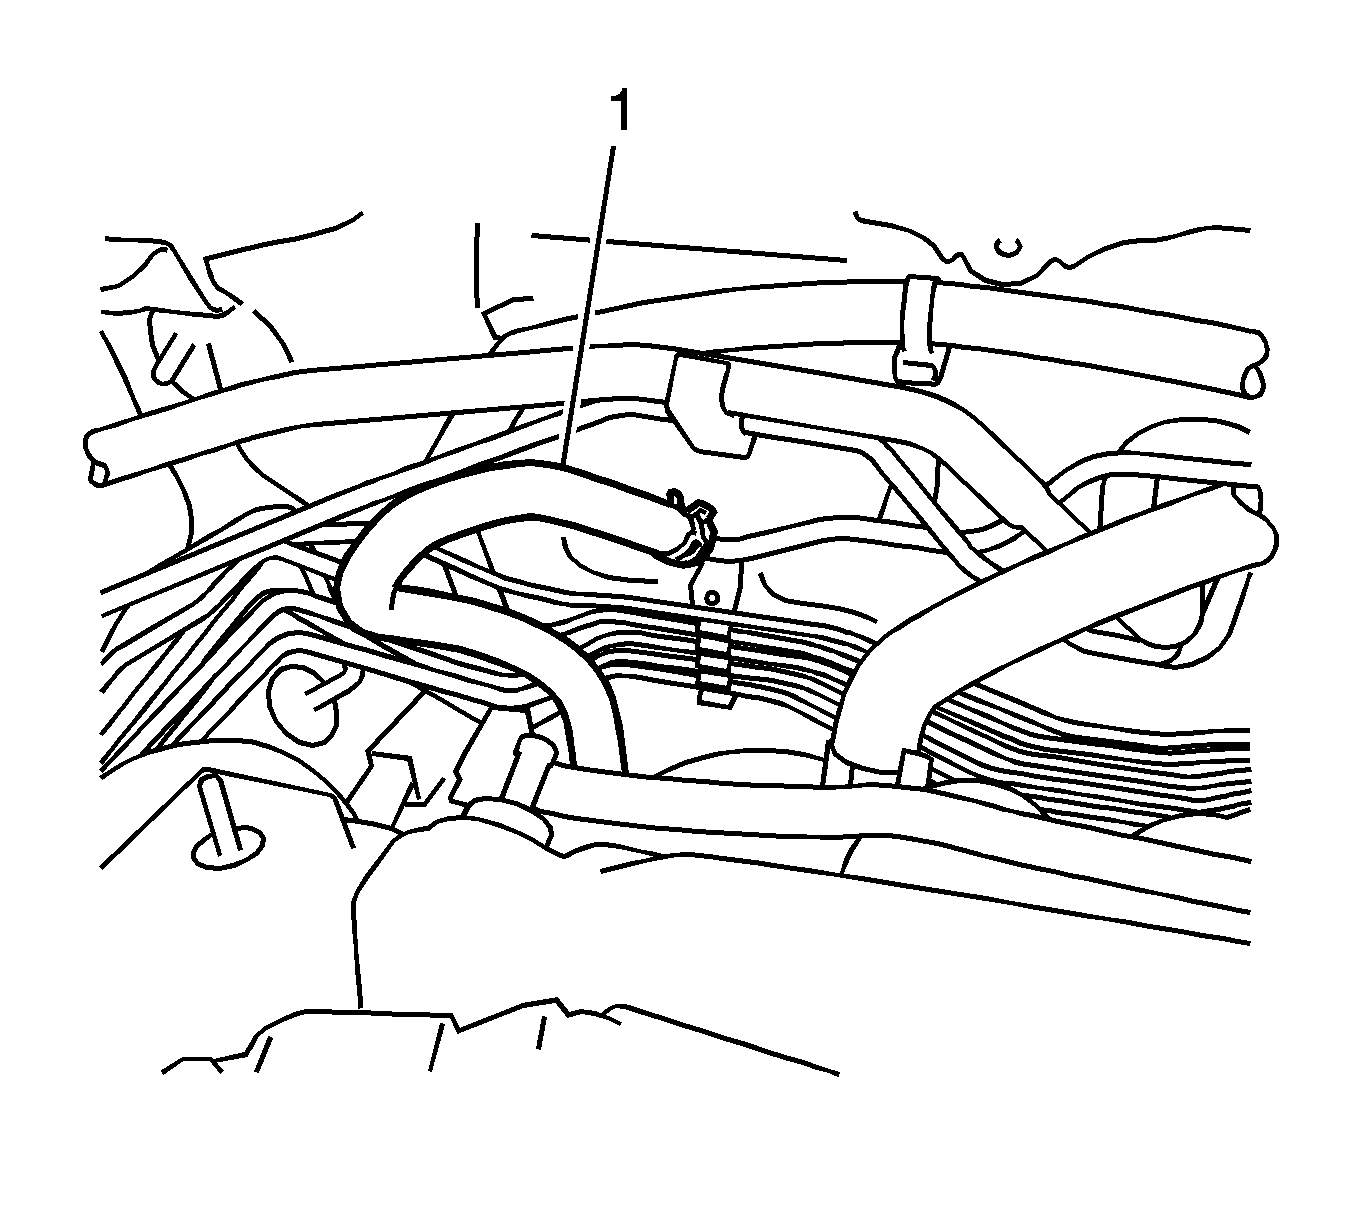
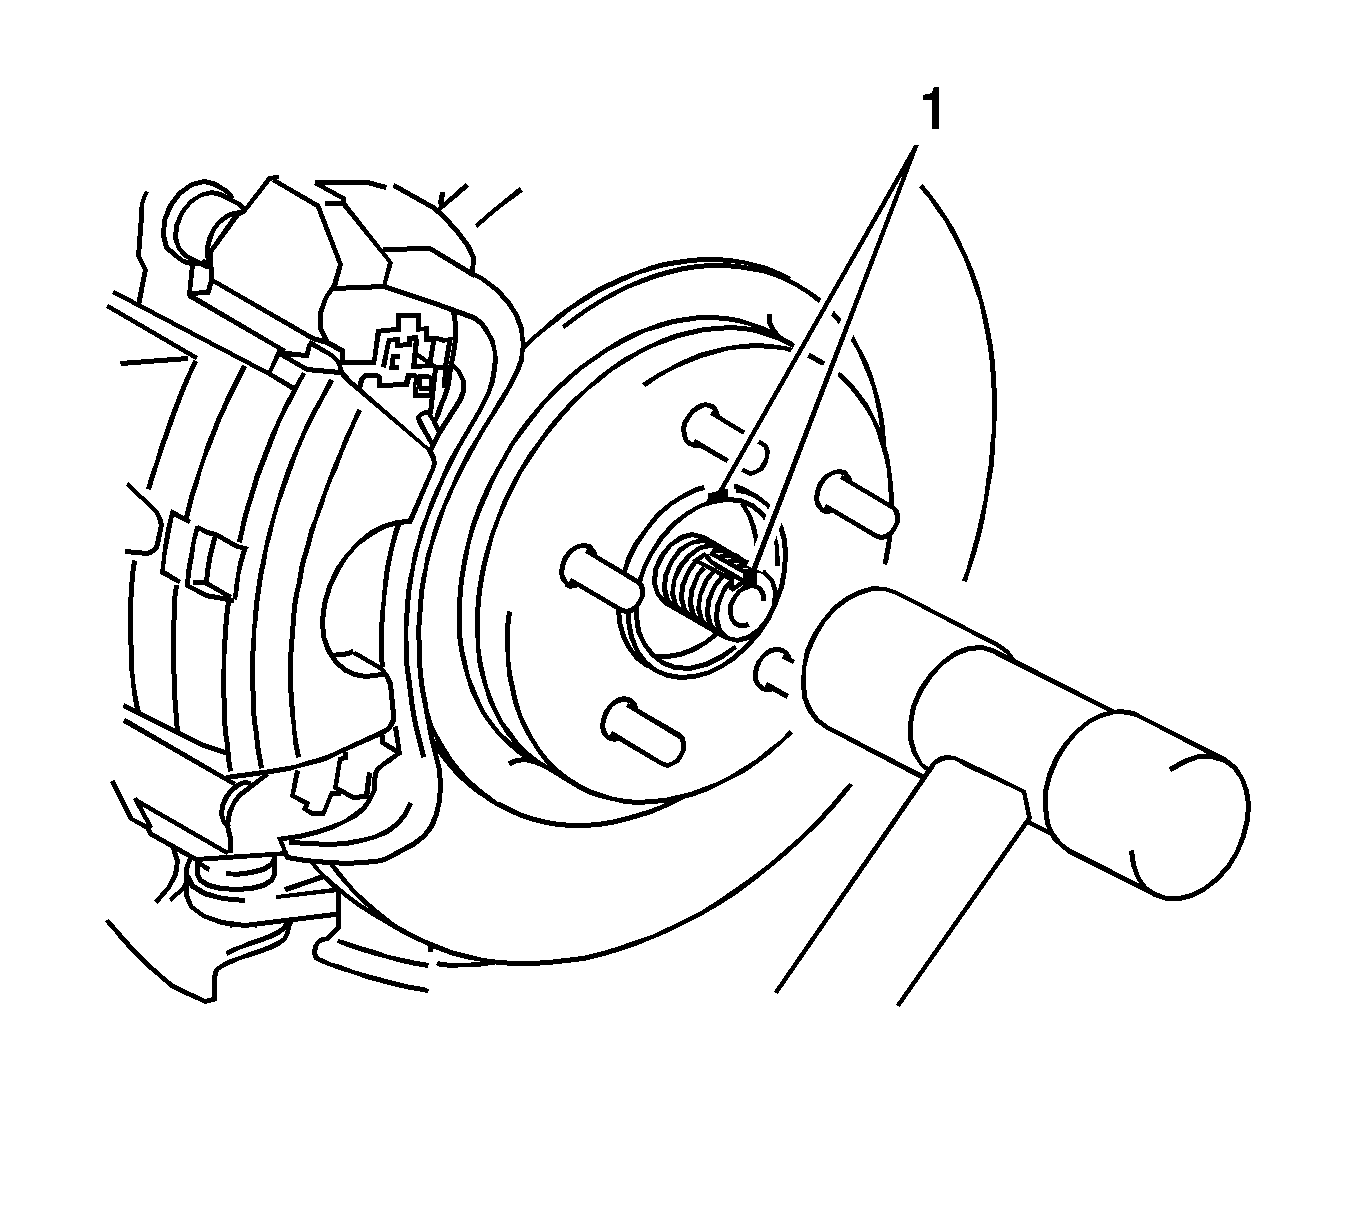
Note: Do not punch the marks.
Note: Be careful not to damage the boot and speed sensor rotor. Do not excessively push out the drive shaft from the axle assembly.
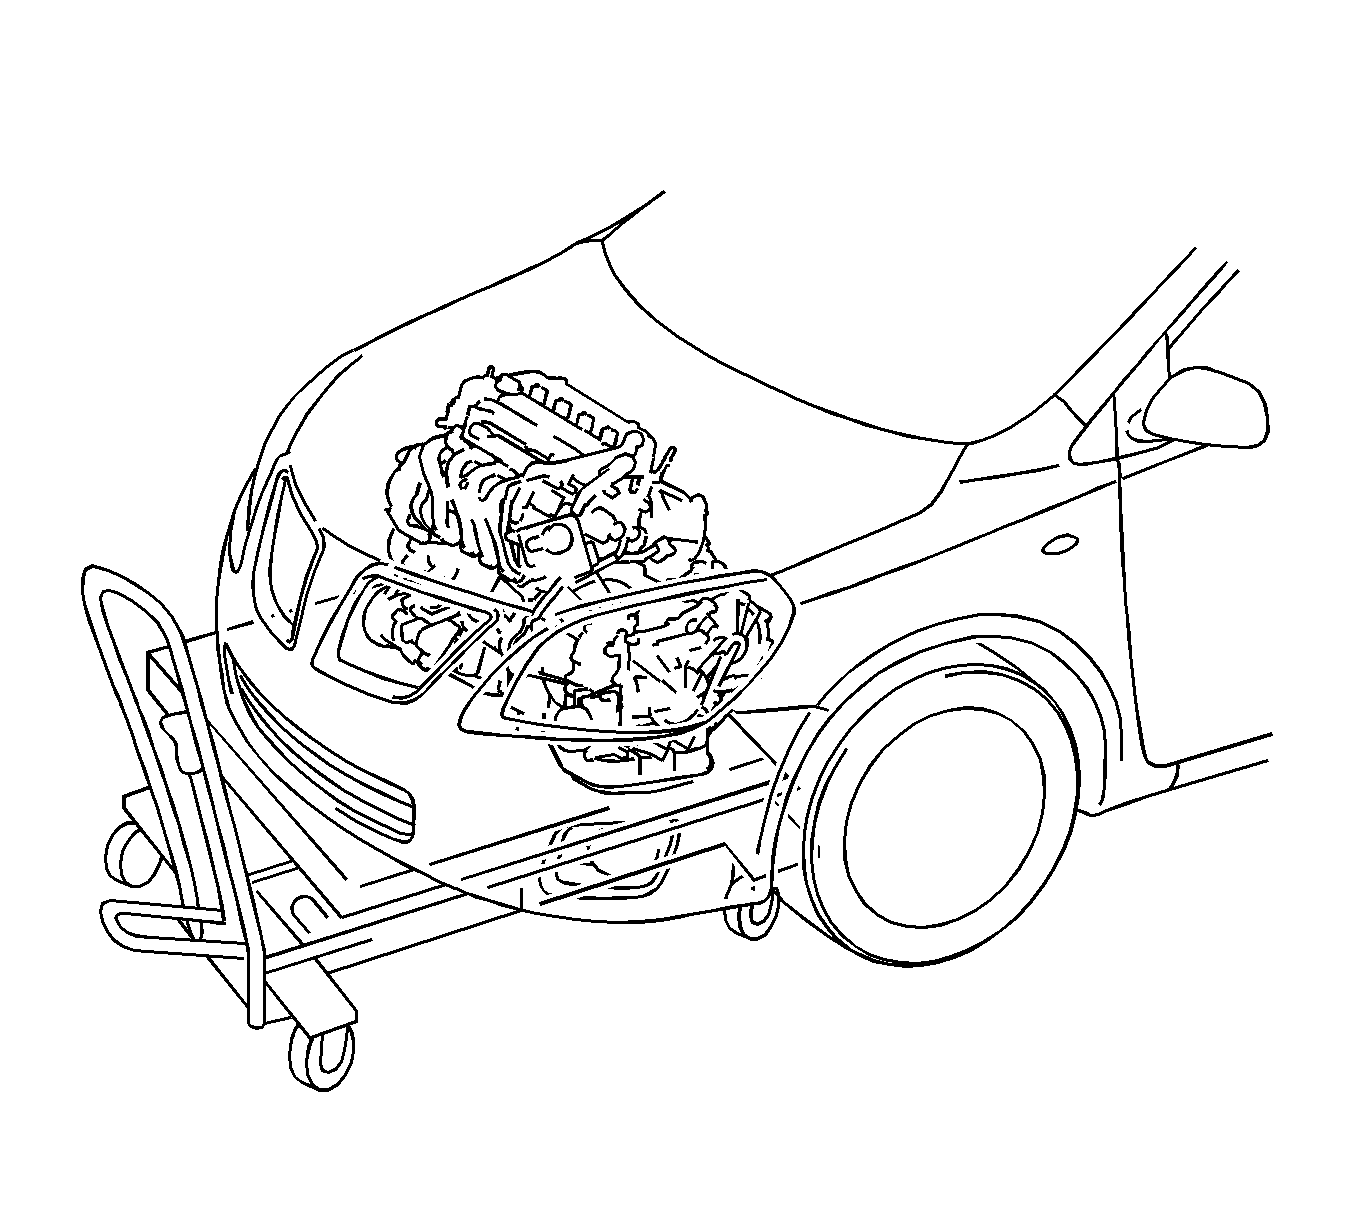
Note: Place the engine on wooden blocks or equivalent so that the engine is level.
Caution: Refer to Fastener Caution in the Preface section.
Installation Procedure
- Install the engine wire harness.
- Install the drive plate and ring gear subassembly (for automatic transaxle).
- Install the flywheel assembly (for manual transaxle).
- Install the clutch disc assembly (for manual transaxle).
- Install the clutch cover assembly (for manual transaxle).
- Install the transaxle assembly. Refer to Transmission Replacement for the MVA 4 speed transmission, Transmission Replacement for the MVD 5 speed transmission or Transmission Replacement for the MVC 5 speed transmission.
- Install the starter assembly.
- Install the drive shaft bearing bracket with the 3 bolts (1, 2, 3) and tighten to 64 N·m (47 lb ft) (for 2WD).
- Temporarily tighten the front engine mounting insulator with the nut (2) and through bolt (1).
- Temporarily tighten the rear engine mounting insulator to the engine mounting bracket with the through bolt (1) (for 2WD).
- Temporarily tighten the rear engine mounting insulator to the engine mounting bracket with the through bolt (1) (for 4WD).
- Install the right engine mounting insulator with the 3 bolts (1, 2, 3) and tighten to 52 N·m (38 lb ft).
- Temporarily install the left engine mounting insulator with the 4 bolts (1-4).
- Tighten the 4 bolts to 52 N·m (38 lb ft).
- Set the engine assembly with transaxle on the engine lifter.
- Remove the 2 bolts and 2 engine hangers.
- Operate the engine lifter and lift the engine assembly with transaxle to the position where the engine mounting insulators RH and LH can be installed.
- Install the right engine mounting insulator with the bolt (2) and 2 nuts (1, 3) and tighten.
- Install the engine mounting insulator LH with the through bolt (2) and nut (1) and tighten to 56 N·m (41 lb ft).
- Temporarily tighten the center engine mounting member sub-assembly.
- Install the front suspension crossmember mounting bolts. Refer to Front Suspension Crossmember Replacement.
- Fully tighten the center engine mounting member sub-assembly.
- Fully tighten the front engine mounting insulator with the nut (2) and through bolt (1) and tighten to 73 N·m (53 lb ft).
- Fully tighten the rear engine mounting insulator to the engine mounting bracket with the through bolt and tighten to 65 N·m (48 lb ft) (for 2WD).
- Fully tighten the rear engine mounting insulator to the engine mounting bracket with the through bolt (1) and tighten to 65 N·m (48 lb ft) (for 4WD).
- Install the drive plate and torque converter clutch setting bolt.
- Align the matchmarks (1) and connect the left front drive shaft assembly to the front axle assembly.
- Install the right steering knuckle with axle hub.
- Install the left front lower suspension arm assembly.
- Install the right front lower suspension arm assembly.
- Install the left front stabilizer link assembly.
- Install the right front stabilizer link assembly.
- Install the left tie rod end assembly.
- Install the right tie rod end assembly.
- Install the left front axle shaft nut. Refer to Front Wheel Drive Shaft Replacement - Left Side.
- Install the right front axle shaft nut. Refer to Front Wheel Drive Shaft Replacement - Right Side.
- Temporarily tighten the propeller with center bearing shaft assembly (for 4WD).
- Install the propeller with center bearing shaft (for 4WD). Refer to Propeller Shaft Replacement.
- Install the front exhaust pipe assembly. Refer to Front Pipe Replacement.
- Install the catalytic converter assembly. Refer to Catalytic Converter Replacement.
- Install the steering column hole cover sub-assembly.
- Install the steering intermediate shaft assembly.
- Install the column hole cover silencer sheet.
- U250e automatic transaxle--Connect the transmission control cable to the control cable bracket (1).
- Connect the transmission control cable to the bracket with a new clip.
- Connect the transmission control cable assembly to the control shaft lever with the nut (1) and tighten to 12 N·m (9 lb ft).
- U140F Automatic Transaxle--Connect the transmission control cable to the control cable bracket (1).
- Connect the transmission control cable to the bracket with a new clip.
- Connect the transmission control cable assembly to the control shaft lever with the nut (1) and tighten to 12 N·m (9 lb ft).
- E351 Manual Transaxle--Install the 2 transmission control cables (1, 2) to the control cable bracket with 2 new clips 1.
- Install the clutch release cylinder assembly (for manual transaxle).
- Connect the union to the connector tube hose (1).
- Connect the fuel tube connector and fuel pipe.
- Engage the claw and install the fuel pipe clamp.
- Connect the inlet heater water hose (1) with the clamp.
- Connect the outlet heater water hose (1) with the clamp.
- Install the breather hose (for Automatic Transaxle).
- Connect the 2 oil cooler hoses (1, 2) with the clamps (for Automatic Transaxle).
- Connect the upper radiator hose (1) with the clamp.
- Connect the lower radiator hose (1) with the clamp.
- Install the compressor assembly with pulley (with air conditioning system). Refer to Air Conditioning Compressor Replacement.
- Install the generator assembly. Refer to Generator Replacement.
- Install the V-ribbed belt. Refer to Drive Belt Replacement.
- Install the throttle body assembly.
- Install the ground cable to the engine compartment wire with the bolt (1) and clamp (2) (for Manual Transaxle) and tighten to 13 N·m (10 lb ft).
- Install the ground wire to the engine compartment wire with the bolt (1) and clamp (2) (for Automatic Transaxle) and tighten to 26 N·m (19 lb ft).
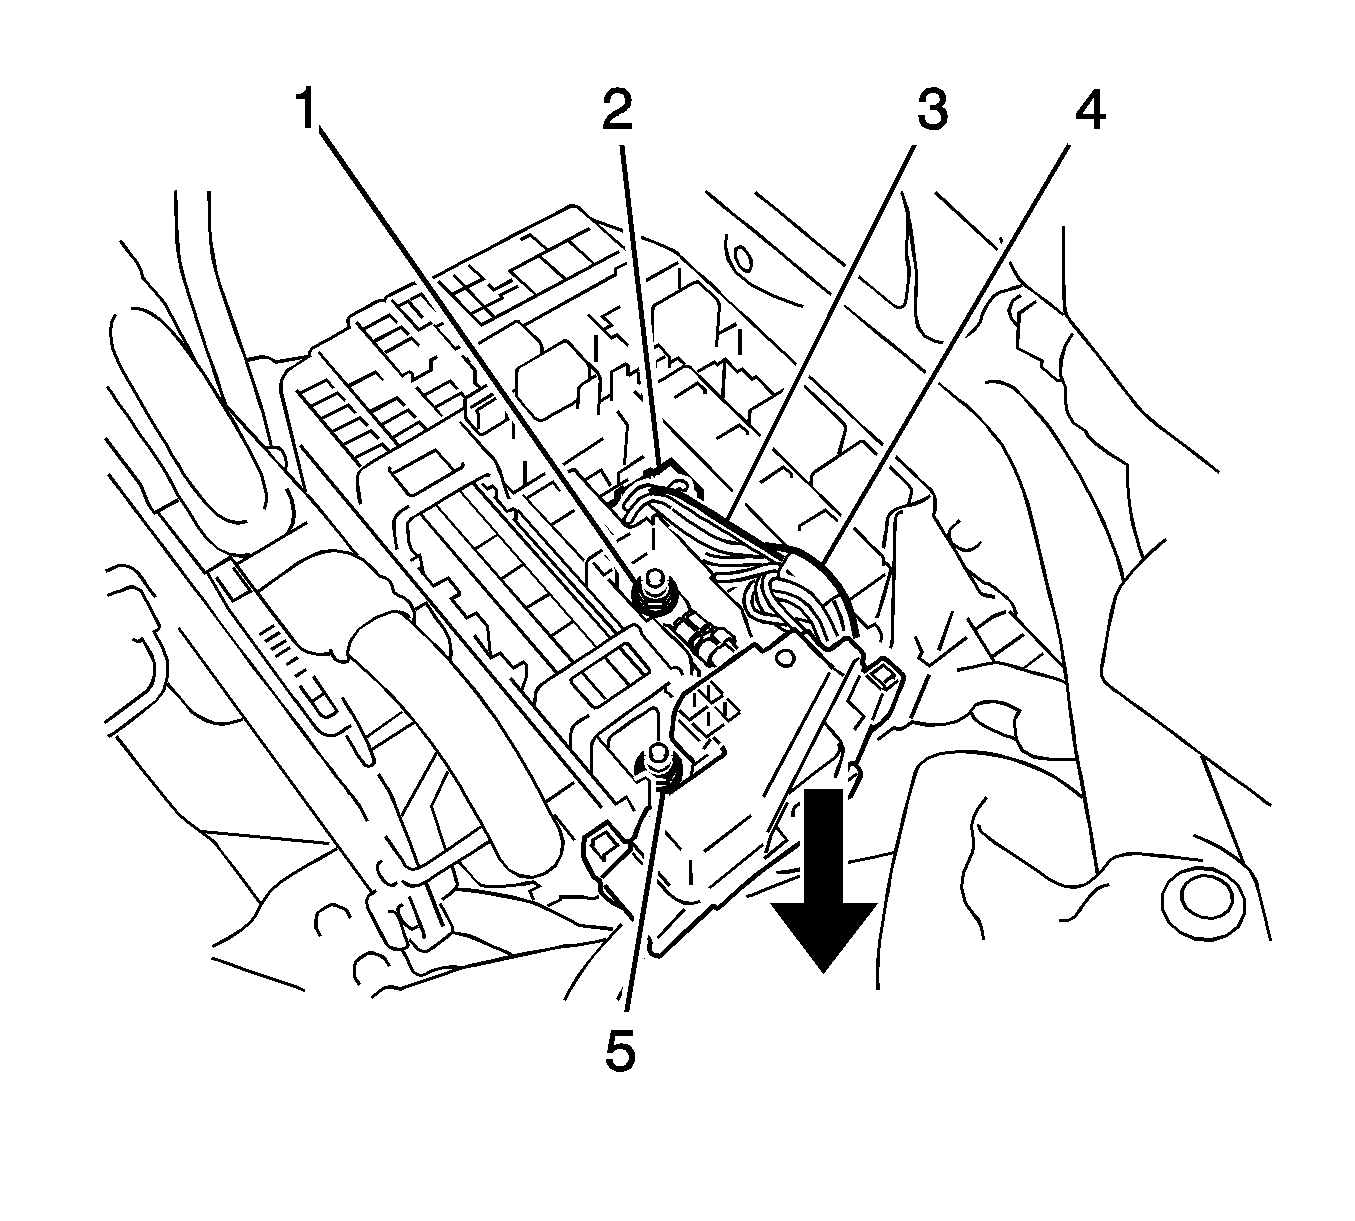
- Install the wire harness with the 2 nuts (1, 5) and tighten to 8.4 N·m (74 lb in).
- Connect the 3 connectors (2, 3, 4).
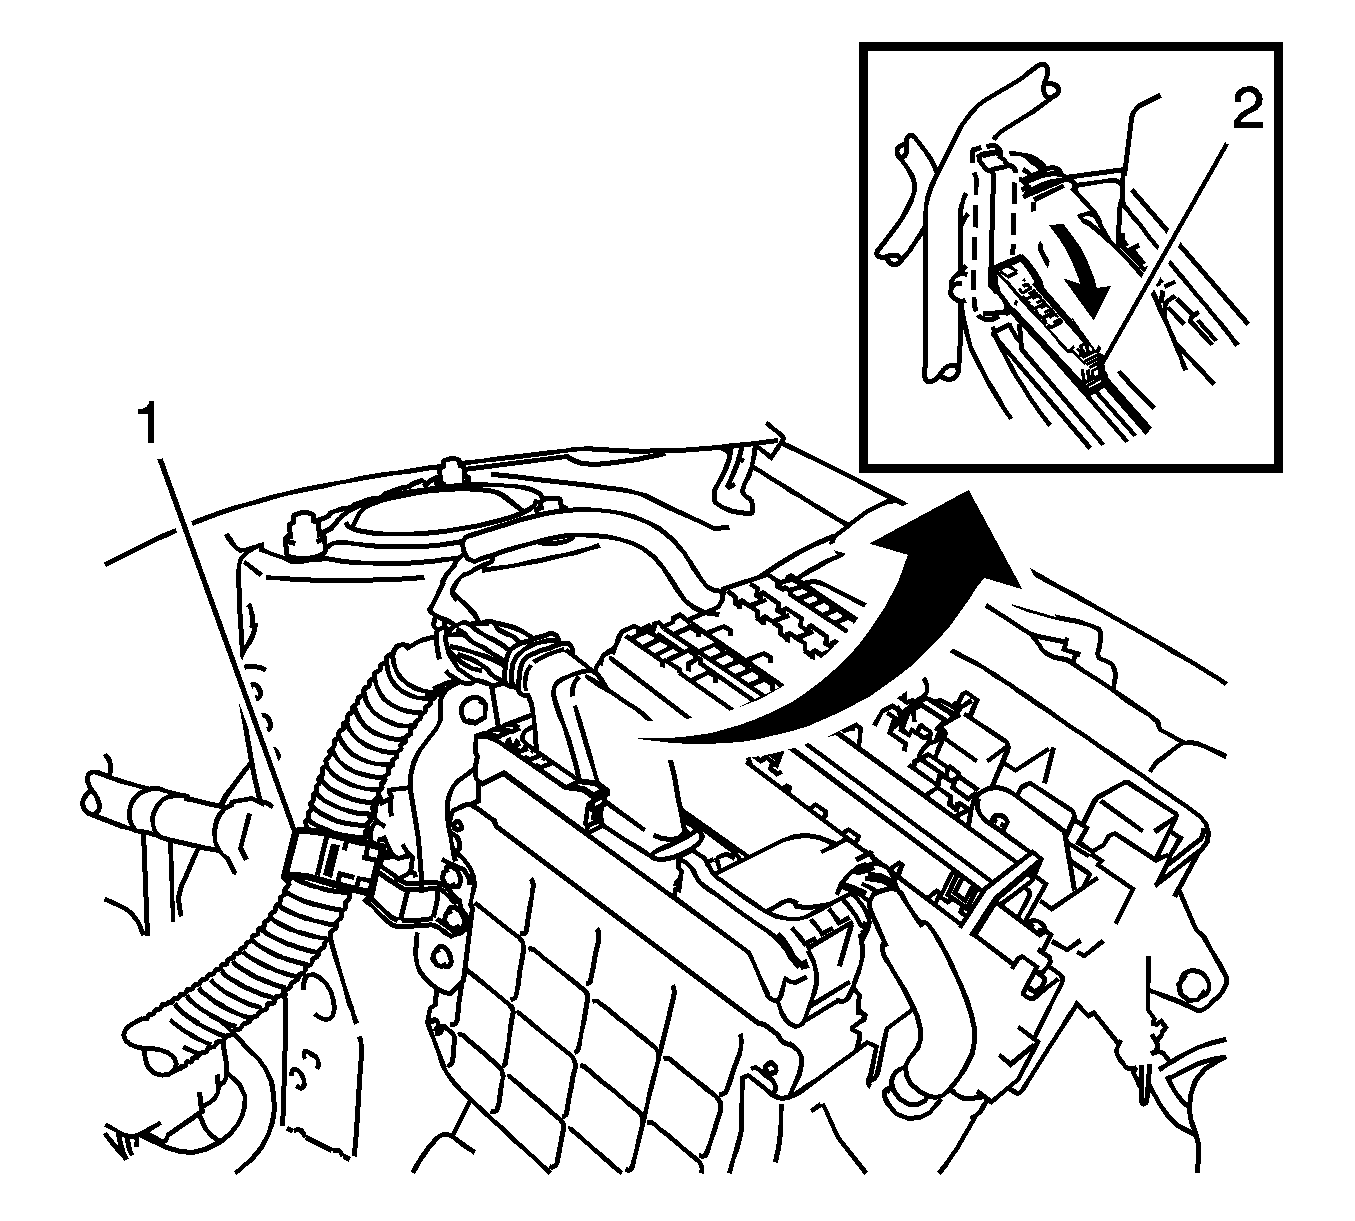
- Connect the connector to the engine control computer with the clamp and lock lever (2).
- Install the battery carrier with the 4 bolts (1, 2) and tighten to 13 N·m (10 lb ft).
- Connect the 2 wire harness clamps.
- Install the battery tray, battery and battery insulator. Refer to Battery Tray Replacement.
- Install the battery clamp with the bolt (1) and nut (2) and tighten.
- Install the air cleaner case with the 3 bolts (1) and tighten to 7.0 N·m (62 lb in).
- Install the engine wire clamp to the air cleaner case.
- Install the air cleaner filter element.
- Install the air cleaner cap with hose.
- Install the radiator reserve tank assembly with the 3 bolts (1, 2, 3) and tighten to 7.0 N·m (62 lb in).
- Add manual transaxle oil (for manual transaxle).
- Inspect the manual transaxle oil (for manual transaxle).
- Add automatic transaxle fluid (for automatic transaxle).
- Inspect the transaxle fluid level (for automatic transaxle).
- Add transfer case oil.
- Inspect the transfer case oil.
- Inspect the shift lever position (for automatic transaxle).
- Adjust the shift lever position (for automatic transaxle) Refer to Park/Neutral Position Switch Adjustment.
- Add engine coolant. Refer to Cooling System Draining and Filling.
- Connect the cable to negative battery terminal. Refer to Battery Negative Cable Disconnection and Connection.
- Warm up the engine.
- Fill the brake fluid reservoir (for manual transaxle)
- Bleed the clutch line (for manual transaxle).
- Inspect the fluid level (for manual transaxle).
- Inspect for fuel leak.
- Inspect for coolant leak
- Inspect for oil leak.
- Inspect for exhaust gas leak.
- Install the engine under left cover.
- Install the engine under right cover.
- Install the front wheels. Refer to Tire and Wheel Removal and Installation.
- Inspect the ignition timing.
- Inspect the engine idling speed.
- Adjust the front wheel alignment. Refer to Wheel Alignment Measurement.
- Install the engine cover with the 2 nuts (1, 2).
- Check the ABS speed sensor signal.


Note: Perform this procedure only when replacement of the engine mounting insulator is necessary.

Note: Place the engine on wooden blocks or equivalent so that the engine is level.
Note: Do not raise the engine more than necessary. If the engine is raised excessively, the vehicle may also be lifted up.
Note: Make sure that the engine is clear of all wiring and hoses. While raising the engine into the vehicle, do not allow it to contact the vehicle.
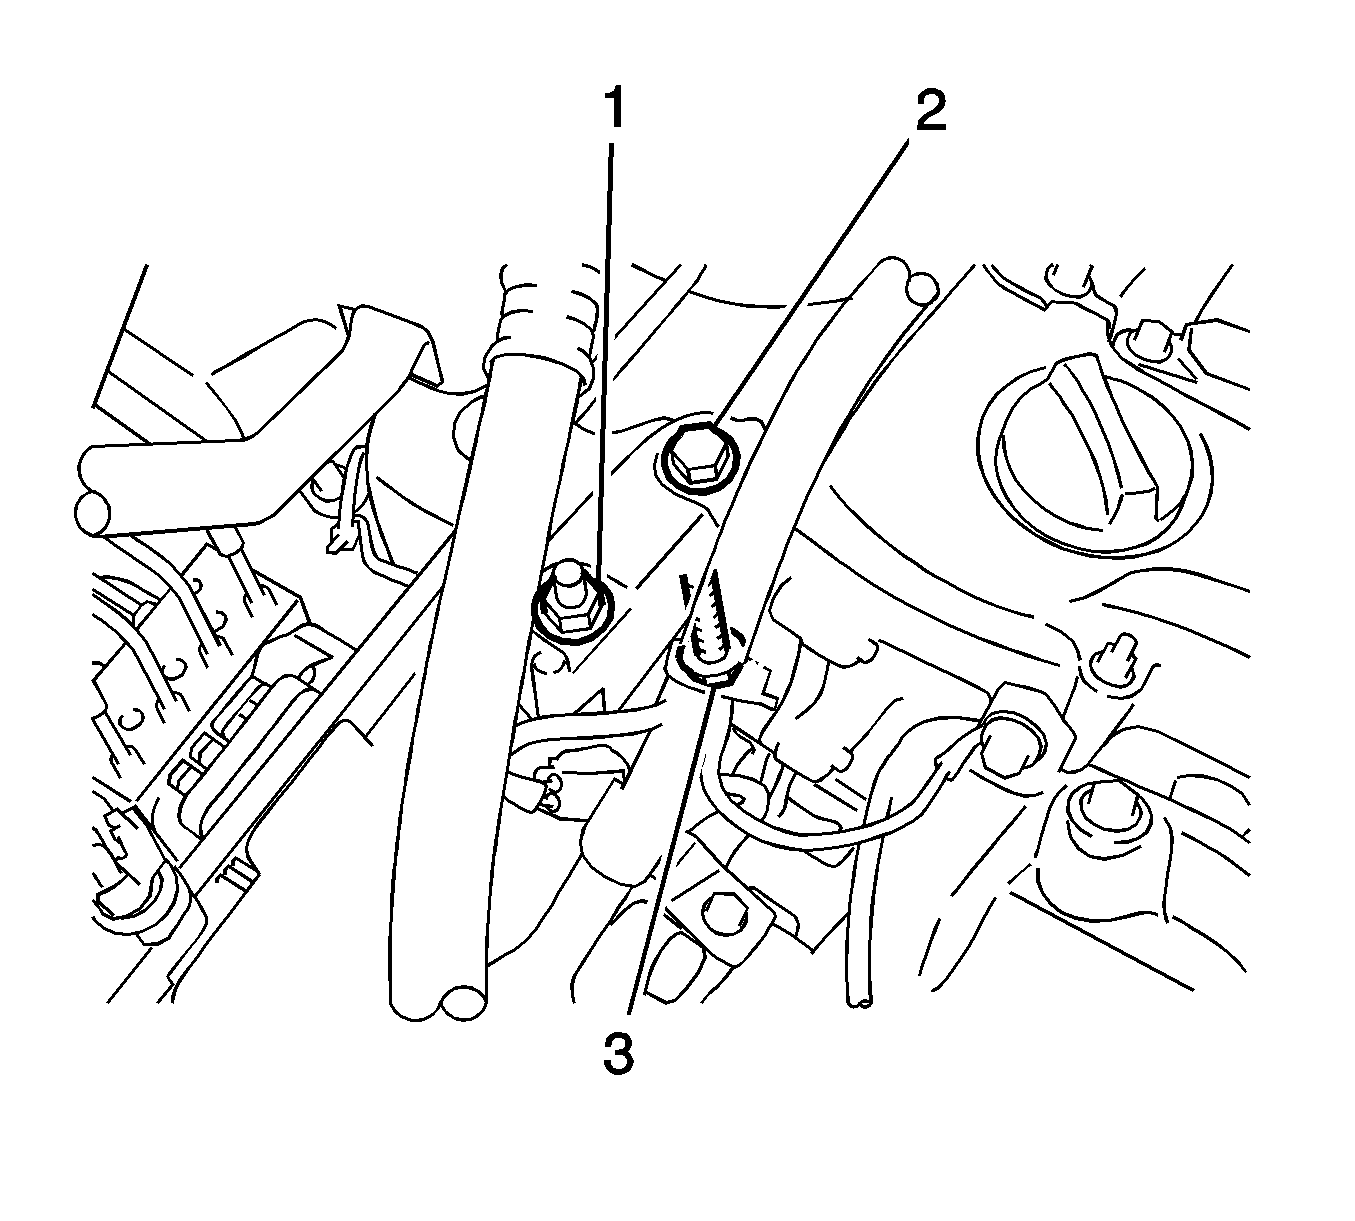
| • | Nut 1 to 95 N·m (70 lb ft) |
| • | Nut 2 to 52 N·m (38 lb ft) |
| • | Bolt 3 to 95 N·m (70 lb ft) |


Note: Align the fuel tube connector with the pipe, then push the fuel tube connector in until the retainer makes a click sound. If the connection is tight, apply a small amount of engine oil to the tip of the pipe. After connecting, pull the pipe and connector to make sure that they are securely connected.





| • | Bolt to 6.5 N·m (58 lb in) |
| • | Nut to 3.5 N·m (31 lb in) |


