For 1990-2009 cars only
Removal Procedure
- Remove the rear compartment lid trim. Refer to Rear Compartment Lid Inner Panel Trim Replacement .
- Remove the rear compartment lid applique. Refer to Rear Compartment Lid Applique Replacement .
- Remove the rear compartment lid latch assembly. Refer to Rear Compartment Lid Latch Replacement .
- Remove the rear compartment lid actuator assembly. Refer to Rear Compartment Lid Lock Actuator Replacement .
- Remove the rear compartment lid release cable assembly from the rear compartment lid only. Refer to Rear Compartment Lid Latch Release Cable Replacement .
- Remove the rear compartment lid spoiler. Refer to Rear Spoiler Replacement .
- Remove the rear compartment lid emblems. Refer to Rear Compartment Lid Emblem/Nameplate Replacement in Exterior Trim.
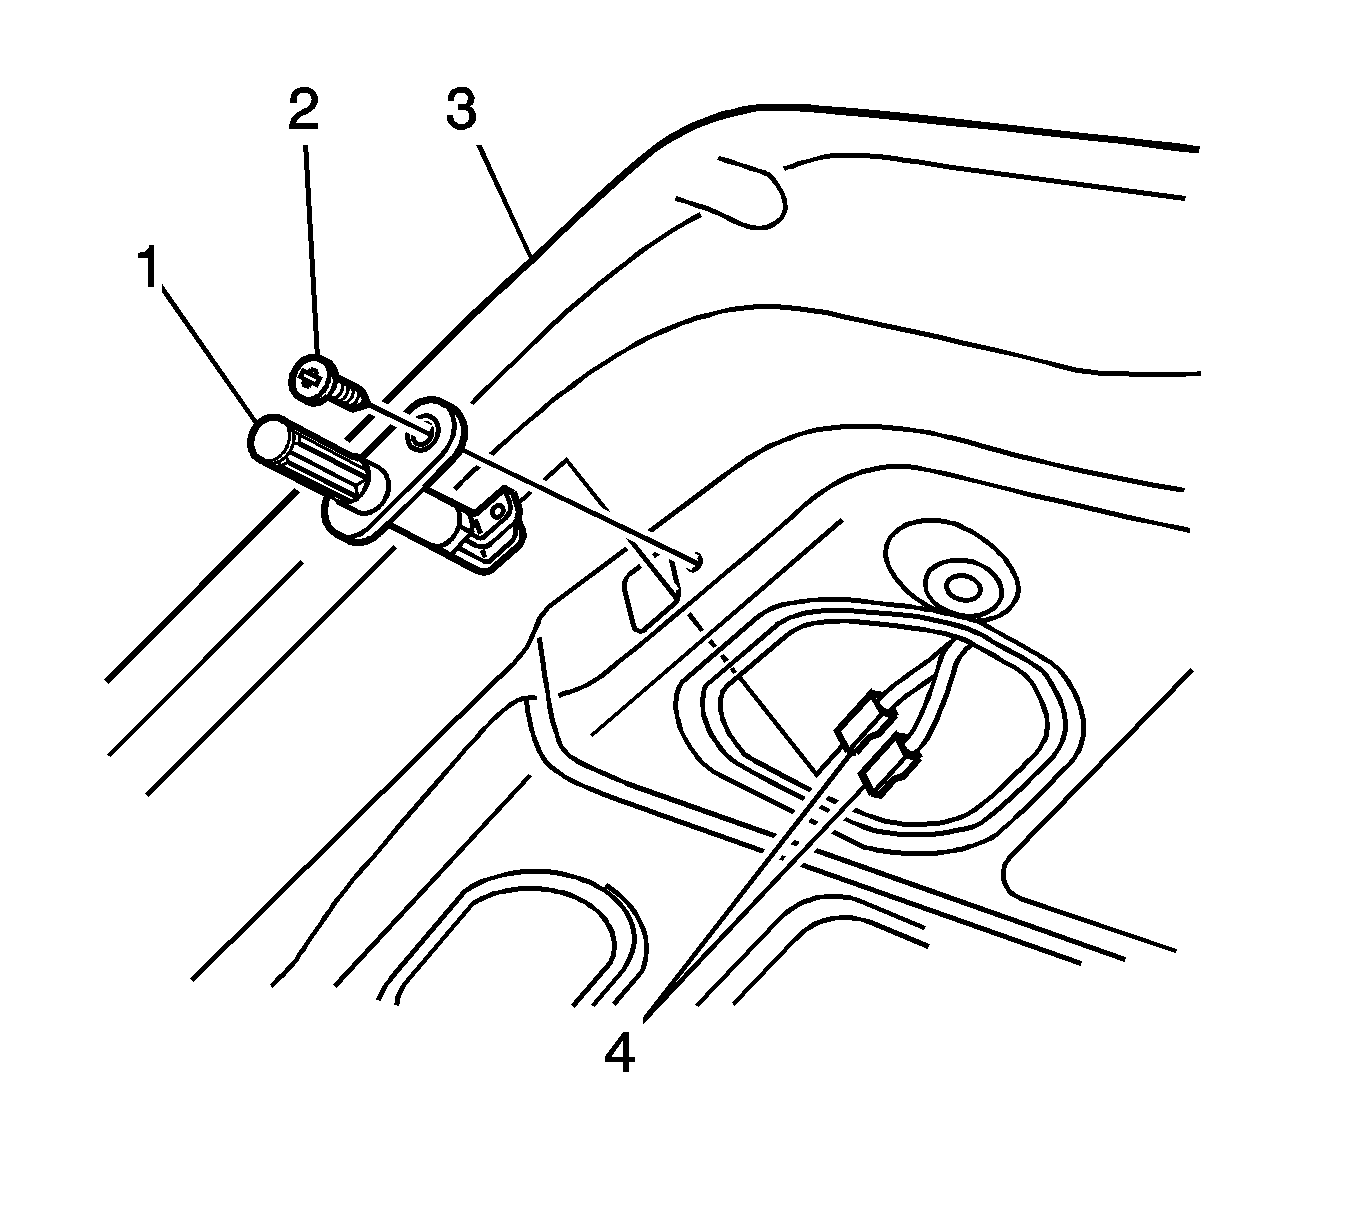
- Remove the screw (2) from the rear compartment lid ajar switch assembly (1).
- Remove the rear compartment lid ajar switch (1) from the rear compartment lid (3) and disconnect the wire connectors (4).
- Remove the body wiring harness from the rear compartment lid only.
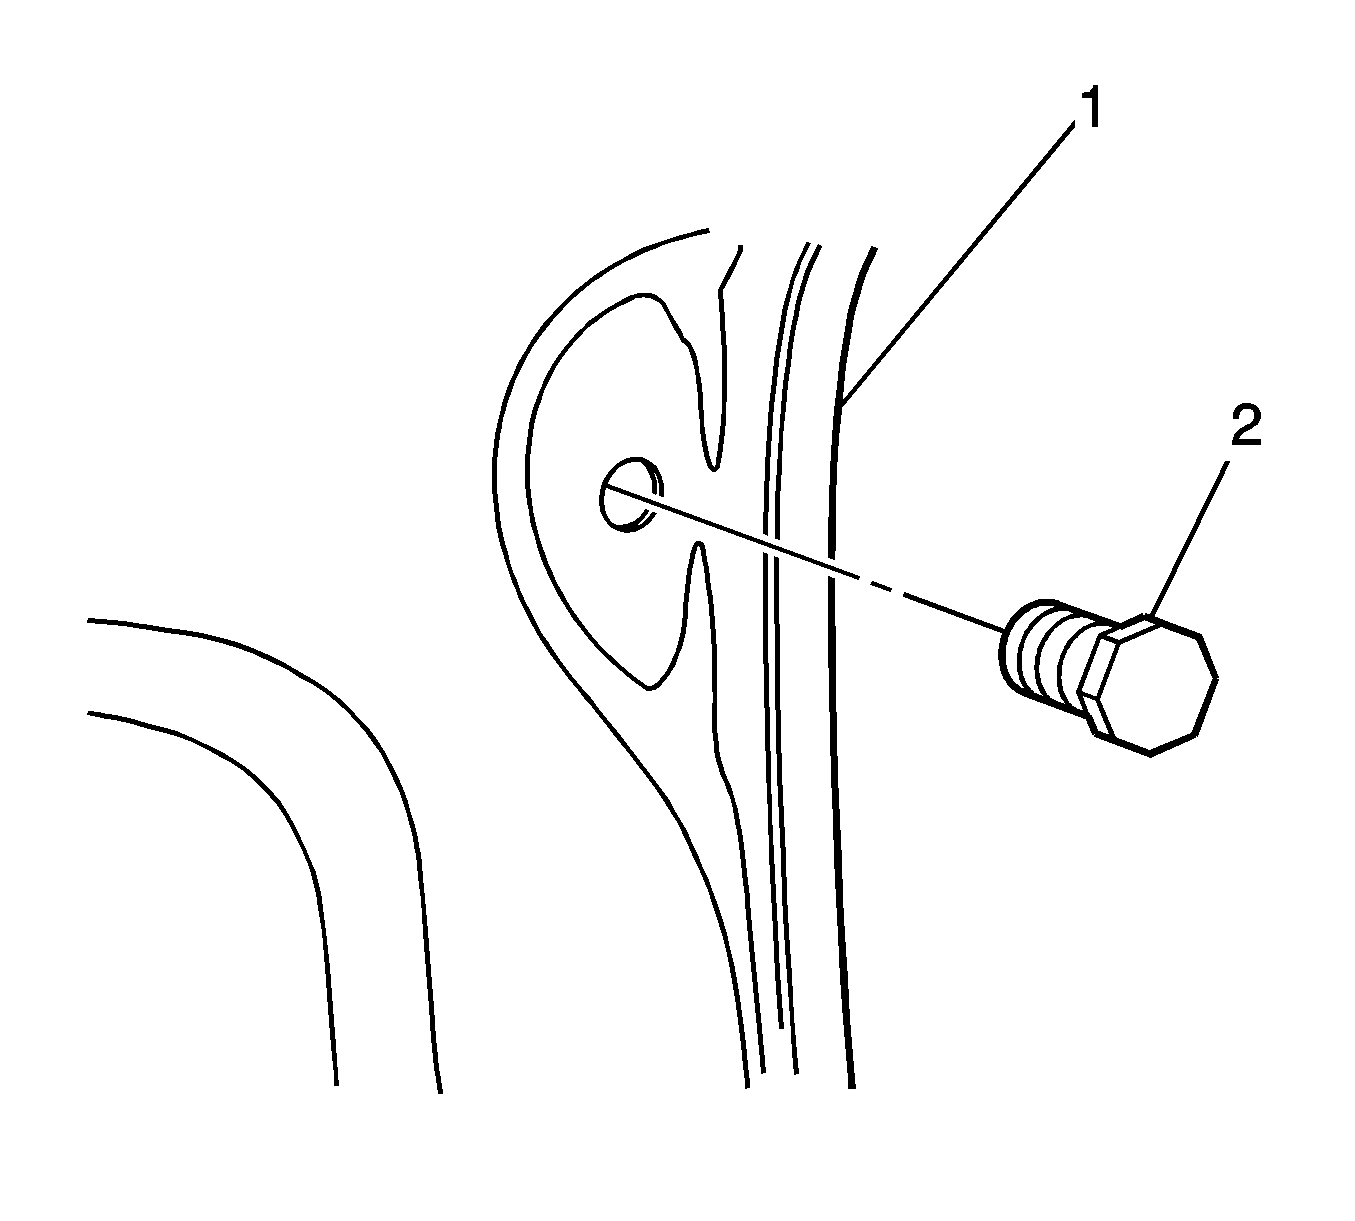
- Unscrew the rear compartment lid bumper (2) from each side of the rear compartment lid (1).
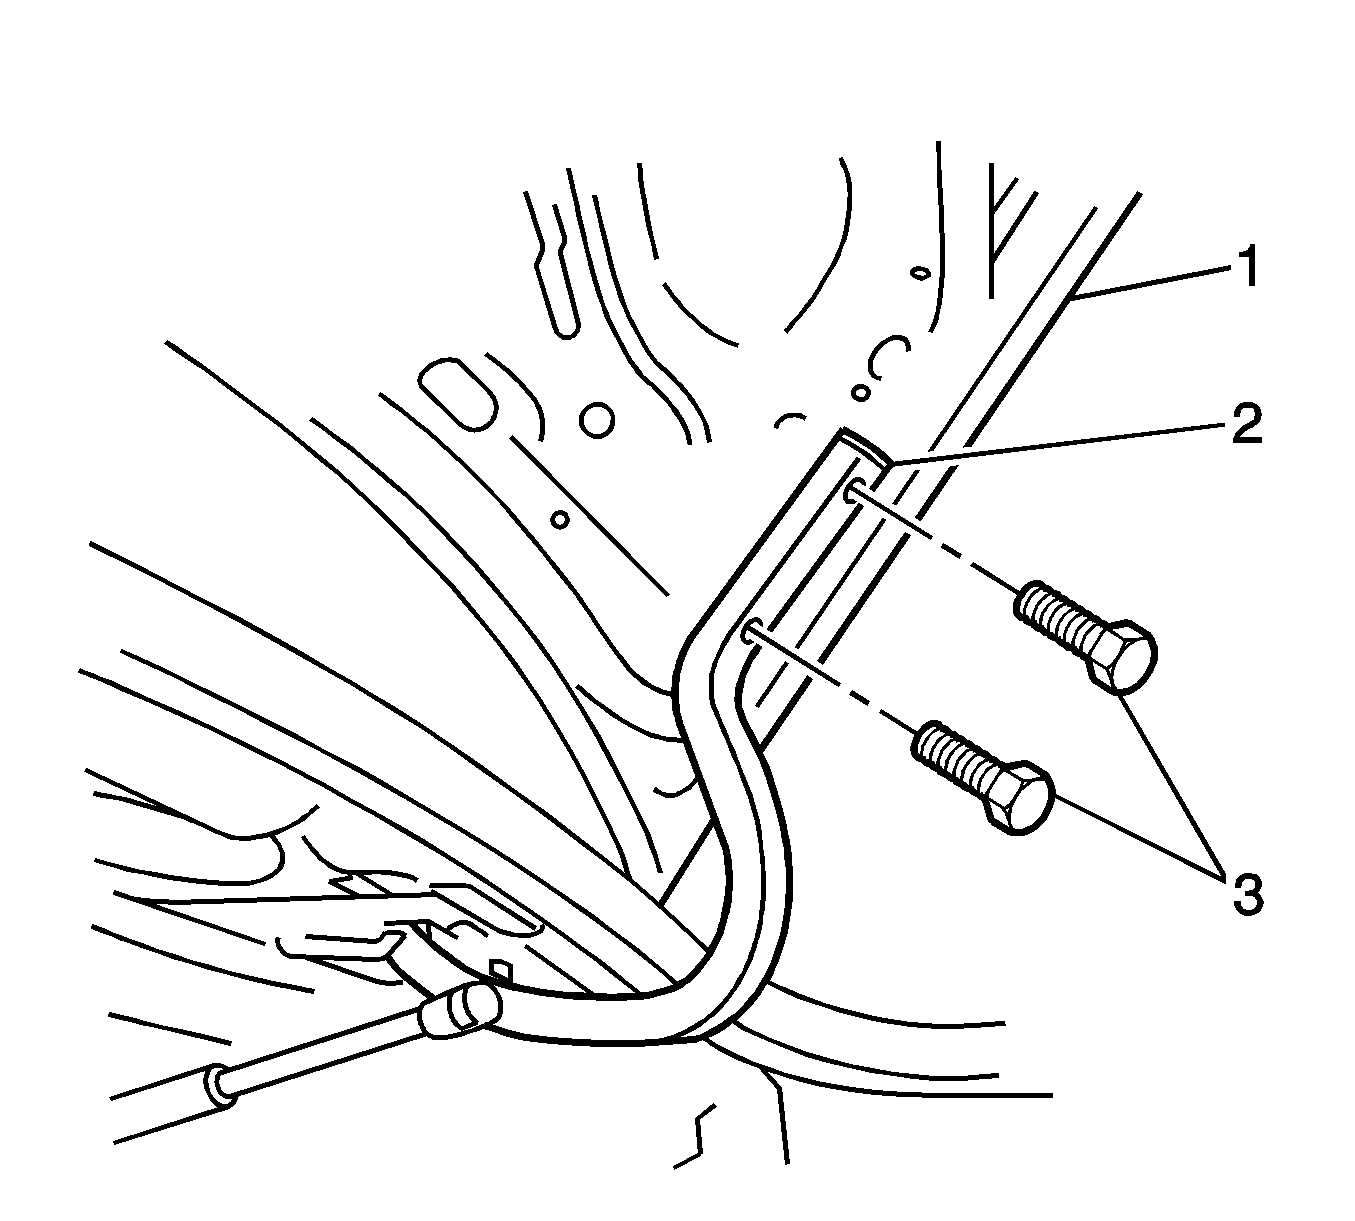
- Mark the position of the rear compartment lid bolts (3) on the hinges (2) to aid installation.
- With the aid of an assistant to support the other side of the rear compartment lid (1), remove the 2 bolts (3) from each side of the rear compartment lid hinges (2).
- Remove the rear compartment lid (1) from the vehicle.


Installation Procedure
- With the aid of an assistant, lift the rear compartment lid into position.
- Align the rear compartment lid (1) with the bolt holes in the hinges (2) and install the 4 bolts (3).
- Align the bolt heads with the marks previously made . If no mark exists, align the bolts (3) centrally in their holes.
- Install the rear compartment lid bumpers (2) setting them fully in.
- Carefully, close the rear compartment lid ensuring it does not contact the surrounding panels.
- Adjust the rear compartment lid, if required. Refer to Rear Compartment Lid Adjustment .
- Tighten the bolts (3) to the rear compartment hinges (2).
- Install the rear compartment lid wiring harness from the rear compartment lid.
- Connect the electrical connectors (4) to the rear compartment lid ajar switch (1).
- Install the rear compartment lid ajar switch (1) to the rear compartment lid (3).
- Install the screw (2) to the rear compartment lid ajar switch (1).
- Install the rear compartment lid emblems. Refer to Rear Compartment Lid Emblem/Nameplate Replacement in Exterior Trim.
- Install the rear spoiler. Refer to Rear Spoiler Replacement .
- Install the rear compartment lid release cable assembly. Refer to Rear Compartment Lid Latch Release Cable Replacement .
- Install the compartment lid actuator assembly. Refer to Rear Compartment Lid Lock Actuator Replacement .
- Install the rear compartment lid latch assembly. Refer to Rear Compartment Lid Latch Replacement .
- Install the rear compartment lid applique. Refer to Rear Compartment Lid Applique Replacement .
- Install the rear compartment lid trim. Refer to Rear Compartment Lid Inner Panel Trim Replacement .
- Close the rear compartment lid.

Do not tighten the bolts (3) until after the lid (1) has been aligned.

Notice: Refer to Fastener Notice in the Preface section.

Tighten
Tighten the rear compartment lid hinge bolts to 10 N·m (88 lb in).
Important: When installing a new compartment lid, use mechanics wire to pull the wiring harness into position.

Tighten
Tighten the rear compartment lid ajar switch screw to 2 N·m (18 lb in).
