For 1990-2009 cars only
Headlining Trim Panel Replacement Buick
Removal Procedure
Notice: Use care when removing and installing the headliner. If reusing the headliner lay the headliner down flat on a clean surface. Excessive bending will damage the headliner.
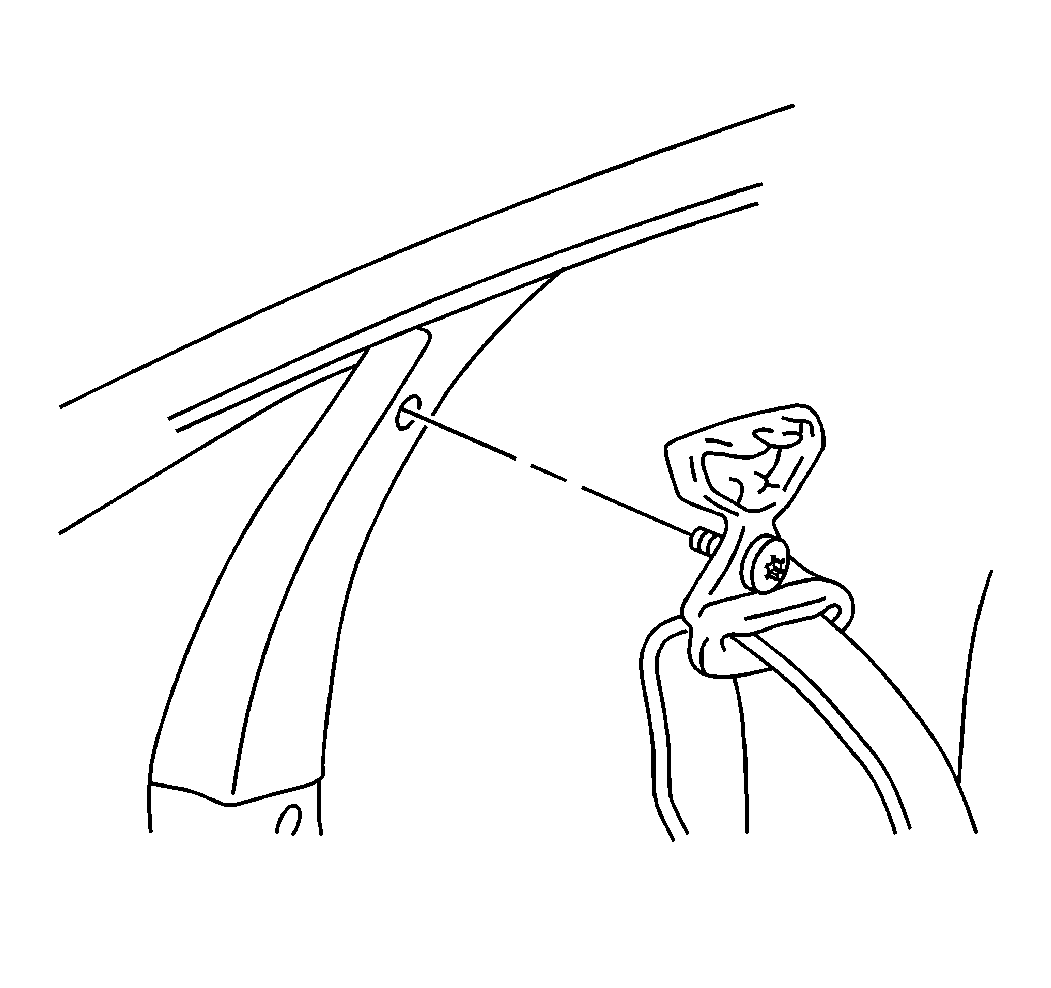
- Remove the shoulder belt bolts from the B-pillar. Refer to Seat Belt Replacement - Driver or Passenger in Seat Belts.
- Remove the upper B-pillar trim.
- Remove the courtesy lamp.
- Remove the front upper pinchweld lace.
- Remove the windshield garnish molding. Refer to Windshield Pillar Garnish Molding Replacement .
- Remove the rear sail panels. Refer to Sail Panel Replacement .
- Remove the assist handles (2). Refer to Assist Handle Replacement .
- Disconnect the electrical connectors to the following components:
- Remove the sunshades (4). Refer to Sunshade Replacement .
- Remove the map light bezel.
- Disconnect the electrical connectors from the mirror and the map light.
- Remove the rearview mirror.
- Lower the front seat backs.
- With the aid of an assistant, remove the headliner (1) through the passenger door.
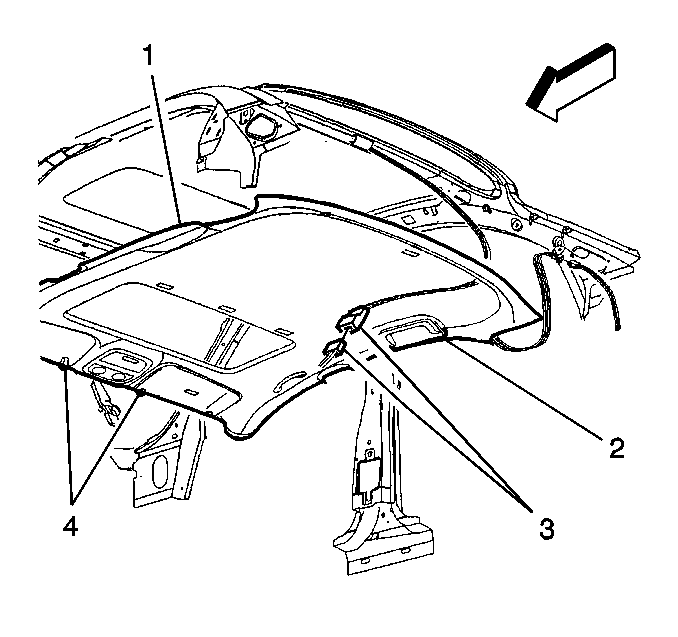
| • | The headliner harness |
| • | The courtesy lamp |
| • | The sunshade (4) |
Installation Procedure
- With the aid of an assistant, install the headliner (1) through the front passenger door.
- Connect the connectors to the mirror and to the map light.
- Install the map light bezel.
- Connect the connectors to the following components:
- Install the sunshade (4).
- Install the assist handles (2). Refer to Assist Handle Replacement .
- Install the rear sail panels. Refer to Sail Panel Replacement .
- Install the windshield garnish molding. Refer to Windshield Pillar Garnish Molding Replacement .
- Install the front upper pinchweld lace.
- Install the courtesy lamp.
- Install the upper B-pillar trim.
- Install the shoulder belts. Refer to Seat Belt Replacement - Driver or Passenger in Seat Belts.
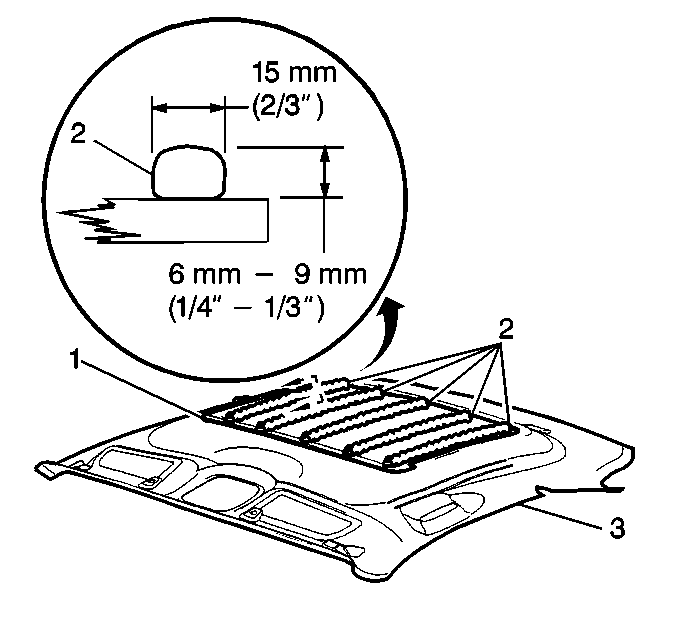
Notice: If cardboard sound insulator is removed from the roof, reinstall using adhesive. Apply five 6 mm (¼ in) beads of adhesive where it was previously removed.

| • | The headliner harness |
| • | The courtesy lamp |
| • | The sunshade (4) |
Headlining Trim Panel Replacement Oldsmobile
Removal Procedure
Notice: Use care when removing and installing the headliner. If reusing the headliner lay the headliner down flat on a clean surface. Excessive bending will damage the headliner.
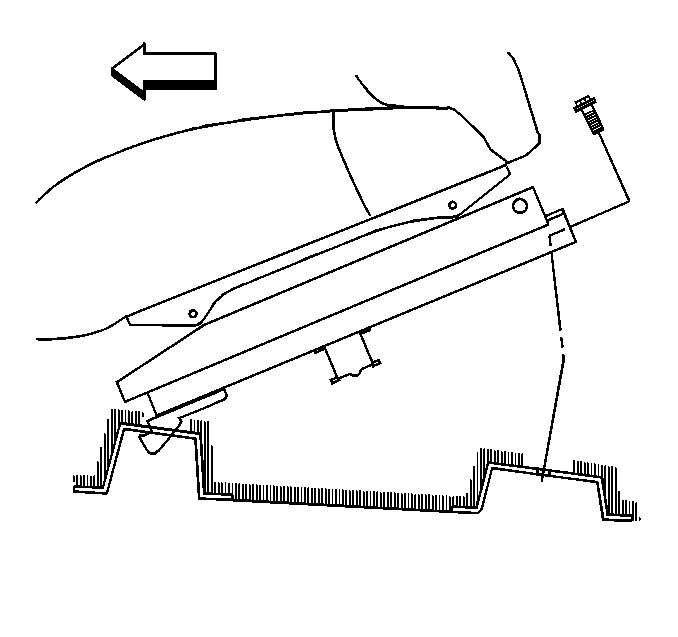
- Remove the front passenger seat. Refer to Driver or Passenger Seat Replacement in Seats.
- Recline the front drivers seat to the full recline position.
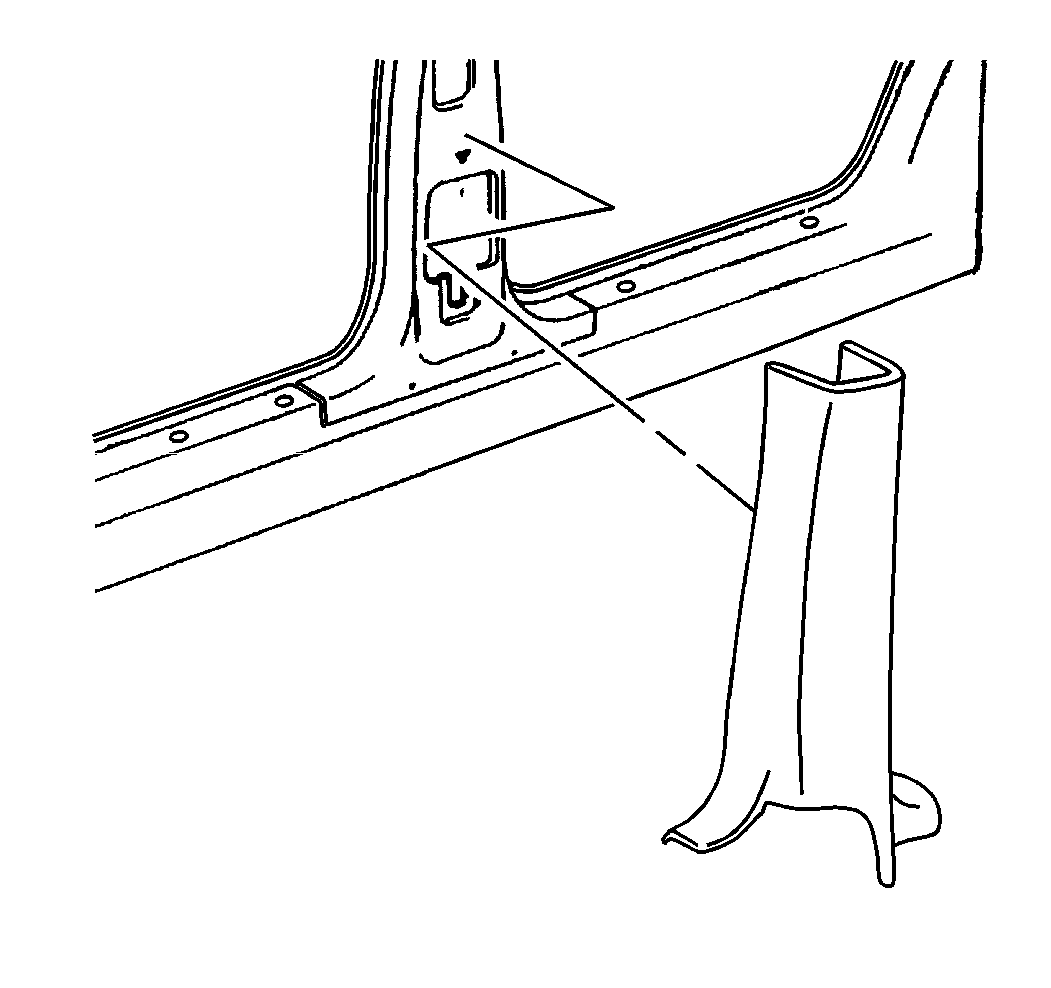
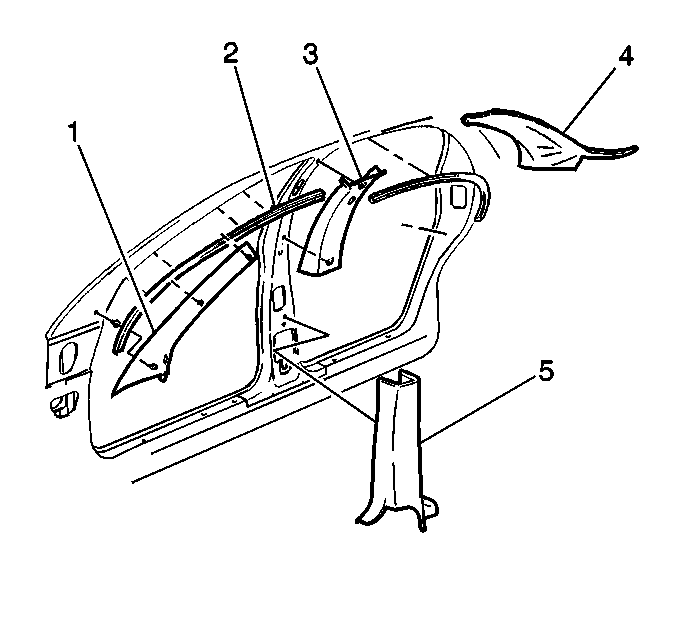
- Remove the lower pillar garnish moldings. Refer to Lower Pillar Garnish Molding Replacement .
- Remove the driver and passenger shoulder belt guide and bolt. Refer to Seat Belt Replacement - Driver or Passenger in Seat Belts.
- Remove the upper pillar garnish moldings (3). Refer to Upper Pillar Garnish Molding Replacement .
- Remove the windshield pillar garnish moldings (1). Refer to Windshield Pillar Garnish Molding Replacement .
- Remove the pinch weld lace (2).
- Remove the sail panels (4). Refer to Sail Panel Replacement .
- Remove the rear assist handles (4). Refer to Assist Handle Replacement .
- Disconnect the headliner electrical harness connector at the sail panel.
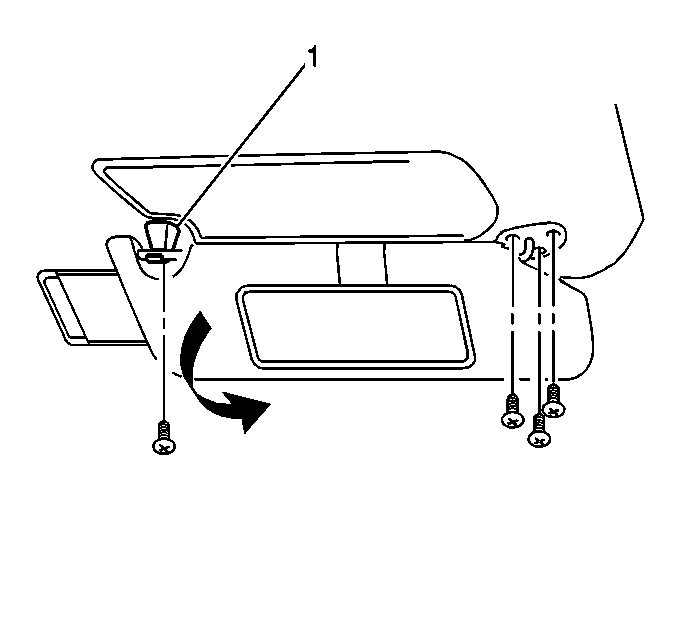
- Remove the sunshades (1). Refer to Sunshade Replacement .
- Remove the right front assist handle. Refer to Assist Handle Replacement .
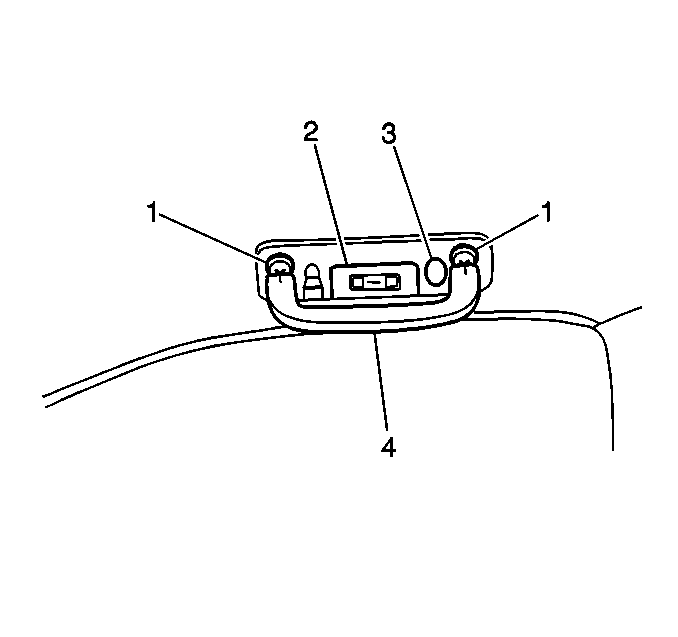
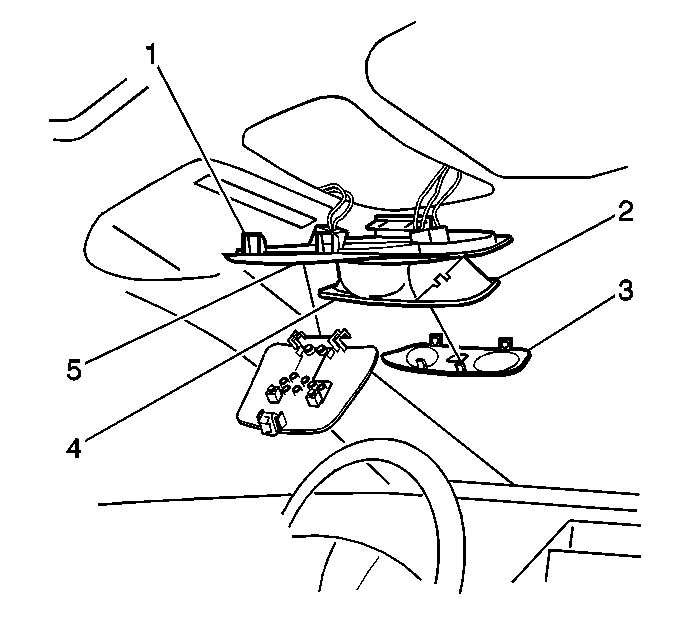
- Remove the map light lens (3), the housing (2), and the bezel (1). Refer to Garage Door Opener Replacement in Garage Door Opener.
- Using the aid of an assistant, carefully remove the headliner (1) through the passenger rear door.



Installation Procedure
- Install the headliner (1) into the vehicle through the rear passenger door.
- Apply glue (2) to the headliner (3) in order to secure the cardboard.
- Install the rear assist handles (4). Refer to Assist Handle and Rear Coat Hook Replacement .
- Install the front assist handles (4). Refer to Assist Handle Replacement .
- Install the map light lens (3), the housing (2), and the bezel (1). Refer to Garage Door Opener Replacement in Garage Door Opener.
- Install the sunshades. Refer to Sunshade Replacement .
- Connect the headliner connector at the sail panel.
- Install the sail panels (4). Refer to Sail Panel Replacement .
- Install the windshield pillar garnish moldings (1). Refer to Windshield Pillar Garnish Molding Replacement .
- Install the upper pillar garnish moldings (3). Refer to Upper Pillar Garnish Molding Replacement .
- Install the upper pinch weld laces.
- Install the upper seat belt guide and bolts. Refer to Seat Belt Replacement - Driver or Passenger in Seat Belts.
- Install the lower pillar garnish moldings. Refer to Lower Pillar Garnish Molding Replacement .
- Install the front passenger seat. Refer to Driver or Passenger Seat Replacement in Seats.
- Incline the drivers seat to the original position.


Notice: If cardboard sound insulator is removed from the roof, reinstall using adhesive. Apply five 6 mm (¼ in) beads of adhesive where it was previously removed.


