Tools Required
| • | J 28410 Gasket Remover |
| • | J 45059 Angle Meter |
Removal Procedure
- Remove the powertrain engine assembly. Refer to Engine Replacement .
- The intake manifold. Refer to Intake Manifold Replacement .
- The left side cam cover. Refer to Camshaft Cover Replacement.
- The right side cam cover. Refer to Camshaft Cover Replacement.
- The crankshaft balancer. Refer to Crankshaft Balancer Replacement .
- The engine front cover. Refer to Engine Front Cover Replacement .
- Align the timing marks.
- Remove the chain tensioner from the timing chain for the cylinder head being removed.
- Remove the cam sprockets from the head being removed. The timing chain remains in the chain case.
- Remove the timing chain guides. Access to the retaining screws is through the plugs at the front of the cylinder head.
- Remove the water crossover.
- Remove the left exhaust manifold. Refer to Exhaust Manifold Replacement.
- Remove the right exhaust manifold. Refer to Exhaust Manifold Replacement.
- Remove and discard the cylinder head bolts.
- Remove the cylinder head gasket.
- Clean the gasket surfaces.
- Clean the combustion chambers.
- Clean the head bolt threads in the cylinder block with a soft brush or the equivalent.
- Clean the head bolt bosses in the cylinder head with compressed air.
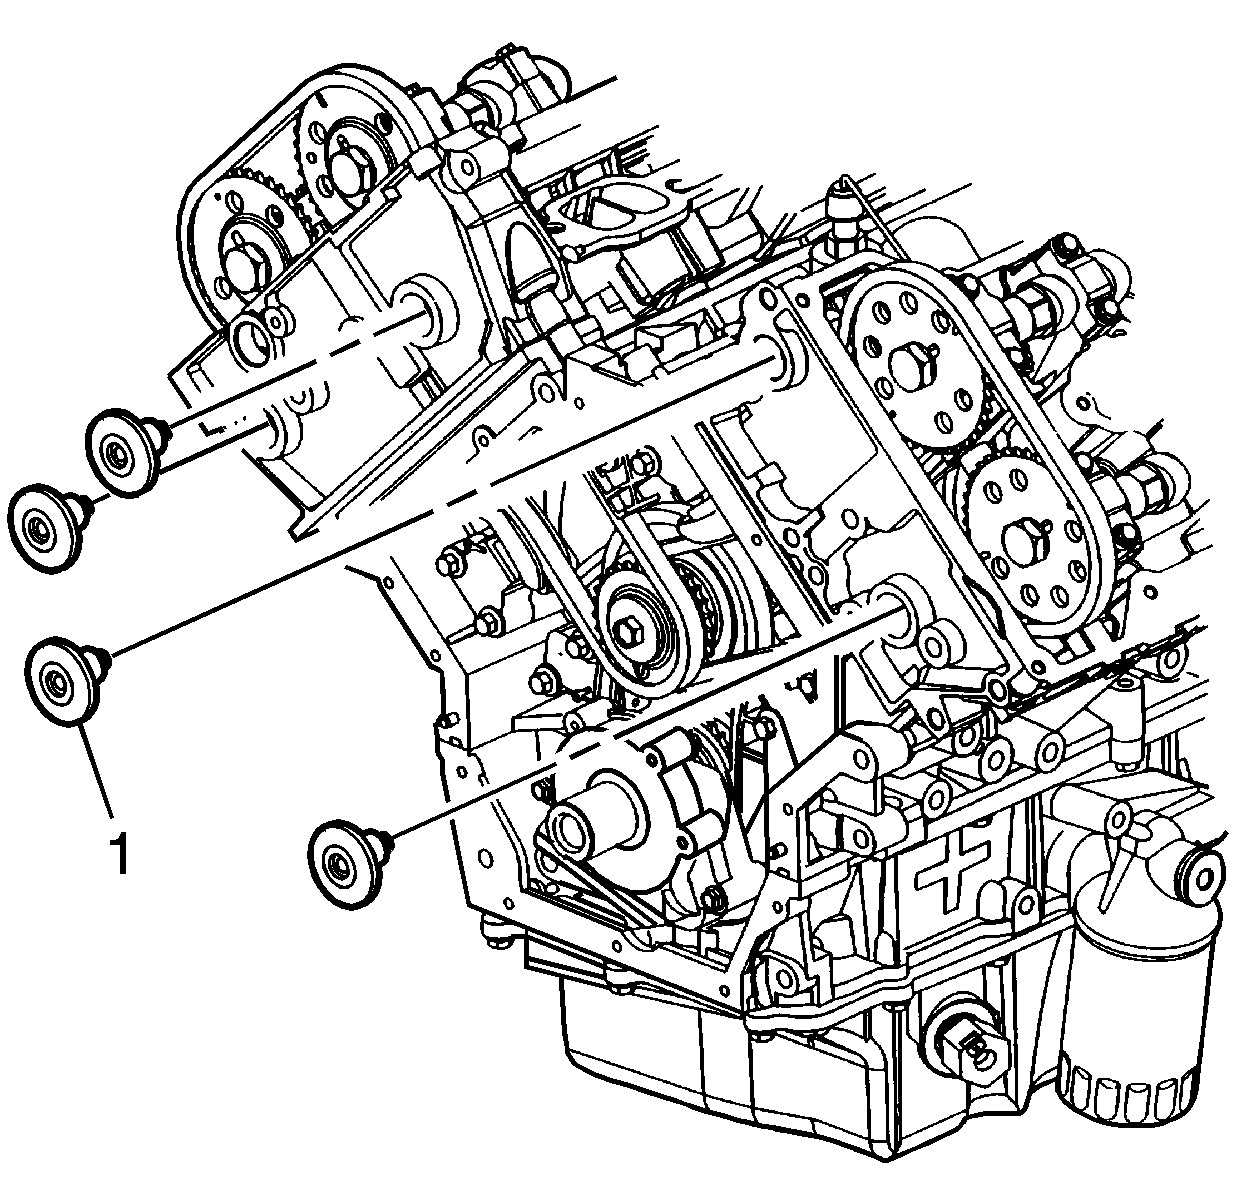
Important: Do not reuse the head bolts after removal. New bolts have a special coating used for bolt retention after installation. This coating remains in the cylinder block threads after removal so proper cleaning of the cylinder block threads is important.
Important: With the camshafts remaining in the cylinder head some valves will be open at all times. For this reason the cylinder head cannot rest on a flat surface with the cylinder face down, or valve damage will result.
Notice: Carefully clean the aluminum gasket surfaces in order to prevent damage to the sealing surfaces. Use only plastic, wood, or dull gasket scrapers, such as J 28410. Follow the manufacturer's recommendations to dissolve gasket materials with chemical agents.
Caution: Wear safety glasses in order to avoid eye damage.
Installation Procedure
- Ensure all the cylinder head locating pins are securely mounted in the cylinder block deck face.
- Make sure any old thread sealant material is removed from the cylinder head bolts holes in the cylinder block.
- Install a new right cylinder head gasket using the deck face locating pins for retention.
- Install a new left cylinder head gasket using the deck face locating pins for retention.
- Align the cylinder head with the deck face locating pins.
- Place the cylinder head in position on the deck face.
- Install new M11 cylinder head bolts (1) in the cylinder head.
- Install the M6 cylinder head bolts (2) at the front of the cylinder head.
- Repeat these procedures for the remaining cylinder head.
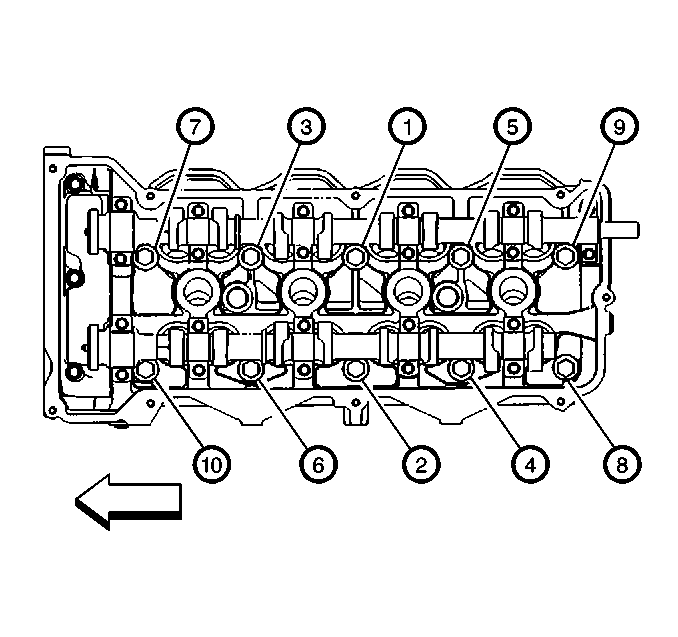
- Tighten the left cylinder head bolts in the sequence shown.
- Tighten the M6 bolts at the front of the cylinder head.
- Tighten the right cylinder head bolts in the sequence shown.
- Tighten the M6 bolts at the front of the right cylinder head.
- Install the camshaft. Refer to Camshaft Replacement .
- Set the camshaft timing. Refer to Setting Camshaft Timing .
- Install the camshaft guide bolt access hole plugs in the cylinder heads. The plugs should be seated and snug.
- Install the engine front cover. Refer to Engine Front Cover Replacement .
- Install the intake manifold. Refer to Intake Manifold Replacement .
- Install the left side cam cover. Refer to Camshaft Cover Replacement.
- Install the right side cam cover. Refer to Camshaft Cover Replacement.
- Install the crankshaft balancer. Refer to Crankshaft Balancer Replacement .
- Install the right exhaust manifold. Refer to Exhaust Manifold Replacement.
- Install the left exhaust manifold. Refer to Exhaust Manifold Replacement.
- Install the water crossover.
- Install the powertrain assembly. Refer to Engine Replacement .
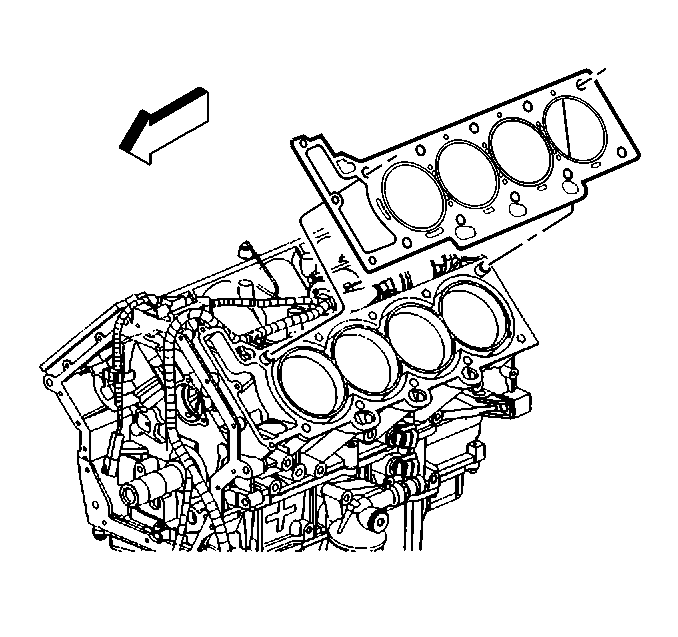
Important: Failure to remove all the old thread sealant material from the cylinder block could cause false torque readings.
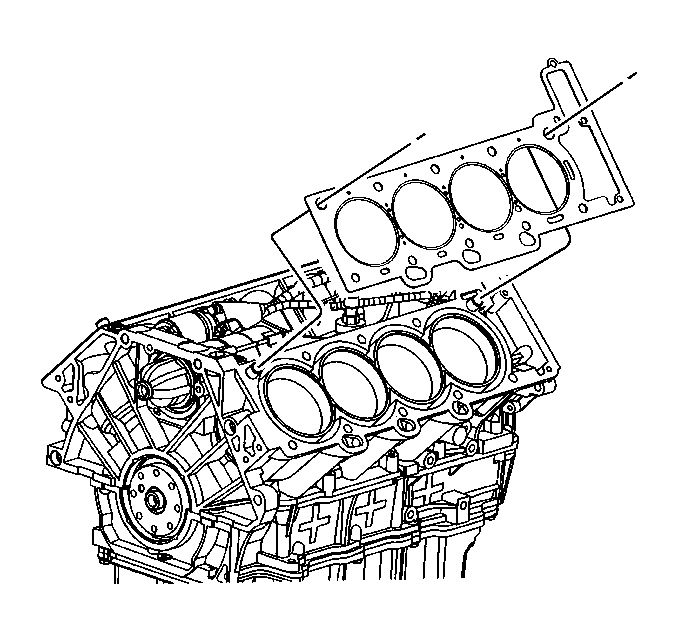
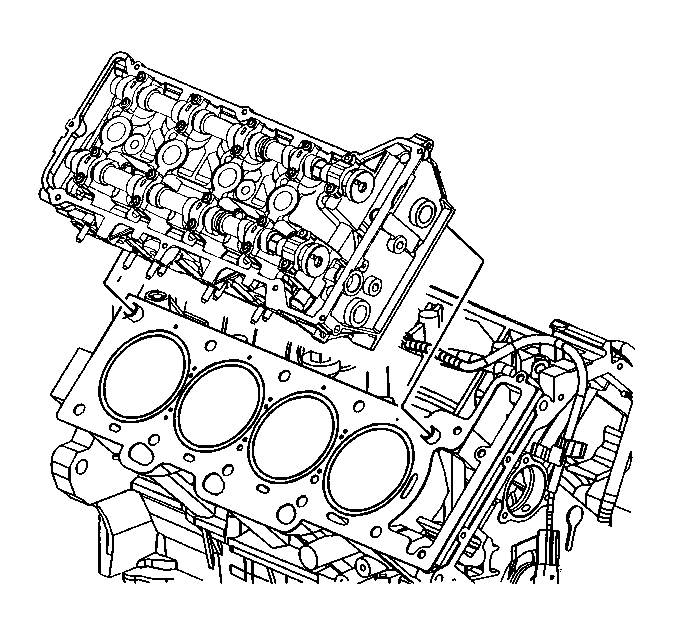
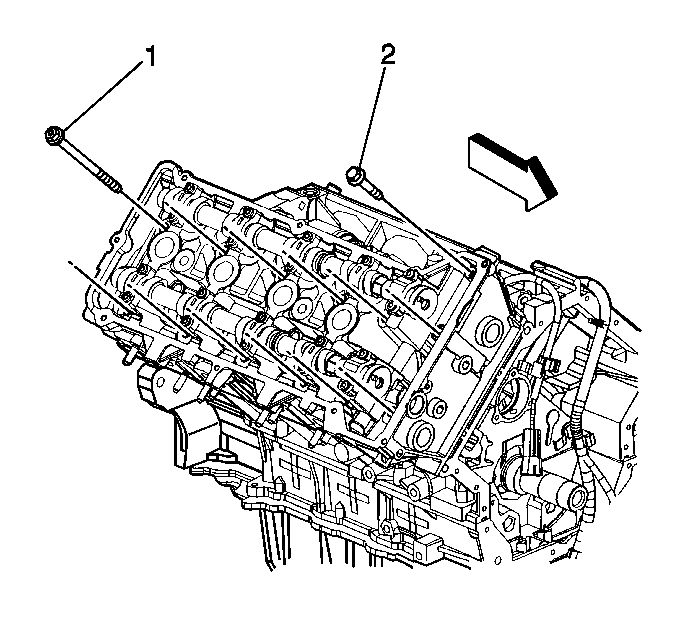
Important: DO NOT reuse the old M11 cylinder head bolts.
Notice: Use the correct fastener in the correct location. Replacement fasteners must be the correct part number for that application. Fasteners requiring replacement or fasteners requiring the use of thread locking compound or sealant are identified in the service procedure. Do not use paints, lubricants, or corrosion inhibitors on fasteners or fastener joint surfaces unless specified. These coatings affect fastener torque and joint clamping force and may damage the fastener. Use the correct tightening sequence and specifications when installing fasteners in order to avoid damage to parts and systems.
| 10.1. | First Pass |
Tighten
Tighten the left cylinder head M11 cylinder head
bolts to 30 N·m (22 lb ft ) in the sequence shown.
| 10.2. | Second Pass |
Tighten
Tighten the left cylinder head M11 cylinder head
bolts an additional 60 degrees in the sequence shown using the J 45059
.
| 10.3. | Third Pass |
Tighten
Repeat the sequence turning each bolt another 60 degrees.
| 10.4. | Final Pass |
Tighten
Repeat the sequence again turning each bolt a final
60 degrees (total 180 degrees).
Tighten
Tighten the M6 cylinder head bolts to 12 N·m
(106 lb in).
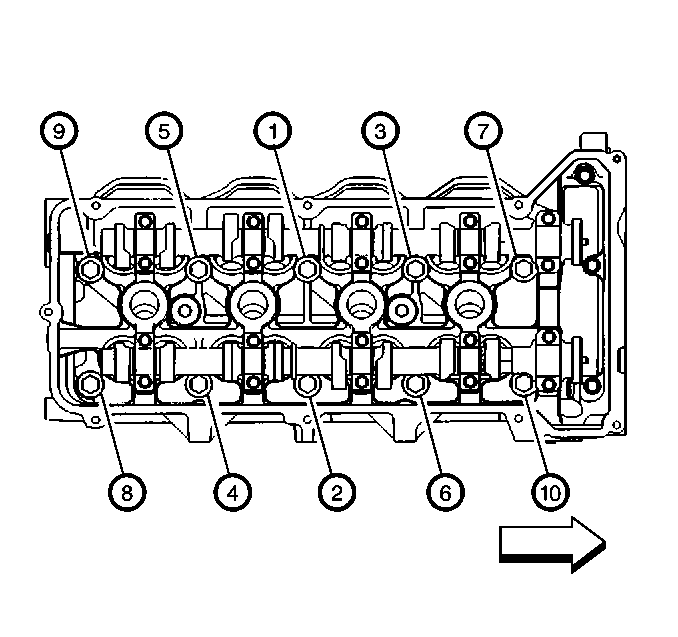
| 12.1. | First Pass |
Tighten
Tighten the right cylinder head M11 cylinder head
bolts to 30 N·m (22 lb ft) in the sequence shown.
| 12.2. | Second Pass |
Tighten
Tighten the right cylinder head M11 cylinder head
bolts an additional 60 degrees in the sequence shown using the J 45059
.
| 12.3. | Third Pass |
Tighten
Repeat the sequence turning each bolt an another
60 degrees.
| 12.4. | Final Pass |
Tighten
Repeat the sequence again turning each bolt a final
60 degrees (total 180 degrees).
Tighten
Tighten the M6 cylinder head bolts to 12 N·m
(106 lb in).
