Removal Procedure
Tools Required
J 37088-A Fuel Line
Quick Connect Separator Tool Set
Caution: Unless directed otherwise, the ignition and start switch must be in the OFF or LOCK position, and all electrical loads must be OFF before servicing
any electrical component. Disconnect the negative battery cable to prevent an electrical spark should a tool or equipment come in contact with an exposed electrical terminal. Failure to follow these precautions may result in personal injury and/or damage to
the vehicle or its components.
- Remove the
negative battery cable.

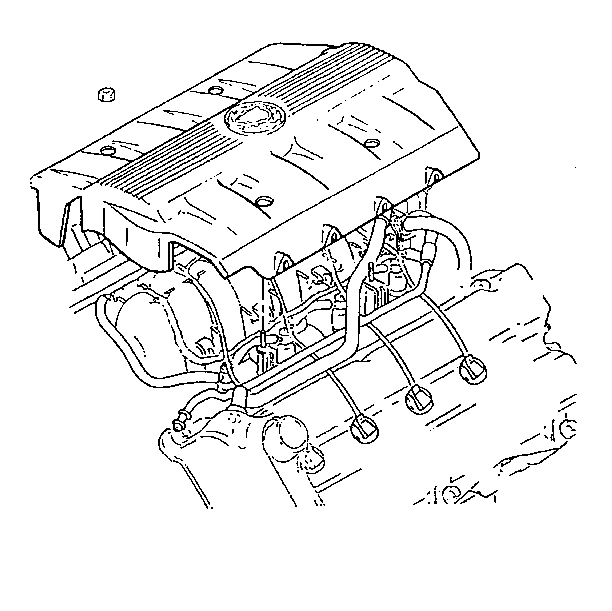
- Remove the intake manifold
sight shield--four nuts.
- Relieve the fuel system pressure. Refer to
Fuel Pressure Relief
in Engine Controls.
- Remove the air intake duct from the throttle body.
- Remove the transaxle vent hose and transaxle shift cable at the
bracket.
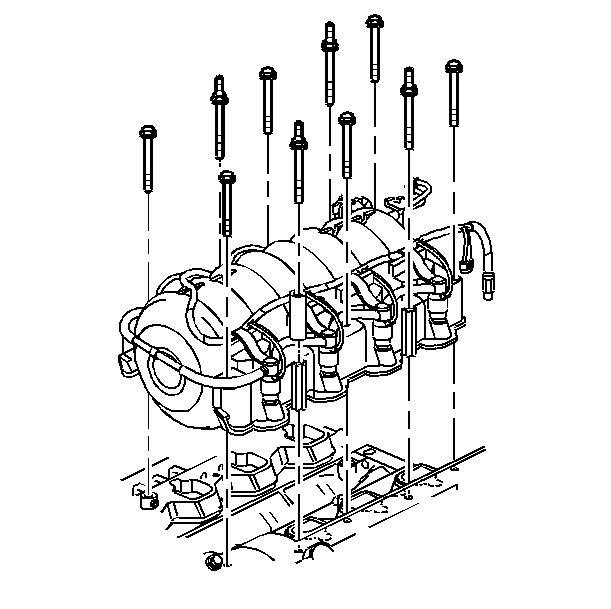
- Remove the TP sensor and IAC valve connectors.
- Remove the accelerator cable and cruise control cable at the throttle
body.
- Remove the front bank spark plug wires and lay them aside.
- Remove the throttle body coolant hoses at the throttle body and
the surge tank pipe. Refer to Throttle Body Coolant Hose Replacement in Engine
Cooling.
- Remove the EGR pipe and the crankcase ventilation pipe at the
throttle body spacer.
- Remove the brake booster vacuum hose at the intake manifold vacuum
fitting.
- Remove the fuel rail ground wire at the rear cylinder head.
- Remove the quick-connect fittings at the fuel rail.
| 13.1. | Grasp both sides of the fitting. |
| 13.2. | Twist the female connector 1/4 turn in each direction to loosen
any dirt within fitting. |
| | Caution: Safety glasses must be worn when using compressed air, as flying dirt
particles may cause eye injury.
|
| 13.3. | Blow the dirt out of the fitting using compressed air. |
| 13.4. | Choose the correct tool from the J 37088-A
for the size of the fitting. Insert the tool into the female
connector, then push/pull inward to release the locking tabs. |
| 13.5. | Pull the connection apart. |
| • | Using a clean shop towel, wipe off the male pipe end. |
| • | Inspect both ends of the fitting for dirt and burrs. |
| • | Clean or replace the components or assemblies as required |
- Disconnect the fuel rail bracket at the EGR valve.
- Disconnect the PCV hose at the intake manifold.
- Disconnect the injector harness main connector.

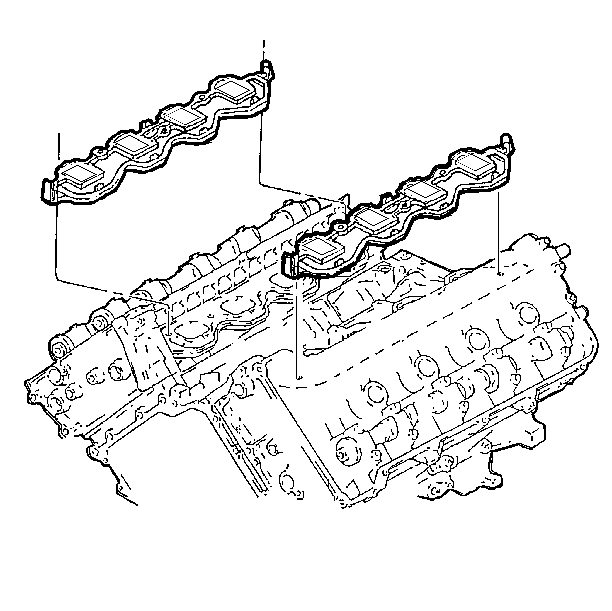
Important: The intake manifold carrier gaskets are attached to the intake manifold
through a snap-lock feature. When removing the intake manifold, the carrier
gaskets will remain attached to the manifold.
- Remove six bolts, four studs and the intake manifold

- If replacing intake manifold,
perform the following steps:
| 18.1. | Remove the fuel rail. |
| | Important: Do not replace the intake manifold gaskets after intake manifold removal.
The gaskets are reusable. The gaskets should only be replaced if the plastic
housing or rubber seals are damaged.
|
| 18.2. | Remove the intake manifold carrier gaskets from the intake manifold. |
| 18.3. | Remove the throttle body. |
Installation Procedure

- If the intake manifold
was replaced, perform the following steps:
| • | Clean the throttle body O-ring sealing surfaces. |
| • | Clean the intake manifold sealing surfaces. |
| • | Install the MAP sensor. |
| • | Install the throttle body. |
| • | Install the intake manifold carrier gaskets. |
Important:
| • | When tightening the intake manifold bolts and studs, start at
the center of the manifold and work your way outward in a circular pattern. |
| • | Only tighten the intake manifold bolts when the engine and manifold
are cool. Do not tighten the intake manifold bolts and studs with the engine
at operating temperature. |
Notice: Use the correct fastener in the correct location. Replacement fasteners
must be the correct part number for that application. Fasteners requiring
replacement or fasteners requiring the use of thread locking compound or sealant
are identified in the service procedure. Do not use paints, lubricants, or
corrosion inhibitors on fasteners or fastener joint surfaces unless specified.
These coatings affect fastener torque and joint clamping force and may damage
the fastener. Use the correct tightening sequence and specifications when
installing fasteners in order to avoid damage to parts and systems.
- Install the intake
manifold, six bolts and four studs.
Tighten
Tighten the bolts and studs to 10 N·m (89 lb in).
- Install the injector harness main connector.
- Install the PCV hose at the intake manifold.
- Install the fuel rail bracket at the EGR valve. Refer to
Exhaust Gas Recirculation Valve Replacement
in Engine Controls.
- Install the quick connect fittings to the fuel rail.
| 6.1. | Apply a few drops of clean engine oil to the male ends of the
engine fuel rail inlet and outlet tubes. |
| 6.2. | Push both sides of the fitting together in order to snap the retaining
tabs/fingers into place. |
| 6.3. | Once installed, pull on both sides of the fitting to make sure
the connection is secure. |
- Install the fuel rail ground wire at the rear cylinder head.
- Install the brake booster vacuum hose at the intake manifold vacuum
fitting.
- Install the EGR pipe and crankcase ventilation pipe at the throttle
body spacer. Refer to
Exhaust Gas Recirculation Pipe Replacement
in Engine Controls.
Tighten
Tighten the EGR pipe bolt to 28 N·m (21 lb ft).
- Install the throttle body coolant hoses at the throttle body and
the surge tank pipe.
- Install the front bank spark plug wires.
- Install the accelerator cable and cruise control cable at the
throttle body.
- Install the TP sensor and IAC valve connectors.
- Install the transaxle vent hose and the transaxle shift cable
at the bracket.
- Install the air intake duct.
- Install the fuel filler cap.
- Connect the negative battery cable.
- To clean, turn the ignition switch to the ON position for two
seconds, then turn to the OFF position for ten seconds. Again turn to the
ON position and check for fuel leaks.

- Install the four intake
manifold sight shield nuts.
Tighten
Tighten the intake manifold sight shield nuts to 3 N·m
(27 lb in).


