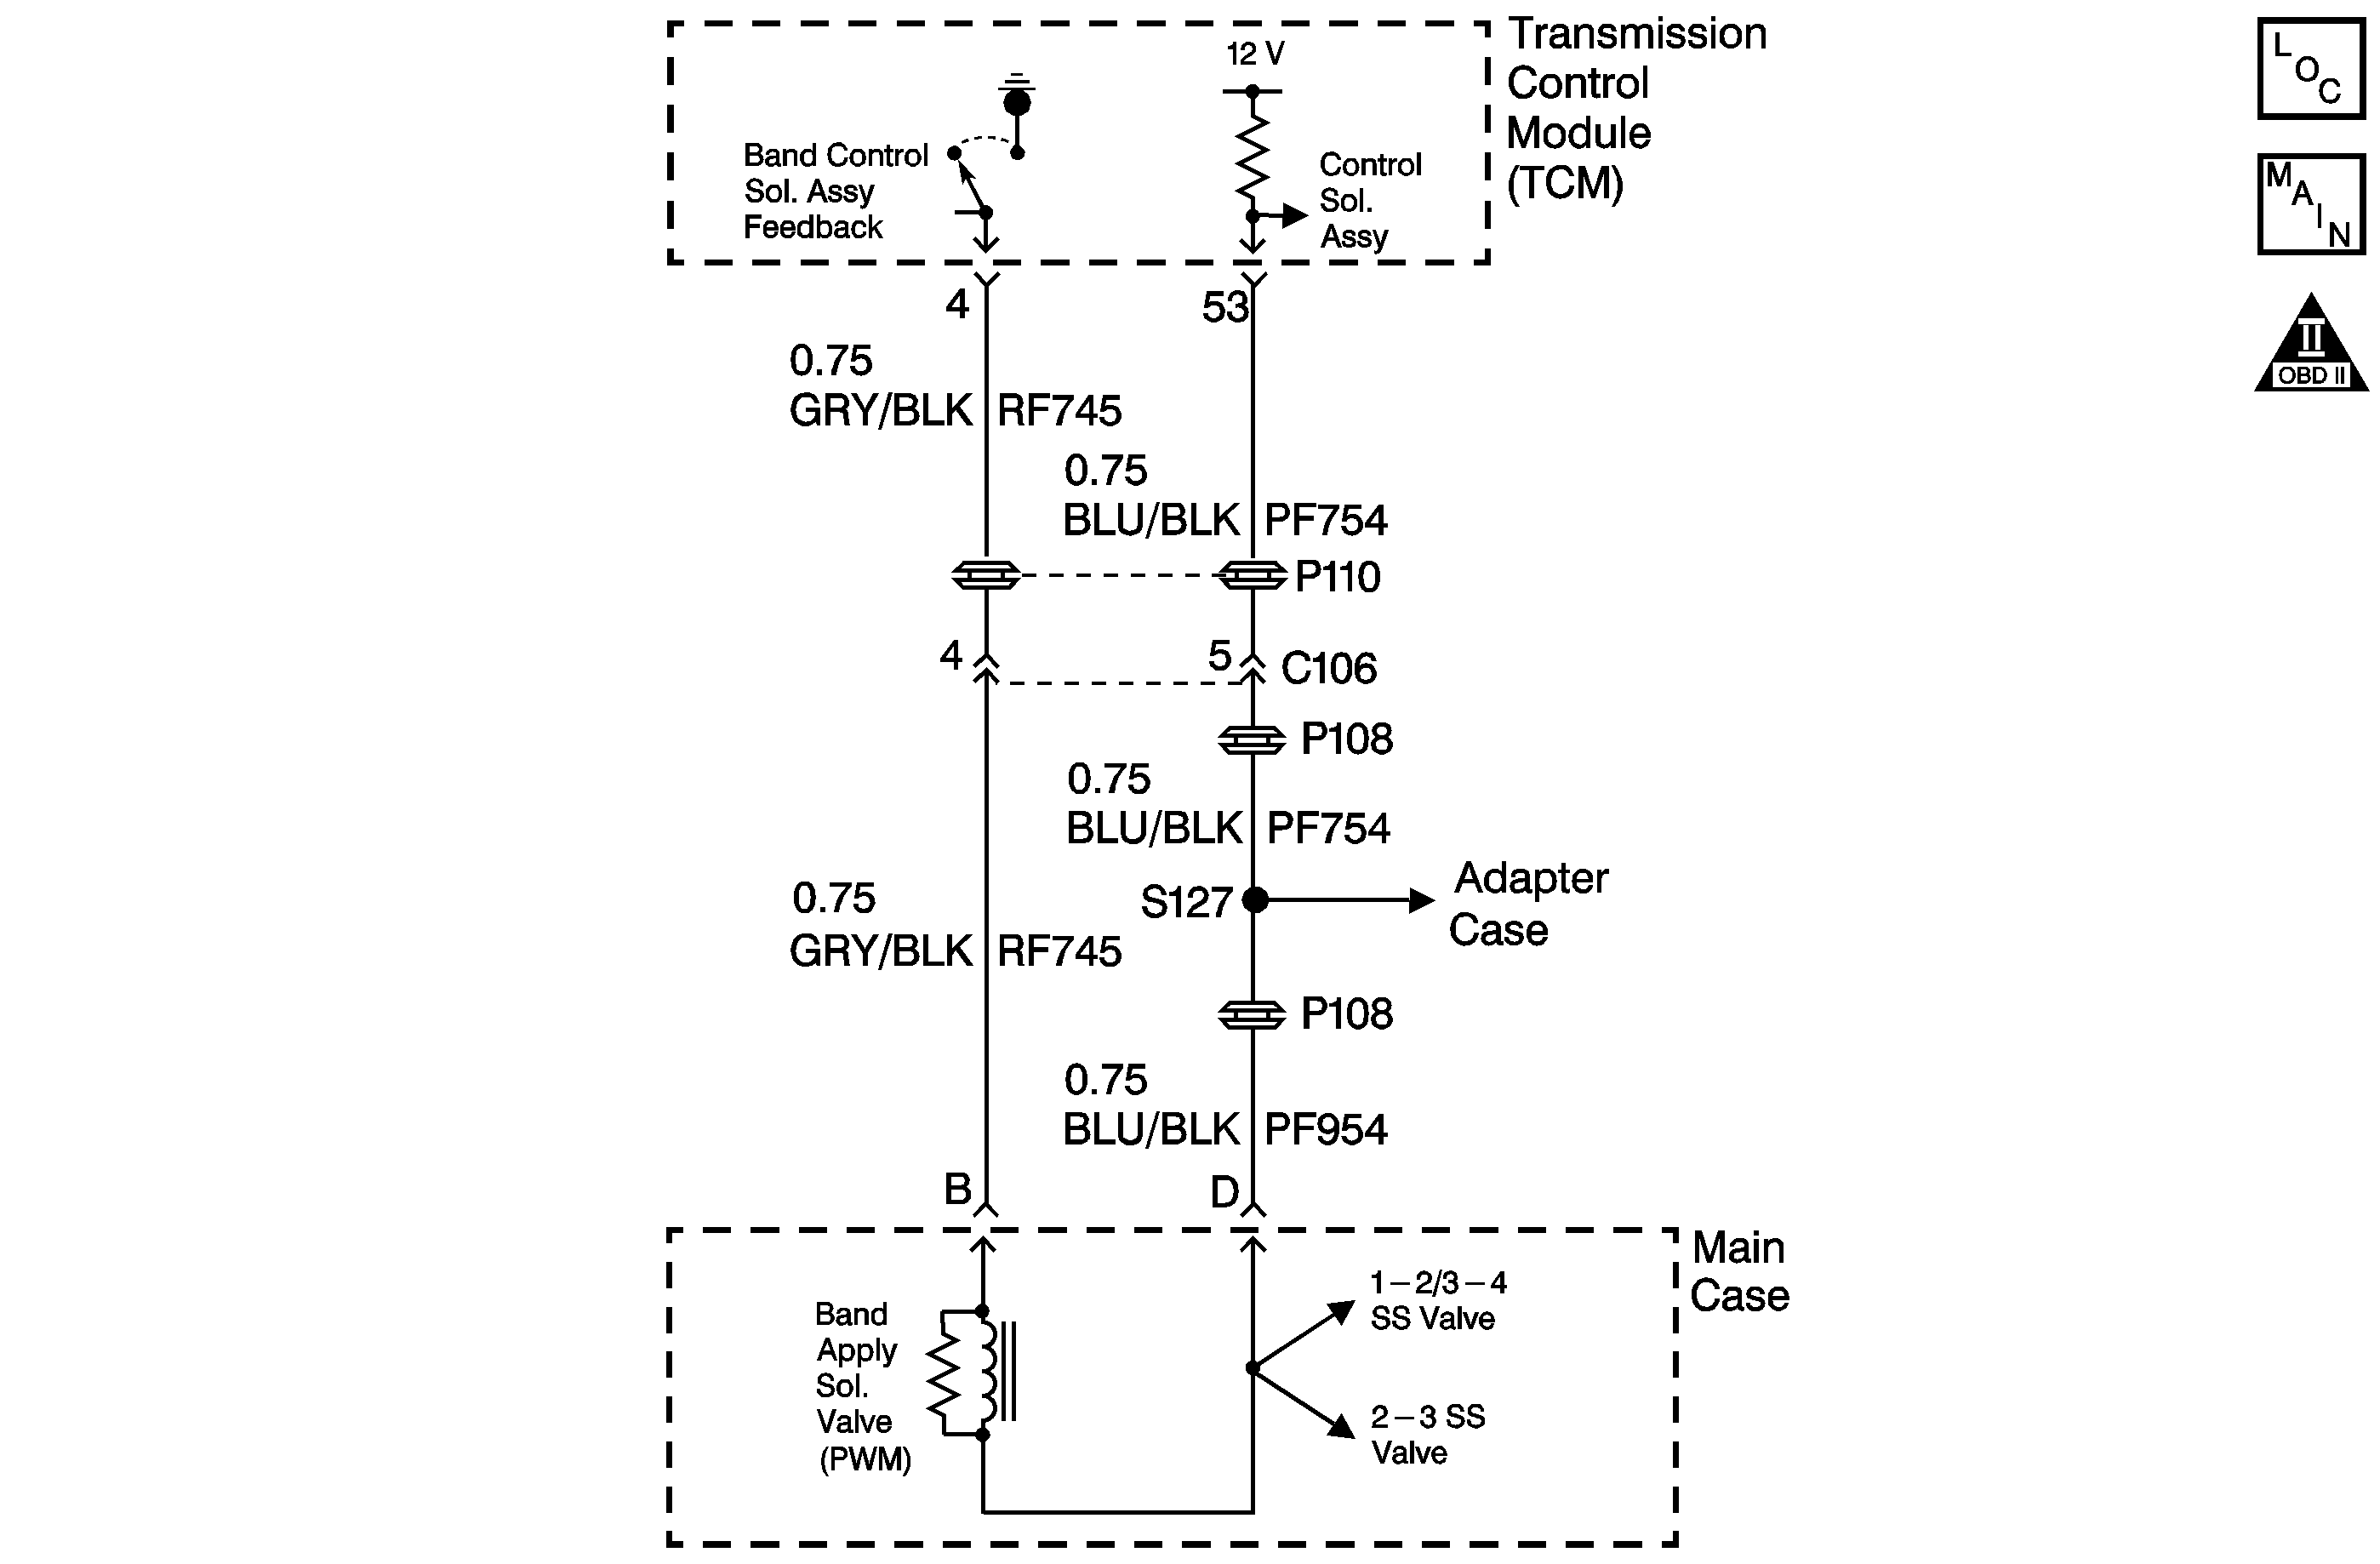
Circuit Description
The band apply solenoid valve is located in the valve body of the transmission main case. The band apply solenoid controls the apply and release rate of the brake band assembly. Refer to Shift Solenoid Valve State and Gear Ratio .
The transmission control module (TCM) provides voltage to the solenoid through an internal power control relay. The TCM uses a pulse width modulated (PWM) driver to control the solenoid ground. The frequency is approximately 32 Hz. The duty cycle is controllable from 0-100 percent. The controlled ground driver reports feedback voltage to the TCM. When the TCM commands the band apply solenoid valve ON, the voltage of the control circuit should be approximately 0 volts. When the TCM commands the band apply solenoid valve OFF, the voltage of the control circuit should be approximately system voltage.
When the TCM detects a continuous open, short to voltage, or a short to ground in the band apply solenoid circuit, DTC P1850 sets. DTC P1850 is a type B DTC.
Conditions for Running the DTC
The ignition is ON.
The TCM power control relay is closed.
Conditions for Setting the DTC
DTC P1850 sets if any one of the following conditions occurs for 0.18 seconds.
| • | The band control solenoid assembly is commanded off and the feedback voltage is lower than 2.45 volts. |
| • | The band control solenoid assembly is commanded off and the feedback voltage is 2.45 -3.53 volts. |
| • | The band control solenoid assembly is commanded on and the feedback voltage is greater than 4.02 volts. |
Action Taken When the DTC Sets
| • | The TCM flashes the sport mode lamp and sends a MIL request to the ECM on the second consecutive drive trip that the diagnostic runs and fails. The ECM then illuminates the MIL. |
| • | The ECM records the operating conditions in the Freeze Frame at the time of the MIL request from the TCM. |
| • | The transmission operates in the default mode (maximum line pressure, command 4th gear, inhibit TCC, freeze shift adapts). |
Conditions For Clearing the MIL/DTC
| • | The ECM turns off the MIL after three consecutive drive trips during which the TCM sends no MIL request. |
| • | A History DTC clears after forty consecutive warm-up cycles, if no failures are present by this diagnostic or any other emission related diagnostic. |
| • | The scan tool clears the MIL/DTC. |
| • | The TCM cancels the DTC default mode actions when the ignition switch is Off long enough in order to power down the TCM. |
Step | Action | Value(s) | Yes | No | ||||||
|---|---|---|---|---|---|---|---|---|---|---|
1 | Did you perform Powertrain On Board Diagnostic (OBD) System Check - Automatic Transmission ? | -- | Go to Powertrain On Board Diagnostic (OBD) System Check - Automatic Transmission | |||||||
2 |
Important: Record the Failure Records before clearing the DTCs. Using the Clear Info function erases the Failure Records from the ECM and the TCM. Does the solenoid operate? | -- | ||||||||
3 |
Does the test light illuminate? | -- | ||||||||
4 |
Refer to Component Resistance . Is the resistance within the specified range? | -- | ||||||||
5 | Measure the resistance between terminal D of the J 44539 and a good ground on the transmission case with the J 39200 . Is the resistance greater than the specified value? | 50K ohms | ||||||||
6 |
Caution: When you are performing service on or near the SIR components or the SIR wiring, you must disable the SIR system. Refer to Disabling the SIR System. Failure to follow the correct procedure could cause air bag deployment, personal injury, or unnecessary SIR system repairs.
Did you find a condition? | -- | ||||||||
7 |
Caution: When you are performing service on or near the SIR components or the SIR wiring, you must disable the SIR system. Refer to Disabling the SIR System. Failure to follow the correct procedure could cause air bag deployment, personal injury, or unnecessary SIR system repairs.
Did you find a condition? | -- | ||||||||
8 |
Did you find a condition? | -- | ||||||||
9 | Replace the TCM. Refer to Transmission Control Module Replacement . Is the action complete? | -- | -- | |||||||
10 | Perform the necessary wiring repairs. Refer to Wiring Repairs in Wiring Systems. Is the action complete? | -- | -- | |||||||
11 | Replace the AT main case internal transmission wiring harness. Refer to Control Valve Body . Is the action complete? | -- | -- | |||||||
12 | Replace the Band Apply Solenoid valve. Refer to Band Control Solenoid Replacement . Is the action complete? | -- | -- | |||||||
13 | Perform the following procedure in order to verify the repair:
Did DTC P1850 reset? | -- | System OK |
