For 1990-2009 cars only
Knuckle Replacement All Wheel Drive
Removal Procedure
- Raise and support the vehicle. Refer to Lifting and Jacking the Vehicle.
- Remove the rear tire and wheel assembly. Refer to Tire and Wheel Removal and Installation.
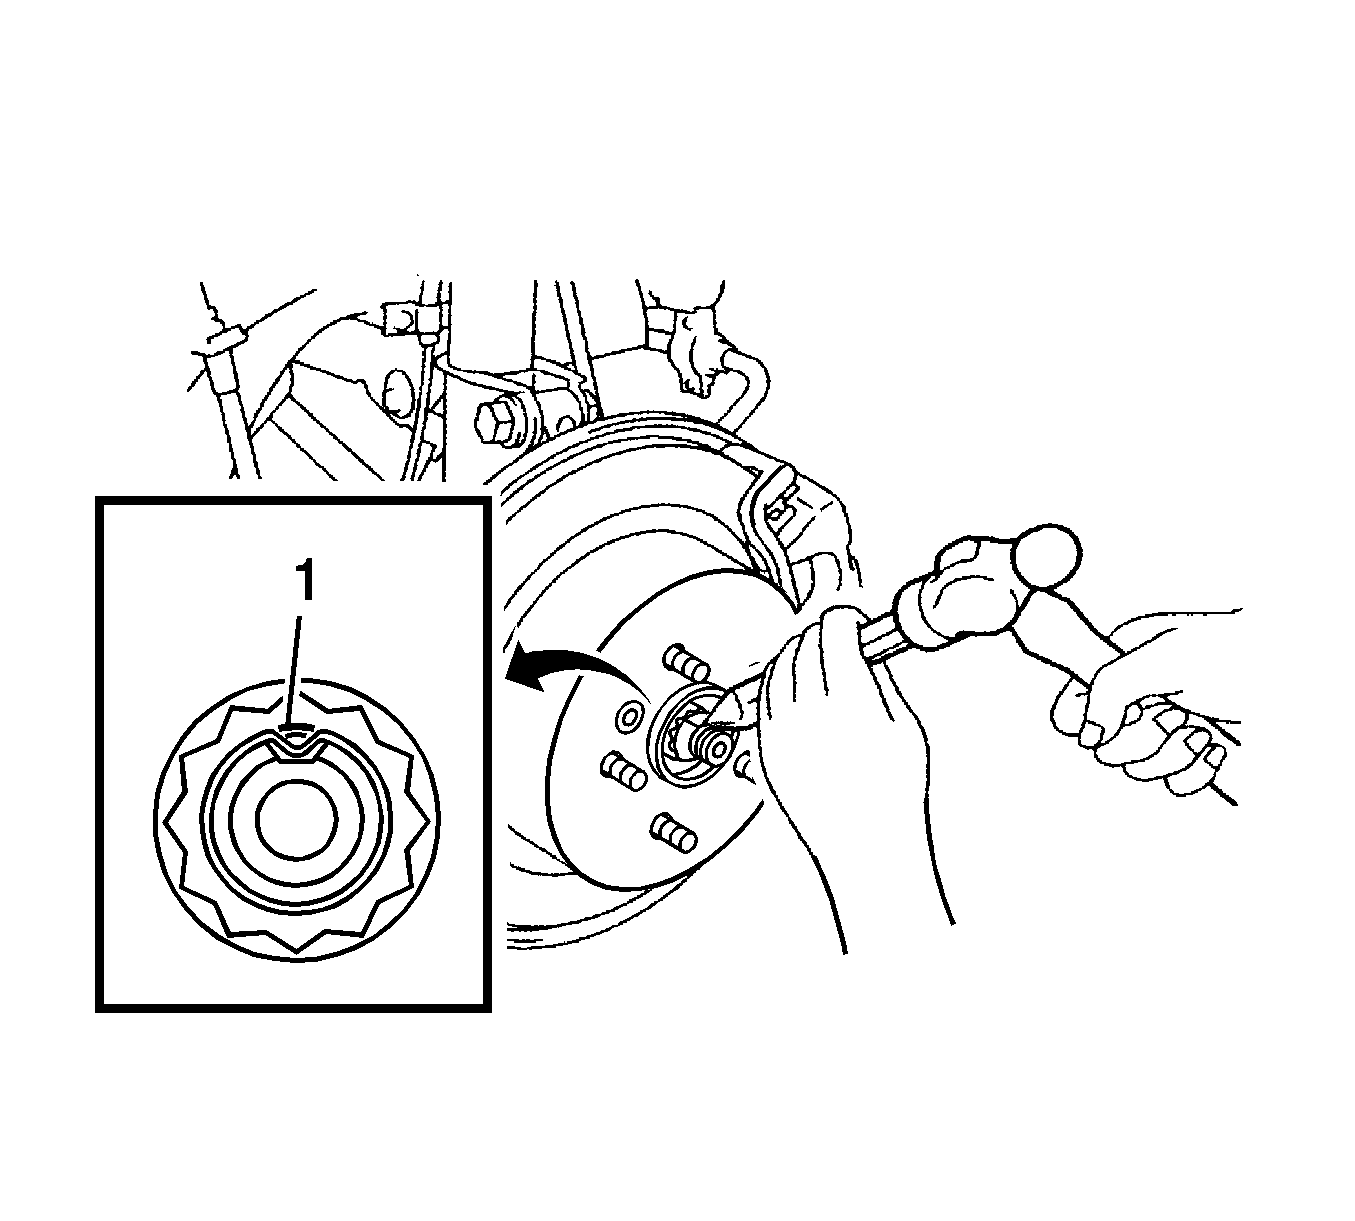
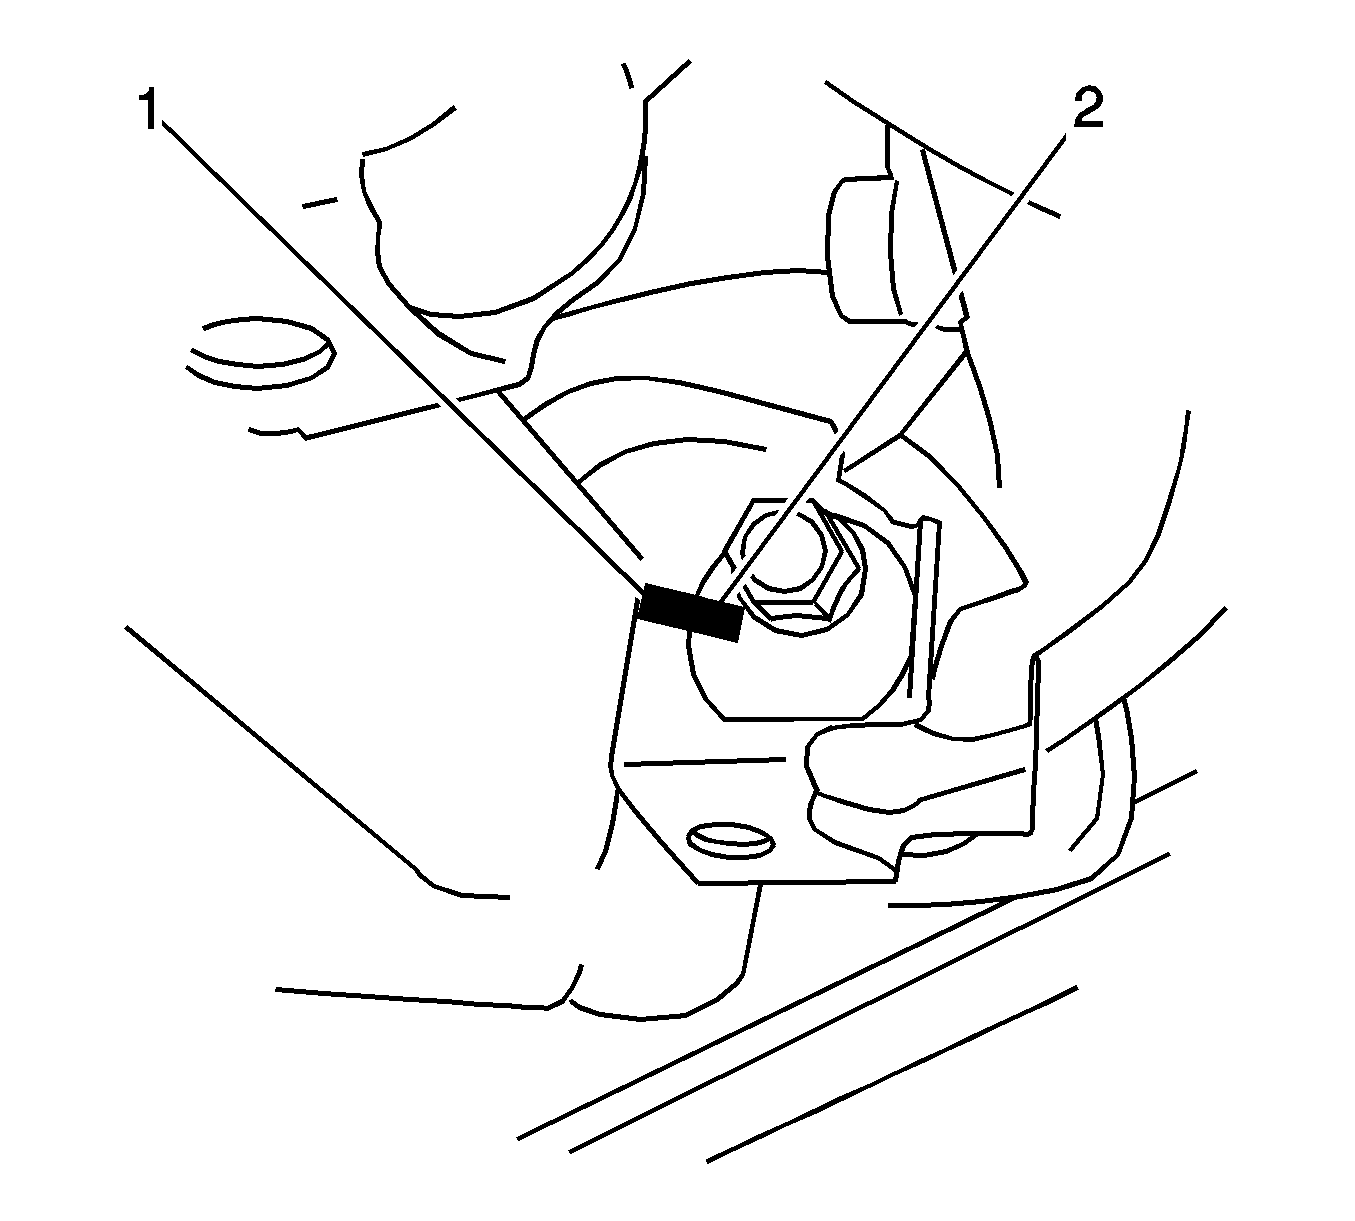
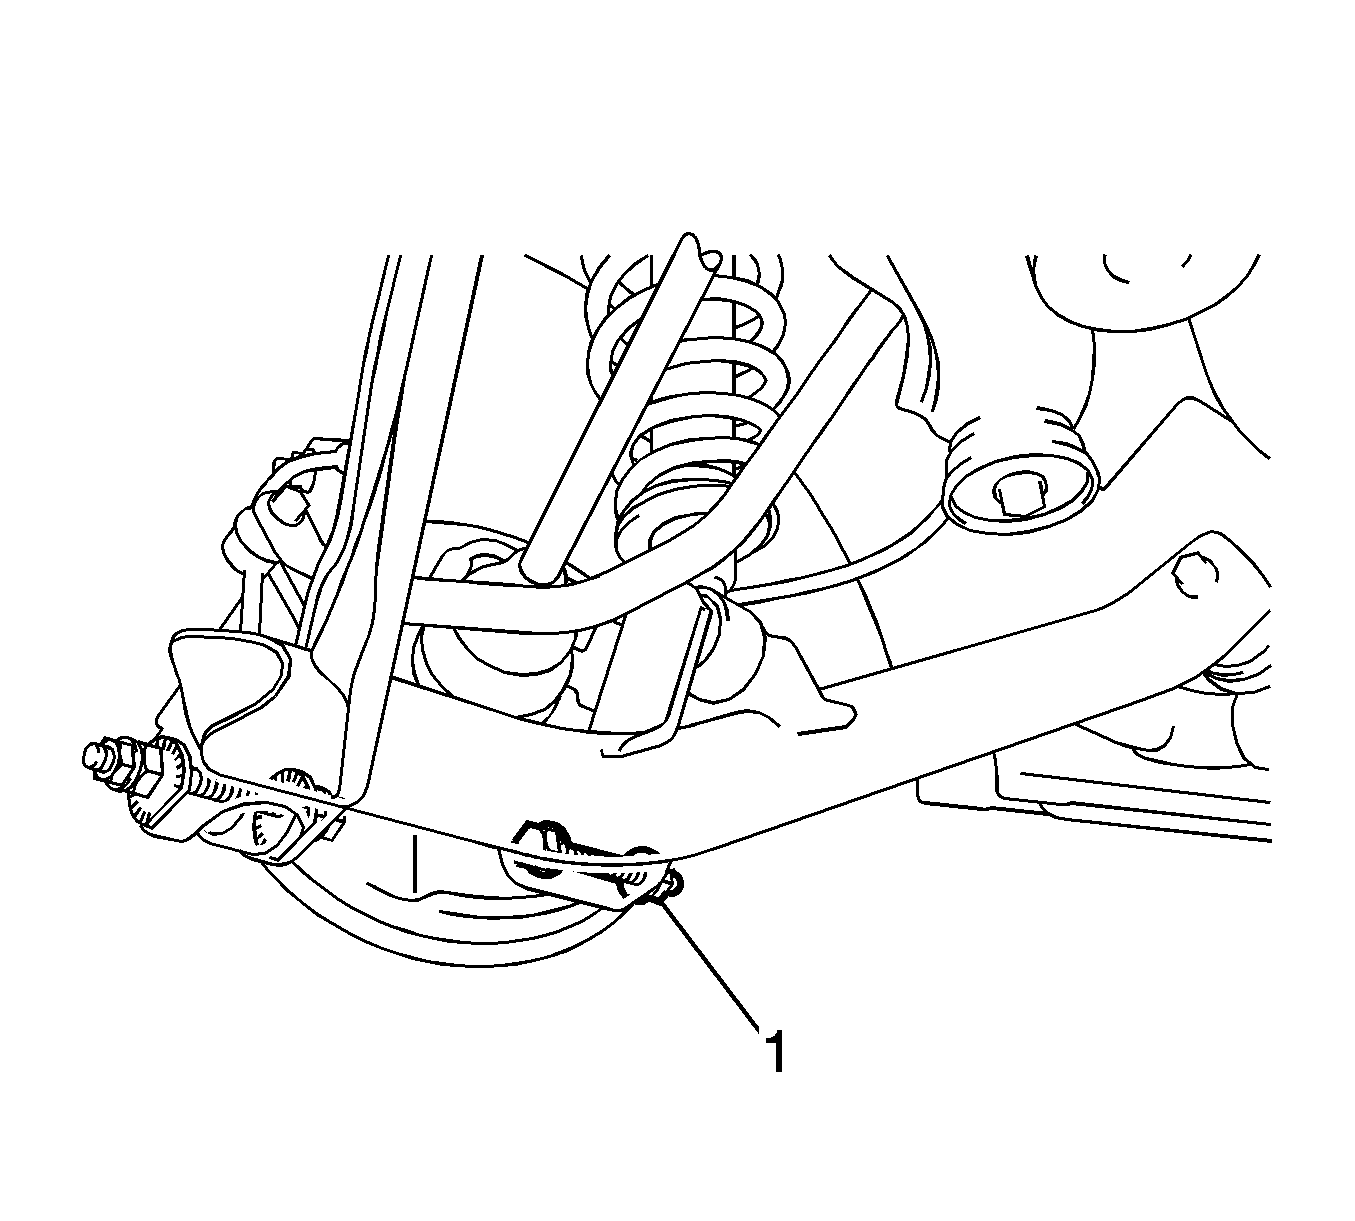
- Use a drift and a hammer in order to unstake the rear wheel drive shaft nut (1).
- Have an assistant apply the brakes.
- Remove the rear wheel drive shaft nut.
- Release the brakes.
- Remove the brake rotor and the park brake hardware. Refer to Park Brake Hardware Replacement.
- Remove the rear wheel speed sensor and the pigtail wire. Refer to Rear Wheel Speed Sensor Replacement.
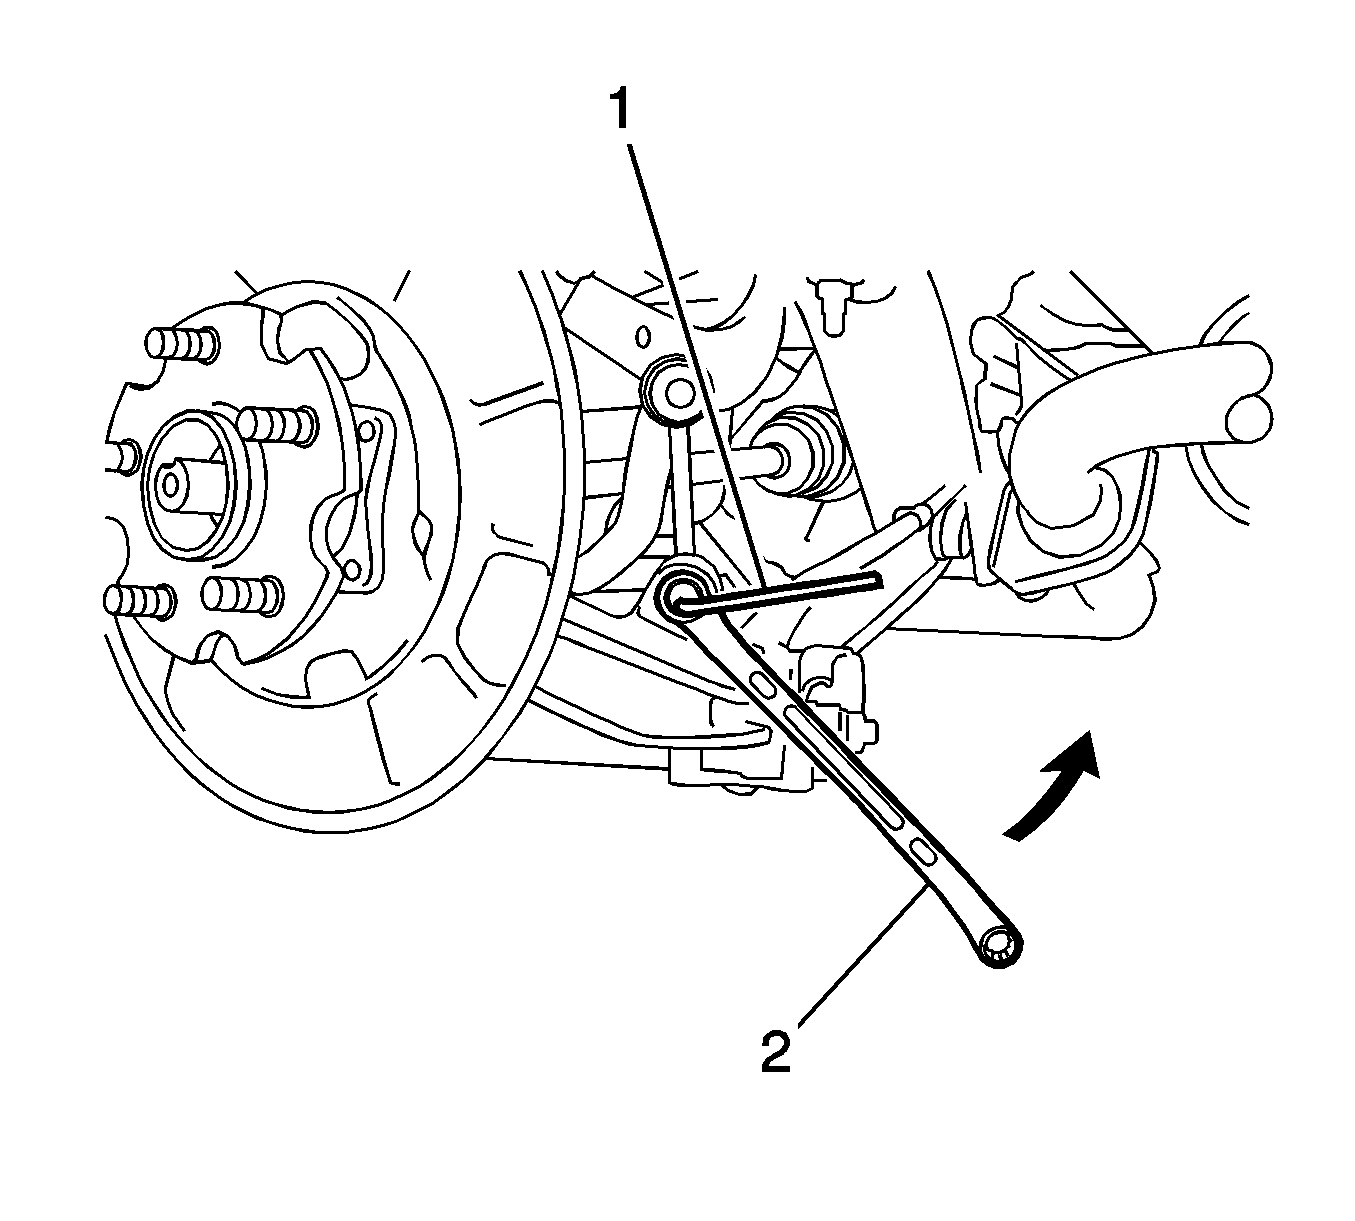
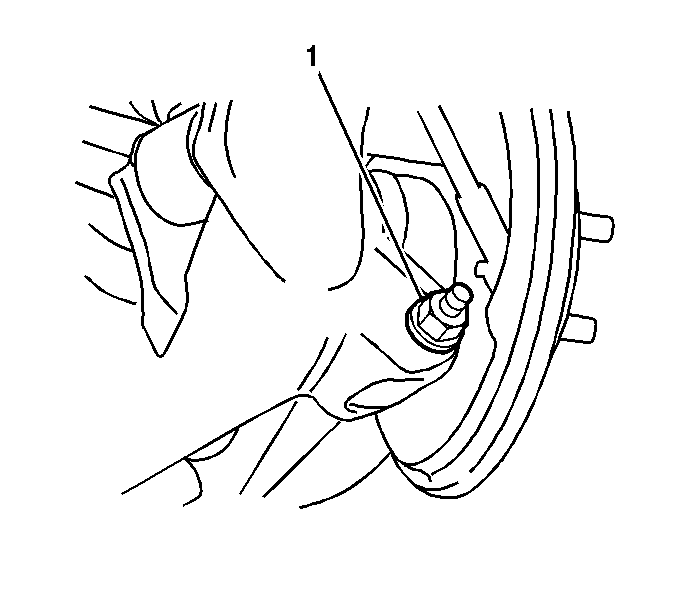
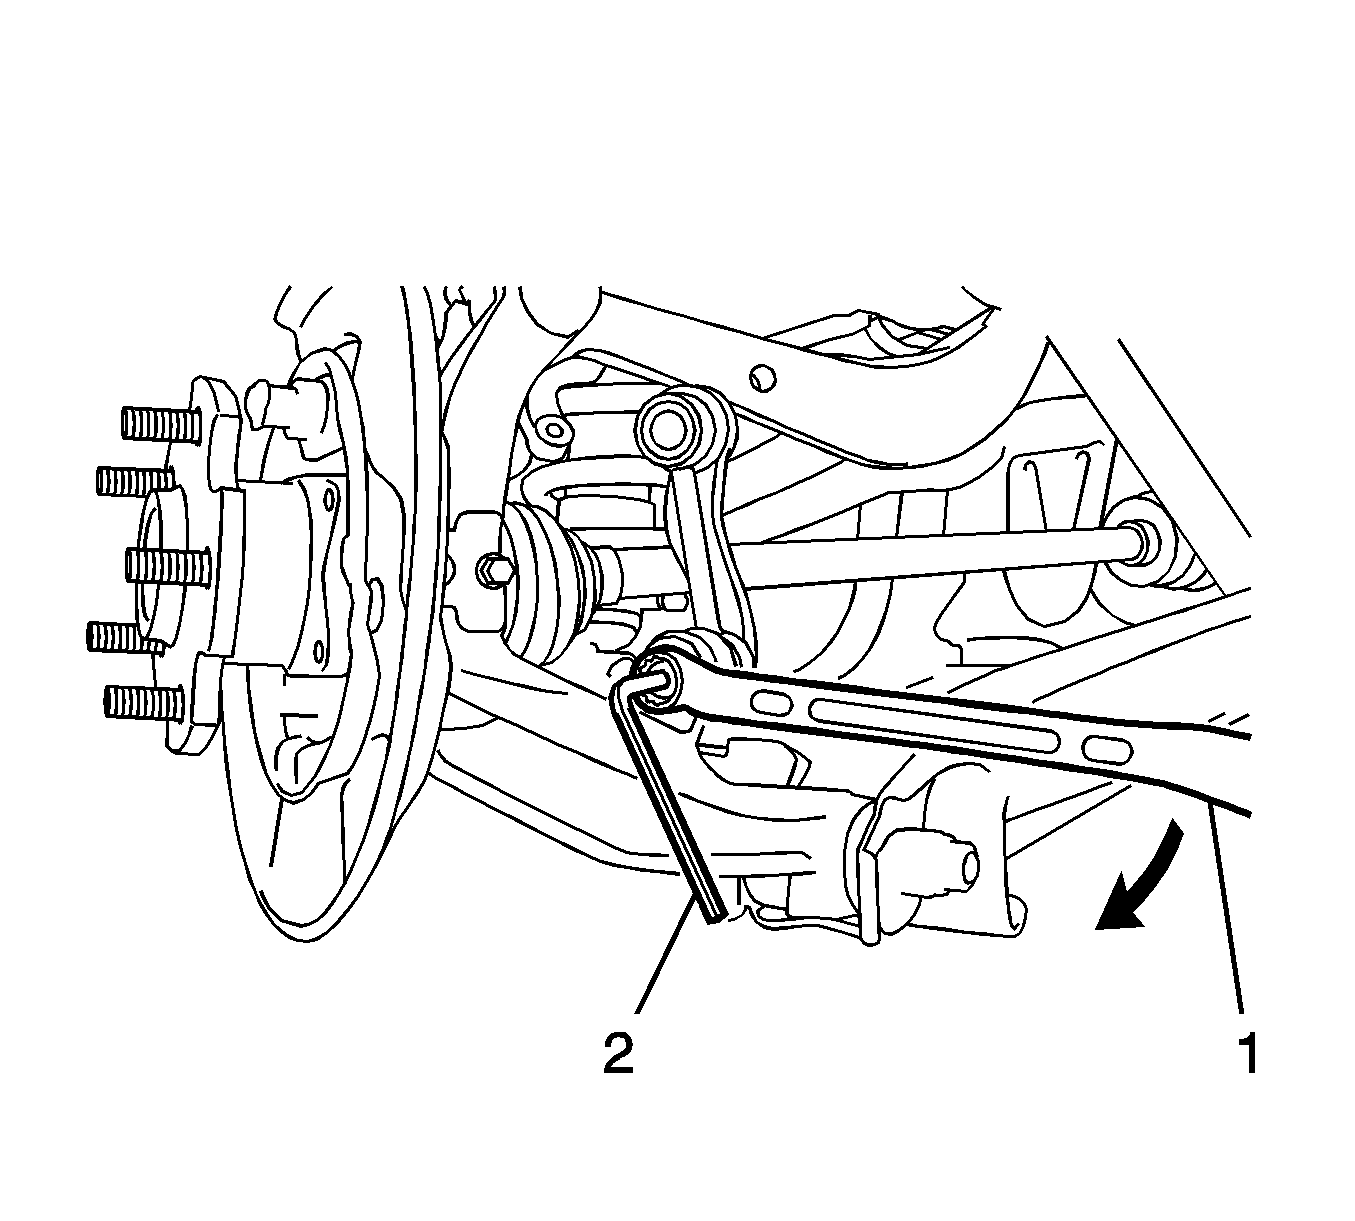
- Use a wrench (1) in order to hold the lower stud on the stabilizer shaft link. Remove the nut in order to separate the lower stabilizer shaft link stud from the knuckle.
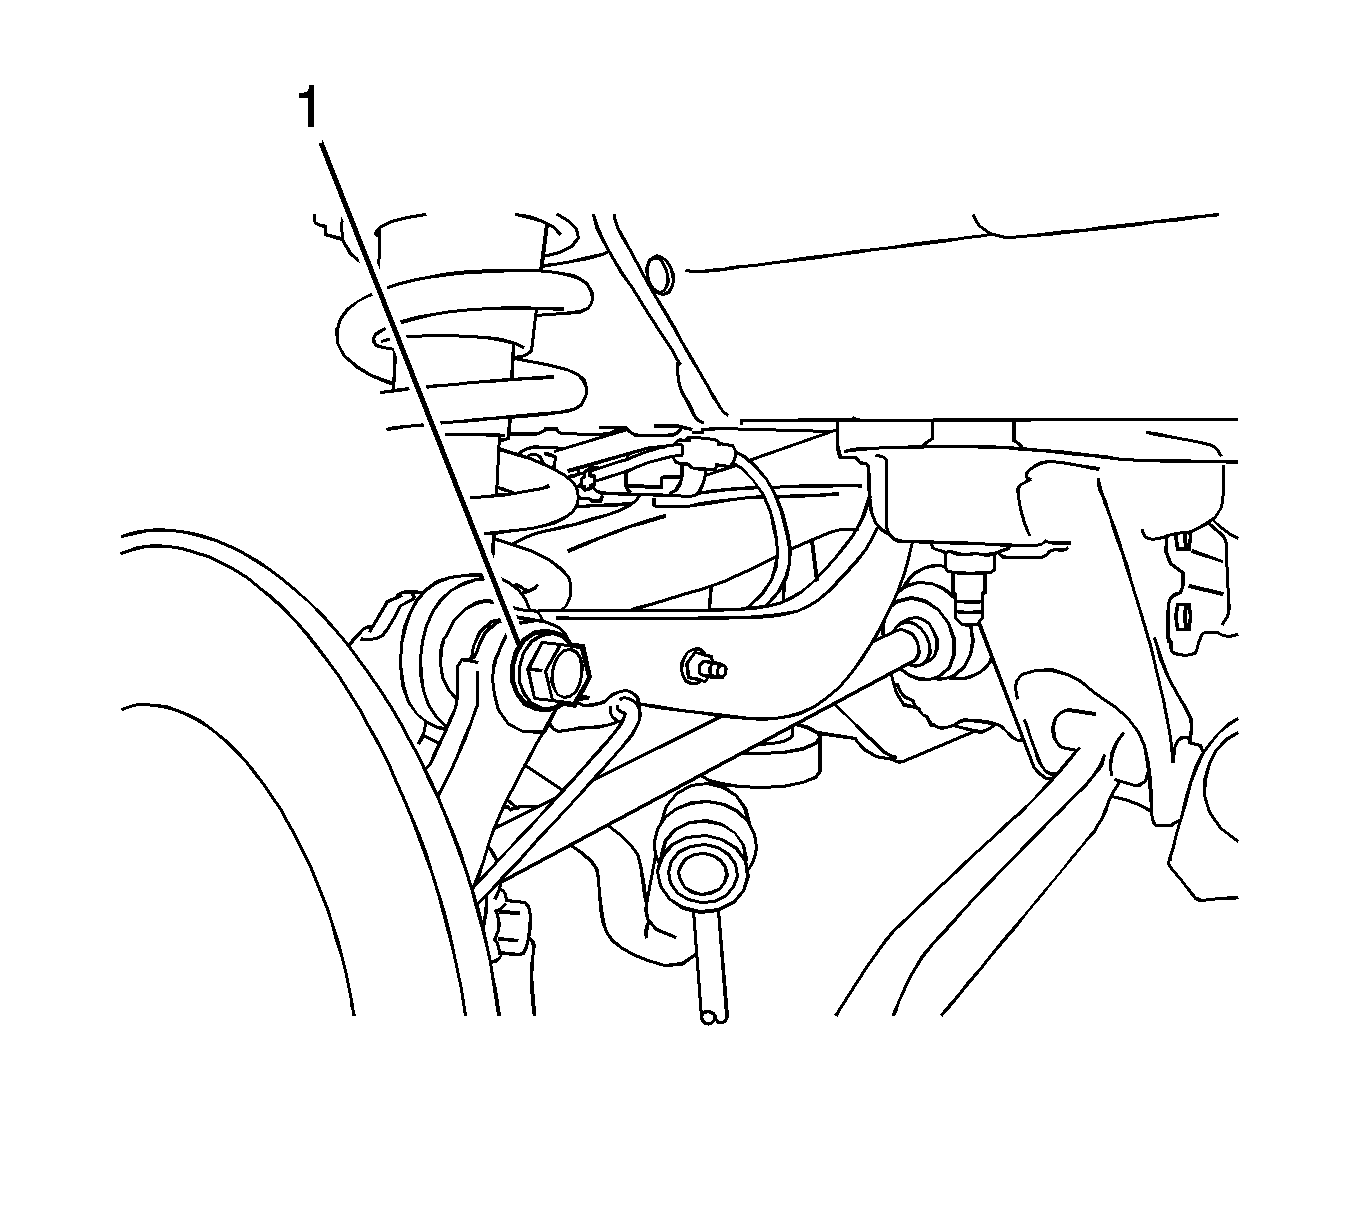
- Use a wrench in order to hold the nut that retains the upper control arm to the knuckle. Remove the bolt (1).
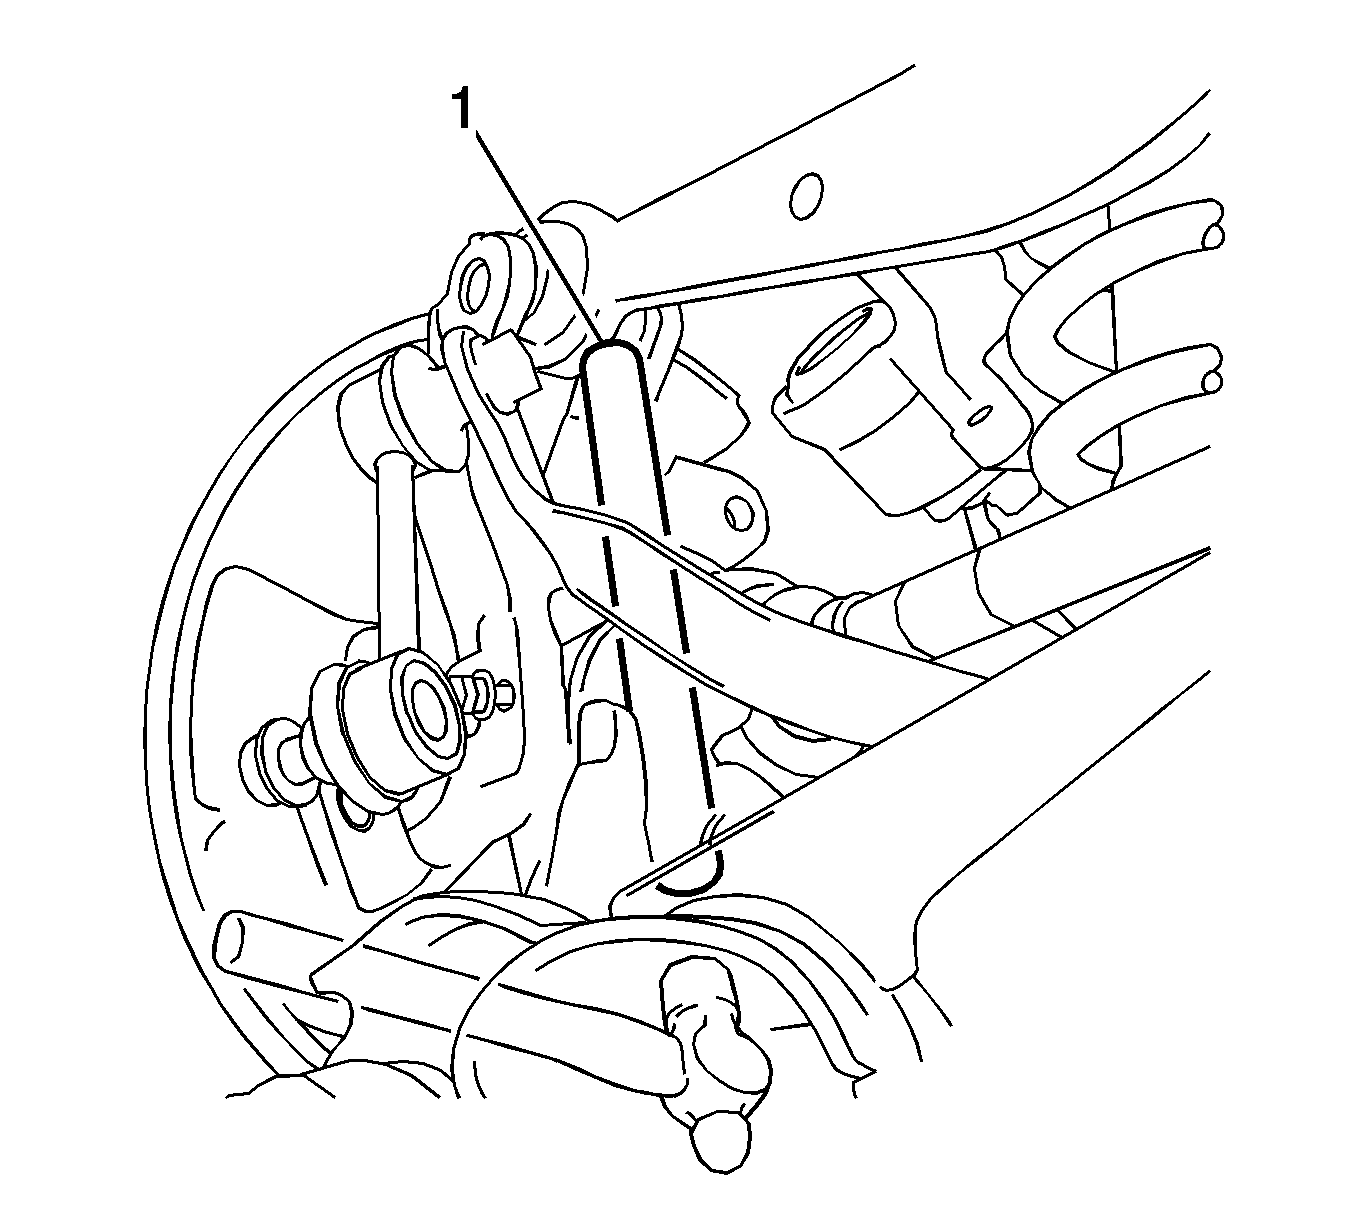
- Use a brass bar (1) and a hammer in order to separate the upper control arm from the knuckle.
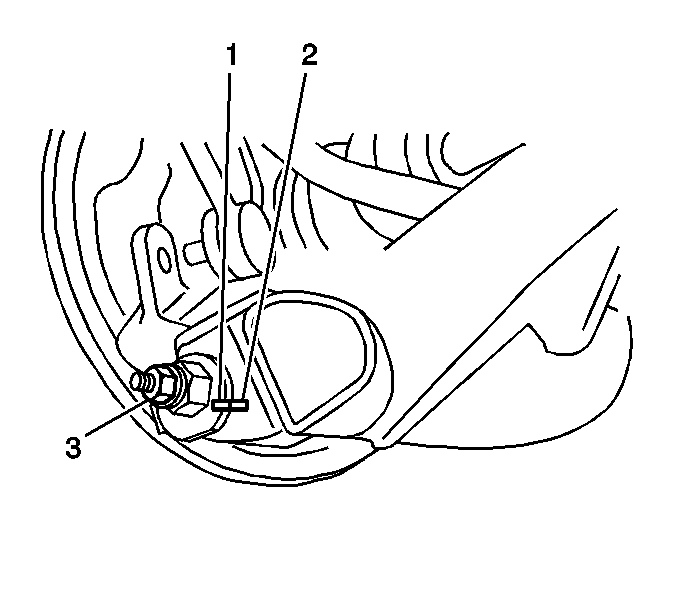
- Use paint in order to place match marks on the cam bolt (2) and on the lower control arm (1).
- Use paint in order to place match marks on the adjust cam (1) and on the lower control arm (2).
- Remove the nut (3) from the adjust cam and from the cam bolt.
- Remove the adjust cam.
- Remove the cam bolt.
- Remove the nut (1) and the bolt in order to separate the lower control arm from the knuckle.
- Use mechanics wire or the equivalent in order to support the wheel drive shaft.
- Remove the knuckle from the wheel drive shaft.
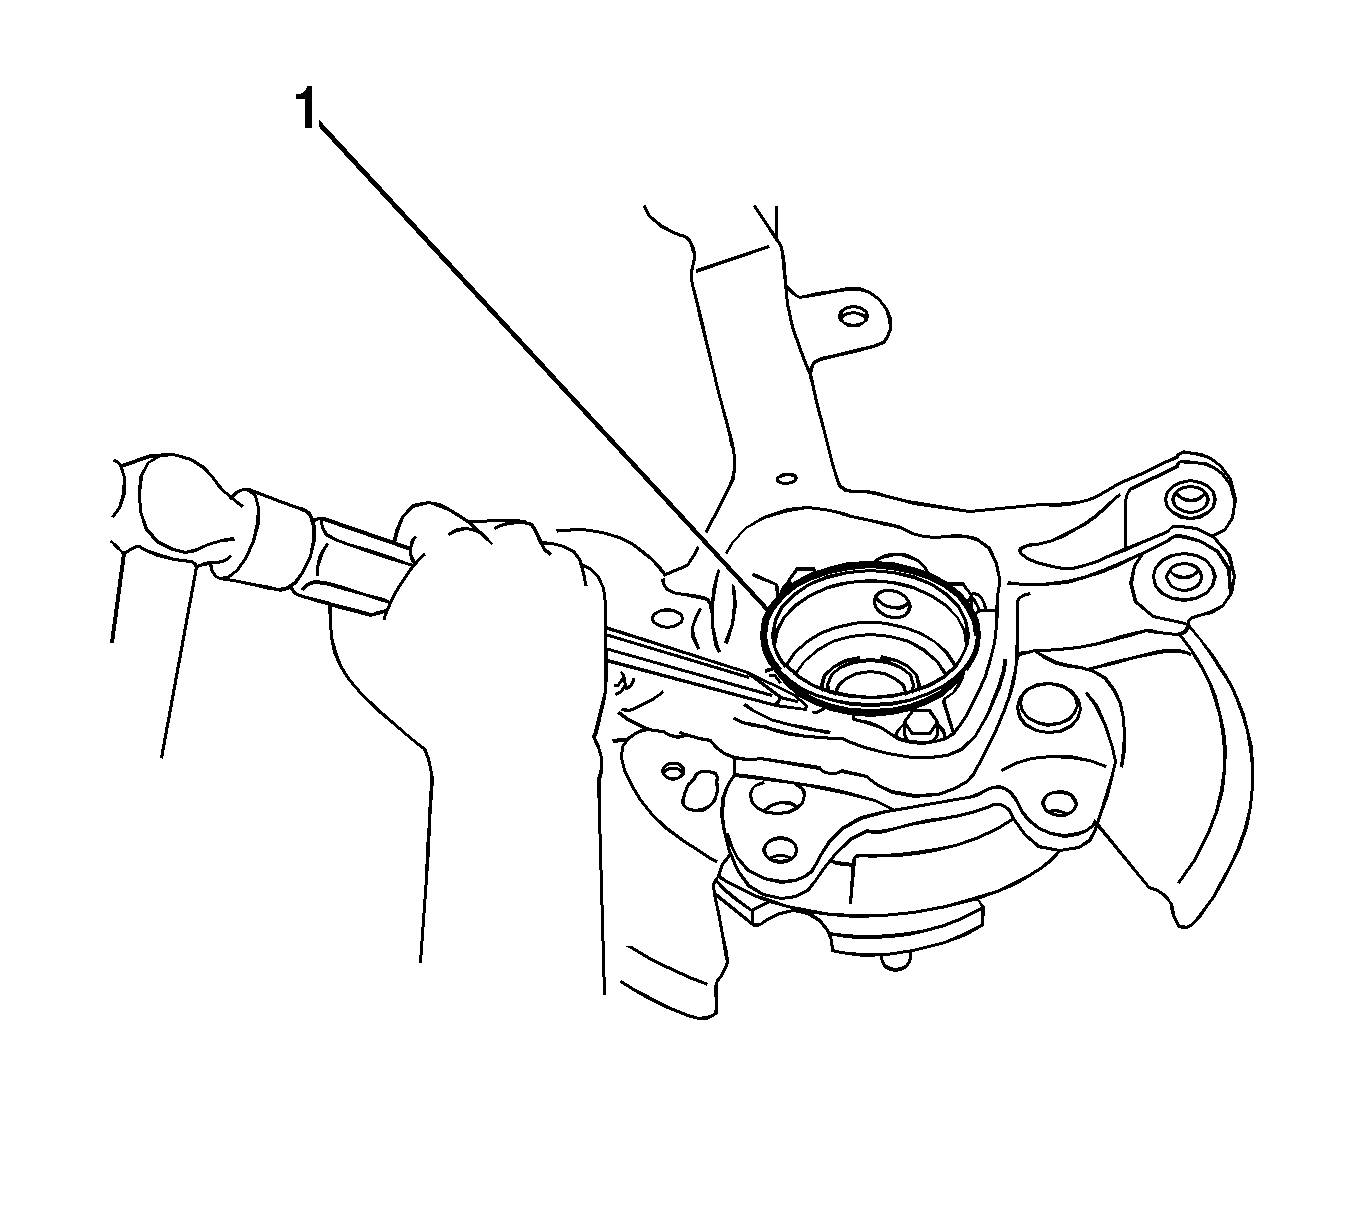
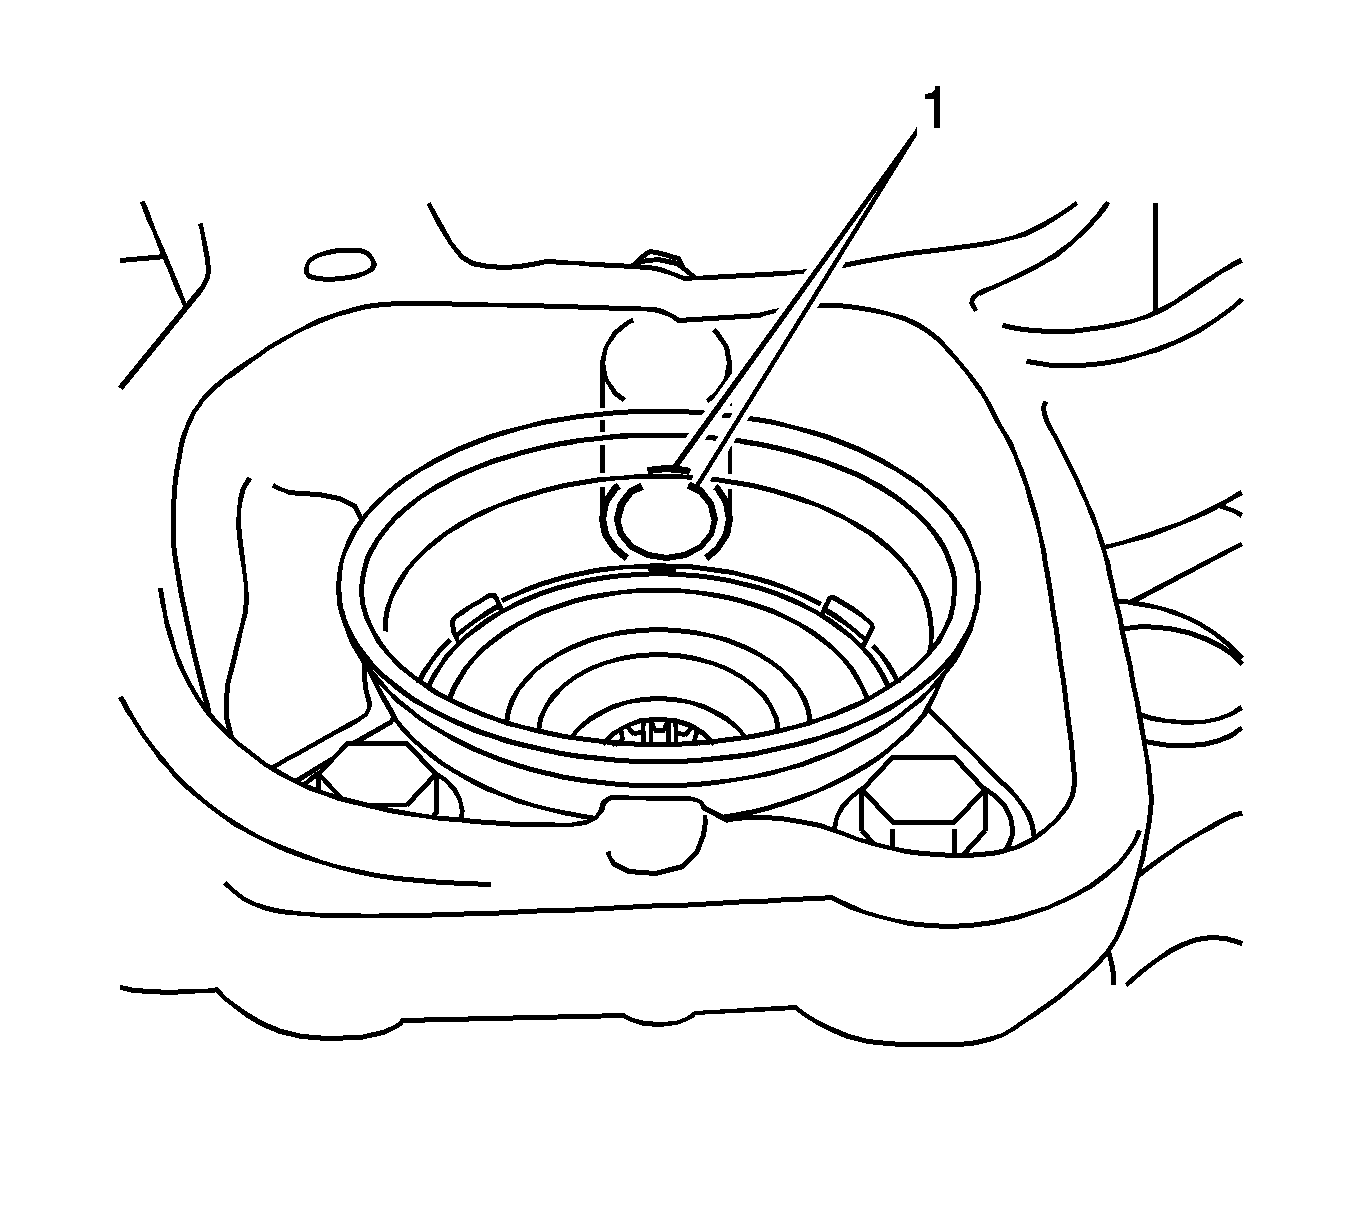
- Remove the wheel bearing dust deflector (1).
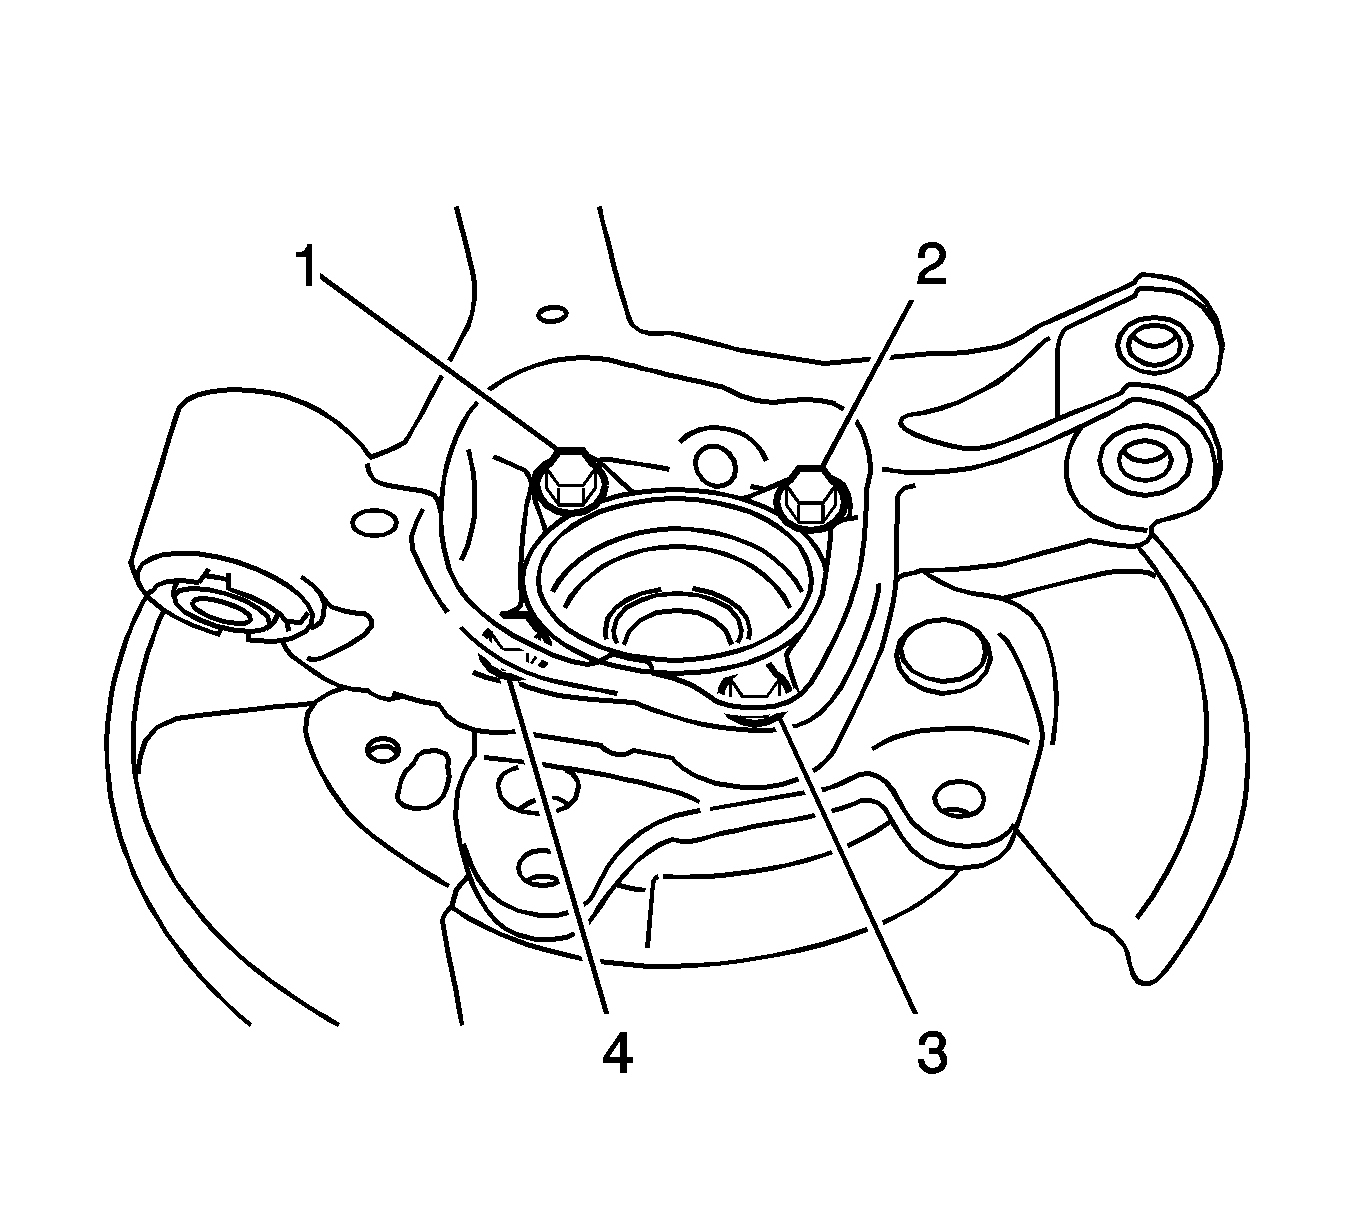
- Remove the 4 bolts (1, 2, 3, 4).
- Remove the wheel hub and bearing.
- Remove the brake shield.
Installation Procedure
- Install the brake shield to the knuckle.
- Install the wheel hub and bearing to the knuckle.
- Install the 4 bolts (1, 2, 3, 4) to the knuckle and tighten to 56 N·m (41 lb ft).
- Align the hole (1) for rear wheel speed sensor in a NEW dust deflector with the hole in the knuckle.
- Use a hydraulic press and press tools, or use a hammer and a piece of flat steel stock, in order to install the NEW dust deflector.
- Install the knuckle to the wheel drive shaft.
- Install, but do not tighten, the bolt (1) and the nut in order to retain the knuckle to the upper control arm.
- Remove the mechanics wire or the equivalent from the wheel drive shaft.
- Install, but do not tighten, the bolt and the nut (1) to the front of the lower control arm.
- Align the match marks and install the cam bolt (2) to the rear of the lower control arm (1).
- Align the match marks and install the adjust cam (1) to the cam bolt.
- Install, but do not tighten, the nut (3).
- Install the nut in order to retain the stabilizer shaft link stud to the knuckle. Use a wrench (2) in order to hold the link stud. Tighten the nut to 44 N·m (32 lb ft).
- Install the rear wheel speed sensor and the pigtail wire. Refer to Rear Wheel Speed Sensor Replacement.
- Install the brake rotor and the park brake hardware. Refer to Park Brake Hardware Replacement.
- Clean the threaded portion of the rear wheel drive shaft.
- Clean the threads on the rear wheel drive shaft nut.
- Use 3 wheel nuts in order to hold the brake rotor on the hub.
- Apply the park brake.
- Have an assistant apply the brakes.
- Install a NEW rear wheel drive shaft nut and tighten to 216 N·m (159 lb ft).
- Release the brakes and the park brake.
- Remove the wheel nuts and the brake rotor. Refer to Rear Brake Rotor Replacement.
- Inspect the rear wheel bearing for looseness and runout. Refer to Wheel Bearings Diagnosis.
- Install the brake rotor and the caliper. Refer to Rear Brake Rotor Replacement.
- Adjust the park brake. Refer to Park Brake Adjustment.
- Use a chisel and a hammer in order to stake the rear wheel drive shaft nut (1).
- Install the rear tire and wheel assembly. Refer to Tire and Wheel Removal and Installation.
- Lower the vehicle.
- Raise and support the vehicle on an alignment rack.
- With the weight of the vehicle on the tires, push down on the rear bumper 3 times in order to stabilize the suspension.
- Use a wrench in order to hold the nut. Tighten the bolt (1) that retains the upper control arm to the knuckle to 74 N·m (55 lb ft).
- Use a wrench in order to hold the nut (1). Tighten the bolt that retains the front of the lower control arm to the knuckle to 140 N·m (103 lb ft).
- Align the match marks on the cam bolt (2) and on the control arm (1).
- Align the match marks on the adjust cam (1) and on the control arm (2).
- Tighten the nut (3) that retains the rear of the lower control arm to the knuckle to 74 N·m (55 lb ft).
- Measure the wheel alignment and perform the zero point calibrations. Adjust the wheel alignment if necessary. Refer to Wheel Alignment Measurement.
- Lower the vehicle.
Caution: Refer to Fastener Caution in the Preface section.


Note: Do not tighten the nuts or the bolts on the control arms yet. The weight of the vehicle must be on the tire and wheel assemblies before tightening the nuts and the bolts.






Knuckle Replacement GT
Removal Procedure
- Disconnect the negative battery cable. Refer to Battery Negative Cable Disconnection and Connection.
- Raise and support the vehicle. Refer to Lifting and Jacking the Vehicle.
- Remove the rear tire and wheel assembly. Refer to Tire and Wheel Removal and Installation.
- Remove the brake rotor and the park brake hardware. Refer to Park Brake Hardware Replacement.
- Remove the rear wheel speed sensor and the pigtail wire. Refer to Rear Wheel Speed Sensor Replacement.
- Use a wrench (1) in order to hold the lower stud on the stabilizer shaft link. Remove the nut in order to separate the lower stabilizer shaft link stud from the knuckle.
- Use a wrench in order to hold the nut that retains the upper control arm to the knuckle. Remove the bolt (1).
- Use a brass bar (1) and a hammer in order to separate the upper control arm from the knuckle.
- Use paint in order to place match marks on the cam bolt (2) and on the lower control arm (1).
- Use paint in order to place match marks on the adjust cam (1) and on the lower control arm (2).
- Remove the nut (3) from the adjust cam and from the cam bolt.
- Remove the adjust cam.
- Remove the cam bolt.
- Remove the nut (1) and the bolt in order to separate the lower control arm from the knuckle.
- Remove the knuckle.
- Remove the 4 bolts (1, 2, 3, 4).
- Remove the wheel hub and bearing from the knuckle.
- Remove the brake shield from the knuckle.


Installation Procedure
- Install the brake shield to the knuckle.
- Install the wheel hub and bearing to the knuckle.
- Install the 4 bolts (1, 2, 3, 4) to the knuckle and tighten to 56 N·m (41 lb ft).
- Position the knuckle on the upper control arm.
- Install, but do not tighten, the bolt (1) and the nut in order to retain the knuckle to the upper control arm.
- Install, but do not tighten, the bolt and the nut (1) to the front of the lower control arm.
- Align the match marks and install the cam bolt (2) to the rear of the lower control arm (1).
- Align the match marks and install the adjust cam (1) to the cam bolt.
- Install, but do not tighten, the nut (3).
- Install the nut in order to retain the stabilizer shaft link stud to the knuckle. Use a wrench in order to hold the link stud. Tighten the nut to 44 N·m (32 lb ft).
- Install the rear wheel speed sensor and the pigtail wire. Refer to Rear Wheel Speed Sensor Replacement.
- Inspect the rear wheel bearing for looseness and runout. Refer to Wheel Bearings Diagnosis.
- Install the brake rotor and the park brake hardware. Refer to Park Brake Hardware Replacement.
- Adjust the park brake. Refer to Park Brake Adjustment.
- Install the rear tire and wheel assembly. Refer to Tire and Wheel Removal and Installation.
- Lower the vehicle.
- Connect the negative battery cable. Refer to Battery Negative Cable Disconnection and Connection.
- Raise and support the vehicle on an alignment rack.
- With the weight of the vehicle on the tires, push down on the rear bumper 3 times in order to stabilize the suspension.
- Use a wrench in order to hold the nut. Tighten the bolt (1) that retains the upper control arm to the knuckle to 74 N·m (55 lb ft).
- Use a wrench in order to hold the nut (1). Tighten the bolt that retains the front of the lower control arm to the knuckle to 140 N·m (103 lb ft).
- Align the match marks on the cam bolt (2) and on the control arm (1).
- Align the match marks on the adjust cam (1) and on the control arm (2).
- Tighten the nut (3) that retains the rear of the lower control arm to the knuckle to 74 N·m (55 lb ft).
- Measure the wheel alignment and perform the zero point calibrations. Adjust the wheel alignment if necessary. Refer to Wheel Alignment Measurement.
- Lower the vehicle.
Caution: Refer to Fastener Caution in the Preface section.


Note: Do not tighten the nuts or the bolts on the control arms yet. The weight of the vehicle must be on the tire and wheel assemblies before tightening the nuts and the bolts.


