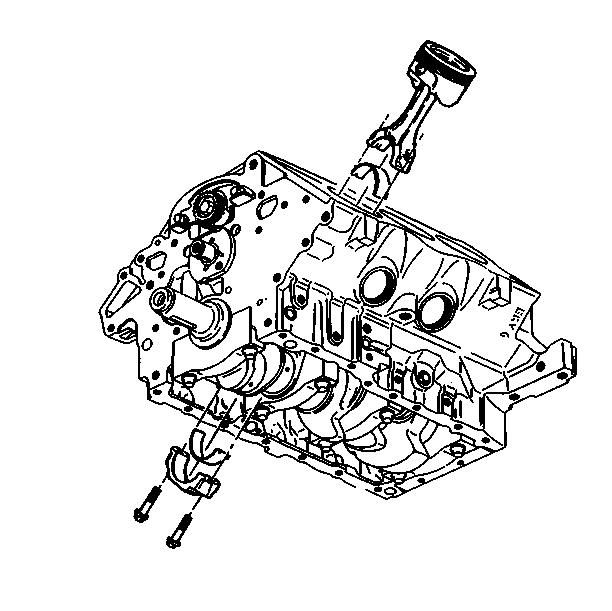
- Coat the following parts
with engine oil:
Important: When installing a piston and connecting rod, the stamped arrow on the
piston must point to the front of the engine. Hold the J 8037
firmly against the engine block until
all the piston rings have entered the cylinder bore.
- Install the piston into its original bore. Use the J 8037
and the J 41512
and lightly tap the top of the piston with a wooden hammer
handle.
- Install the connecting rod bearings and caps onto their original
connecting rod. Align and match the marks or numbers which were placed on
the connecting rod and connecting rod cap during removal.
Notice: Use the correct fastener in the correct location. Replacement fasteners
must be the correct part number for that application. Fasteners requiring
replacement or fasteners requiring the use of thread locking compound or sealant
are identified in the service procedure. Do not use paints, lubricants, or
corrosion inhibitors on fasteners or fastener joint surfaces unless specified.
These coatings affect fastener torque and joint clamping force and may damage
the fastener. Use the correct tightening sequence and specifications when
installing fasteners in order to avoid damage to parts and systems.
- Install the connecting rod bolts.
Tighten
Tighten the bolts to 27 N·m (20 lb ft) and
rotate the bolts an additional 50 degrees, using the J 36660-A
.
- Inspect the connecting rod for binding by prying back and forth
with a suitable tool. If necessary, loosen and re-tighten the connecting rod
cap.
- Measure the connecting rod side clearance. Refer to specifications.
- Install the cylinder head. Refer to Refer to
Cylinder Head Replacement
.
- Install the oil pump screen. Refer to
Oil Pump Suction Pipe and Screen Assembly Replacement
- Install the oil pan. Refer to
Oil Pan Replacement
.


