For 1990-2009 cars only
Liftgate Replacement Aztek
Removal Procedure
- Remove the upper and lower liftgate trim panel. Refer to Liftgate Trim Panel Replacement .
- Remove the liftgate window. Refer to Liftgate Window Replacement in Stationary Windows.
- Remove the liftgate latch strikers. Refer to Liftgate Latch Striker Replacement .
- Remove the liftgate bumper mounting brackets.
- Remove the liftgate struts. Refer to Liftgate Strut Replacement .
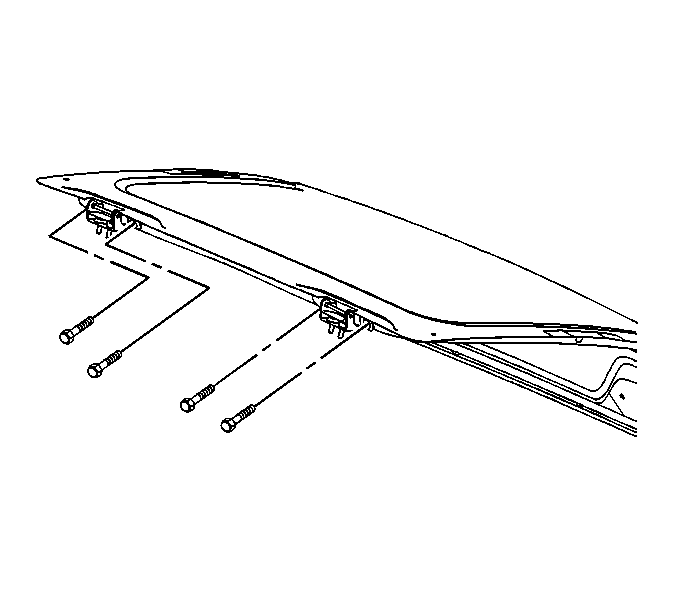
- Mark the location of the liftgate hinges to the liftgate with a grease pencil.
- Remove the bolts from the liftgate hinges, with an assistant.
- Remove the liftgate from the vehicle , with an assistant and place outside face down on a clean padded surface.

Installation Procedure
- Position the liftgate hinges to the marked location points on the liftgate, with an assistant.
- Install the bolts to the liftgate hinges, with an assistant.
- Install the liftgate struts. Refer to Liftgate Strut Replacement .
- Install the liftgate latch strikers. Refer to Liftgate Latch Striker Replacement .
- Install the liftgate bumper mounting brackets.
- Install the liftgate window. Refer to Liftgate Window Replacement in Stationary Windows.
- Install the upper and lower liftgate trim panels. Refer to Liftgate Trim Panel Replacement .
- Adjust the liftgate as required. Refer to. Endgate Hinge Replacement

Notice: Use the correct fastener in the correct location. Replacement fasteners must be the correct part number for that application. Fasteners requiring replacement or fasteners requiring the use of thread locking compound or sealant are identified in the service procedure. Do not use paints, lubricants, or corrosion inhibitors on fasteners or fastener joint surfaces unless specified. These coatings affect fastener torque and joint clamping force and may damage the fastener. Use the correct tightening sequence and specifications when installing fasteners in order to avoid damage to parts and systems.
Tighten
Tighten the liftgate hinge bolts to 33 N·m (28 lb ft).
