Rear Hub and Bearing Replacement Hub and Bearing
Removal Procedure
Caution: When servicing brake parts, do not create dust by grinding or sanding
brake pads, by cleaning brake parts with a dry brush or with compressed air.
Many earlier models or aftermarket brake parts may contain asbestos fibers
which can become airborne if dust is created during servicing. Breathing dust
containing asbestos fibers may cause serious bodily harm. A water dampened
cloth or water based solution should be used to remove any dust on brake parts.
Equipment is commercially available to perform this washing function. These
methods will prevent fibers from becoming airborne.
Important: Ensure that the vehicle rear wheel on the service side is off of the
floor.
- Block the front wheels.
- Raise the rear axle and place the supports under the frame rails.
Ensure that the vehicle rear wheels are off the floor.
- Release the parking brake.
- Remove the rear tire and wheel assembly. Refer to Tire and Wheel Removal and Installation (Dual/Rear)
in Tires and
Wheels.
- Remove the rear axle shaft. Refer to
Differential Replacement
.
- Remove the rear brake drum, if equipped.
- Remove the following components from the rear
wheel bearing:
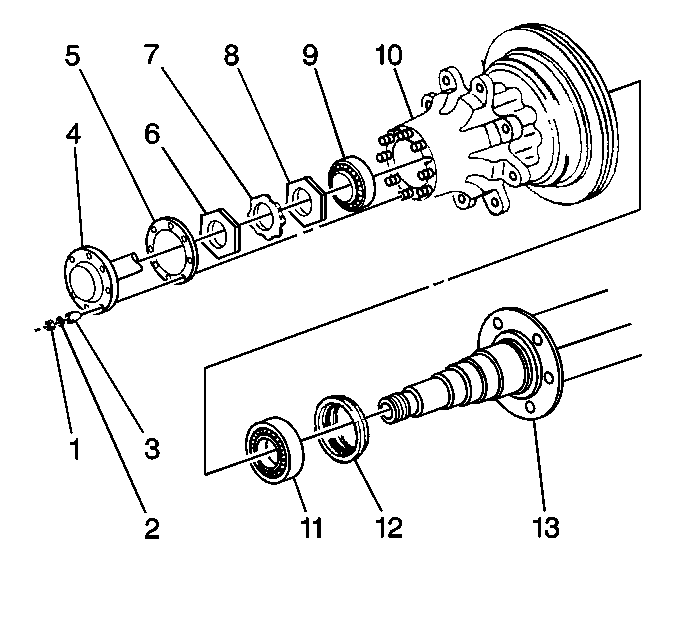
| • | The rear bearing inner nut (8) |
- Remove the rear hub assembly or hub/rotor assembly (10).
- Remove the rear wheel bearing outer cone assembly (9).
- Remove the following components:
| • | The rear wheel bearing seal (12) |
| • | The rear wheel bearing inner cone assembly (11) |
Notice: When cleaning wheel bearing components, use only clean mineral spirits.
Do not spin-dry the bearing. Bearing components may be damaged if cleaned
with the wrong solvent and/or dried by spinning the bearing.
- Clean the rear wheel bearing cones and the rear hub using clean mineral
spirits.
- Clean the rear brake rotor, if equipped, and the rear axle housing
spindle. Use Brake Parts Cleaner GM P/N 12345754 or equivalent.
- Inspect the rear wheel hub. Replace the hub, if damaged.
- Inspect the rear wheel stud for looseness and damaged threads.
- Inspect the rear wheel bearing for the following conditions:
Refer to
Front Wheel Hub, Bearing, and Seal Replacement
in Front Suspension.
- Inspect the rear wheel bearing cups for cracks and pits. Refer
to
Front Wheel Hub, Bearing, and Seal Replacement
in Front Suspension.
- Inspect the rear axle spindle for damage.
- Inspect the rear wheel hub bearing seal retainer. Replace the
retainer, if damaged. Refer to
Front Wheel Hub, Bearing, and Seal Replacement
in Front Suspension.
- Inspect the rear axle (shaft) flange studs for damaged threads
and bends.
- Inspect the rear brake rotor or rear drum brake for scoring. Refer
to Brake Rotor Tolerance or Brake Drum Inspection in Brakes.
Installation Procedure
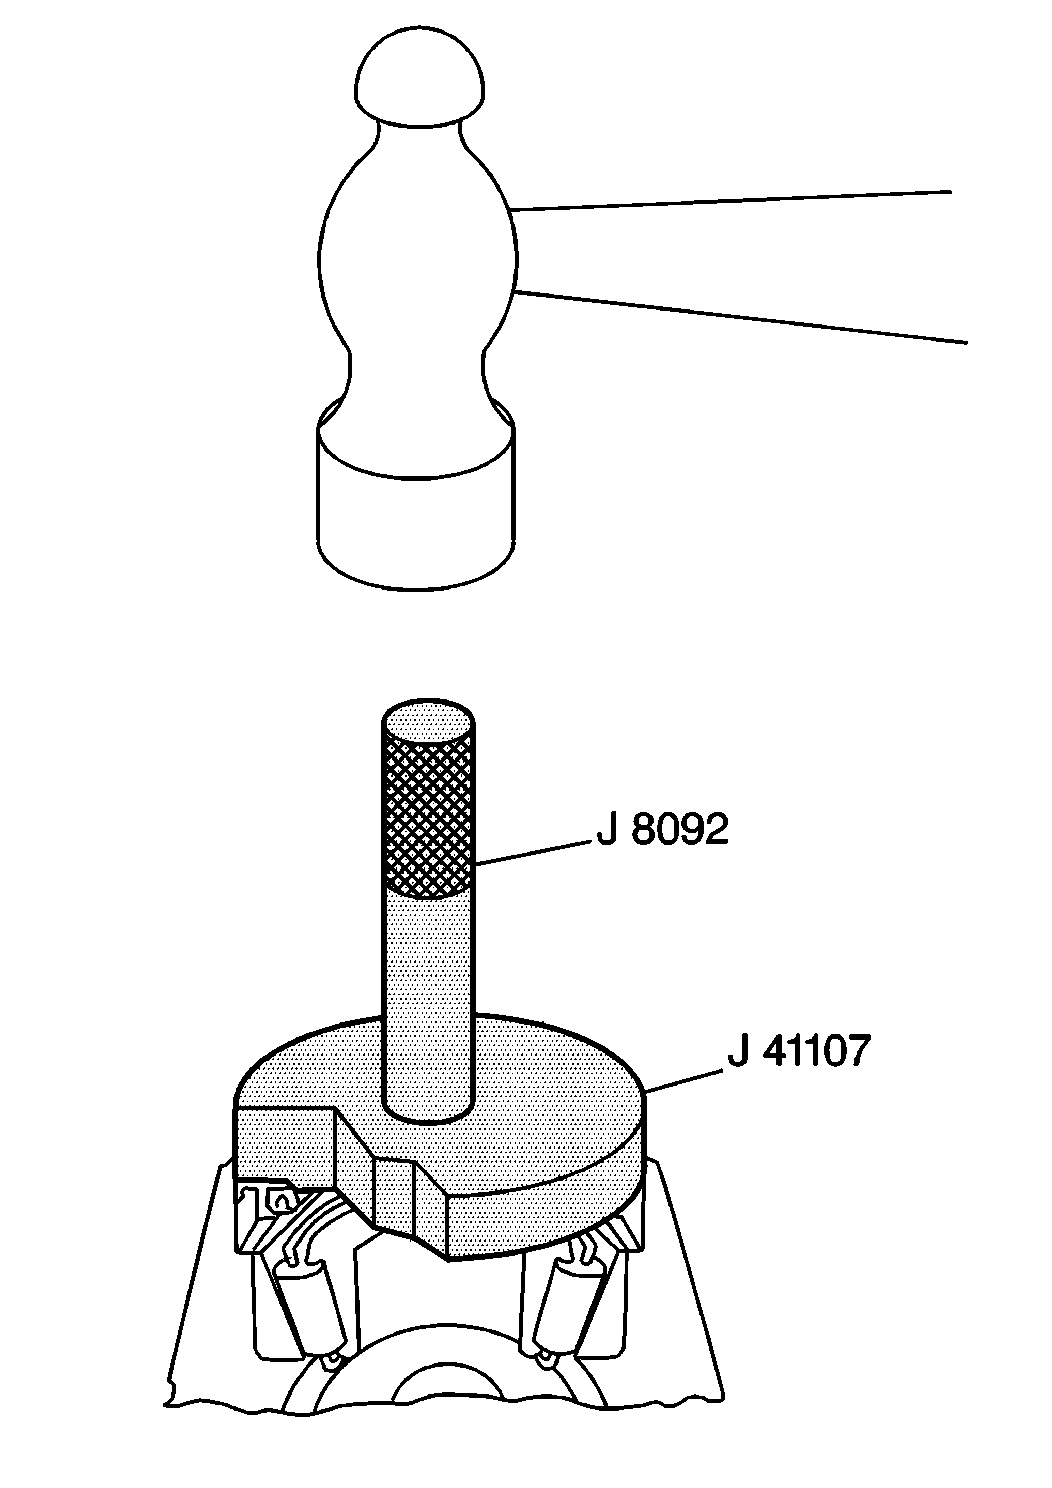
| • | J 41107 Oil
Seal Installation Kit |
- Install the synthetic lubricant in the following locations:
| • | The rear axle housing tube |
| • | The inside of the wheel hub |
| • | The rear wheel hub bearing seal lip |
| • | The rear axle spindle seal lip contact surface |
| • | The rear wheel hub bearing inner cone assembly |
Important: When installing the new rear wheel bearing inner cone, always replace
the rear wheel bearing inner cup.
- Install the rear wheel bearing inner cone. Refer to
Rear Hub and Bearing Replacement
.
- Apply Silicone Sealer (RTV) or equivalent to the OD of the rear
wheel bearing seal. The silicone sealer will overcome minor faults in the
rear wheel bearing seal bore.
Notice: Do not continue to hammer after rear wheel hub bearing seal is fully
seated. This may cause damage to the rear wheel hub bearing seal.
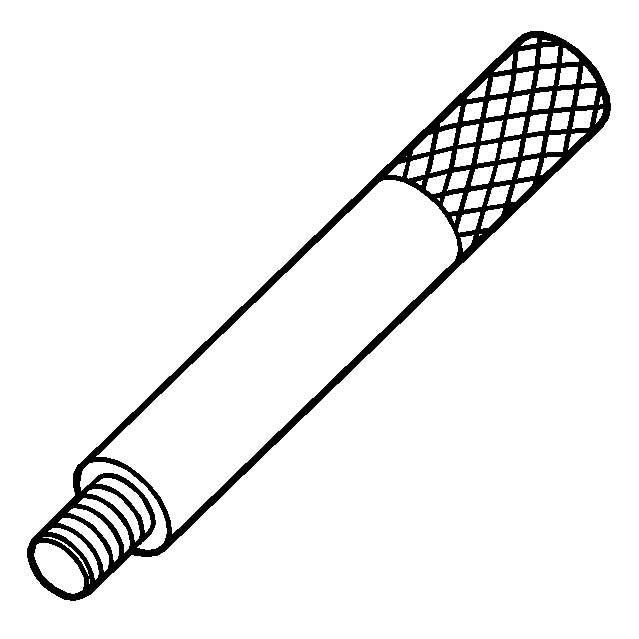
- Install the rear wheel bearing seal. Perform the following steps:
| 4.1. | Ensure that the rear wheel hub bearing seal lip faces inward. |
| 4.2. | Use the J 41107
and
the J 8092
on the standard
rear wheel hub bearing seal. |
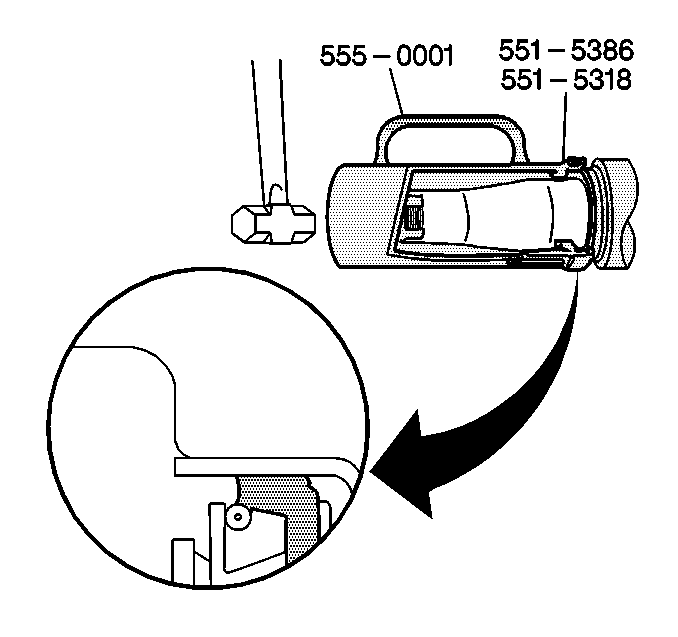
| 4.3. | Use the 551-5386
or the 551-5318
on
the G98 rear wheel hub bearing seal option. |
| 4.4. | Hold the tool handle vertical. Strike a sharp blow with the hammer
in order to start the rear wheel hub bearing seal into the rear wheel hub
bore. |
| 4.5. | Tap the rear wheel hub bearing seal down into place. |
- Install the rear hub assembly. Do not damage the rear wheel bearing
seal.
Important: When installing a new rear wheel bearing outer cone, always replace
the rear wheel bearing outer cup. Refer to
Rear Hub and Bearing Replacement
.
- Install the rear wheel bearing outer cone. Push the cone firmly into
place.
- Install the following rear wheel bearing components:
| 7.1. | The inner adjust nut. |
| 7.2. | The adjust nut lock. |
| 7.3. | The outer adjust nut. |
- Install the rear brake drum, if equipped.
- Install the rear tire and wheel assembly.
- Adjust the rear wheel bearings. Refer to
Wheel Bearing Adjustment
.
- Install the rear axle shaft.
- Adjust the drum brakes, if equipped. Refer to Air Drum Brake Adjustment
in Brakes.
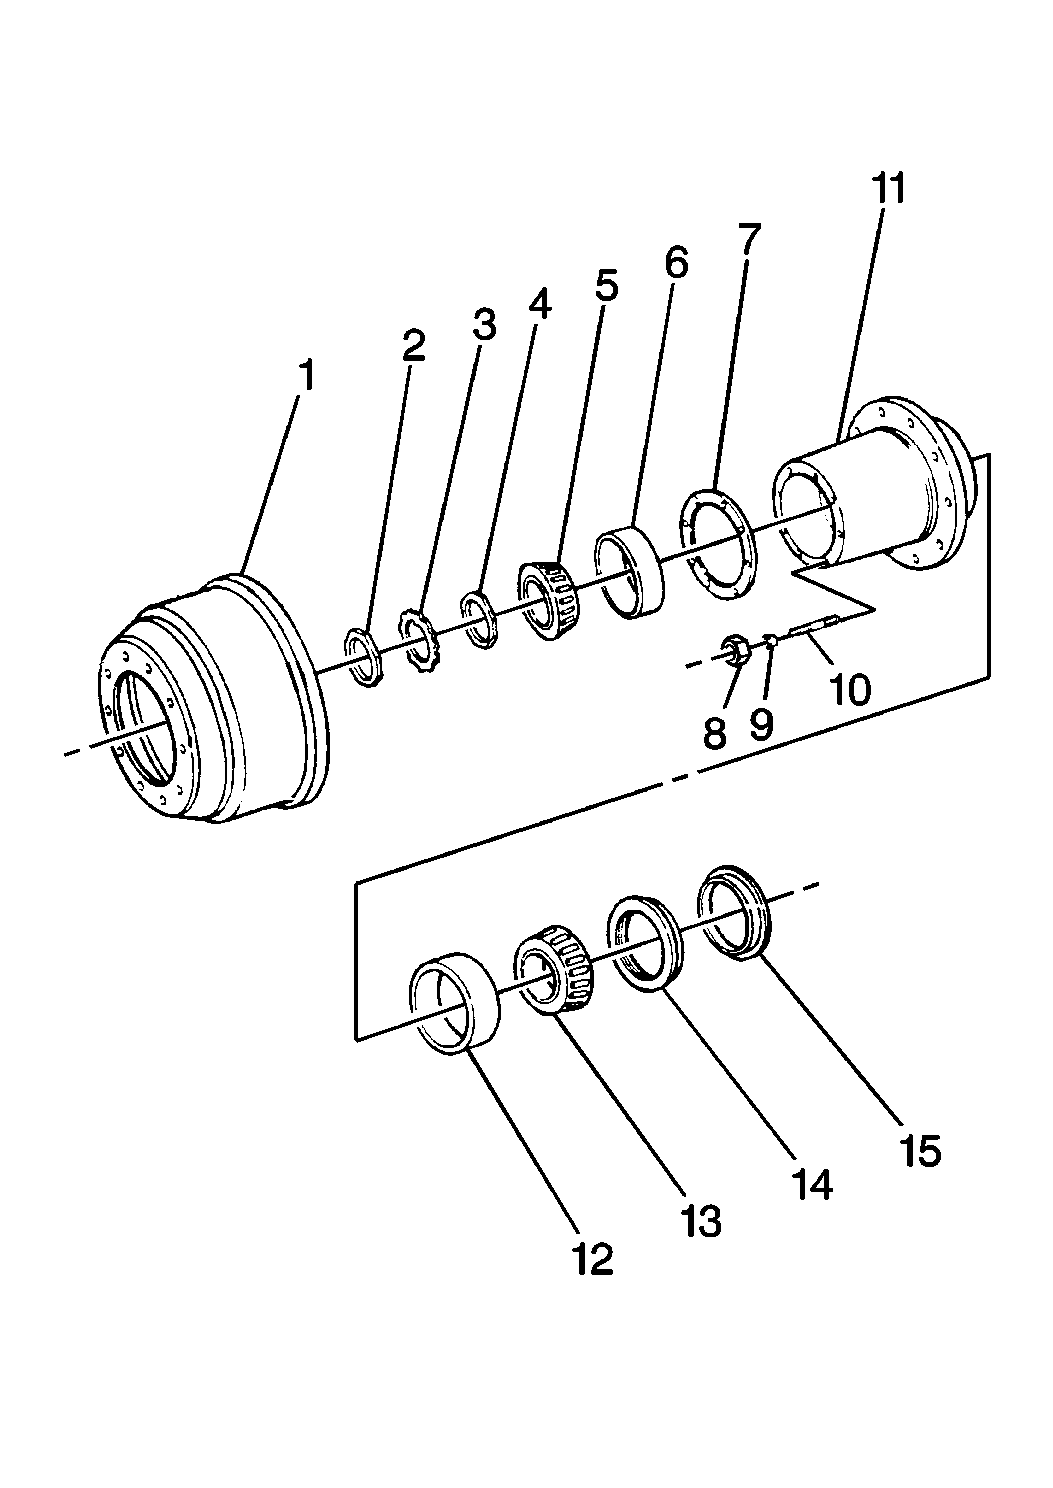
Rear Hub and Bearing Replacement Wheel Bearing Cup
Removal Procedure
- Remove the rear wheel hub. Refer to
Rear Hub and Bearing Replacement
.
- Remove the rear wheel bearing cup (12).
Alternately tap on the opposite sides of the rear wheel bearing cup
inner edge until the bearing cup is free from the wheel hub. Use a brass drift
and a small hammer.
Installation Procedure
- Install the rear wheel bearing cup. Position
the rear wheel bearing cup in the rear wheel hub.
- Alternately tap on the opposite sides of the rear wheel bearing
cup in order to drive the bearing cup in squarely. Use a brass drift and a
small hammer.
- Ensure that the rear wheel bearing cup seats firmly against the
hub shoulder.
- Install the rear wheel hub.
Rear Hub and Bearing Replacement Wheel Bearing Seal
For on-vehicle service of the rear wheel hub bearing seal.
Removal Procedure
Tools Required
- Remove the rear wheel hub (11). Refer
to
Rear Hub and Bearing Replacement
.
- Remove the rear wheel hub bearing seal retainer (15).
| 2.1. | Tap around the outside diameter of the seal retainer (15)
with a hammer in order to stretch the metal. |
| 2.2. | Use a blunt chisel in order to cut into the rear wheel bearing
seal retainer inner flange. The rear wheel bearing seal retainer will be loose
enough for removal. |
- Clean the spindle shoulder and threads. Use Brake Parts Cleaner.
- Remove the burrs from the spindle shoulder.
Installation Procedure
- Apply Silicone Sealer (RTV) to the spindle shoulder.
- Install the new rear wheel bearing seal retainer onto the spindle
shoulder.
| 2.1. | Place the rear wheel bearing seal retainer and tool on to the
rear axle spindle. |
| 2.2. | Tap the end of the tool until the rear wheel bearing seal retainer
contacts the rear axle spindle shoulder. |
| 2.3. | Rotate the tool and tap several times in order to ensure complete
bottoming of the rear wheel bearing seal retainer. |
| 2.4. | Wipe off the excess sealer. |
- Ensure that the edge of the rear wheel bearing seal retainer is
parallel and flush with the rear axle spindle shoulder face.
- Install the rear wheel hub.
