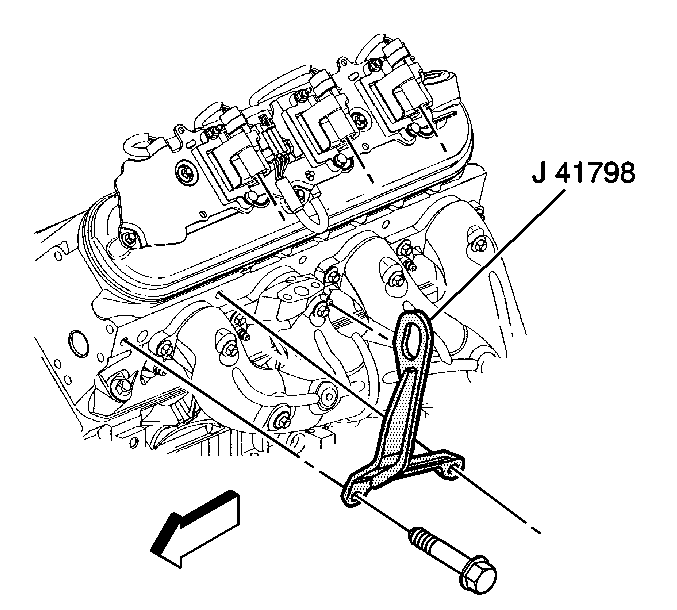
- Install the
J 41798 to the engine.
Tighten
| • | Tighten the M8 engine lift bracket bolts to 25 N·m (18 lb ft). |
| • | Tighten the M10 engine lift bracket bolts to 50 N·m (37 lb ft). |
- Install an engine hoist to the
J 41798 .
- Remove the engine from the engine stand.
- Install the engine to the vehicle.
- Align the engine and transmission.
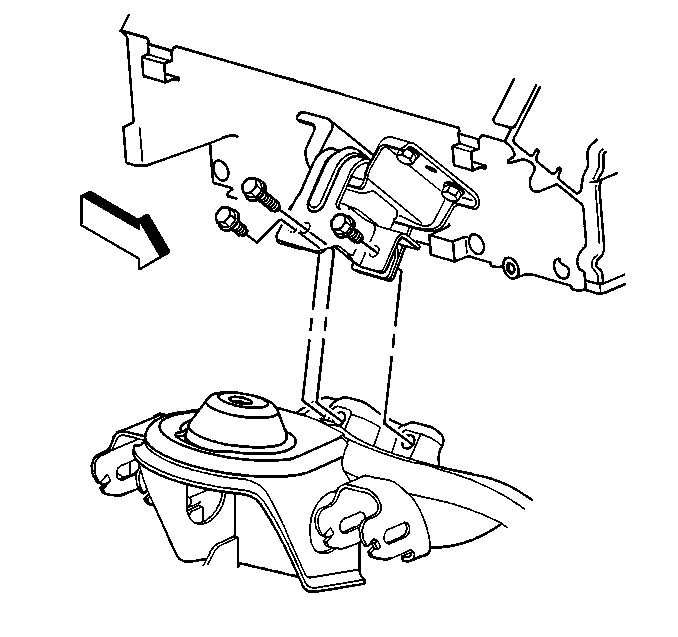
- Install the left and right engine mount-to-engine mount bracket bolts.
Tighten
Tighten the engine mount-to-engine mount bracket bolts to 65 N·m (48 lb ft).
- Install the upper transmission bolts.
Tighten
Tighten upper transmission bolts to 50 N·m (37 lb ft).
- Remove the floor jack from under the transmission.
- Remove the engine hoist.

- Remove the
J 41798 .
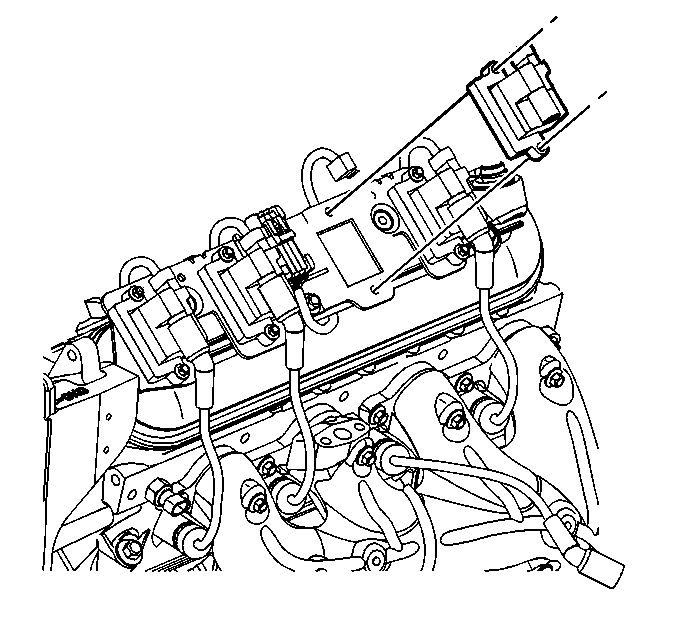
- Install the ignition coils and the spark plug wires. Refer to
Ignition Coil Replacement.
- Raise the vehicle.
- Remove the
J 21366 .
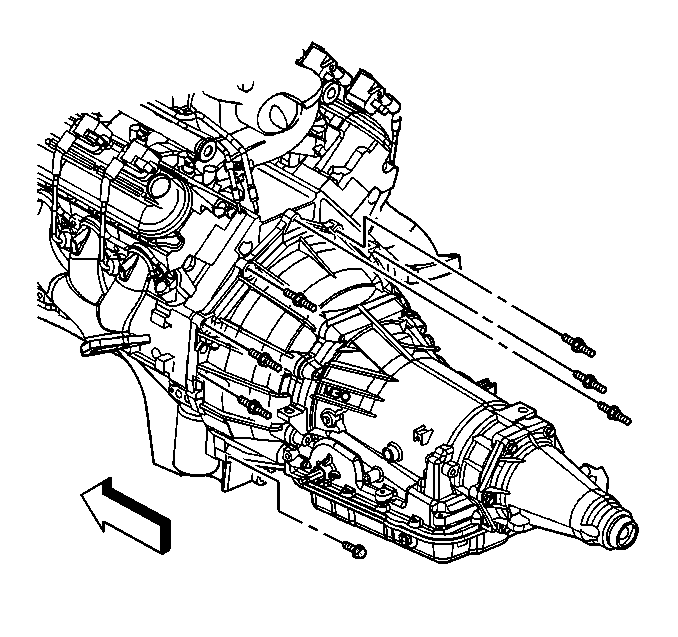
- Install the automatic transmission bolt/studs.
Tighten
Tighten automatic transmission bolts to 50 N·m (37 lb ft).
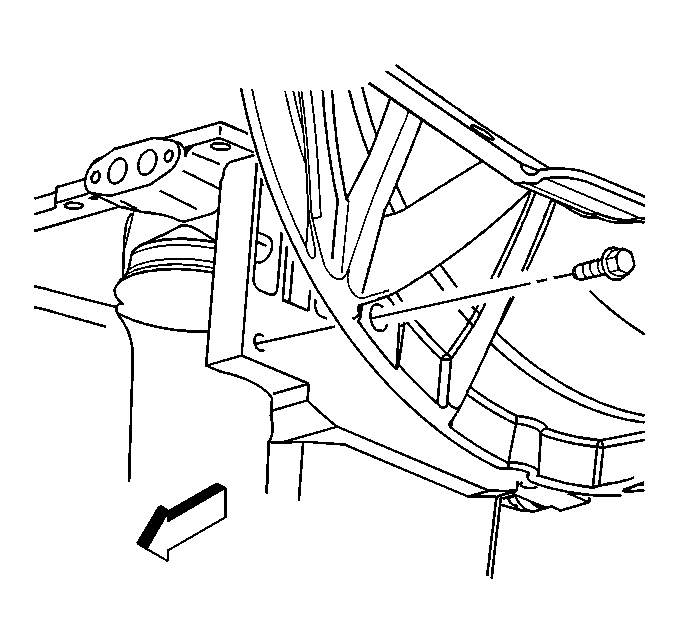
- Install the transmission converter cover bolts.
Tighten
Tighten transmission converter cover bolts to 12 N·m (106 lb in).
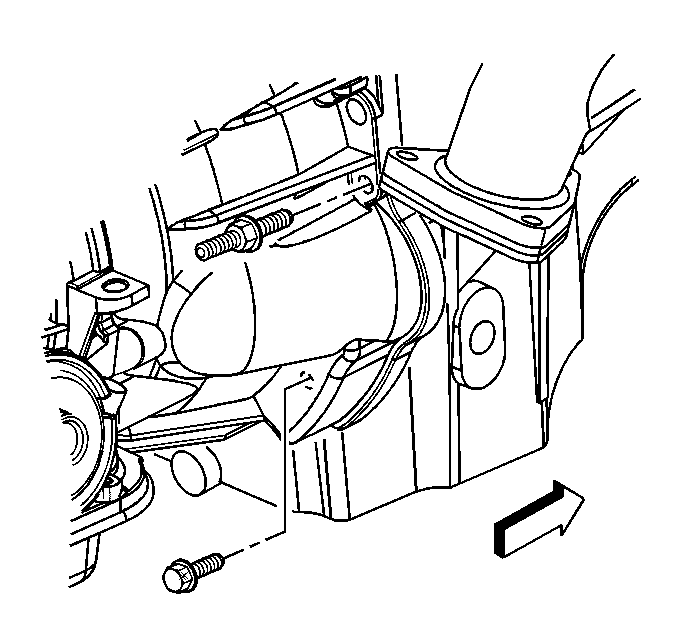
- Install the transmission bolt and stud on the right side.
Tighten
Tighten the automatic transmission bolts/studs to 50 N·m (37 lb ft).
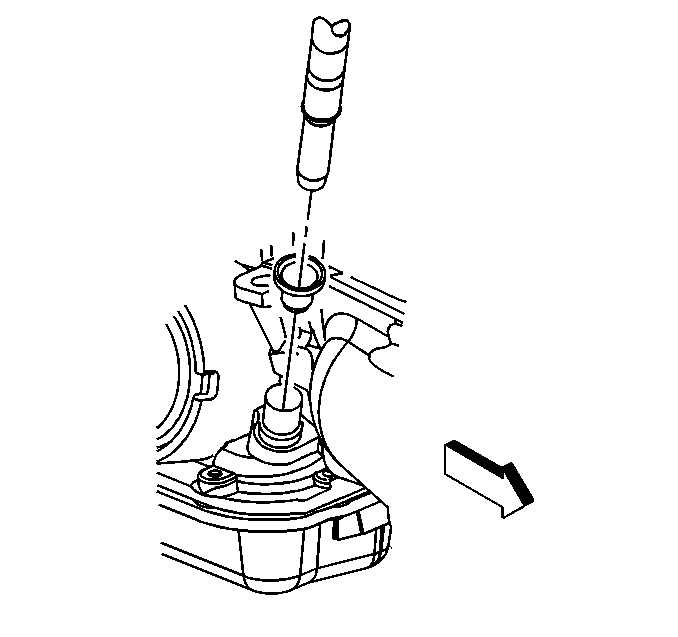
- Install the automatic transmission oil level indicator tube.
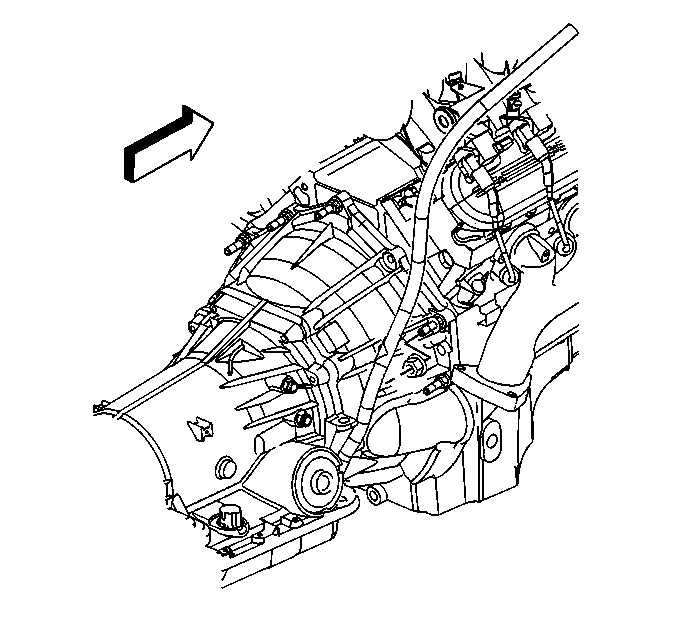
- Install the automatic transmission oil level indicator tube nut.
Tighten
Tighten the automatic transmission oil level indicator tube nut to 18 N·m (13 lb ft).
- If reusing the torque converter-to-flex plate bolts, clean the bolts and apply LOCTITE™ 242, GM P/N 12345382 (Canadian P/N 10953489) or equivalent to the bolt threads.
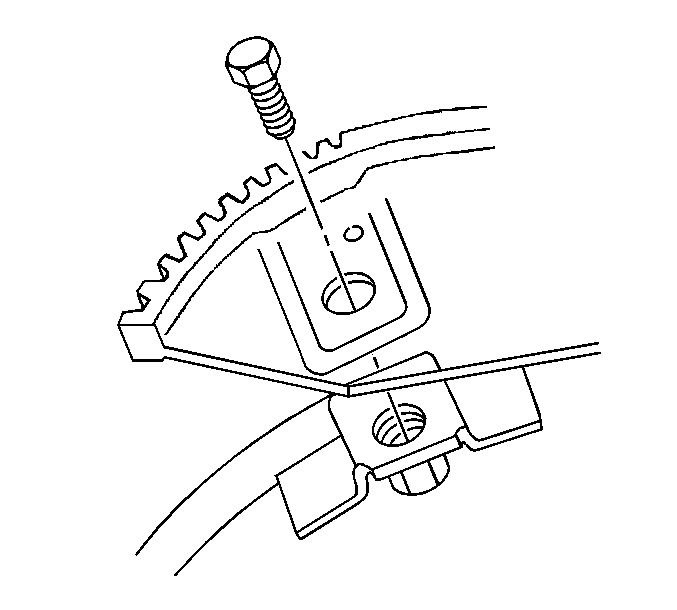
- Install the flywheel to torque converter bolts.
Tighten
Tighten the bolts to 65 N·m (48 lb ft).
- Install exhaust pipes to the exhaust manifolds.
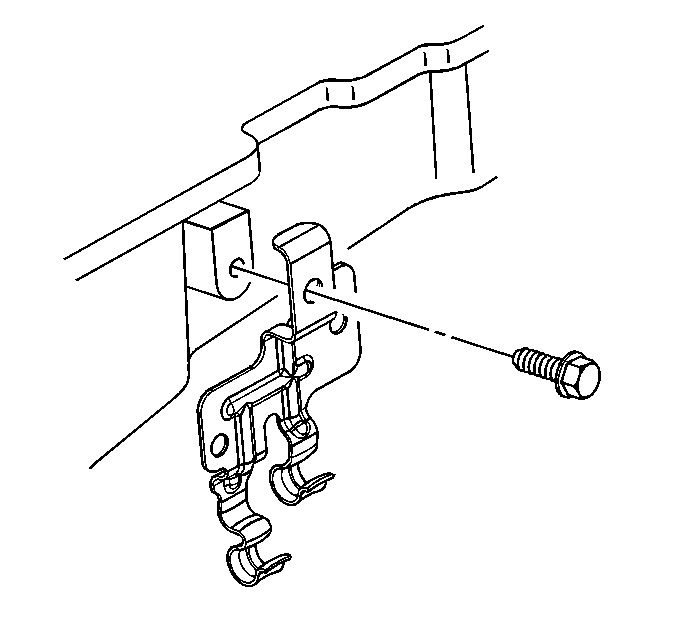
- Install the positive battery cable clip and bolt.
Tighten
Tighten the positive battery cable clip bolt to 9 N·m (80 lb in).
- Install the starter motor. Refer to
Starter Motor Replacement.
- Install the engine protection shield. Refer to
Engine Protection Shield Replacement.
Tighten
Tighten the oil pan skid plate bolts to 20 N·m (15 lb ft).
- Lower the vehicle.
- Install the ground cable to the engine block.
Tighten
Tighten the ground cable bolt to 25 N·m (18 lb ft).
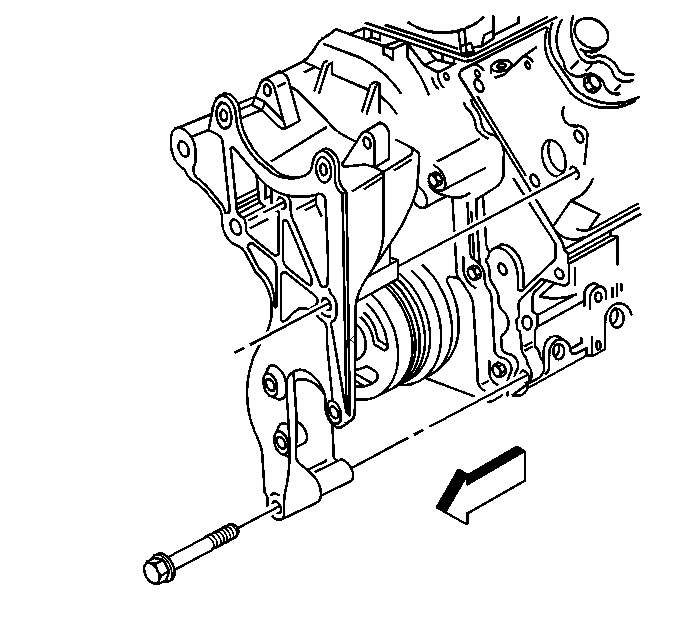
- Position the generator bracket to the front of the engine.
- Install the generator bracket bolts until snug.
- Install the rear power steering pump-to-engine block bolts.
Tighten
| • | Tighten the rear power steering pump bolt to 50 N·m (37 lb ft). |
| • | Tighten the generator bracket bolts to 50 N·m (37 lb ft). |
- Route the engine wiring harness to the lower engine area.
- Raise the vehicle.
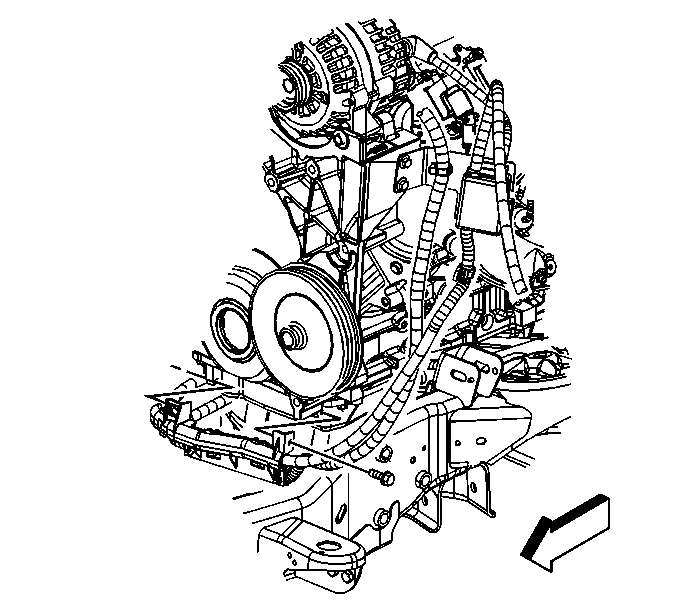
- Slide the channel pin into the oil pan tab.
- Install the battery cable channel bolt.
Tighten
Tighten the battery cable channel bolt to 12 N·m (106 lb in).
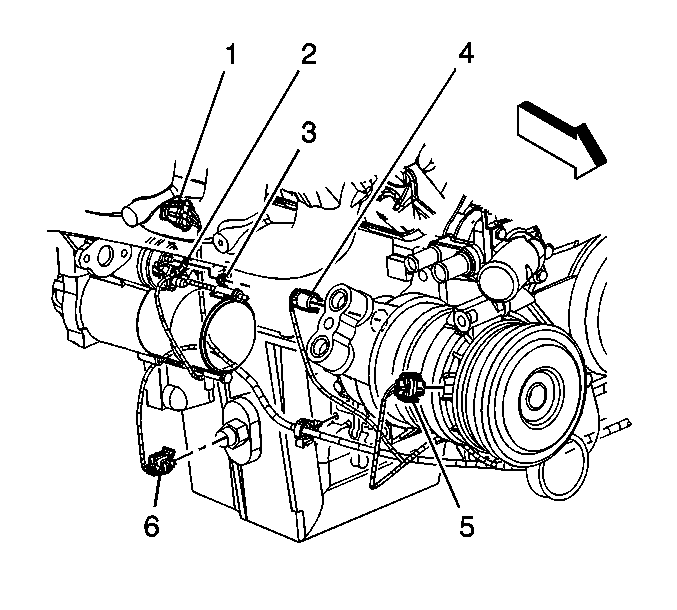
- Connect the following electrical connectors:
| • | The engine oil level sensor (6) |
| • | The coolant heater, if equipped |
- Lower the vehicle.
- Connect the fuel pipes.
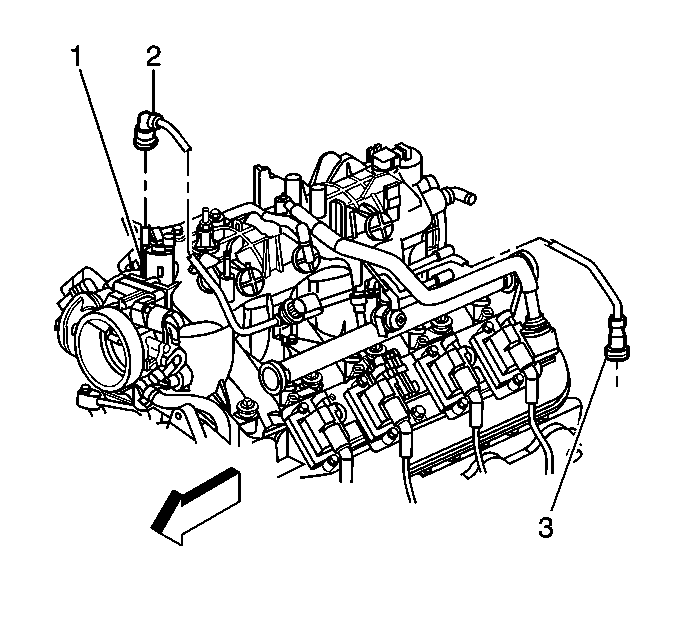
- Install the EVAP purge solenoid vent tube to the solenoid (1).
- Install the EVAP tube end (3) to the vapor pipe.
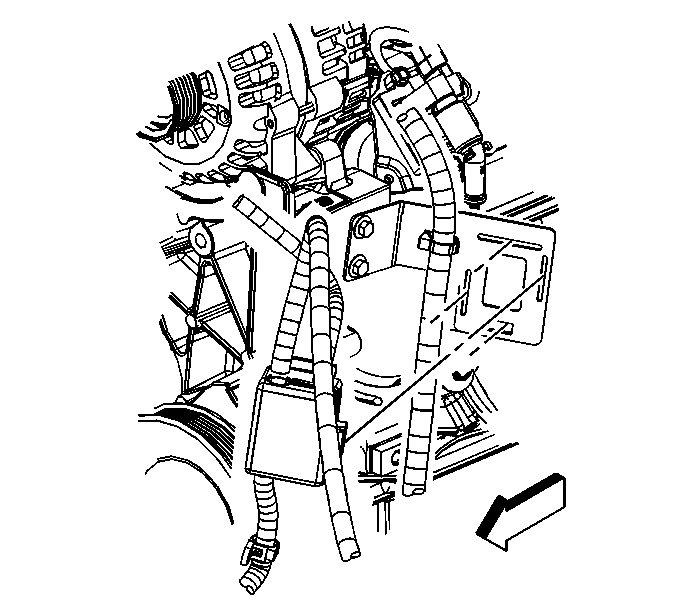
- Install the battery cable junction block to the junction block bracket.
- Clip all of the engine wiring harness clips to their correct location.
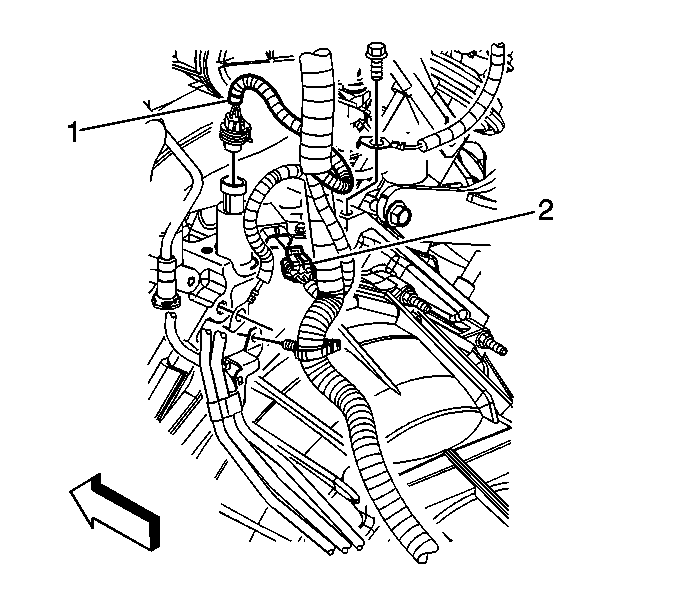
- Connect the following electrical connectors:
| • | Oil pressure sensor (1) |
- Position the harness ground and the engine ground strap to the block.
- Install the harness ground bolt at the left rear of the engine block.
- Position the harness ground to the block.
- Install the harness ground bolt at the right rear of the engine block.
Tighten
Tighten the harness ground bolts at the rear of the block to 16 N·m (12 lb ft).
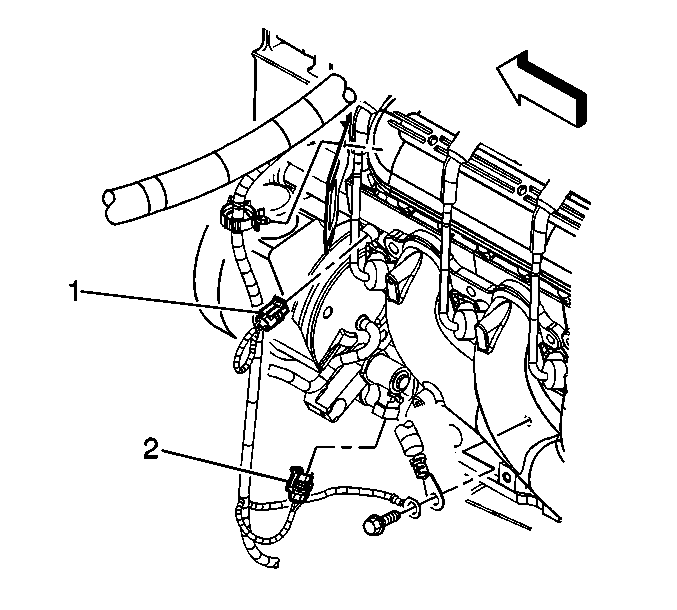
- Connect the following electrical connectors:
| • | Coolant temperature sensor (1) |
| • | Electronic variable orifice switch (2) |
- Position the harness ground and negative battery cable to the block.
- Install the harness ground bolt.
Tighten
Tighten the harness ground bolt to 25 N·m (18 lb ft).
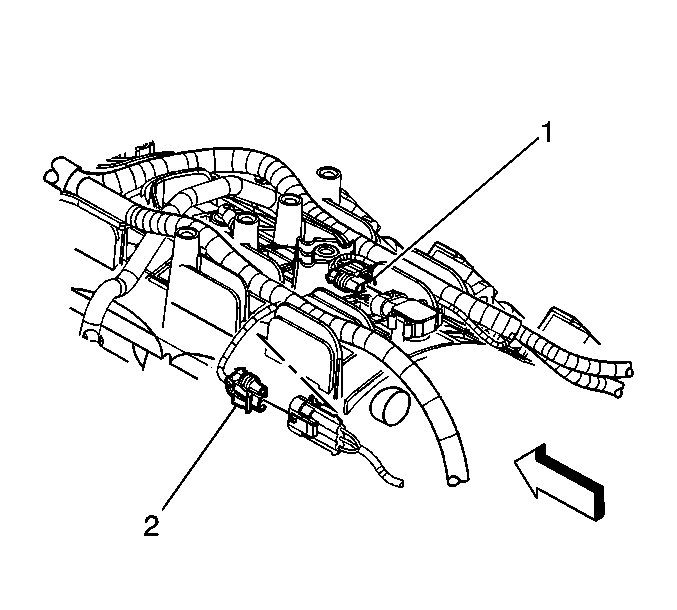
- Connect the MAP sensor (1) and knock sensor (2) electrical connectors.
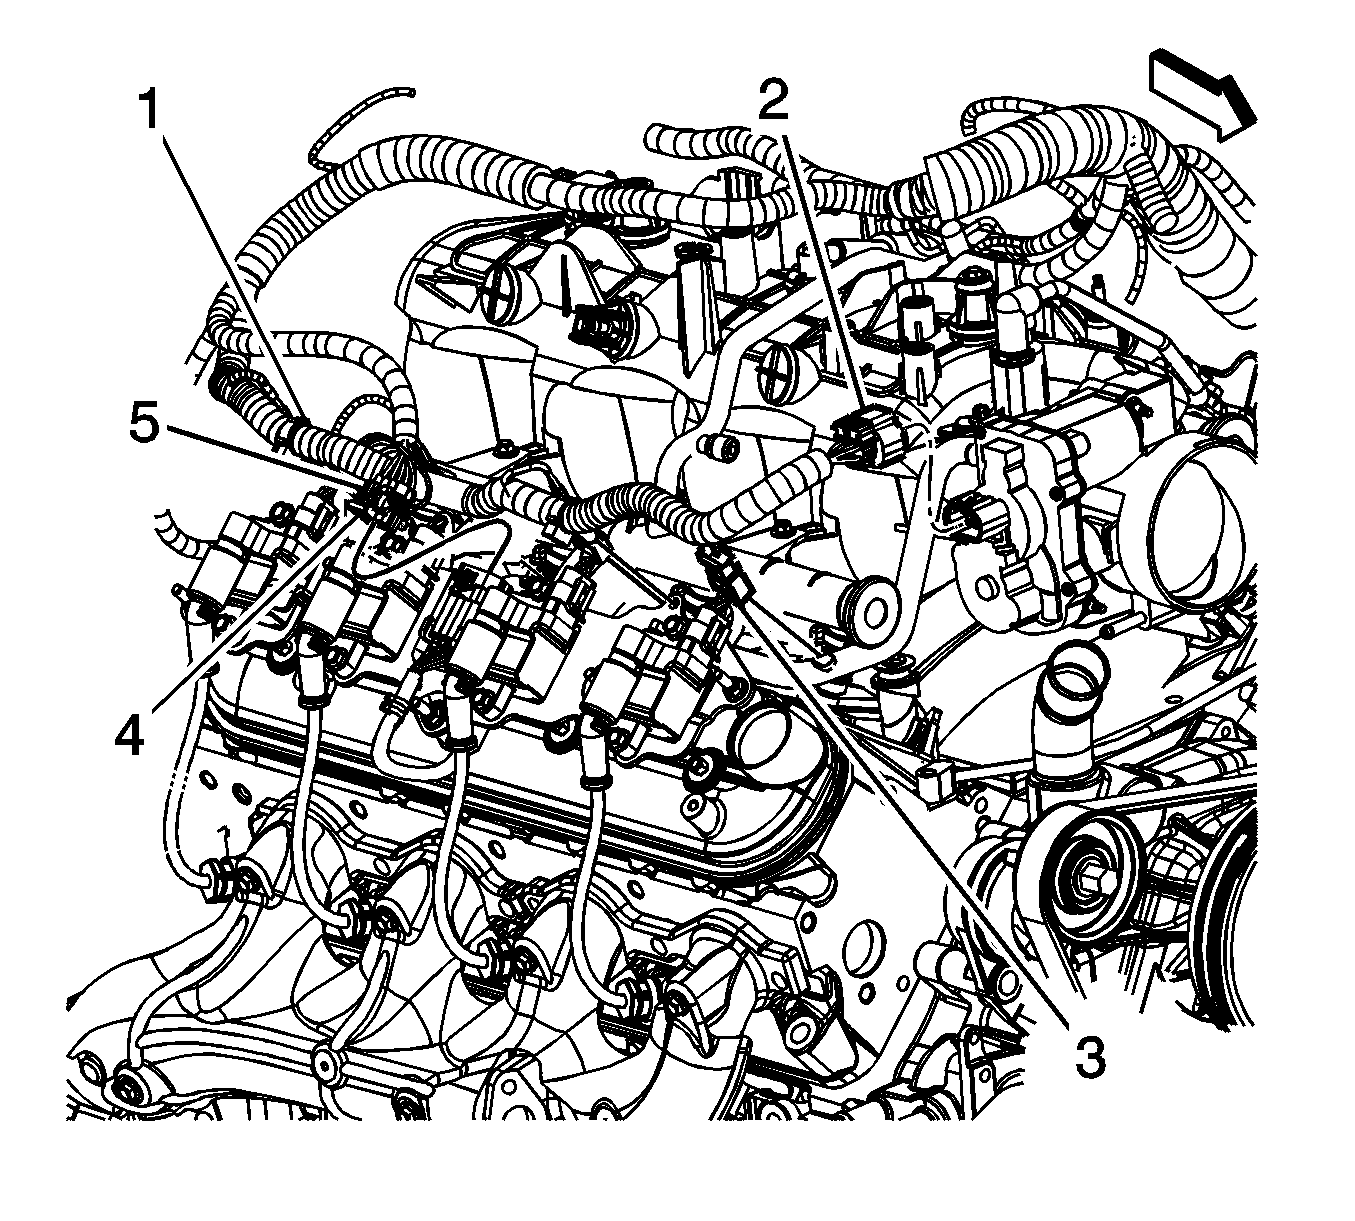
- Connect the following electrical connectors:
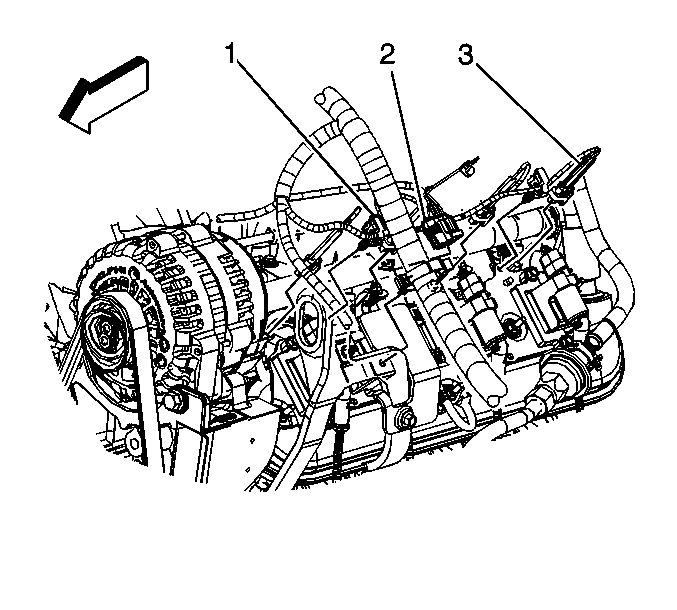
- Connect the main coil harness (2) and fuel injector (3) electrical connectors on the left side.
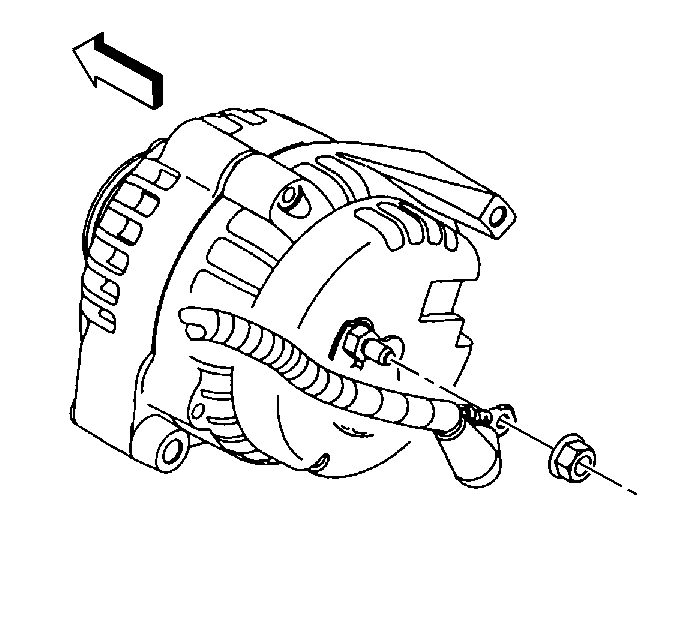
- Install the generator cable to the generator, perform the following:
| 52.1. | Install the generator cable. |
| 52.2. | Install the generator cable nut to the terminal stud. |
Tighten
Tighten the generator output terminal nut to 9 N·m (80 lb in).
| 52.3. | Slide the boot over the terminal stud. |
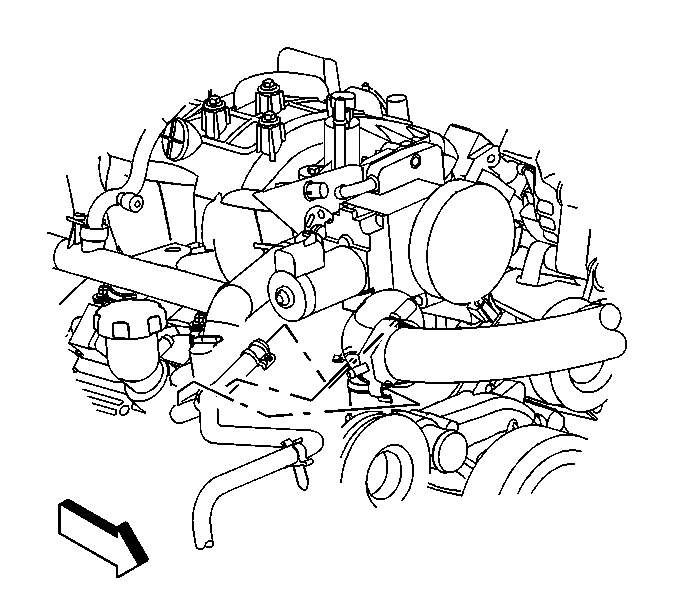
- Install the radiator vent inlet hose to the throttle body.
- Position the vent inlet hose clamp at the throttle body.
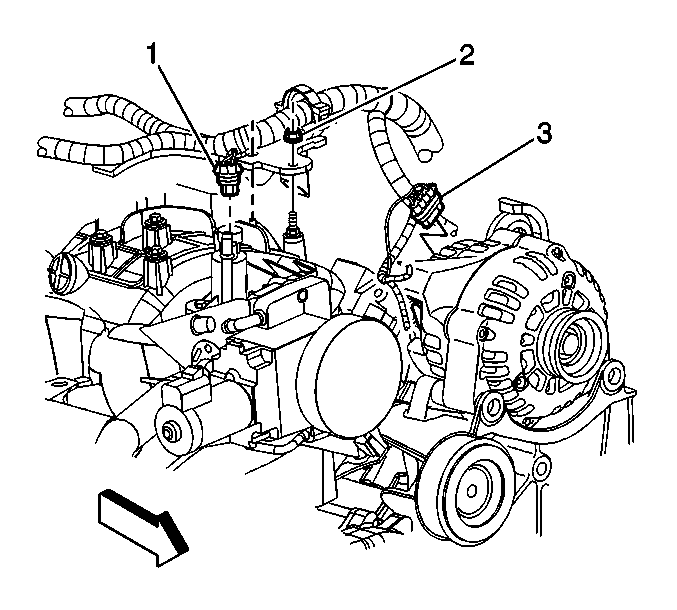
- Install the engine wiring harness bracket and nut (2).
Tighten
Tighten the engine wiring harness bracket nut to 5 N·m (44 lb in).
- Connect the following electrical connectors:
| • | EVAP canister purge solenoid (1) |
- Install the engine sight shield retainer and bolts.
Tighten
Tighten the engine sight shield retainer bolts to 5 N·m (44 lb in).
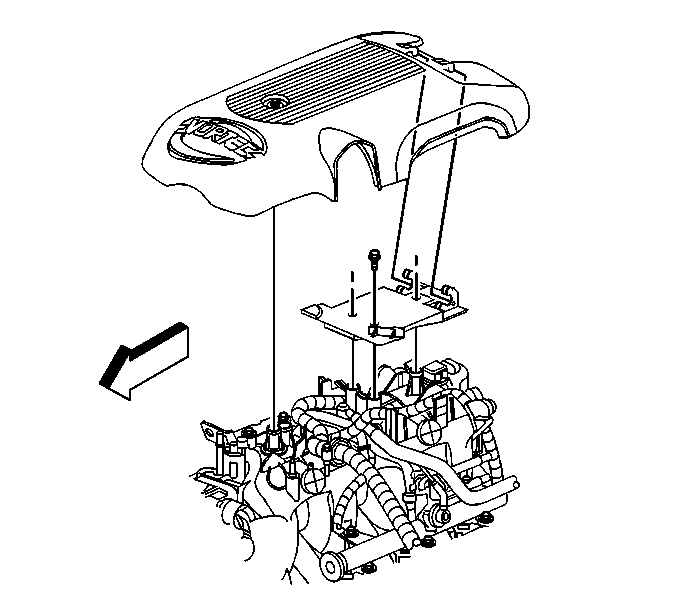
- Install the engine sight shield to the retainer.
- Tighten the engine sight shield bolt.
Tighten
Tighten the bolt to 10 N·m (89 lb in).
- Install the heater hoses. Refer to
Heater Inlet Hose Replacement and
Heater Outlet Hose Replacement.
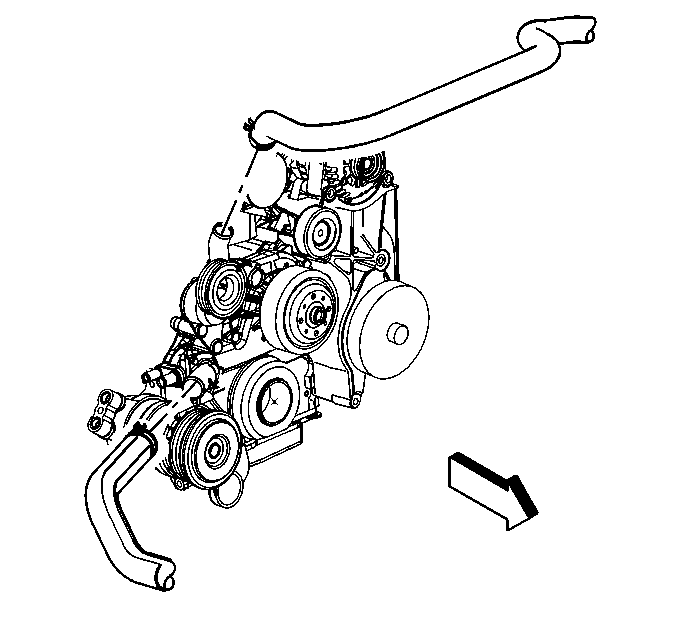
- Install the radiator outlet hose to the water pump.
- Position the radiator outlet hose clamp at the water pump.
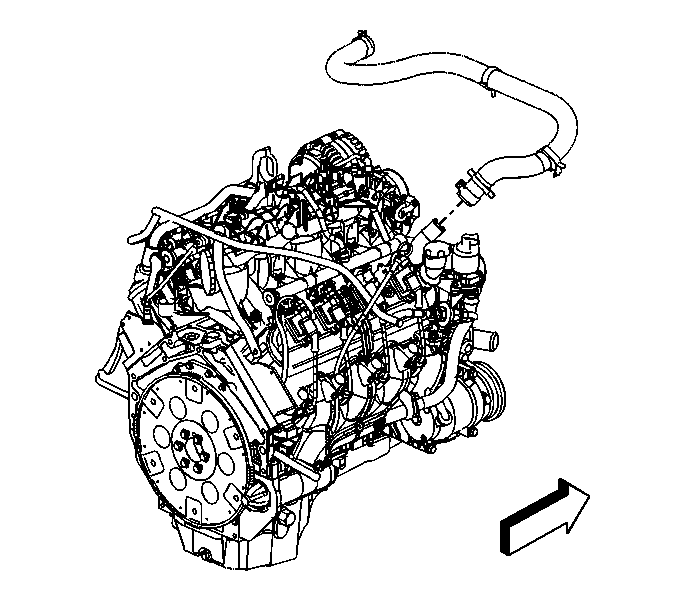
- Install the radiator inlet hose to the water pump.
- Position the radiator inlet hose clamp at the water pump.
- Install the radiator supports. Refer to
Radiator Support Replacement.
- Install the A/C compressor. Refer to
Air Conditioning Compressor Replacement.
- Install the hood. Refer to
Hood Replacement.
- Fill the crankcase with the proper quantity and grade of engine oil. Refer to
Approximate Fluid Capacities or
Fluid and Lubricant Recommendations.
- Perform the CKP system variation learn procedure. Refer to
Crankshaft Position System Variation Learn.
Note: After an overhaul, the engine should be tested. Use the following procedure after the engine is installed in the vehicle.
| 69.1. | Disable the ignition system. |
| 69.2. | Crank the engine several times. Listen for any unusual noises or evidence that parts are binding. |
| 69.3. | Enable the ignition system. |
| 69.4. | Start the engine and listen for unusual noises. |
| 69.5. | Check the vehicle oil pressure gauge or light and confirm that the engine has acceptable oil pressure. |
| 69.6. | Run the engine speed at about 1000 RPM until the engine has reached normal operating temperature. |
| 69.7. | Listen for sticking lifter and other unusual noises. |
| 69.8. | Inspect for fuel, oil and/or coolant leaks while the engine is running. |
| 69.9. | Perform a final inspection for the proper engine oil and coolant levels. |
- Close the hood.
