Oil Pan Replacement LS9
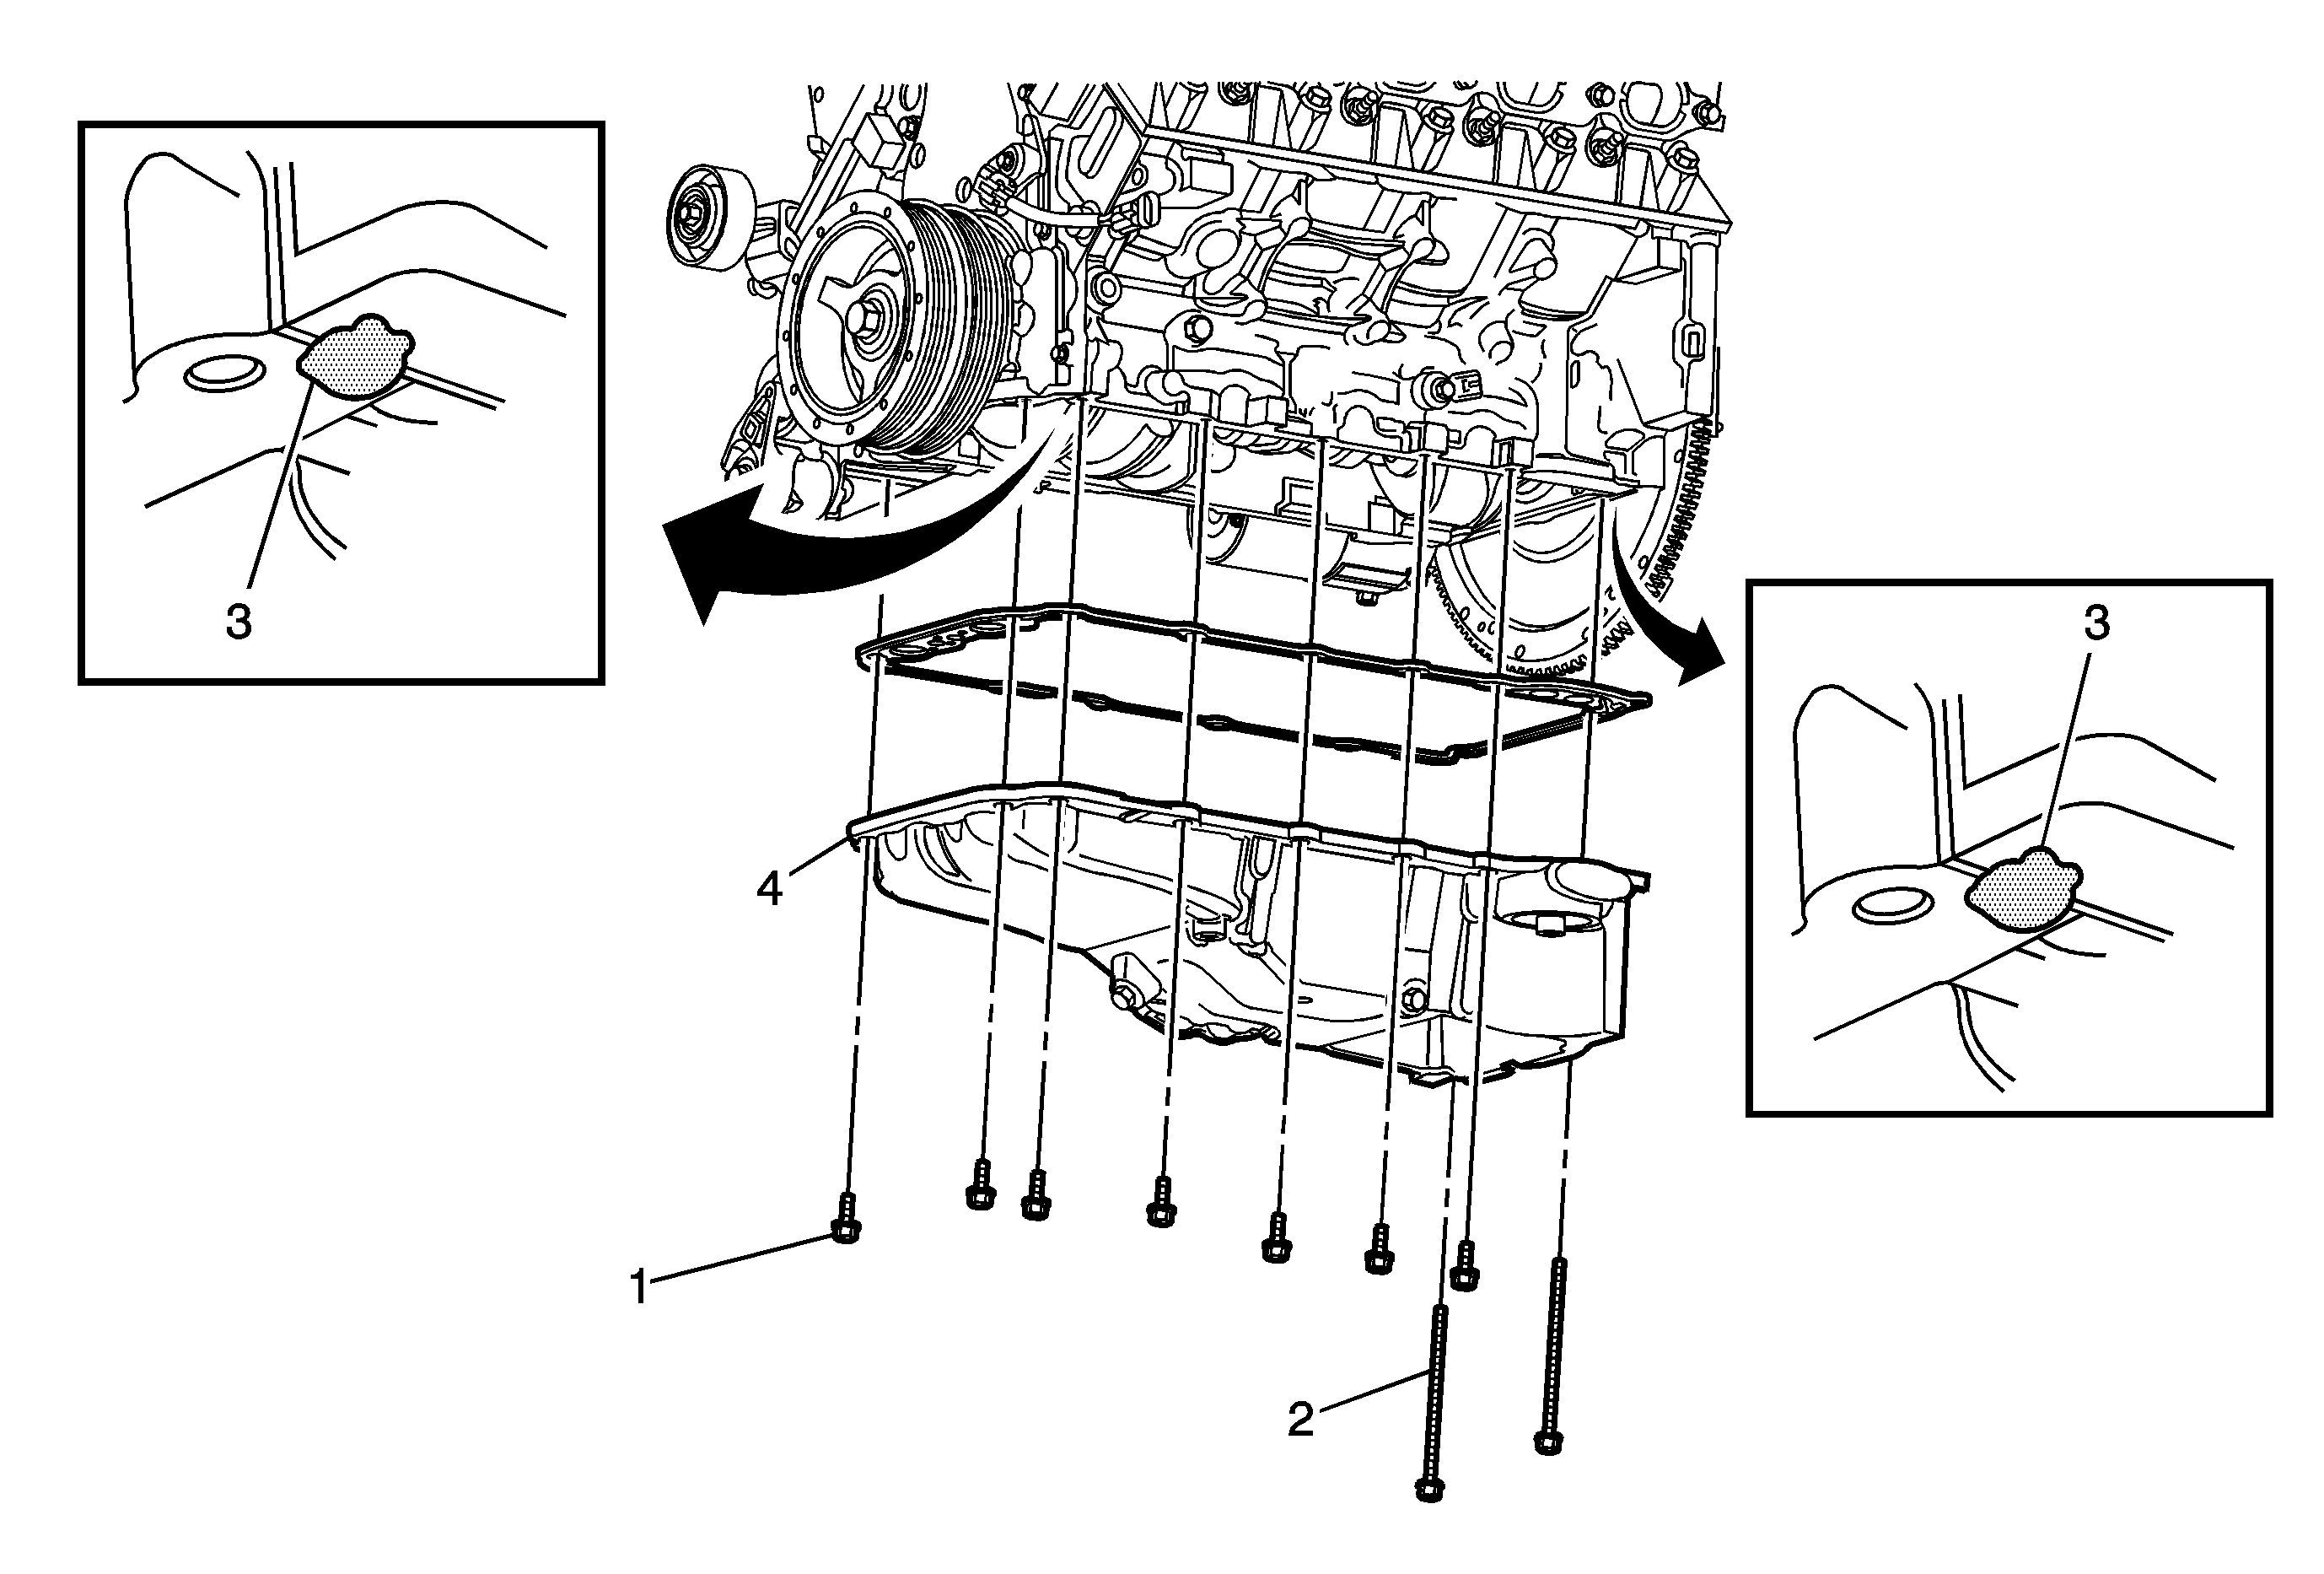
Callout | Component Name | ||||
|---|---|---|---|---|---|
Preliminary Procedures
| |||||
1 | Oil Pan Replacement Fastener (Qty: 12) Caution: Refer to Fastener Caution in the Preface section. Tighten | ||||
2 | Oil Pan Replacement Fastener (Qty: 2) Tighten | ||||
3 | Oil Pan Sealant Procedure
Tip
| ||||
4 | Oil Pan Procedure
| ||||
Oil Pan Replacement w/o LS9
Removal Procedure
- Remove the front suspension crossmember. Refer to Front Suspension Crossmember Replacement.
- Remove the oil filter. Refer to Engine Oil and Oil Filter Replacement.
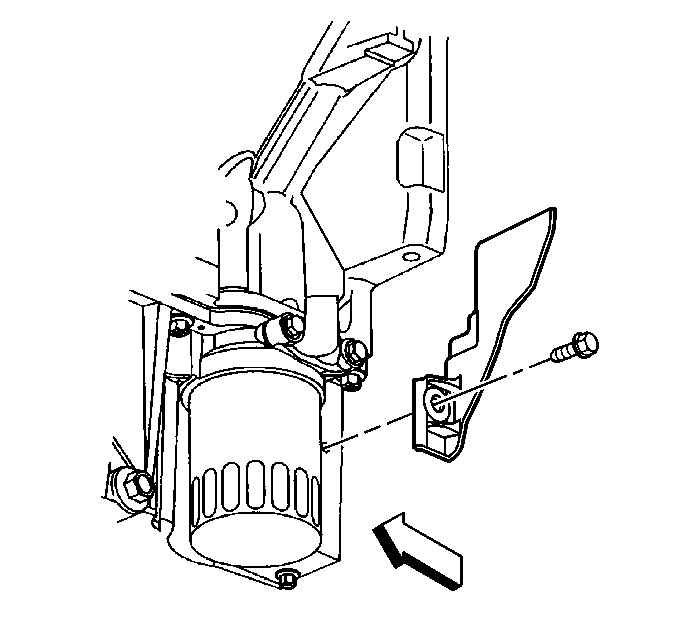
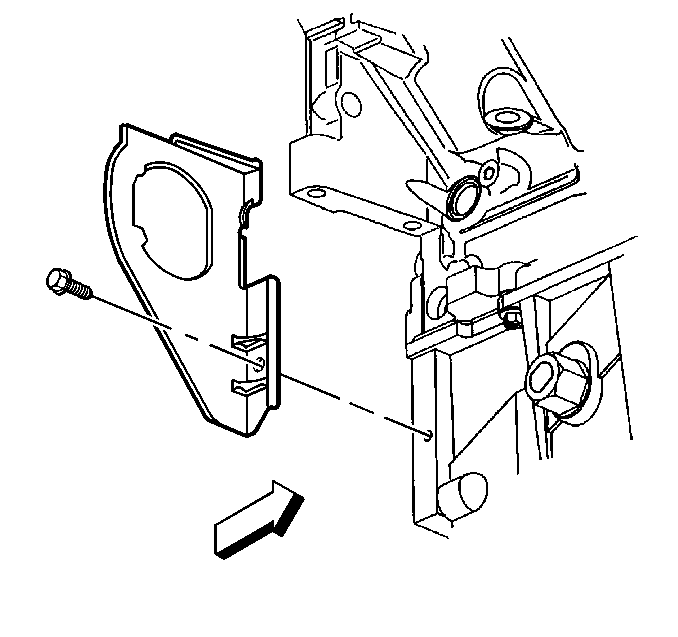
- Remove the left rear transmission cover.
- Remove the starter motor assembly. Refer to Starter Motor Replacement.
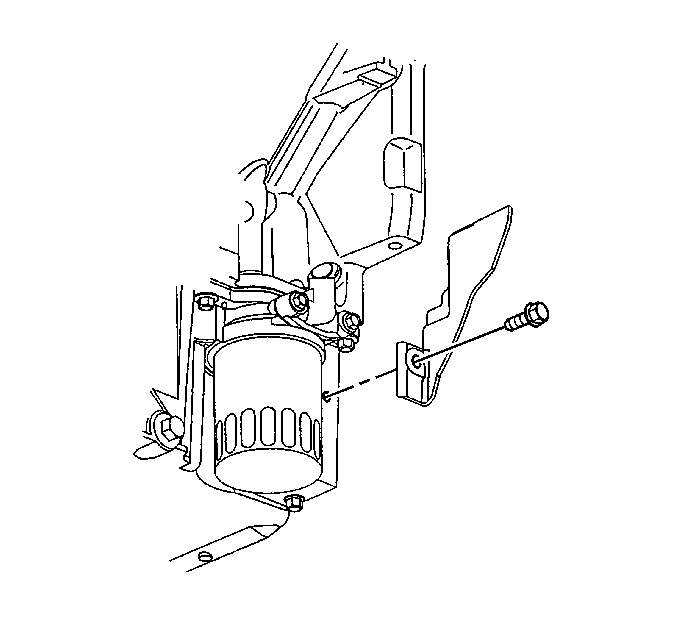
- Remove the right transmission cover.
- Disconnect the engine oil level sensor electrical connector (2).
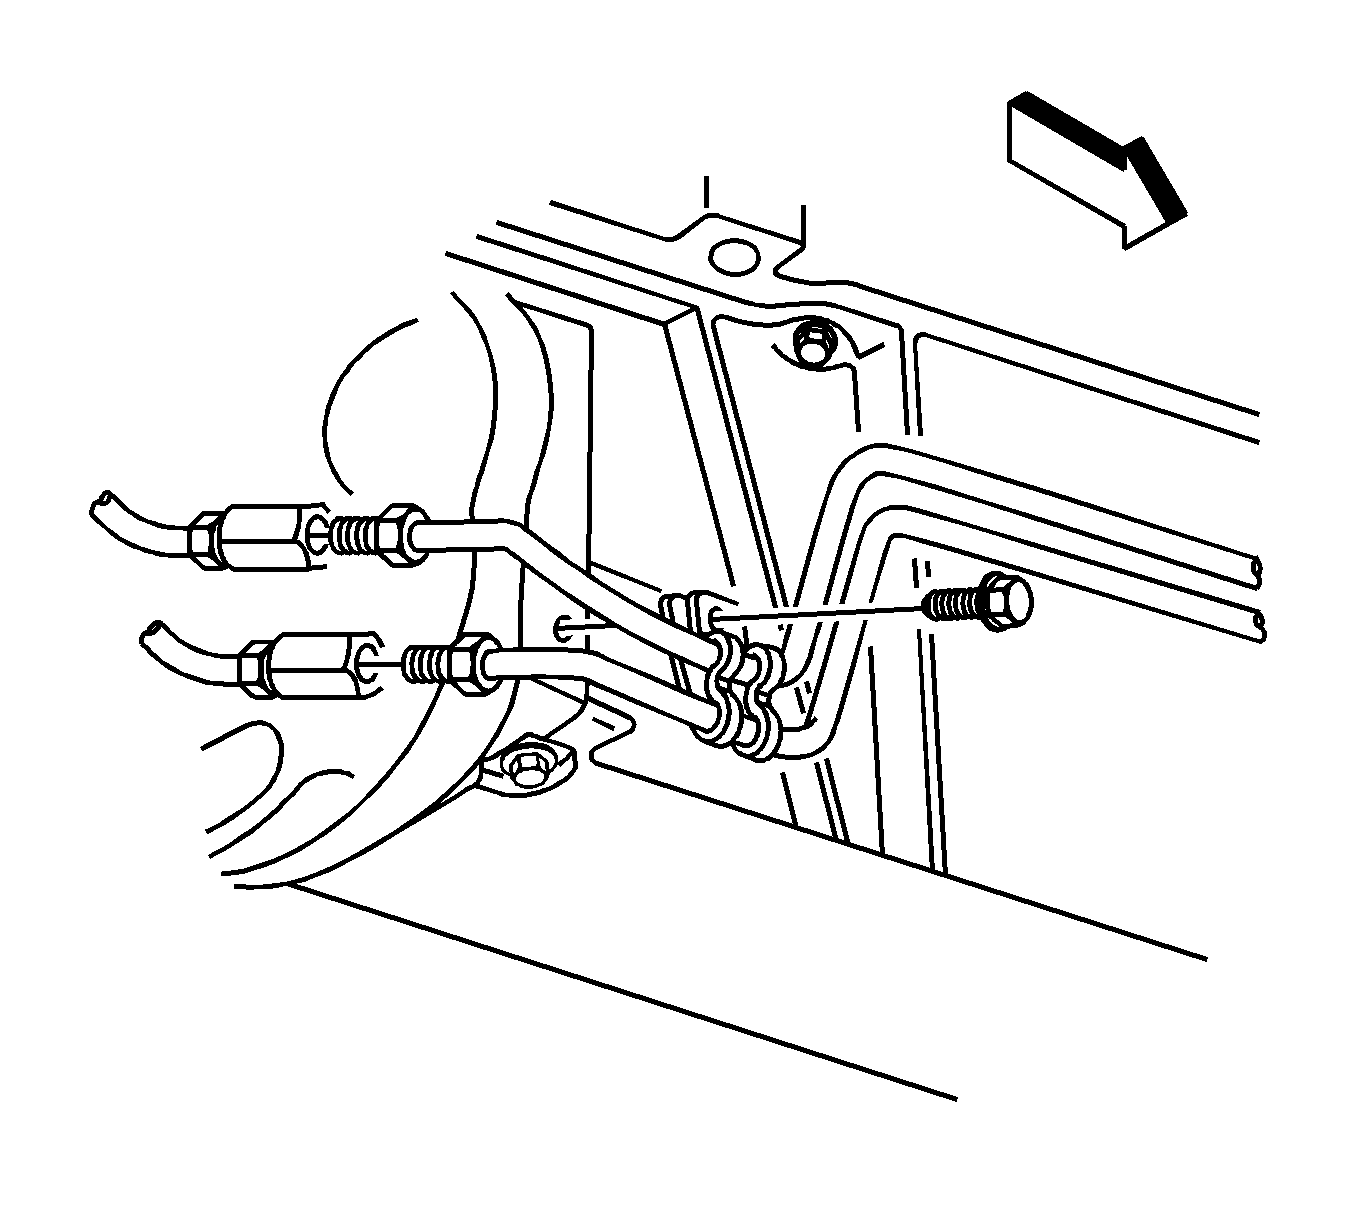
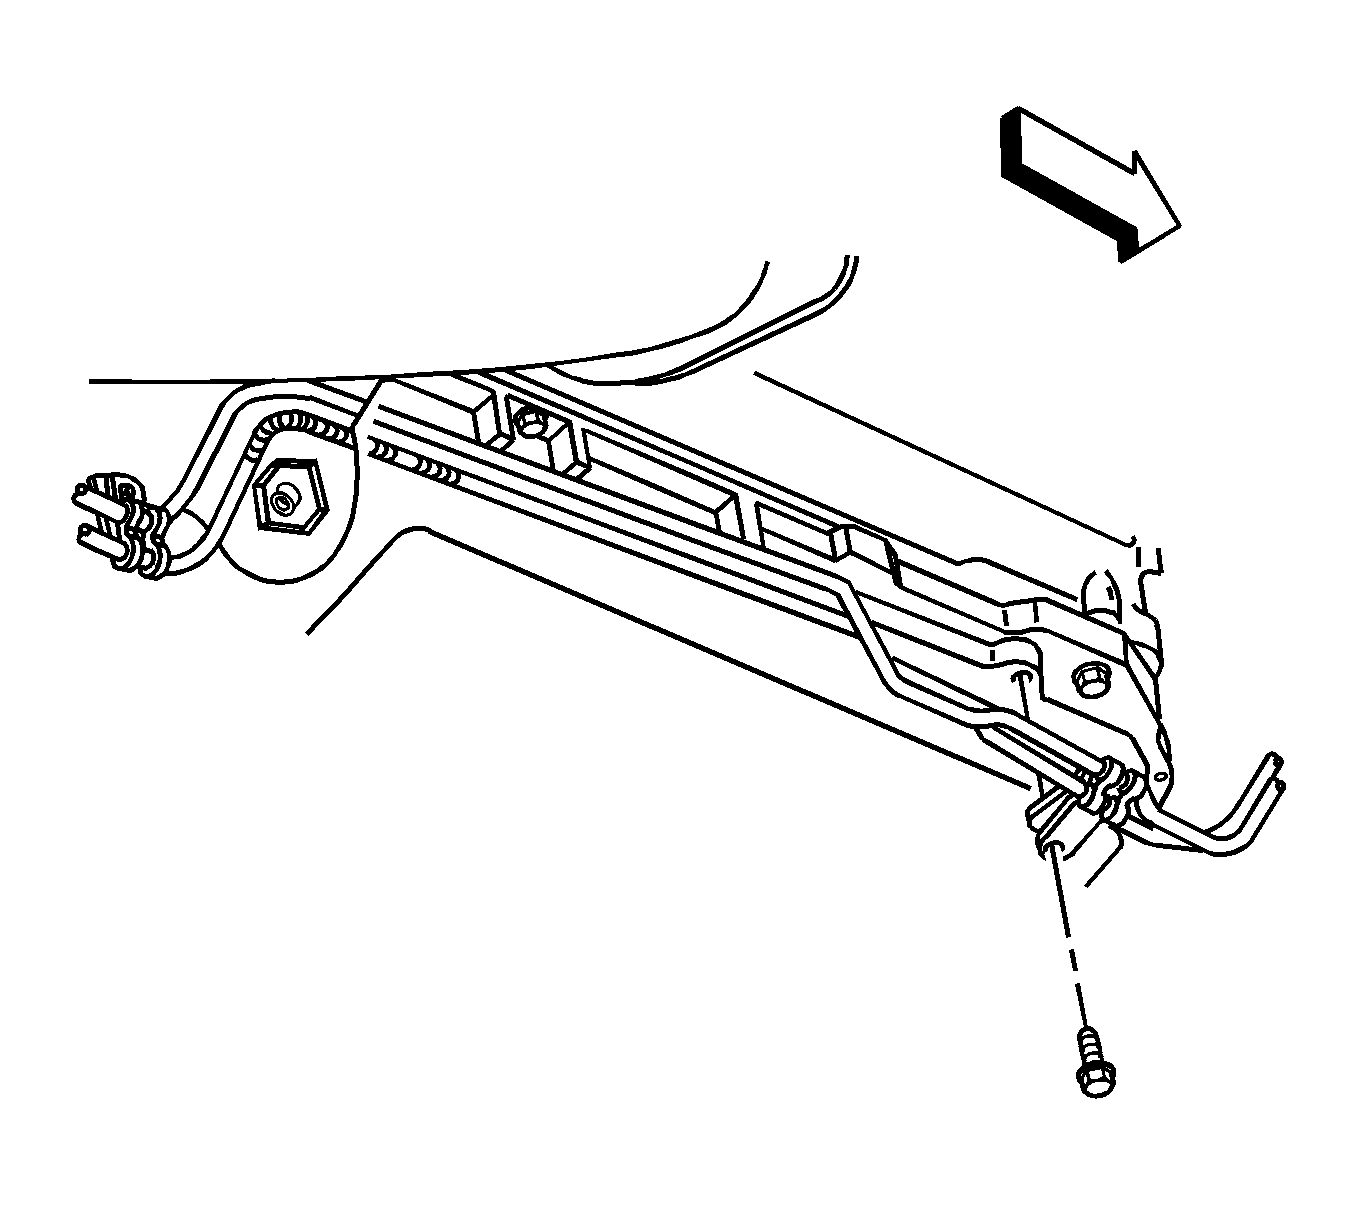
- If equipped, remove the transmission lines from the rear of the oil pan.
- If equipped, remove the transmission lines from the front of the oil pan.
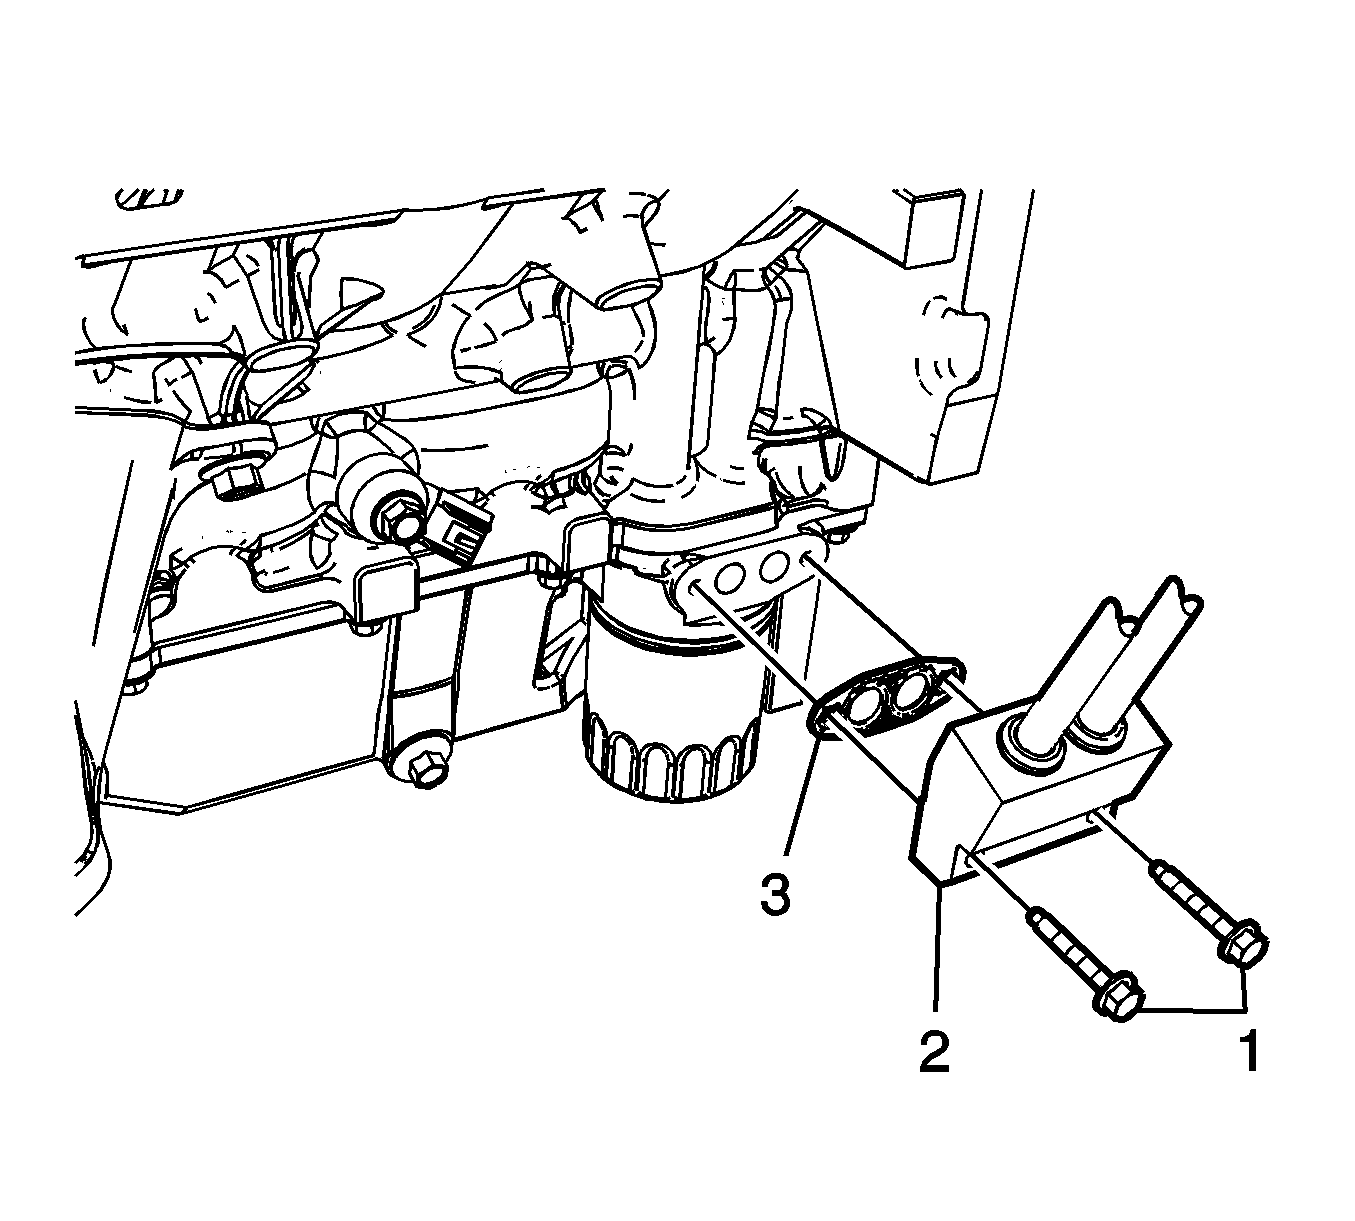
- Remove the 2 oil cooler bolts (1) and separate the oil cooler (2) from the oil pan. Discard the oil cooler seal (3).
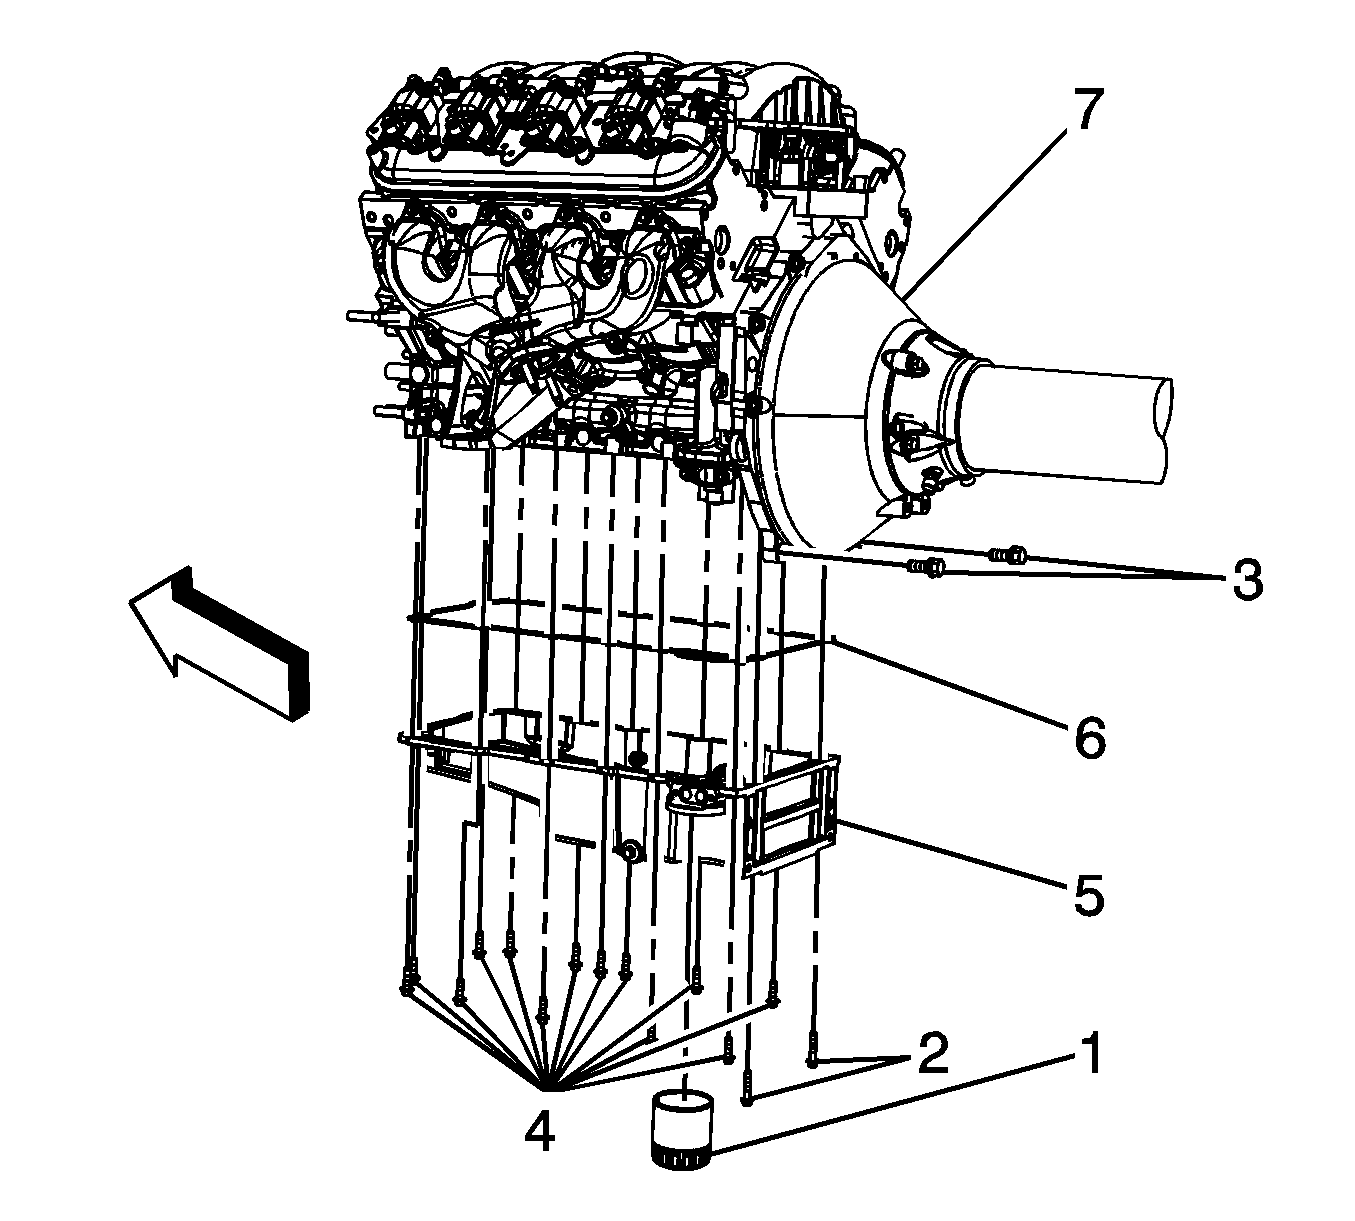
- Remove the rear oil pan bolts (2).
- Remove the bolts from the bell housing to the oil pan (3).
- Remove the remaining oil pan bolts (4).
- Remove the oil pan (5) from the engine block (7).
- Remove the oil pan gasket (6) from the engine block (7).

Note: It maybe necessary to rotate the oil pan to remove to gain enough clearance to clear the oil pump pick up tube.
Installation Procedure
- Apply a 5 mm (0.2 in) bead of sealant 20 mm (0.8 in) long to the engine block. Refer to Adhesives, Fluids, Lubricants, and Sealers for the correct part number. Apply the sealant directly onto the tabs of the front cover gasket that protrude into the oil pan surface.
- Apply a 5 mm (0.2 in) bead of sealant 20 mm (0.8 in) long to the engine block. Refer to Adhesives, Fluids, Lubricants, and Sealers for the correct part number. Apply the sealant directly onto the tabs of the rear cover gasket that protrude into the oil pan surface.
- Position the oil pan gasket (6) on the oil pan (5).
- Using 2 bolts (4) to hold the oil pan gasket in place, install the oil pan assembly (5, 6) to the engine block (7).
- Finger tighten the 2 bolts (4) to hold the oil pan assembly (5) in place.
- Install the mounting bolts (2 and 3) for the oil pan assembly.
- Tighten the oil pan mounting bolts (2) M6 to 12 N·m (106 lb in).
- Tighten the oil pan mounting bolts (4) M8 to 25 N·m (18 lb ft).
- Using a new oil cooler seal (3), install the oil cooler (2) and 2 bolts (1) to the oil pan.
- Reconnect the engine oil level sensor (2) electrical connector.
- Install the right transmission cover and bolt.
- If equipped, install the front automatic transmission cooler line retainer and bolt.
- If equipped, install the rear automatic transmission cooler lines retainer and bolt.
- Install the starter assembly. Refer to Starter Motor Replacement.
- Install the left rear transmission cover and bolt.
- Install the oil filter. Refer to Engine Oil and Oil Filter Replacement.
- Install the front suspension crossmember. Refer to Front Suspension Crossmember Replacement.
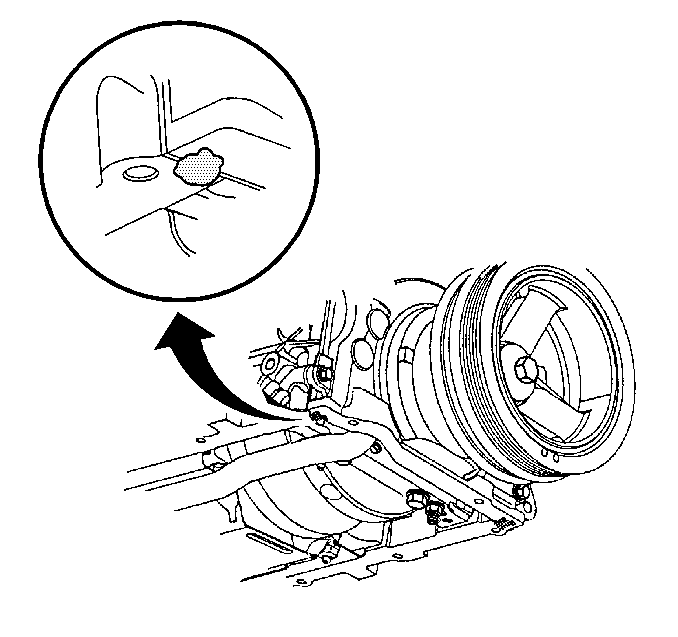
Note:
• The alignment of the structural oil pan is critical. The rear bolt hole locations of the oil pan provide mounting points for the transmission housing. To ensure the rigidity of the powertrain and correct transmission alignment, it is important that
the rear of the block and the rear of the oil pan are flush, or even. The rear of the oil pan must NEVER protrude beyond the engine block and transmission housing plane. • Do not use the oil pan gasket again. • It is not necessary to rivet the NEW gasket to the oil pan.
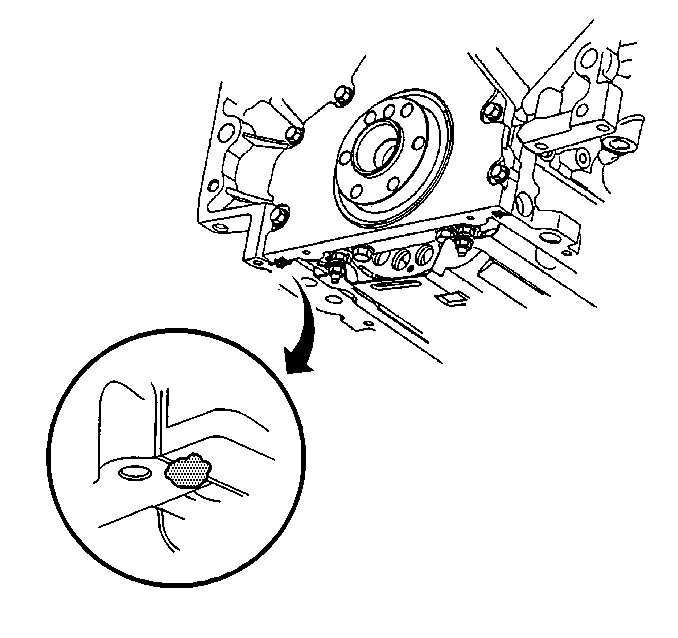

Caution: Refer to Fastener Caution in the Preface section.
Tighten

Tighten
Tighten the oil cooler bolts to 12 N·m (106 lb in).


Tighten
Tighten the transmission cover bolt to 12 N·m (106 lb in).

Tighten
Tighten the automatic transmission cooler line retainer and bolts to 12 N·m (106 lb in).

Tighten
Tighten the automatic transmission cooler line retainer and bolts to 12 N·m (106 lb in).
