Removal Procedure
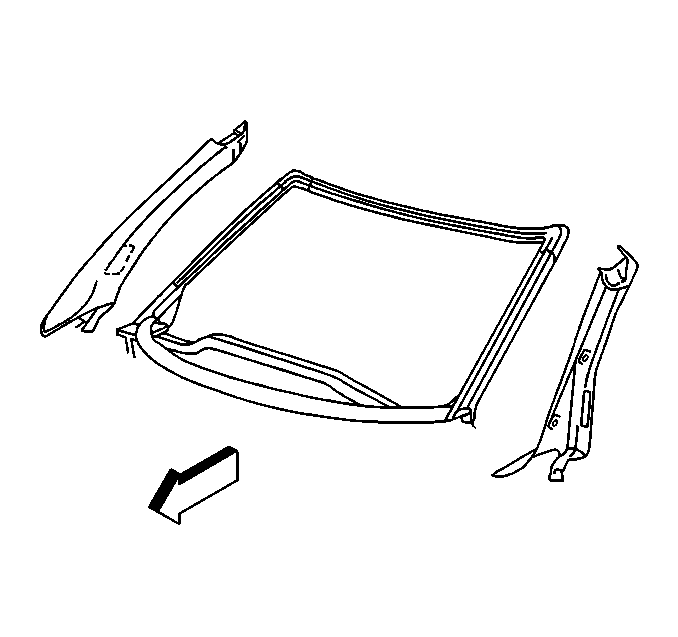
- Remove the windshield reveal molding. Set the molding aside.
- Remove the rear window. Refer to Rear Window Replacement in Stationary Windows.
- Remove the 2 sun visors. Refer to Sunshade Replacement in Interior Trim.
- Remove the windshield side garnish moldings and retainers.
- Remove 2 bolts and the seat belt guides from the roof bow.
- Remove 3 headliner fasteners.
- Remove the headliner.
- Remove the roof weatherstrips and moldings. Refer to Weatherstrip Side Retainer Replacement in Stationary Windows.
- Remove the side reveal molding. Refer to Windshield Side Reveal Molding Replacement in Stationary Windows.
- Protect the interior of the vehicle with plastic sheeting.
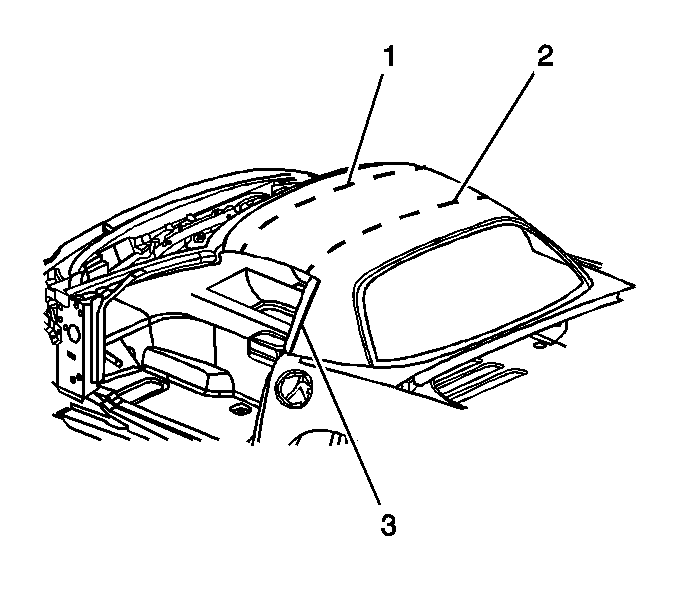
- Make a rough cut the width of the roof, 100 mm (4 in) from the windshield front edge (1) in order to gain access to the bonded areas. Refer to Roof Description .
- Make a rough cut the width of the roof, 150 mm (6 in) forward of the rear glass (2) in order to gain access to the bonded areas. Do NOT cut into the roof bow (3).
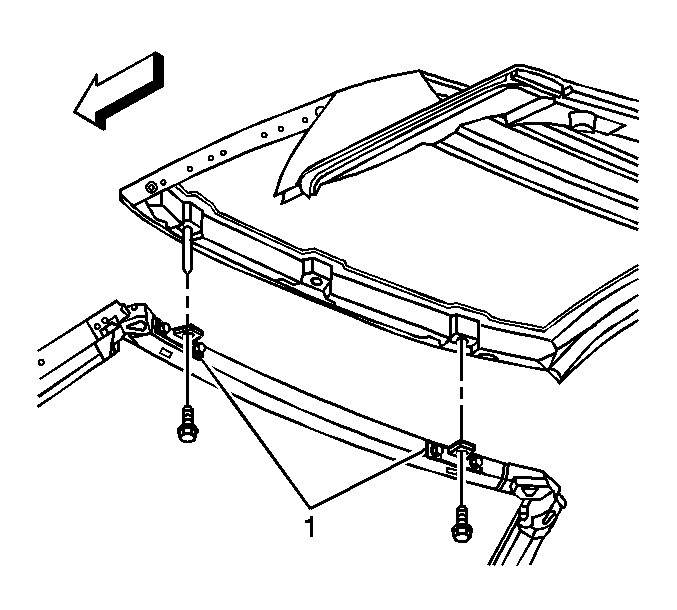
- Mark the location of 2 brackets (1) on the front edge of the roof bow, Remove the brackets.
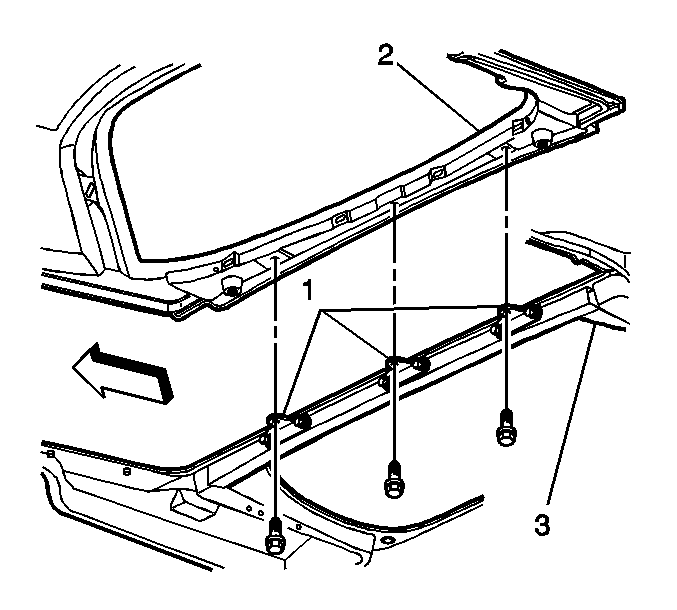
- Mark the location of 3 brackets (1) at the front edge of the surround panel (3). Remove the brackets.
- Mark the location of 2 brackets on the opposite sides of the roof bow. Remove the brackets.
- Use a heat gun to debond the roof panel along all remaining seams. If the outer panel is separating from the inner roof panel, apply more heat.
- Use a pneumatic knife to cut the front edge of the roof from the windshield header and the rear edge of the roof at the surround panel.
- Pry up the roof panel along the roof bow, along the windshield and the front edge of the deck lid.
- Note the location of butyl and clean excess urethane from all panels to prepare for installation.
Important: Use caution when prying off the panel to prevent the inner brace from separating.
Installation Procedure
- Prepare the mating surfaces.
- Remove the tape and all tape residue from the service part along all bonded surfaces.
- Install 3 rear brackets along the rear edge of the roof bow.
- Prepare the bonding surfaces using a scuff pad. Clean the bond area with a lintfree rag, using a water-based cleaner.
- Prime bare metal areas and the SMC bond areas using the urethane adhesive kit, GM P/N #12346284.
- Apply a butyl sealer (1) to the service part as indicated.
- Apply urethane (2) to the vehicle and in recommended locations along the service part.
- With the aid of a helper, install the service part roof.
- From the outside of the vehicle, push down on the top of the roof to create a flush fit with the surrounding panels. From the inside of the vehicle, tighten the fasteners.
- Reinstall the hardware along the windows and along the windshield side pillar.
- Install the side reveal molding. Refer to Windshield Side Reveal Molding Replacement in Stationary Windows.
- Install new roof weatherstrip side retainers and replace the moldings. Refer to Weatherstrip Side Retainer Replacement in Stationary Windows.
- Install the headliner through the rear window opening. Fasten the headliner in place.
- Install 3 headliner fasteners.
- Install the seat belt upper guides. Refer to Seat Belt Retractor Replacement - Left Front and to Seat Belt Retractor Replacement - Right Front in Seat Belts.
- Install the windshield side garnish moldings and retainers.
- Install 2 sun visors. Refer to Sunshade Replacement in Interior Trim.
- Install the rear window. Refer to Rear Window Replacement in Stationary Windows.
- Install the window reveal molding.
- Test the roof panel for water leaks.

Important: Prior to refinishing, refer to GM 4901MD-99 Refinish Manual for recommended products. Do NOT combine paint systems. Refer to the paint manufacturer's recommendations.
| • | Prime the small bare metal areas along the windshield header and the roof bow with the pinch-weld flange primer. |
| • | For large bare metal areas, larger than 4x4 in, use a 2-part catalyzed primer. |
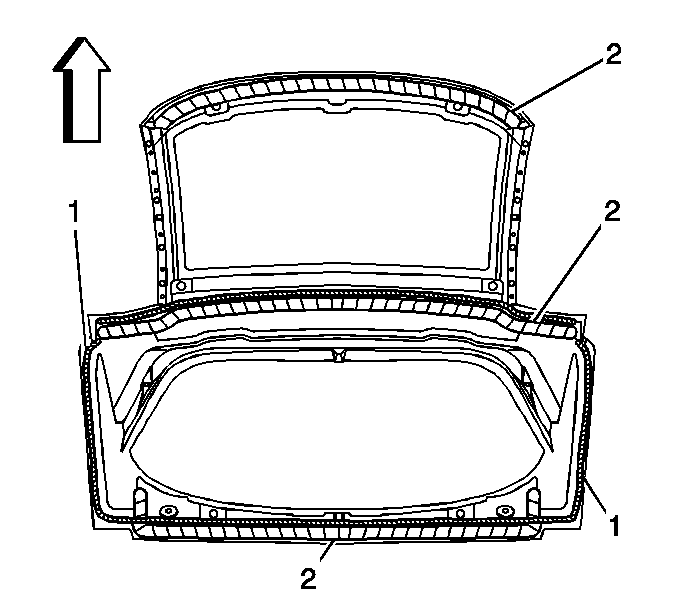

Important: The quarter panels must be in the body position before you insert the roof panel. Place the deck lid in the open position.
Notice: Use the correct fastener in the correct location. Replacement fasteners must be the correct part number for that application. Fasteners requiring replacement or fasteners requiring the use of thread locking compound or sealant are identified in the service procedure. Do not use paints, lubricants, or corrosion inhibitors on fasteners or fastener joint surfaces unless specified. These coatings affect fastener torque and joint clamping force and may damage the fastener. Use the correct tightening sequence and specifications when installing fasteners in order to avoid damage to parts and systems.

