For 1990-2009 cars only
Removal Procedure
There are three slightly different design weatherstrips
| • | Design (1) weatherstrip does not have the drip extension or the clip. |
| • | Design (2) has the drip extension and the clip. |
| • | Design (3) has the drip extension but not the clip. |
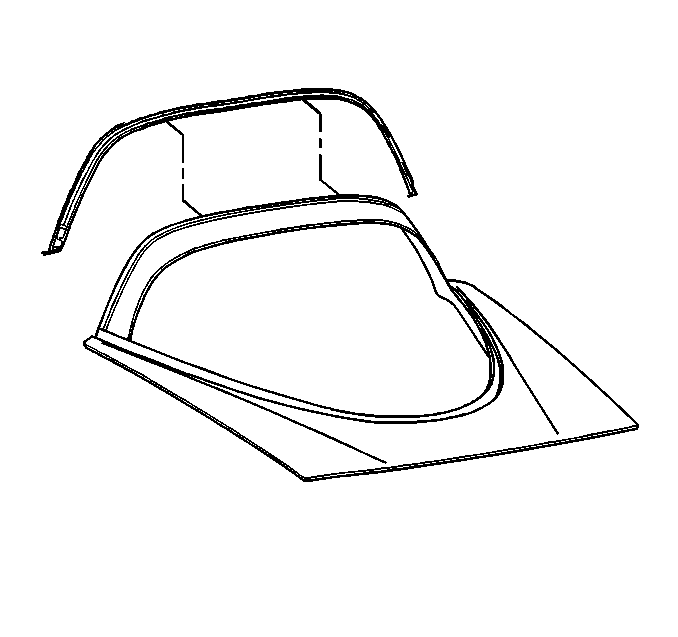
- Remove the rear compartment lift window panel and place the panel on a clean flat protective surface. Refer to Rear Compartment Lift Window Panel Replacement .
- Remove the weatherstrip.
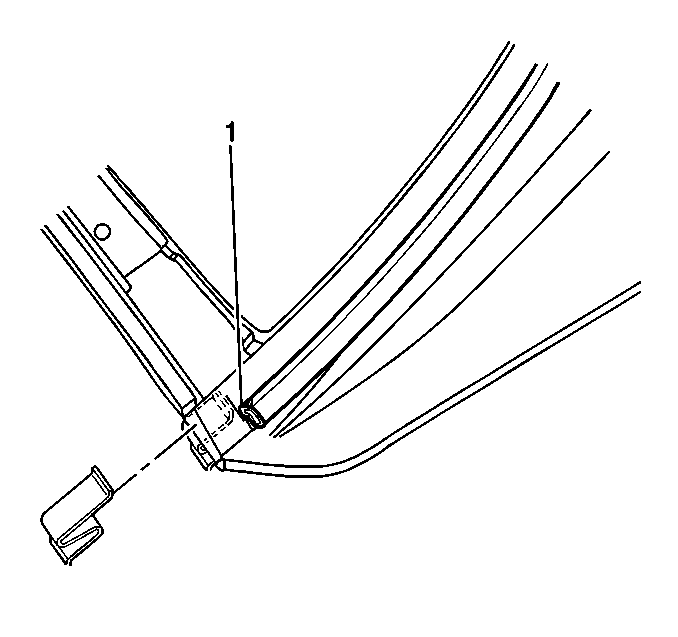
- Remove the old weatherstrip retaining spring clips if replacing the clips (design 2 weatherstrip).
- Clean the panel surface removing all traces of the old weatherstrip.

Pull the weatherstrip from the panel.
Installation Procedure
- Install a spring clip to the right and left side of the lift window panel aligning the lower edge of the clip with the upper edge of the auxiliary seal (1) (design 2).
- Apply a thin continious bead of weatherstrip sealant inside the forward lip of the lid.
- Apply a thin bead of sealant, on the lower side of the lip, from the corners up aproximately 400 mm (16 in)
- Position the weatherstrip to the panel.
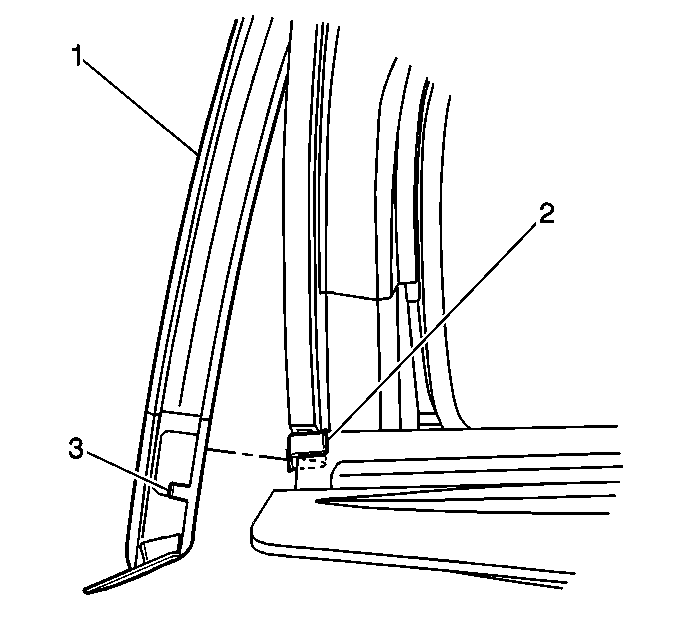
- Align the small notch (3) near the end of the weatherstrip over the edge of the lift window panel (design 2 and 3).
- Insert the flange of the weatherstrip into the spring clip (2) (design 2).
- Install the remainder of the weatherstrip (1).
- Install the lift window panel. Refer to Rear Compartment Lift Window Panel Replacement .


| • | The curved surface of the weatherstrip must point up. |
| • | Work from each end toward the centerline. |

