For 1990-2009 cars only
Removal Procedure
- Remove the seat. Refer to Seat Replacement - Power with Adjuster or to Manual Seat Replacement .
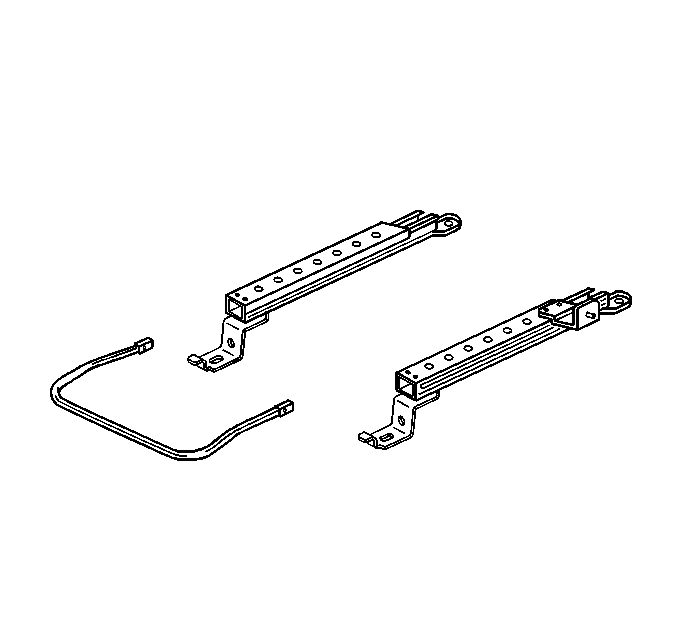
- For vehicles with non-power seats, remove the adjuster adjustment bar.
- Remove the seat cushion cover. Refer to Seat Cushion Trim Cover and Pad Replacement .
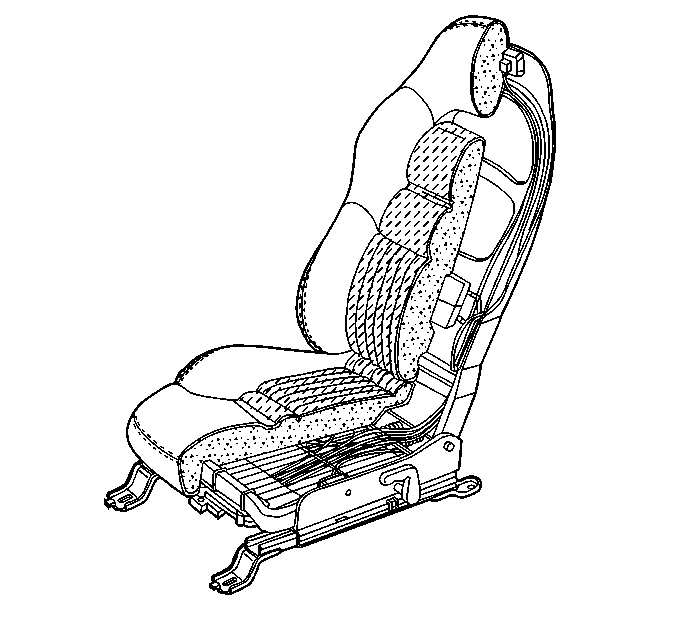
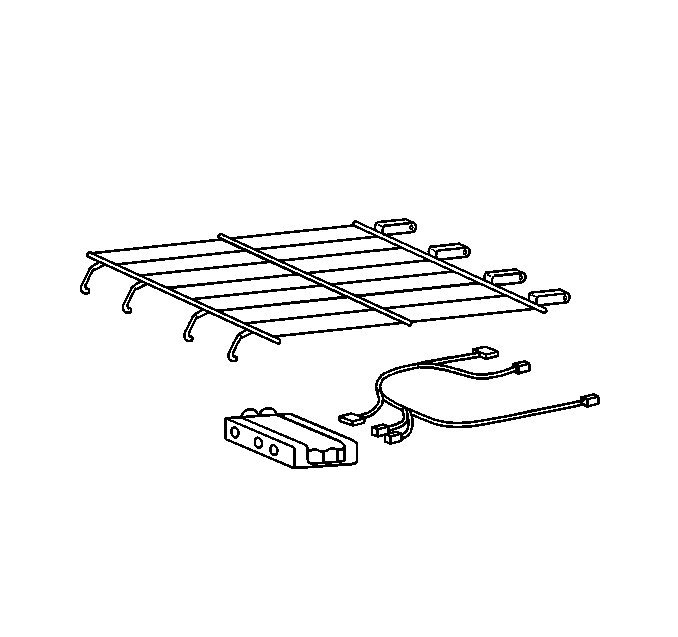
- Remove the seat cushion foam.
- Remove or reposition the lumbar pump, if equipped.
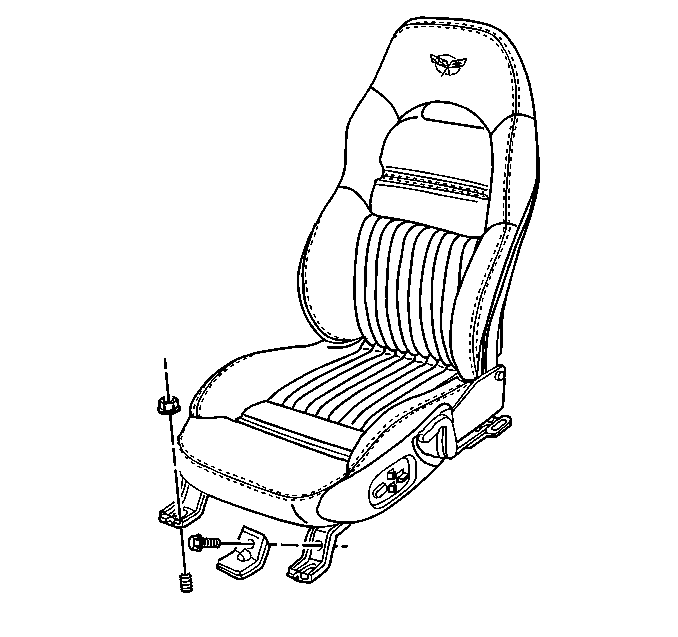
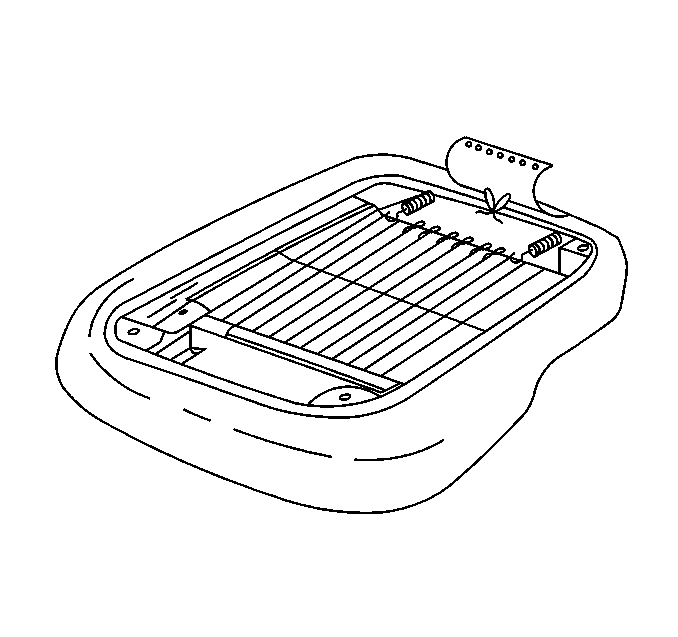
- Remove the seat belt harness from the left seat frame.
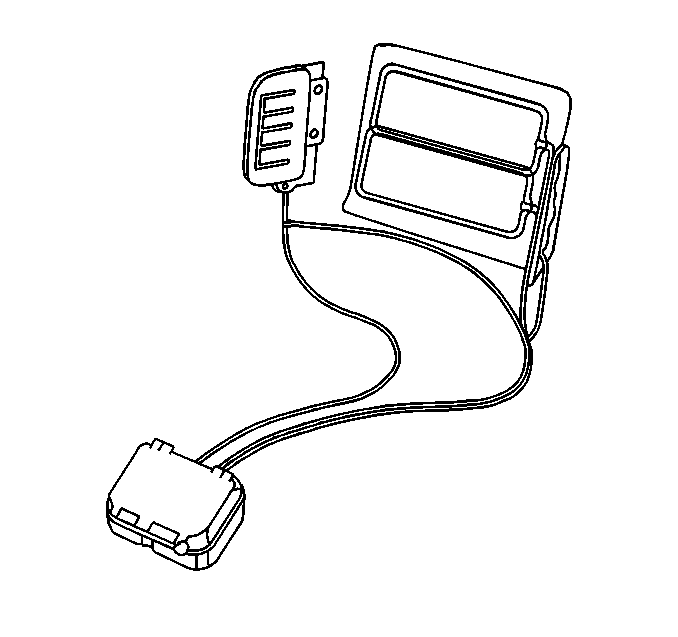
- Remove the memory seat control module, if equipped.
- Remove the buckle side of the seat belt.
- Remove the bolts mounting the seat to the adjuster.
- Remove the adjuster.
- Transfer parts as necessary.

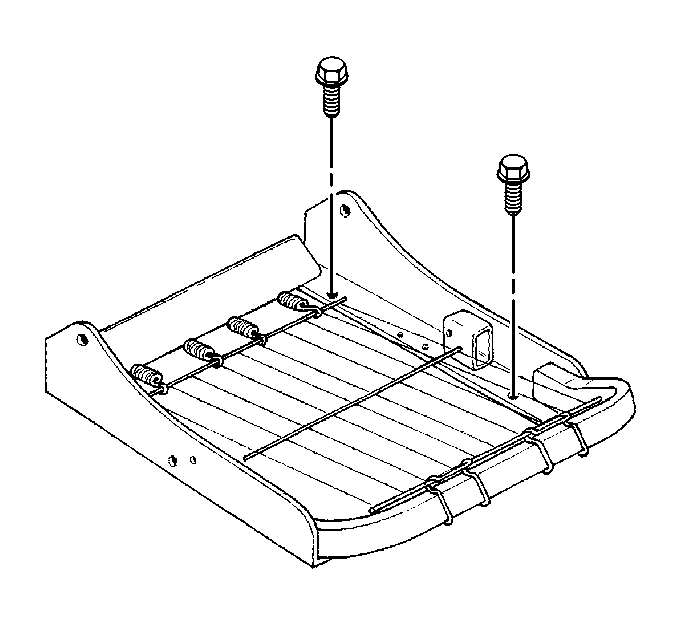
| • | If the pump is attached with a rivet to the front motor bracket, remove the pump. Refer to Lumbar Pump Replacement . |
| • | If the pump is attached with tie straps to the torque tube, remove the tie straps and reposition the pump and pouch up through the seat support wires . |

Installation Procedure
- Install the adjusters to the seat.
- For vehicles with non-power seats, align the adjusters with their locking pawls engaged in the same slots side to side.
- Install the seat adjuster adjustment bar.
- Install the lumbar pump, if equipped.
- Connect the seat belt harness to the left seat.
- Install the memory seat control module to the seat spring wire, if equipped.
- Install the foam to the seat frame.
- Install the seat cushion cover. Refer to Seat Cushion Trim Cover and Pad Replacement .
- Install the buckle side of the seat belt.
- Install the seat. Refer to Seat Replacement - Power with Adjuster or to Manual Seat Replacement .
- If the vehicle is equipped with memory seats, calibrate the seat. Refer to Memory Seat Calibration .
Notice: Use the correct fastener in the correct location. Replacement fasteners must be the correct part number for that application. Fasteners requiring replacement or fasteners requiring the use of thread locking compound or sealant are identified in the service procedure. Do not use paints, lubricants, or corrosion inhibitors on fasteners or fastener joint surfaces unless specified. These coatings affect fastener torque and joint clamping force and may damage the fastener. Use the correct tightening sequence and specifications when installing fasteners in order to avoid damage to parts and systems.
Tighten
Tighten the bolts to 24 N·m (18 lb ft).
| • | Install and rivet the first design pump to the seat front motor bracket. Refer to Lumbar Pump Replacement . |
| • | Tie strap the second design pump to the torque tube. |
Tighten
Tighten the nut to 50 N·m (37 lb ft).
