Shift Lever Replacement - On Vehicle Drivers Shift Control Lever
Removal Procedure
- Remove the shift rod from the shift control. Refer to Shift Lever Replacement - On Vehicle .
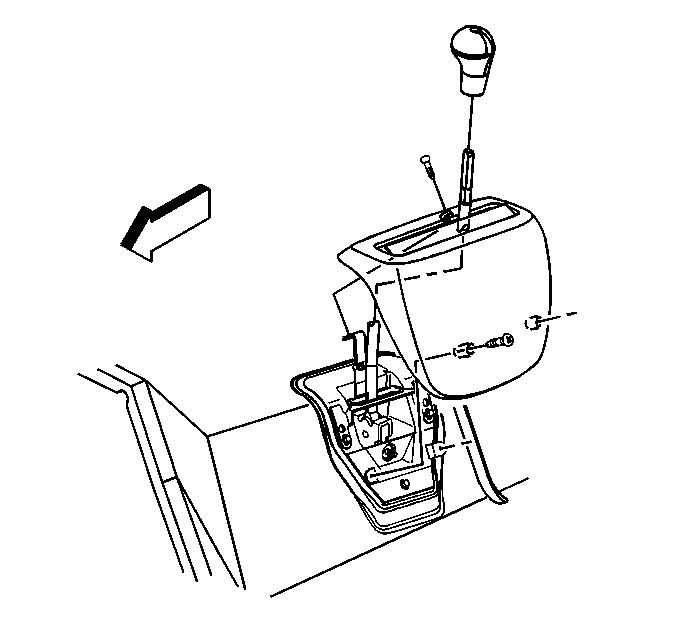
- Remove the shift knob from the transfer case shift lever.
- Remove three screws securing the shift control bezel from the shift control.
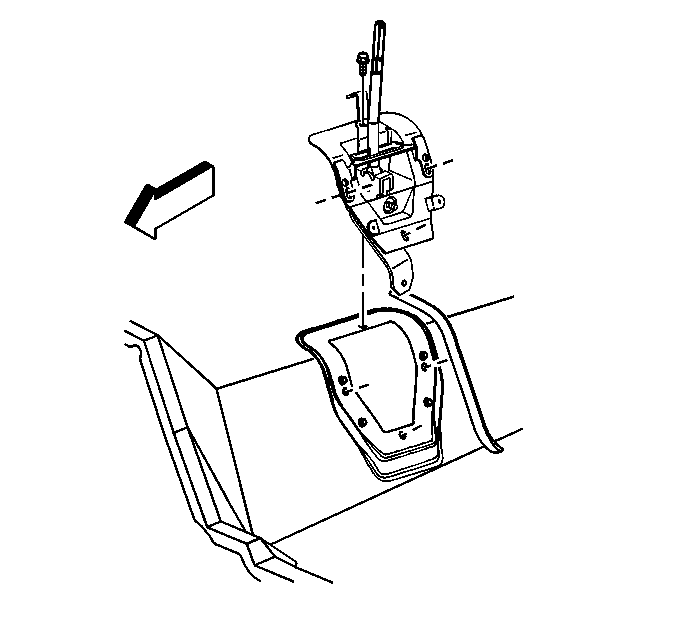
- Remove four bolts securing the shift control to the floor panel and support bracket.
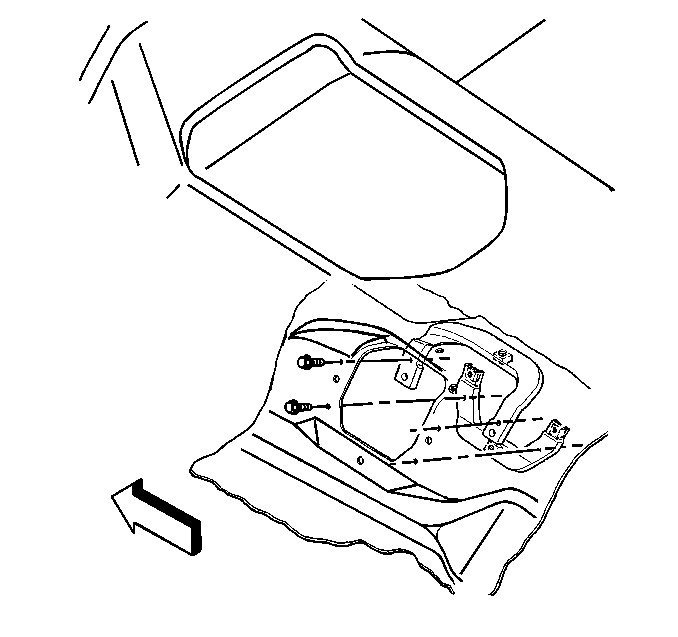
- If required, remove the four screws securing the support bracket to the floor panel.
Installation Procedure
- If removed, install the four screws securing the support bracket to the floor panel.
- Install the four bolts securing the shift control to the floor panel and support bracket.
- Install the three screws securing the shift control bezel to the shift control.
- Install the shift knob to the transfer case shift lever.
- Install the shift rod to the shift control. Refer to Shift Lever Replacement - On Vehicle .

Notice: Use the correct fastener in the correct location. Replacement fasteners must be the correct part number for that application. Fasteners requiring replacement or fasteners requiring the use of thread locking compound or sealant are identified in the service procedure. Do not use paints, lubricants, or corrosion inhibitors on fasteners or fastener joint surfaces unless specified. These coatings affect fastener torque and joint clamping force and may damage the fastener. Use the correct tightening sequence and specifications when installing fasteners in order to avoid damage to parts and systems.
Tighten
Tighten the screws to 2 N·m (18 lb in).

Tighten
Tighten the screws to 12 N·m (9 lb ft).

Tighten
Tighten the screws to 2 N·m (18 lb in).
Shift Lever Replacement - On Vehicle Shift Linkage
Removal Procedure
- Position the automatic transmission into park or the manual transmission into first gear.
- Place the transfer case shift lever into the 2HI position.
- Raise the vehicle. Refer to Lifting and Jacking the Vehicle in General Information.
- Remove the shift rod from the shift control.
- Remove the shift rod from the transfer case shift lever.
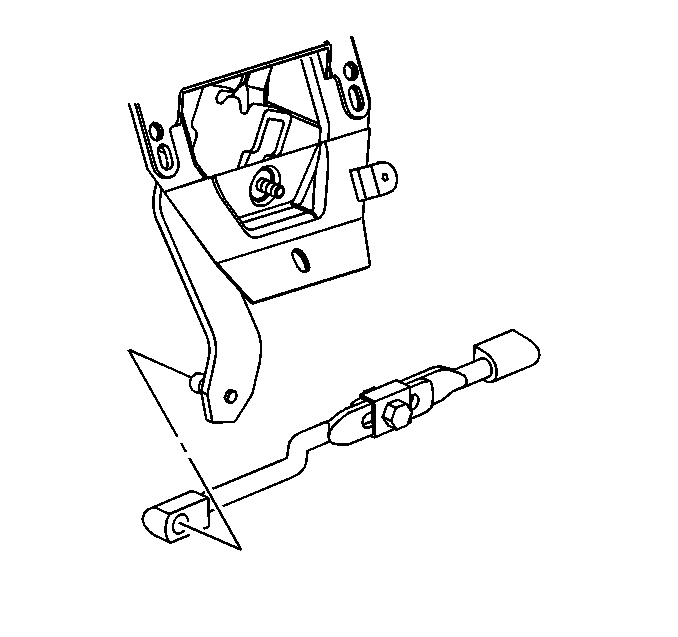
| • | Using a small flat tipped screwdriver, place the screwdriver into the slot and under the clip at the end of the shift rod ball socket. |
| • | Lightly pull up on the clip and pull the shift rod end from the shift control lever ball stud. |
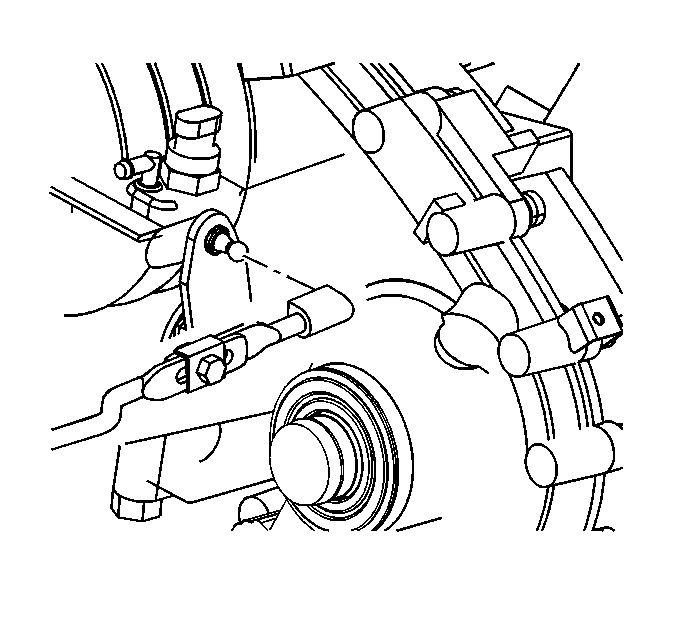
| • | Using a small flat tipped screwdriver, place the screwdriver into the slot and under the clip at the end of the shift rod ball socket. |
| • | Lightly pull up on the clip and pull the shift rod end from the transfer case shift lever ball stud. |
Installation Procedure
- Ensure the transfer case shift lever is positioned into the mechanical 2HI position.
- Ensure the shift control lever is positioned into the 2HI position.
- Loosen the adjusting screw on the shift rod.
- Position (push) the shift rod ball socket onto the transfer case shift lever.
- Position (push) the shift rod ball socket onto the shift control lever.
- Tighten the adjusting nut on the shift rod.
- Ensure the shift rod is positioned straight.
- Lower the vehicle.
- Check for proper transfer case shift operation.

| • | Lightly pull on the shift rod to ensure the rod socket is properly connected to the shift lever ball stud. |
| • | Ensure the clip on the end of the shift rod is flush with the head of the shift rod. |

| • | Lightly pull on the shift rod to ensure the rod socket is properly connected to the shift control lever ball stud. |
| • | Ensure the clip on the end of the shift rod is flush with the head of the shift rod. |
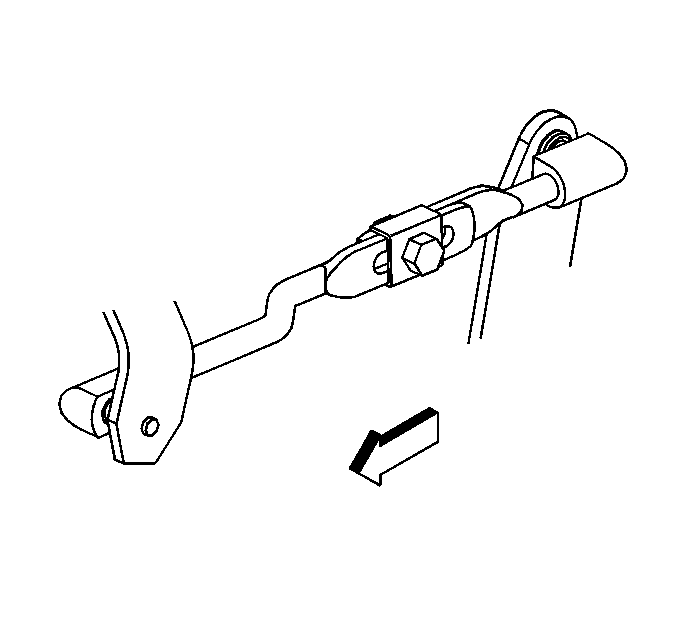
Notice: Use the correct fastener in the correct location. Replacement fasteners must be the correct part number for that application. Fasteners requiring replacement or fasteners requiring the use of thread locking compound or sealant are identified in the service procedure. Do not use paints, lubricants, or corrosion inhibitors on fasteners or fastener joint surfaces unless specified. These coatings affect fastener torque and joint clamping force and may damage the fastener. Use the correct tightening sequence and specifications when installing fasteners in order to avoid damage to parts and systems.
Tighten
Tighten the bolt to 15 N·m (11 lb ft).
