Parking Brake Support Replacement Bendix 229 mm (9 in)
Removal Procedure

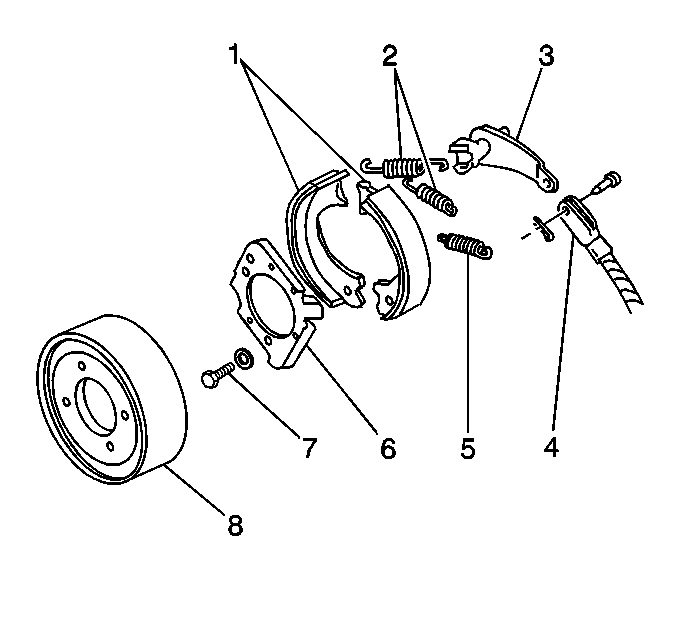
- Remove the drum (8). Refer to
Propeller Shaft Parking Brake Drum Replacement
.
- Remove the linings (1). Refer to
Parking Brake Shoe Replacement
.
- Remove the bolts (7).
- Remove the support plate (6).
- Inspect the support plate (6) for damage, distortion and corrosion.
- Remove any corrosion from the shoe contact surfaces with a fine
emery cloth.
- Replace the support plate if damage or distortion is found.
Installation Procedure

- Install the support plate
(6).
Notice: Use the correct fastener in the correct location. Replacement fasteners
must be the correct part number for that application. Fasteners requiring
replacement or fasteners requiring the use of thread locking compound or sealant
are identified in the service procedure. Do not use paints, lubricants, or
corrosion inhibitors on fasteners or fastener joint surfaces unless specified.
These coatings affect fastener torque and joint clamping force and may damage
the fastener. Use the correct tightening sequence and specifications when
installing fasteners in order to avoid damage to parts and systems.
- Install the bolts (7).
Tighten
Tighten the bolts to the following specifications:
| • | 86 N·m (63 lb ft) for a manual transmission |
| • | 46 N·m (34 lb ft) for an automatic
transmission |
- Install the linings (1). Refer to
Parking Brake Shoe Replacement
.
- Install the drums (8). Refer to
Propeller Shaft Parking Brake Drum Replacement
.
Parking Brake Support Replacement Bendix 305 mm (12 in)
Removal Procedure

- Remove the drum. Refer to
Propeller Shaft Parking Brake Drum Replacement
.
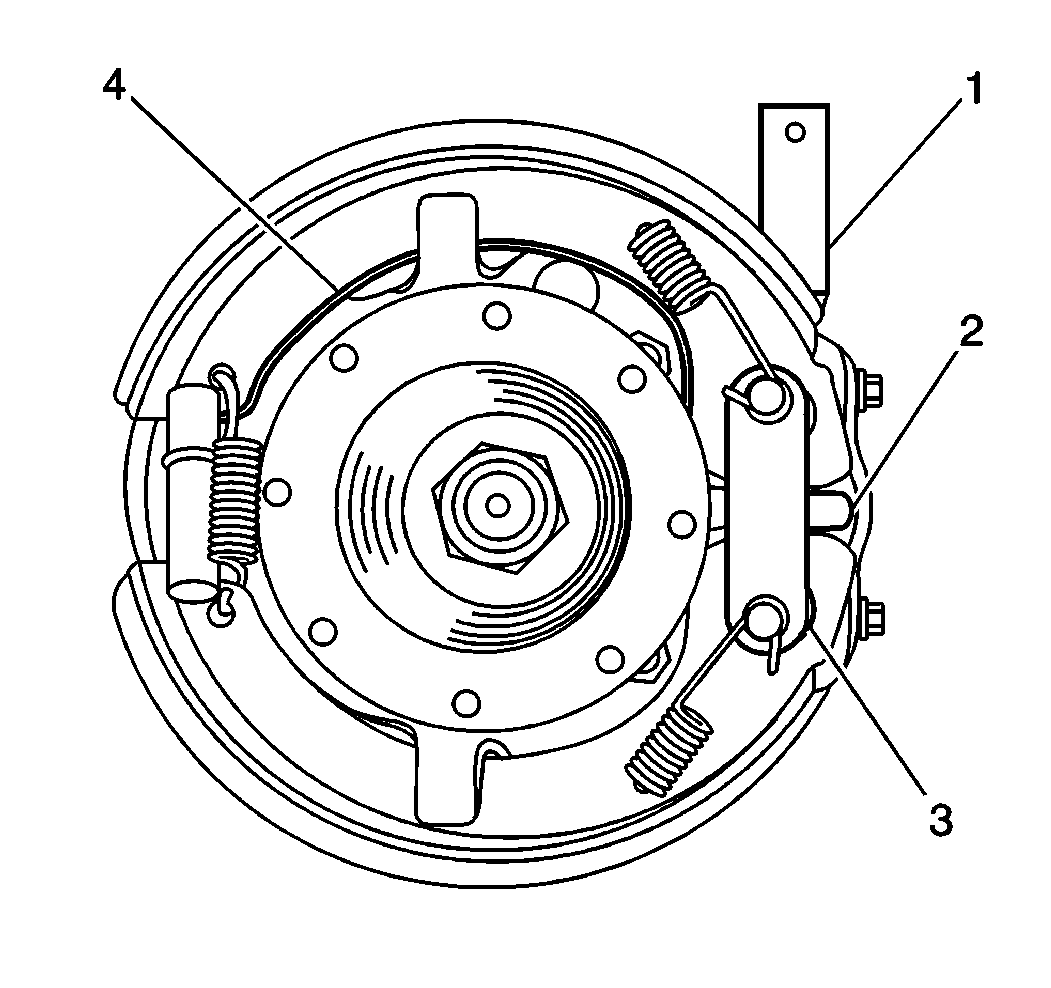
- Remove the camshaft (2). Refer to
Park Brake Camshaft Replacement
.
- Remove the bolts and the nuts that hold the support plate (4).
- Remove the support plate (4).

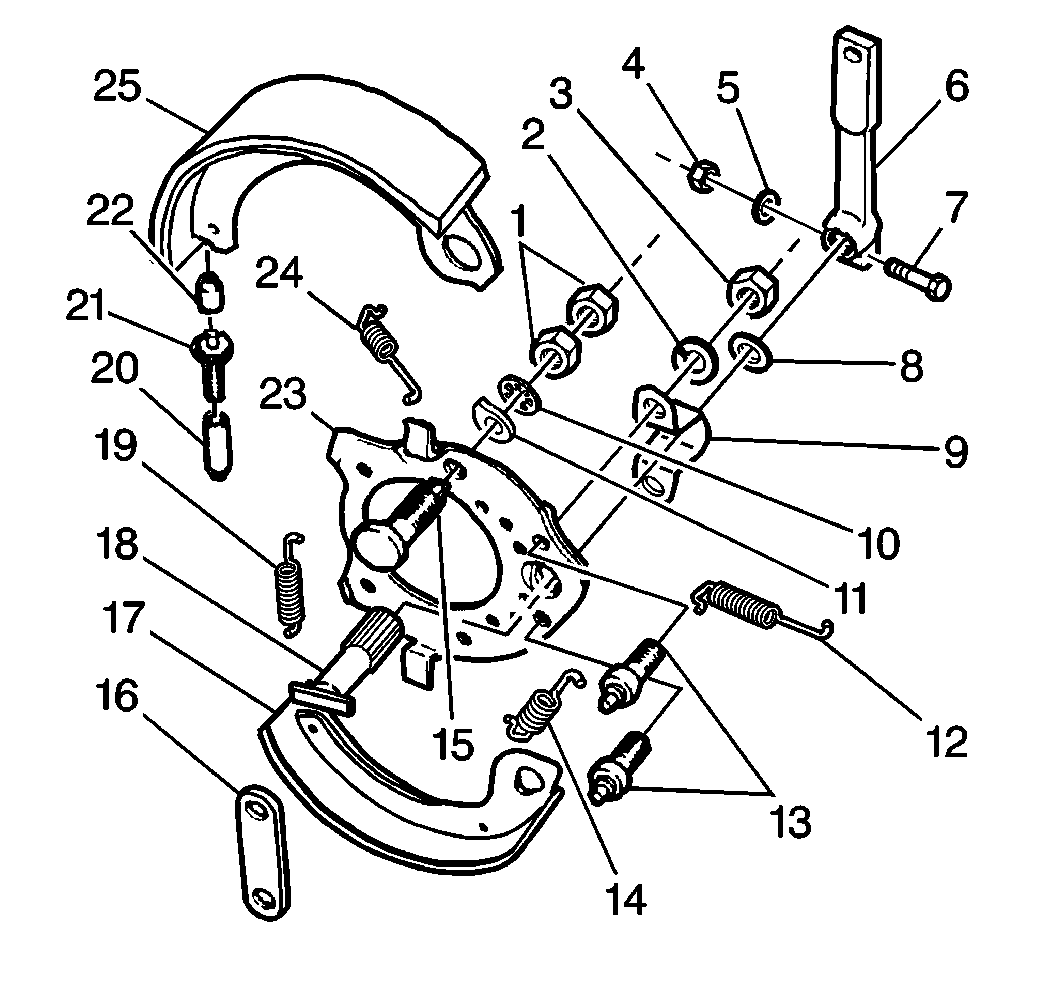
- Remove the following items from the support plate (23)
if necessary:
| • | The curved spring washer (11) |
| • | The adjusting eccentric (15) |
- Inspect the support plate (23) for damage, distortion and corrosion.
- Remove any corrosion from the contact surfaces with a fine emery
cloth.
- Replace the support plate (23) if any damage or distortion is
found.
Installation Procedure

- Install the following items if any of the items were removed:
| • | The adjusting eccentric (15) |
| • | The curved spring washer (11) |
- Adjust the adjusting eccentric (15).
| • | Tighten the inboard nut in order to compress the curved spring
washer (11) enough to create a drag of 6 N·m (55 lb in)
on the shoe adjusting eccentric (15) after the adjusting eccentric
(15) has been turned one complete revolution. |
| • | Tighten the outboard nut in order to lock the adjustment. |

- Install the support plate (4).
Notice: Use the correct fastener in the correct location. Replacement fasteners
must be the correct part number for that application. Fasteners requiring
replacement or fasteners requiring the use of thread locking compound or sealant
are identified in the service procedure. Do not use paints, lubricants, or
corrosion inhibitors on fasteners or fastener joint surfaces unless specified.
These coatings affect fastener torque and joint clamping force and may damage
the fastener. Use the correct tightening sequence and specifications when
installing fasteners in order to avoid damage to parts and systems.
- Install the support plate mounting bolts and the nuts.
Tighten
Tighten the nuts to 170 N·m (125 lb ft).
- Install the camshaft (2). Refer to
Park Brake Camshaft Replacement
.
- Install the drum. Refer to
Propeller Shaft Parking Brake Drum Replacement
.


