GM Service Manual Online
For 1990-2009 cars only

Tools Required

    • J 36214 Axle Stud Cone Puller
    • J 28721-910 Truck Wheel Bearing Locknut Wrench
    • J 28721-911 Truck Wheel Bearing Locknut Wrench

Removal Procedure

  1. Inspect the rear axle housing for leaks and damage.
  2. Clean the rear axle housing with steam.
  3. Important: Shift the two speed rear axle into LOW range, if equipped.

  4. Apply the parking brake.
  5. Block the wheels.
  6. Remove the rear axle housing drain plug. Refer to Lubricant Change .
  7. Remove the propeller shaft. Refer to the following list in order to select the correct procedure:
  8. •  One-Piece Propeller Shaft Replacement
    •  Two-Piece Propeller Shaft Replacement
    •  Three-Piece Propeller Shaft Replacement
    •  Four-Piece Propeller Shaft Replacement
  9. Remove the rear axle shafts. Refer to Rear Axle Shaft and/or Gasket Replacement .
  10. Remove the two-speed shift motor, if equipped. Refer to Two Speed Rear Axle Shift Motor Replacement in Rear Axle Controls.

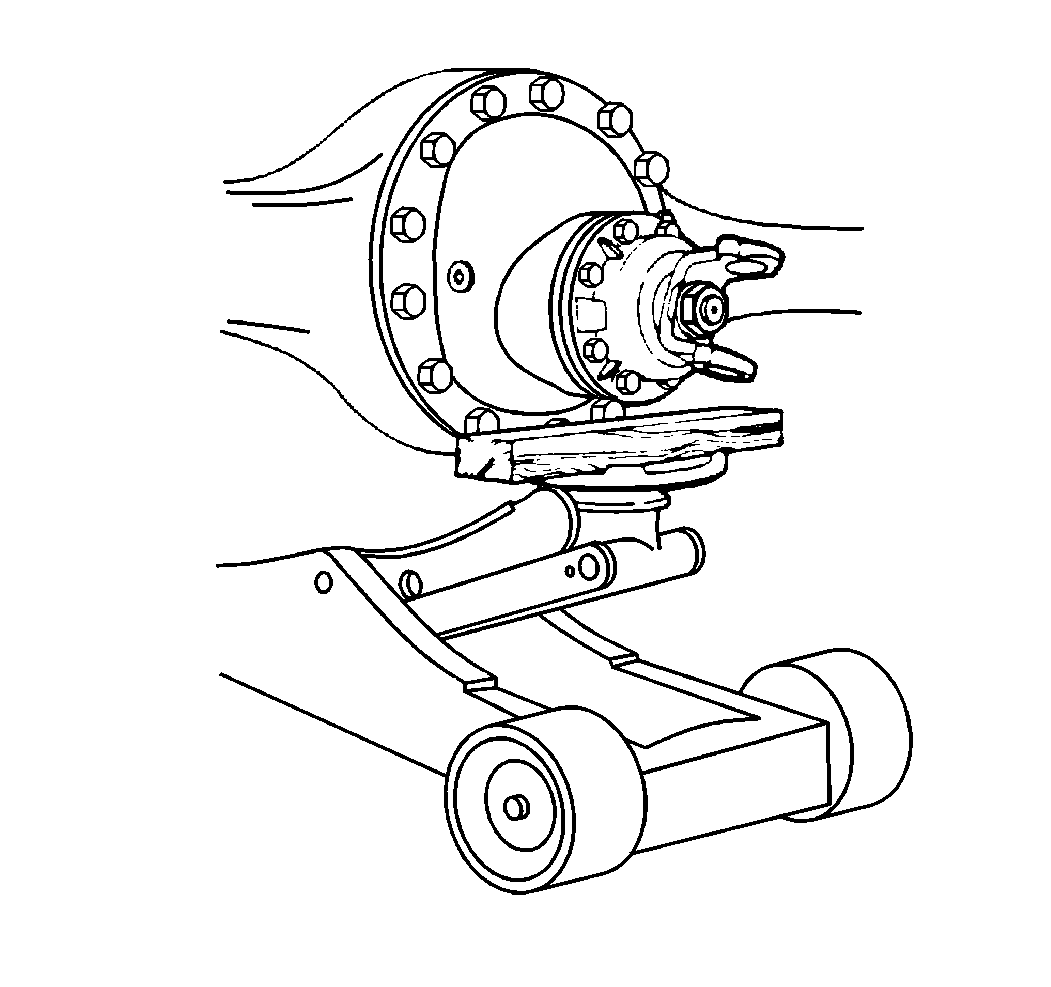
  11. Object Number: 198566  Size: SH
  12. Remove the following components from the differential carrier. DO NOT remove the top 2 fasteners.
  13. • The washers
    • The bolts
    • The stud nuts, if equipped
  14. Use the following steps in order to remove all the rear axles without a differential lock:
  15. 10.1. Remove the top 2 fasteners.
    10.2. Remove the differential carrier from the rear axle housing.
  16. Use the following steps in order to remove all the rear axles with an Eaton® Differential Lock using the air pressure engagement method:
  17. 11.1. Engage the differential lock.
             11.1.1. Using an auxiliary air line, apply 552-827 kPa (80-120 psi) air pressure to the rear differential air shift cylinder air port in order to engage the clutch.
             11.1.2. Support and secure the differential carrier to a floor jack.
    11.2. Remove the top 2 fasteners.
    11.3. Remove the differential carrier from the rear axle housing.
  18. Use the following steps in order to remove all the rear axles with an Eaton® Differential Lock using the manual engagement method:
  19. 12.1. Engage the differential lock.
             12.1.1. Install an M12x1.5 bolt, over 38 mm (1.5 in) long, in the air shift cylinder air port in order to engage the clutch.

    Apply a light coating of rear axle lubricant to the threads of the bolt in order to facilitate hand tightening.

             12.1.2. Hand tighten the bolt using a socket.
             12.1.3. Support and secure the differential carrier to a floor jack.
    12.2. Remove the top 2 fasteners.
    12.3. Remove the differential carrier from the rear axle housing.
  20. Clean the rear axle housing and the differential carrier mating surfaces.
  21. Clean the rear axle housing bowl interior using engine degreaser or equivalent.
  22. Dry the rear axle housing bowl immediately using clean cloths. Then dry the rear axle housing bowl using compressed air.
  23. Inspect the rear axle housing for the following conditions:
  24. • Cracks
    • Loose studs
    • Nicks
    • Burrs

Installation Procedure


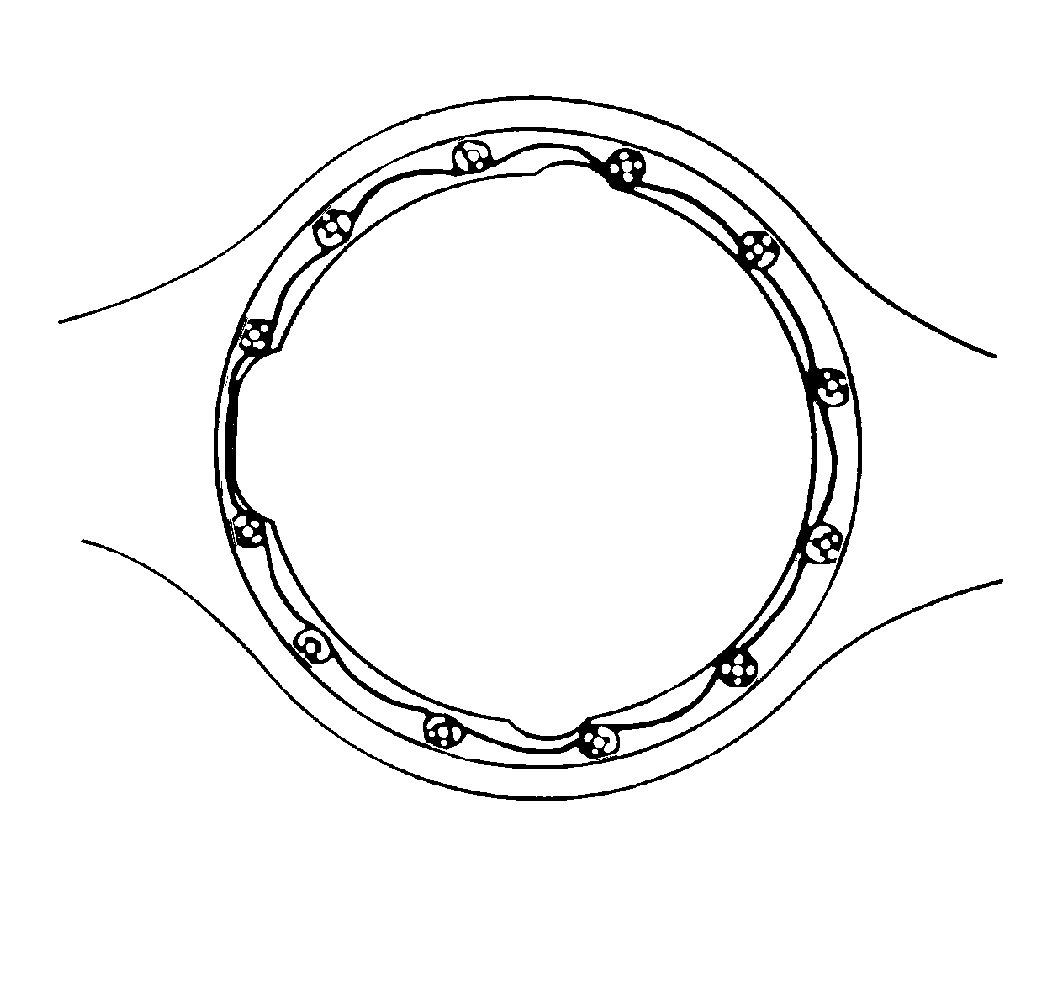
    Object Number: 198568  Size: SH

    Important: Apply a 3.17 mm (0.125 in) diameter bead of silicone sealer (RTV) completely around the rear axle housing differential carrier mating surface and around each threaded hole and stud. Install the differential carrier and fasteners within 20 minutes, before the silicone sealer sets.

  1. Install the silicone sealer (RTV) or equivalent on the rear axle housing surface.
  2. Install the 4 temporary alignment studs, if needed.
  3. Install the differential carrier.
  4. Use the following steps in order to install all the rear axles without the differential lock:
  5. 4.1. Support and secure the differential carrier to a floor jack.
    4.2. Install the deferential carrier into the rear axle housing.
  6. Use the following steps in order to install all the rear axles with an Eaton® Differential Lock using the air pressure engagement method:
  7. 5.1. Engage the differential lock.
             5.1.1. Using an auxiliary air line, apply 552-827 kPa (80-120 psi) air pressure to the rear differential air shift cylinder air port in order to engage the clutch.
             5.1.2. Support and secure the differential carrier to a floor jack.
    5.2. Install the differential carrier into the rear axle housing.
  8. Use the following steps in order to install all the rear axles with an Eaton® Differential Lock using the manual engagement method:
  9. 6.1. Engage the differential lock:
             6.1.1. Install an M12 x 1.5 bolt, over 38 mm (1.5 in) long, in the air shift cylinder air port in order to engage the clutch.

    Apply a light coating of rear axle lubricant to the threads of the bolt in order to facilitate hand tightening.

             6.1.2. Hand tighten the bolt using a socket.
    6.2. Support and secure the differential carrier to a floor jack.
    6.3. Install the differential carrier into the rear axle housing.

    Notice: Use the correct fastener in the correct location. Replacement fasteners must be the correct part number for that application. Fasteners requiring replacement or fasteners requiring the use of thread locking compound or sealant are identified in the service procedure. Do not use paints, lubricants, or corrosion inhibitors on fasteners or fastener joint surfaces unless specified. These coatings affect fastener torque and joint clamping force and may damage the fastener. Use the correct tightening sequence and specifications when installing fasteners in order to avoid damage to parts and systems.

    Important: Threads must be clean and free of grease. Apply 272 Threadlocker GM P/N 12345493, Canadian P/N 10953488 or equivalent to the threads of each differential carrier bolt.

  10. Install the following components to the differential carrier:
  11. • The washers
    • The bolts
    • The nuts, if equipped

    Tighten
    Tighten the differential carrier bolts and the nuts to the specified torque. Refer to Fastener Tightening Specifications .

  12. After installing the differential carrier, disconnect the auxiliary air line or remove the bolt from the rear differential lock air shift cylinder air port.
  13. Install the propeller shaft . Refer to the following procedures:
  14. •  One-Piece Propeller Shaft Replacement
    •  Two-Piece Propeller Shaft Replacement
    •  Three-Piece Propeller Shaft Replacement
    •  Four-Piece Propeller Shaft Replacement
  15. Install the two speed shift motor, if equipped. Refer to Two Speed Rear Axle Shift Motor Replacement in Rear Axle Controls.
  16. Install the rear axle shafts. Refer to Rear Axle Shaft and/or Gasket Replacement .
  17. Fill the rear axle with lubricant. Refer to Lubricant Change .
  18. Remove the wheel blocks.