For 1990-2009 cars only
Crankshaft Rear Oil Seal Replacement Lip Type Seal
Removal Procedure
Tools Required
J 38817-A Rear Main Seal Installer
- Remove the transmission. Refer to Transmission Replacement in Automatic Transmission.
- Remove the flywheel. Refer to Engine Flywheel Replacement .
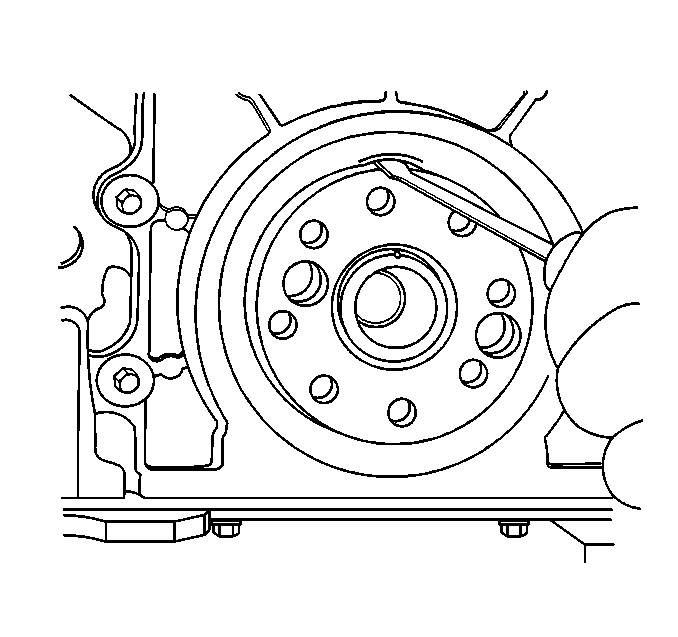
- Remove the rear oil seal using the following procedure:
- Seal removal with a flat blade screwdriver between the seal lip and the crankshaft is also possible but extreme care is required in order to avoid damage to the crankshaft sealing surface.
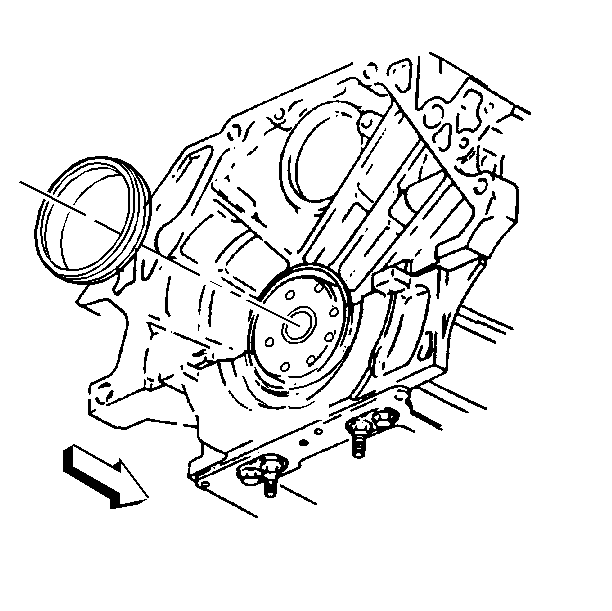
| 3.1. | Drill a 1/8 inch hole in the metal body of the seal. |
| 3.2. | Use a slide hammer to remove the seal. |
Insallation Procedure
- Lubricate both the inner lips and the outer diameter of the rear oil seal.
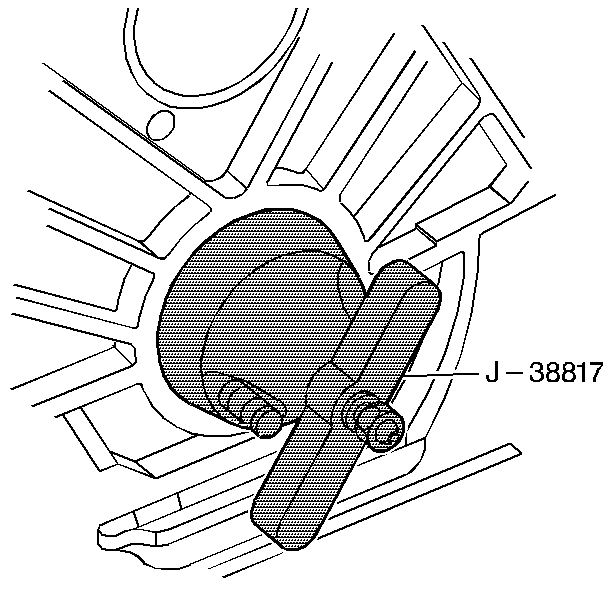
- Slide the seal over the arbor of the J 38817-A
- Thread the J 38817-A into the crankshaft flange.
- Install the seal by turning the handle until the tool bottoms against the crankcase.
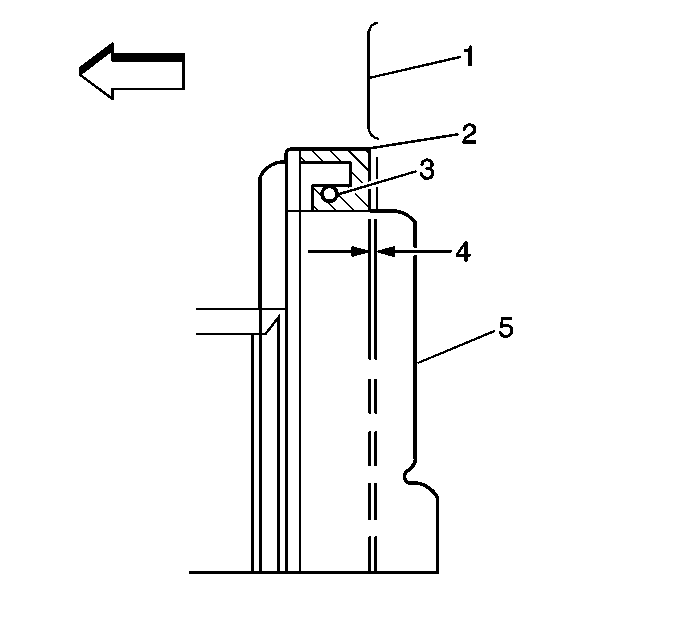
- When properly installed, the outer surface of the seal (2) should be 0.5mm (0.020 in) (4) below the surface of the engine block (1).
- Install the flywheel. Refer to Engine Flywheel Replacement
- Install the trasmission. Refer to Transmission Replacement in Automatic Transmission.

Crankshaft Rear Oil Seal Replacement Cartridge Type Seal
Removal Procedure
Tools Required
| • | J 42841-A Crankshaft Rear Oil Seal Remover |
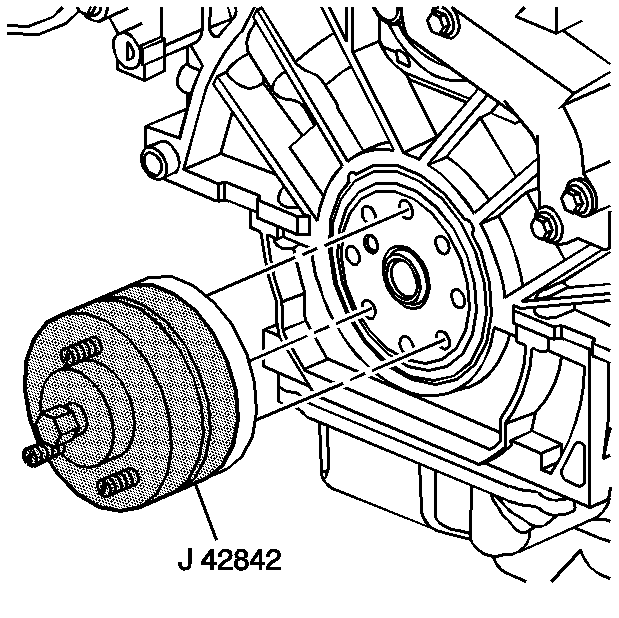
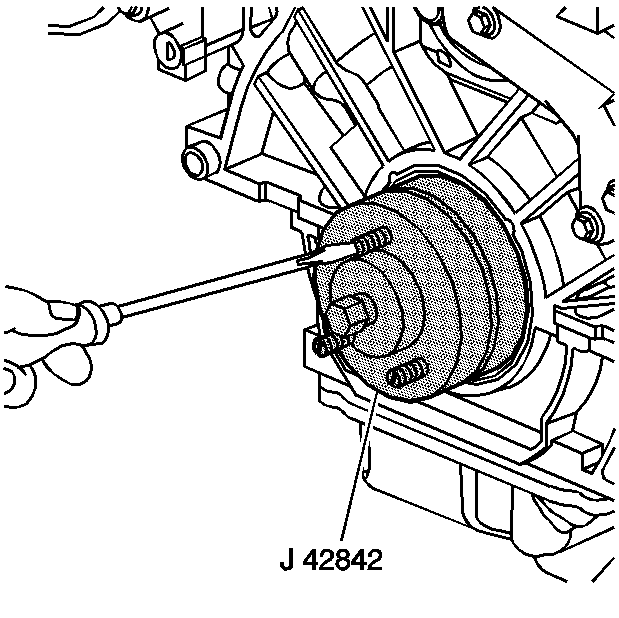
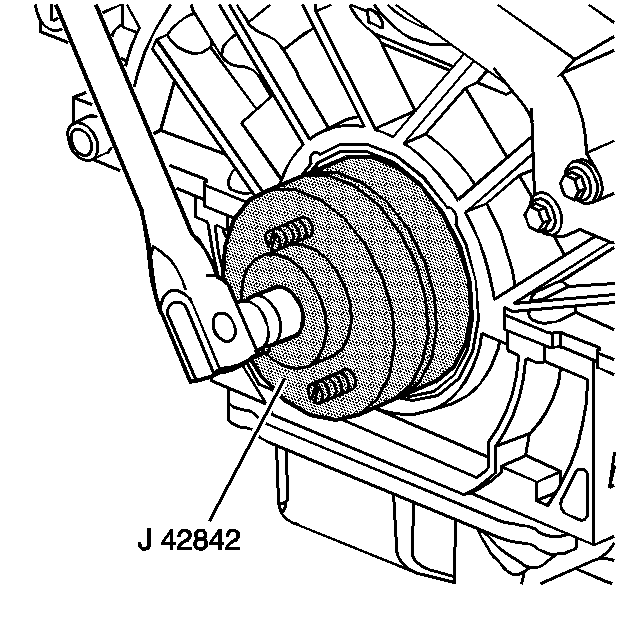
| • | J 42842 Crankshaft Rear Oil Seal Installer |
- Remove the transaxle. Refer to Transmission Replacement in Automatic Transaxle-4T80-E
- Remove the flywheel. Refer to Engine Flywheel Replacement .
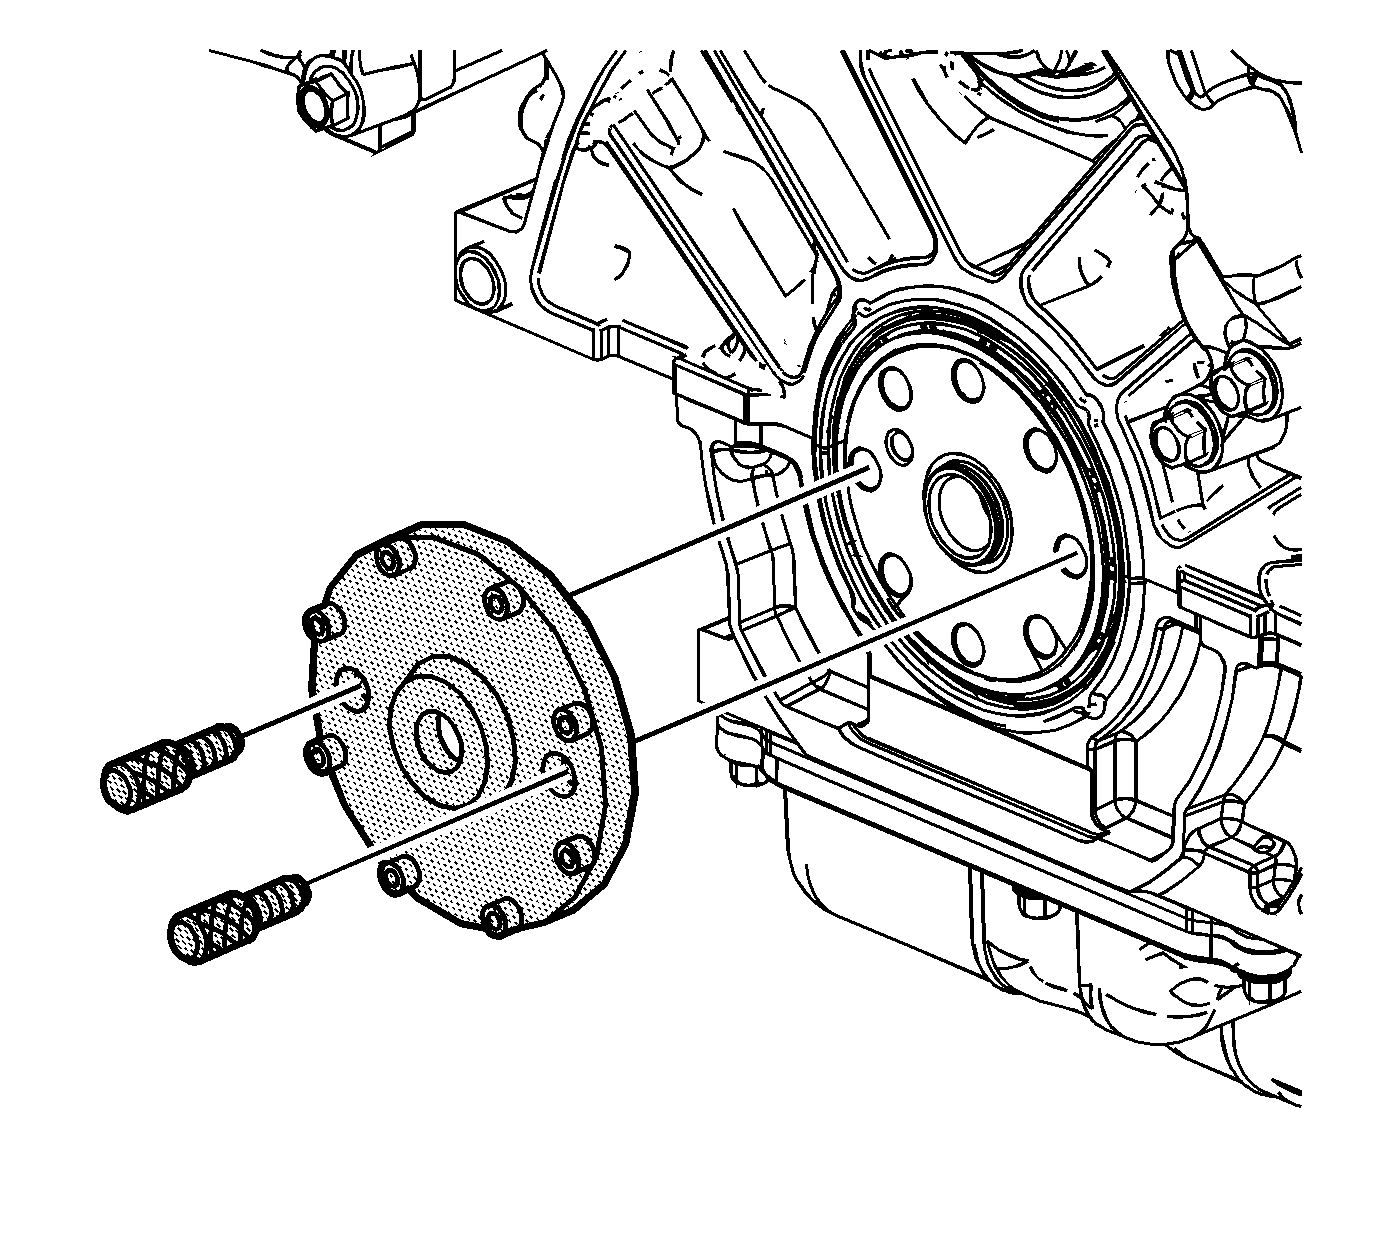
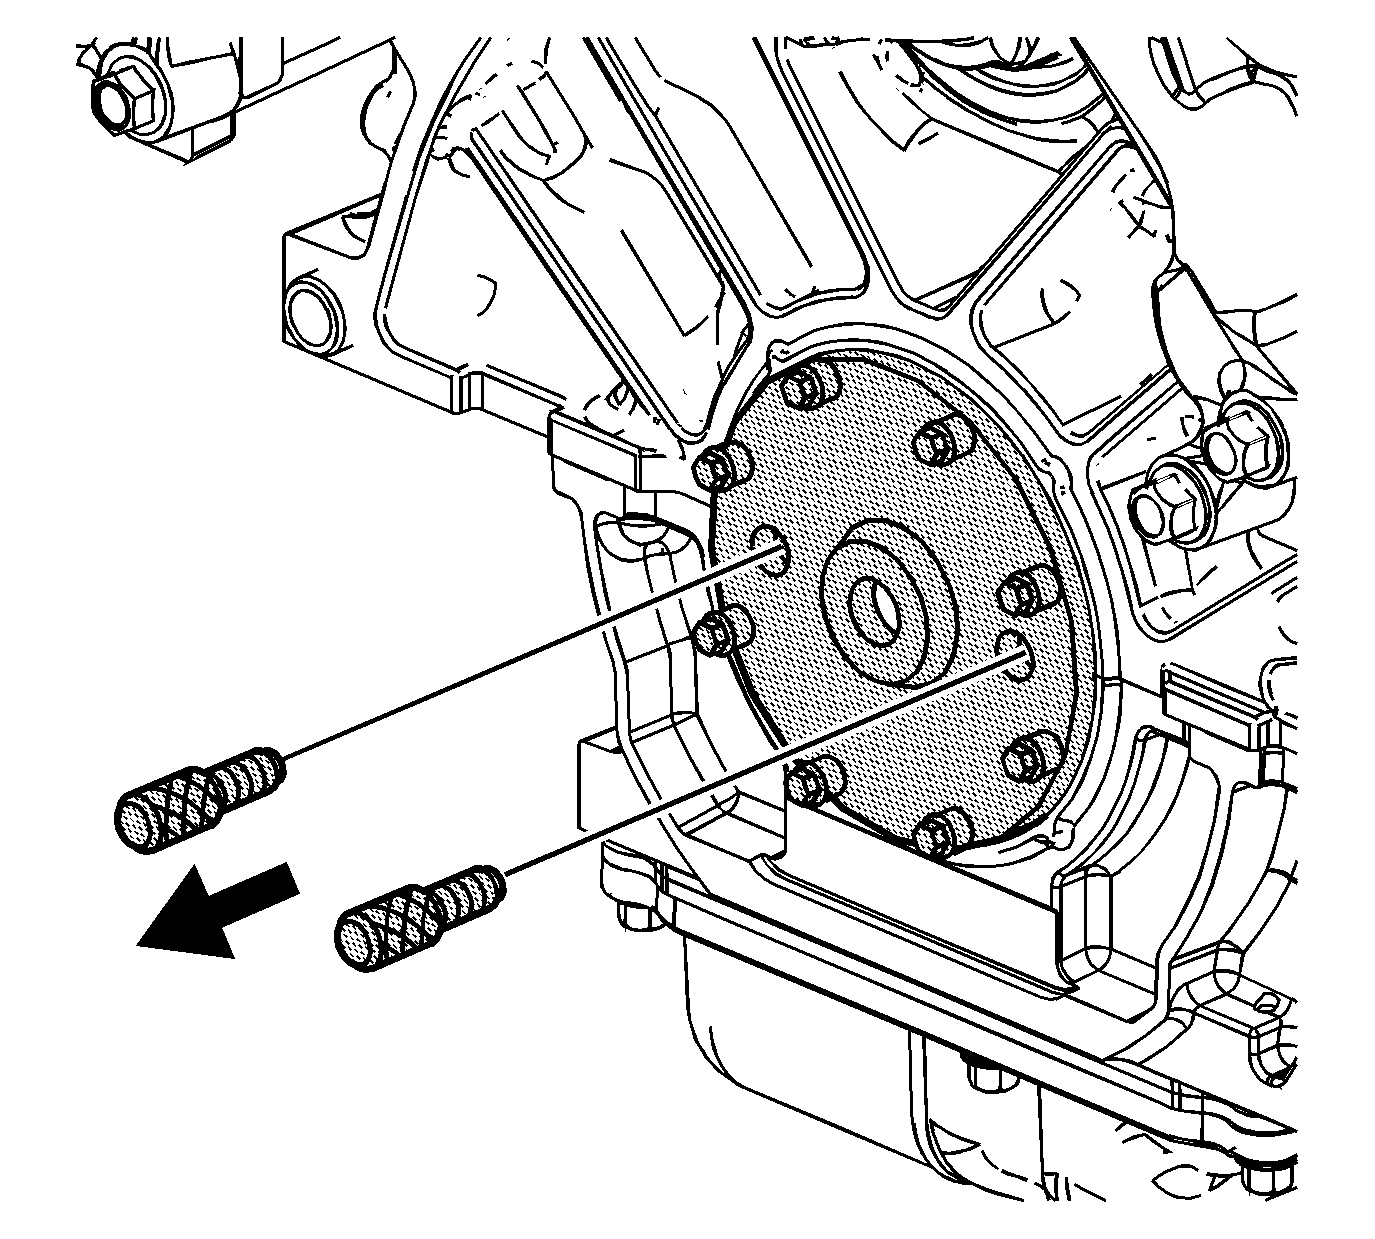
- Place the J 42841-A on to the crankshaft.
- Install the J 42841-A retaining bolts.
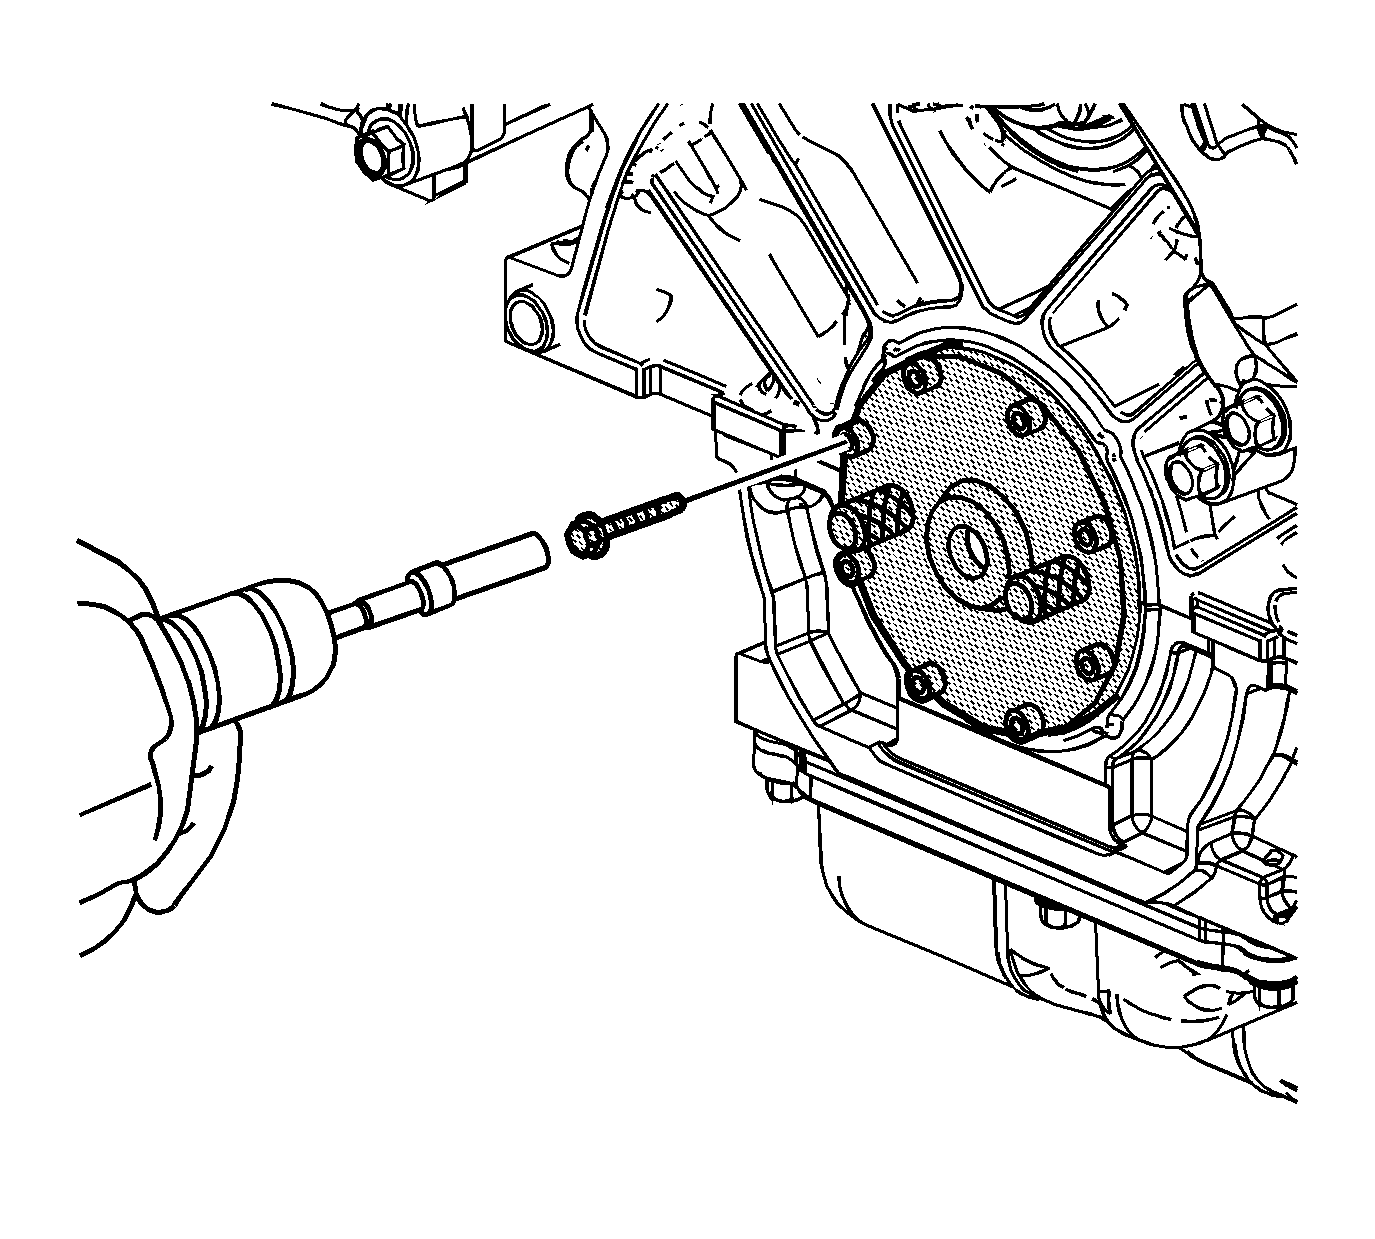
- Using a drill motor (variable speed preferred) with a socket adapter, install eight one-inch self-drilling screws into the seal using the guide holes in the removal tool. When drilling, make sure you reduce the drill speed when the screw begins threading into the seal.
- With all eight removal screws installed, remove the J 42841-A retaining bolts.
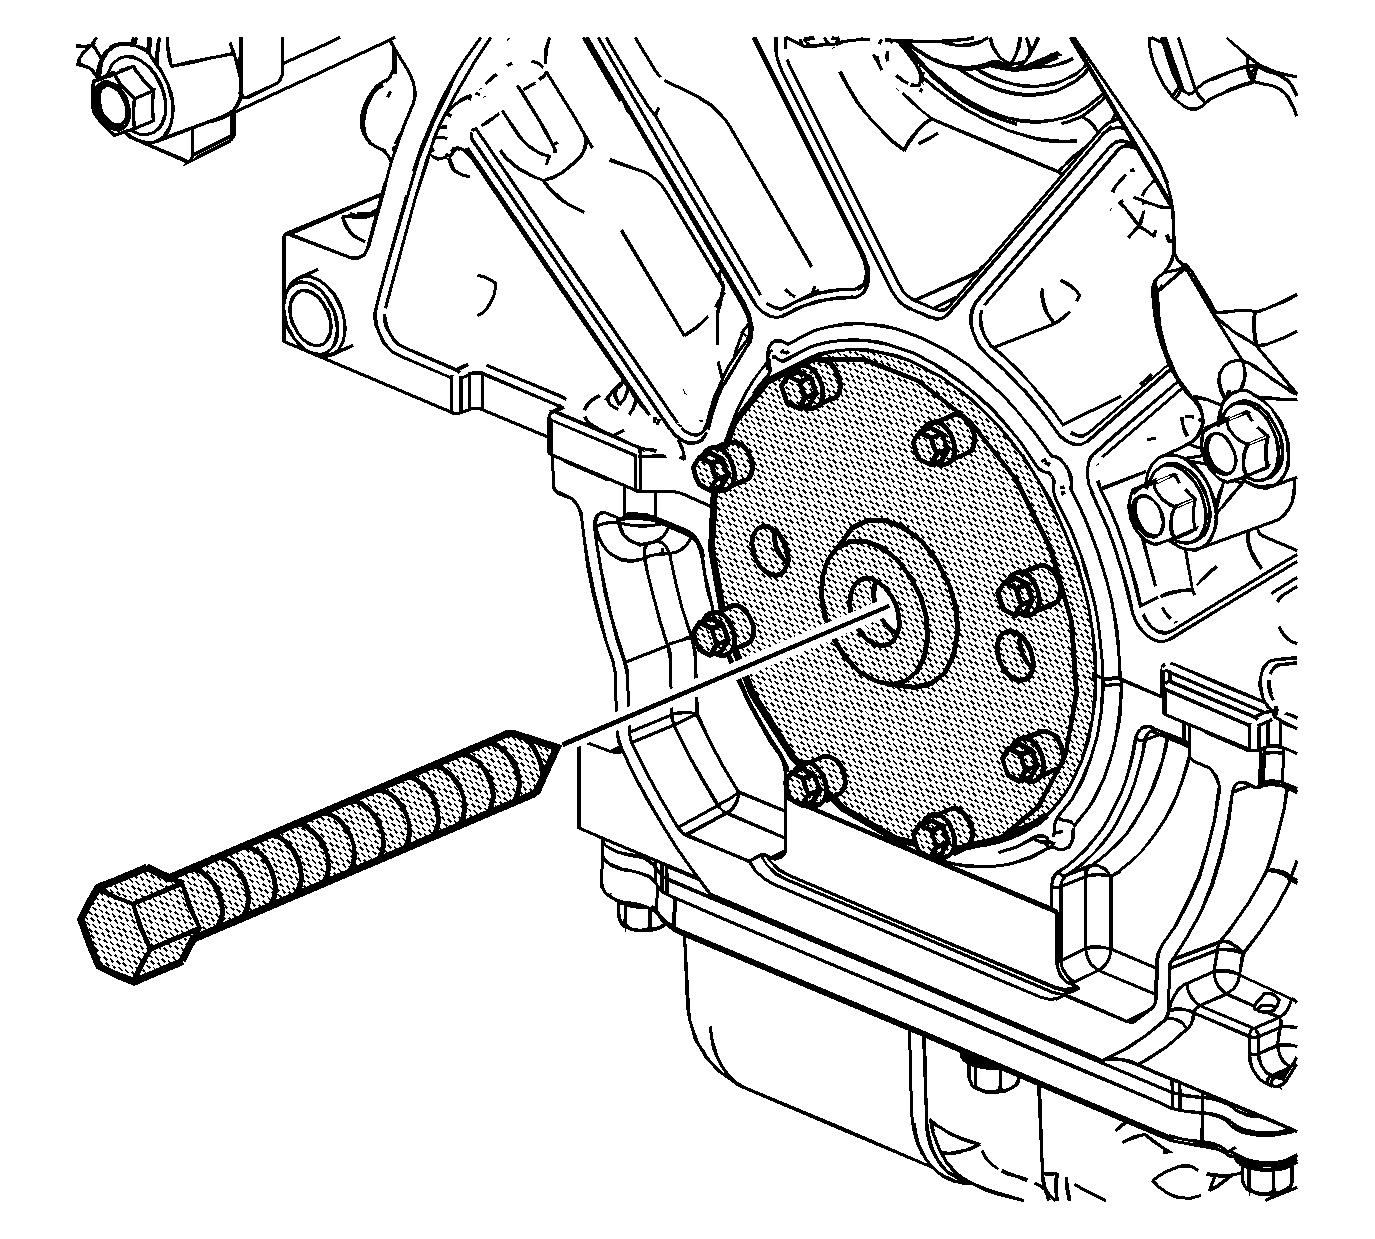
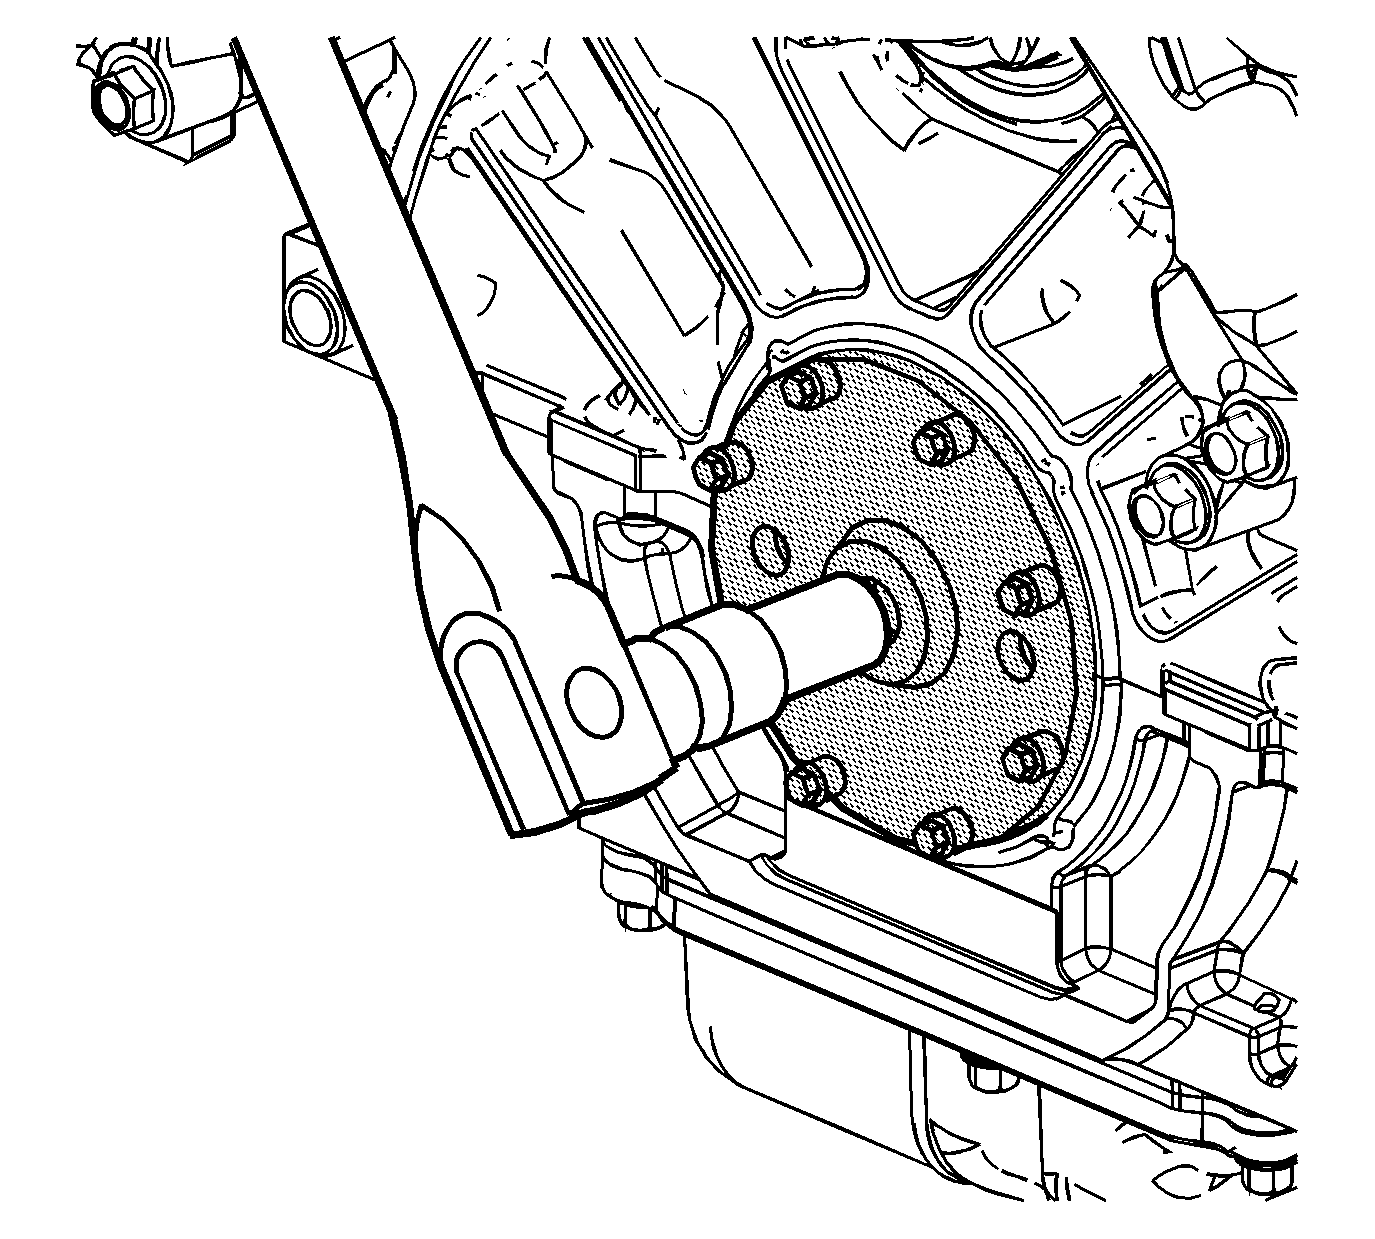
- Install the center screw to the J 42841-A
- Tighten the center screw on the J 42841-A to pull the seal assembly off the end of the crankshaft.
Installation Procedure
- Clean any debris from the crankshaft rear oil seal drain (1) using wire or an unbound plastic tie-wrap (2).
- Coat the outer diameter of the cylinder block crankshaft rear oil seal area with clean engine oil GM P/N 12345501 or equivalent.
- Wipe the outer diameter of the flywheel flange clean with a lint-free cloth.
- Lubricate the outer rubber surface of the crankshaft rear oil seal with clean engine oil GM P/N 12345501 or equivalent.
- Loosen the center bolt of the J 42842 until the center hub protrudes approximately one-half inch beyond the outer plate. It is not necessary to completely unthread the center bolt and separate the two pieces of the J 42842
- Place the J 42842 on to the crankshaft.
- Thread the three mounting bolts into the crankshaft flange.
- Tighten the bolts until the J 42842 is firmly mounted on the crankshaft.
- Install the crankshaft rear oil seal by tightening the center bolt until the J 42842 bottoms against the crankcase.
- Loosen the center bolt to release pressure on the crankcase.
- Loosen the three mounting bolts.
- Remove the J 42842 from the crankshaft flange.
- Inspect to ensure the installation depth is equal around the crankshaft rear oil seal's circumference. If the depth is not equal reinstall the J 42842 and repeat the installation procedures.
- Install the flywheel. Refer to Engine Flywheel Replacement .
- Install the transaxle. Refer to Transmission Replacement in Automatic Transaxle-4T80-E
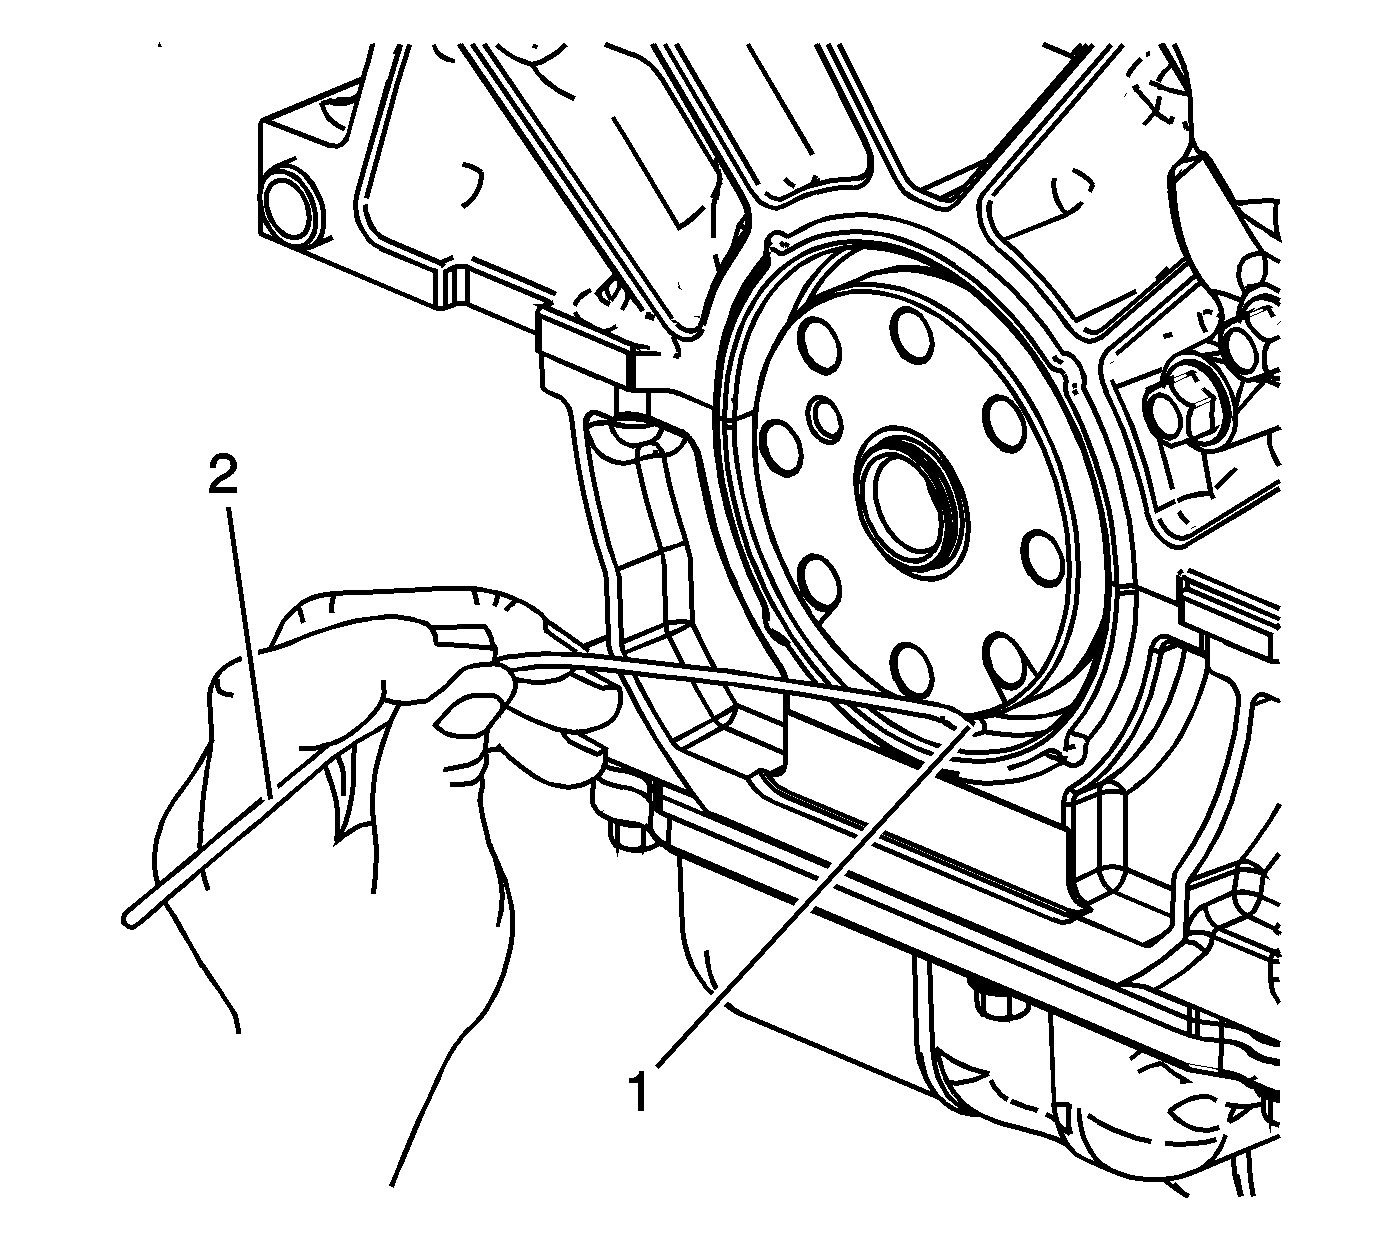
Important: Make sure the drain is clear before installing the new crankshaft rear oil seal. Failure to clear the drain could cause the crankshaft rear oil seal to leak.

Important: DO NOT allow any engine oil on the area where the crankshaft rear oil seal is to be pressed onto the crankshaft. The green coating pre-applied to the inner diameter of the crankshaft rear oil seal must not be contaminated.
Important: DO NOT put any engine oil on the green coating pre-applied to the inner diameter of the crankshaft rear oil seal. This coating is a sealant that must not be contaminated.
