Tools Required
J 34730-1A Fuel Pressure Gauge
Removal Procedure
Notice: Do not damage the MAF sensor screen. A damaged screen could restrict airflow and lead to a driveability concern.
- Relieve the fuel pressure. Refer to Fuel Pressure Relief .
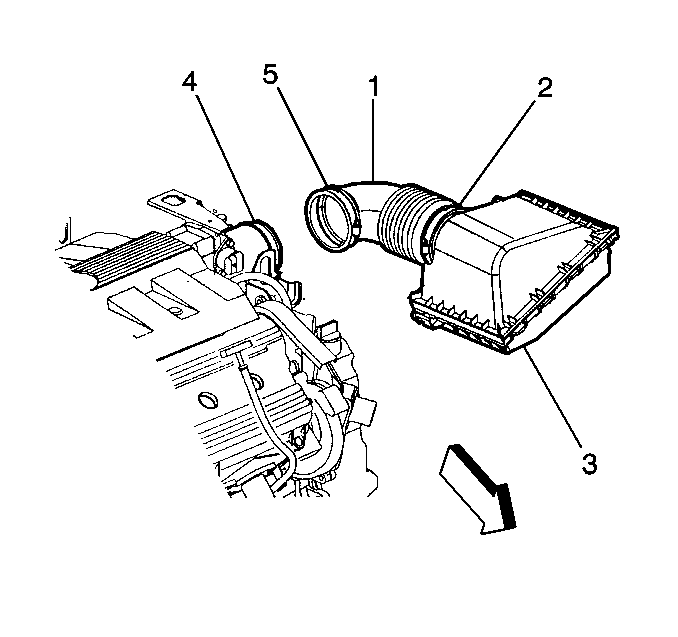
- Remove the intake air duct (1) clamp (2) from the air cleaner assembly (3).
- Remove the intake air duct (1) clamp (5) from the MAF sensor (4).
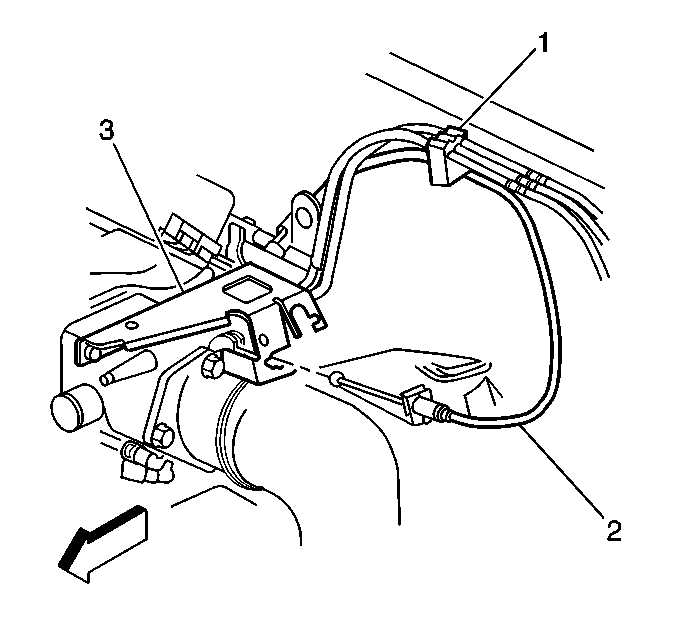
- Remove the transaxle vent hose (4) from the clip (3) that is attached to the accelerator control cable bracket.
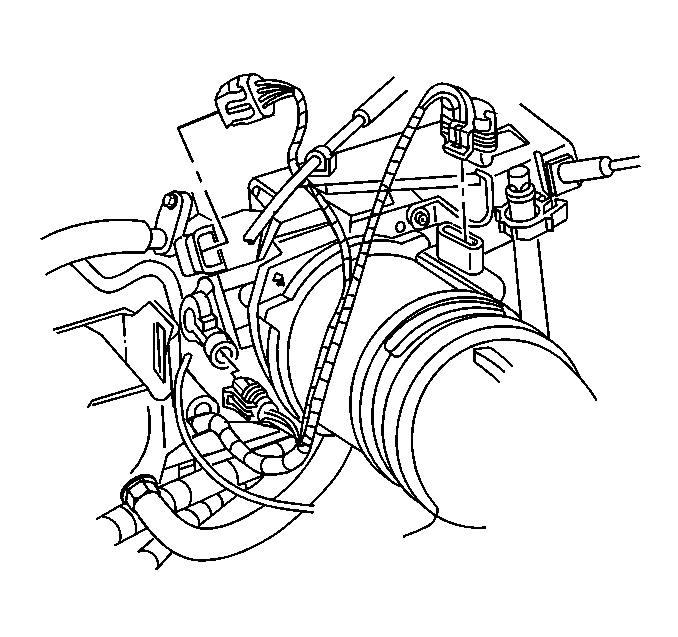
- Remove the MAF sensor electrical connector (2) from the MAF sensor (5).
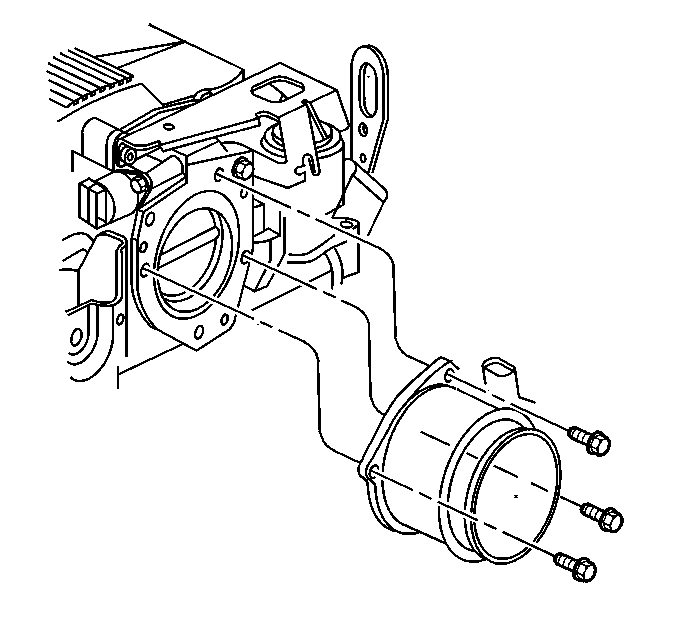
- Remove the MAF sensor. Refer to Mass Airflow Sensor Replacement .
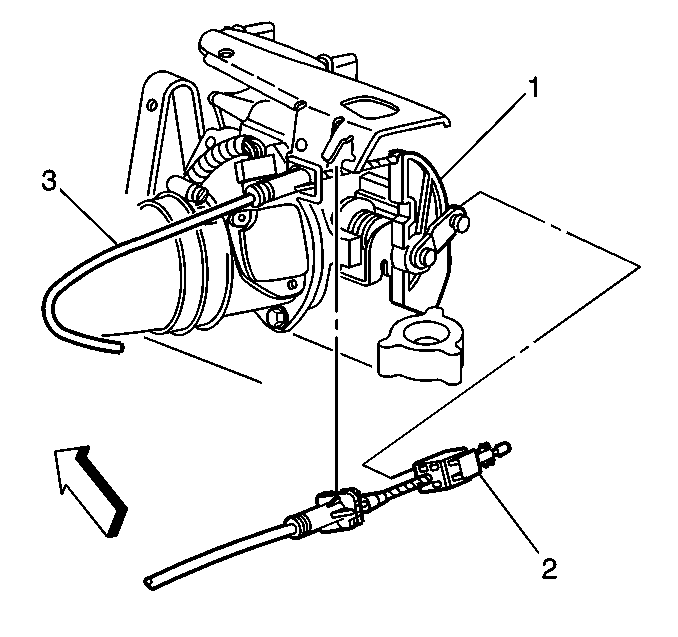
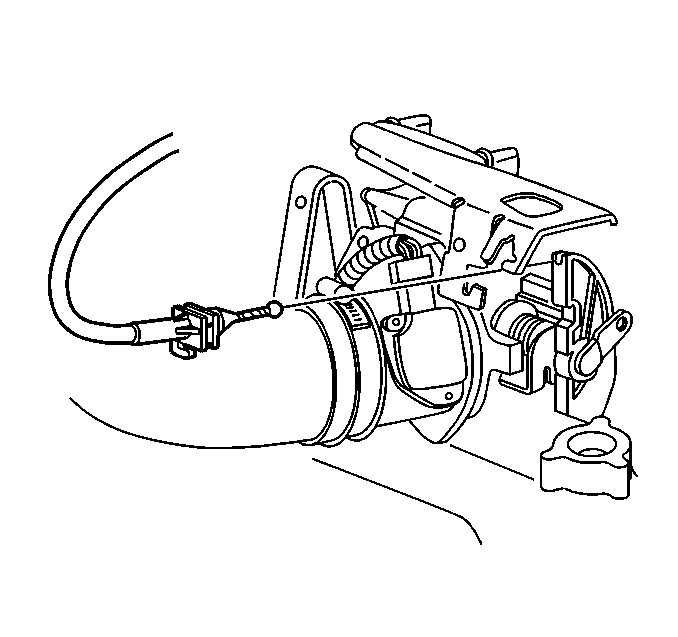
- Remove the cruise control cable (2) from the accelerator controls cable bracket.
- Remove the accelerator controls cable (3) from the accelerator controls cable bracket. Refer to Accelerator Control Cable Replacement .
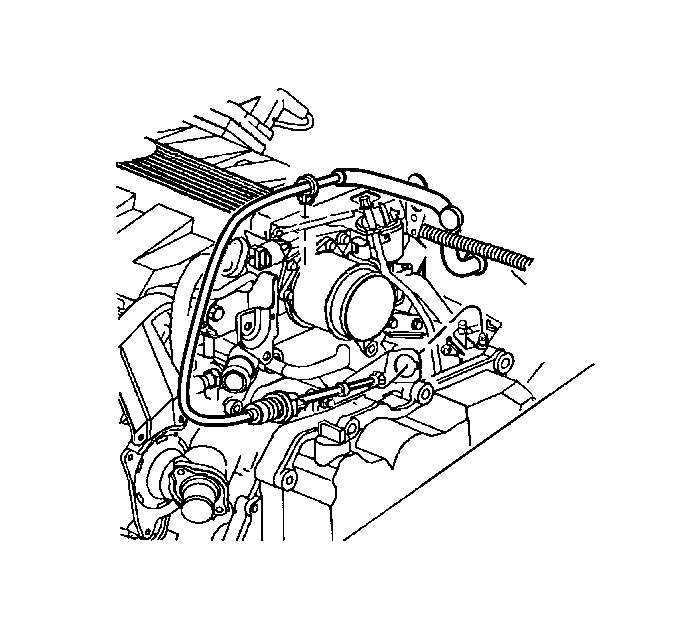
- Disconnect the transaxle shift cable clip from the accelerator controls cable bracket.
- Remove the accelerator controls cable (3) from throttle body lever (1). Refer to Accelerator Control Cable Replacement .
- Remove the cruise control cable (2) from throttle body lever (1).
- Remove the TP sensor connector (6) from the TP sensor (7).
- Remove the IAC valve electrical connector (1) from the IAC valve (8).
- Drain the coolant. Refer to Cooling System Draining and Filling .
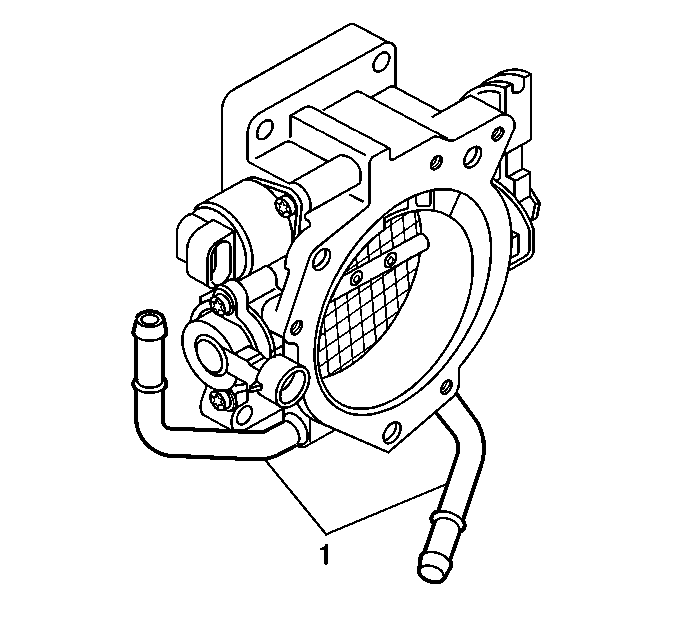
- Remove the throttle body coolant hoses at the throttle body (1).
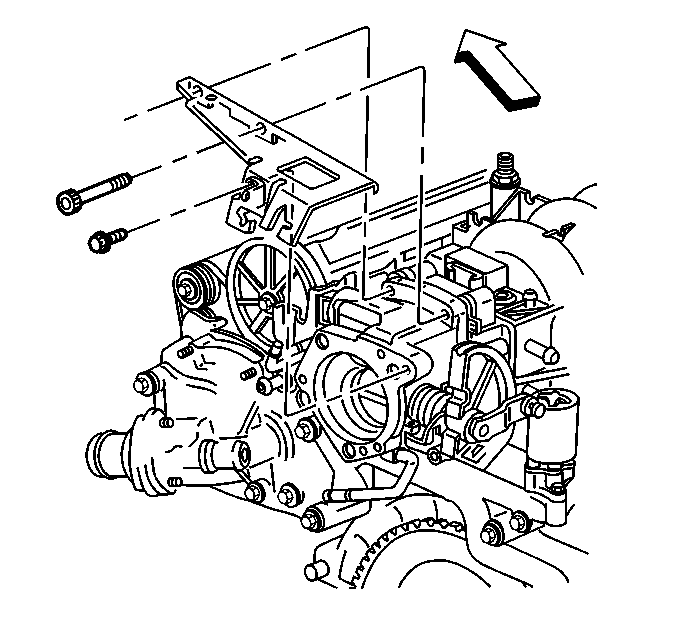
- Remove the 3 accelerator controls cable bracket bolts from the throttle body.
- Remove the throttle body (1) and gasket (2) bolts from the throttle body.




Disassemble Procedure
- Remove the TP sensor attaching screws (3) from the TP Sensor (2).
- Remove the TP sensor (2) from the throttle body.
- Remove the IAC valve attaching screws (4) from the IAC valve (1).
- Remove the IAC valve (1).
- Clean the throttle body gasket surfaces.
Notice: The TP sensor is an electrical component. Do not soak the TP sensor in any liquid cleaner or solvent, as damage may result.
Notice: If the IAC valve has been in service: DO NOT push or pull on the IAC valve pintle. The force required to move the pintle may damage the threads on the worm drive. Also, DO NOT soak the IAC valve in any liquid cleaner or solvent, as damage may result.
Notice: Do not use a cleaner which contains methyl ethyl ketone. This extremely strong solvent may damage components and is not necessary for this type of cleaning.
Use a carburetor cleaner in order to remove deposits. Refer to the instructions provided with the cleaner.Notice: Use care when cleaning the old gasket from the aluminum surfaces in order to prevent damage to the sealing surfaces.

Assemble Procedure
- Install the IAC valve (1) to the throttle body.
- Install the TP Sensor (2) to the throttle body.

Notice: Use the correct fastener in the correct location. Replacement fasteners must be the correct part number for that application. Fasteners requiring replacement or fasteners requiring the use of thread locking compound or sealant are identified in the service procedure. Do not use paints, lubricants, or corrosion inhibitors on fasteners or fastener joint surfaces unless specified. These coatings affect fastener torque and joint clamping force and may damage the fastener. Use the correct tightening sequence and specifications when installing fasteners in order to avoid damage to parts and systems.
Tighten
Tighten the screws to 3 N·m (27 lb in).
Tighten
Tighten the screws to 2.3 N·m (20 lb in).
Installation Procedure
Important: The outlet of the air cleaner assembly and the MAF sensor inlet duct must line up when completely installed. An improperly installed air cleaner or a distorted/missing intake air duct assembly may cause a DTC to set. Ensure that the air cleaner assembly and the intake air duct is installed correctly and that there are no kinks or folds in the intake air duct or possible debris in the air cleaner assembly or the MAF sensor inlet screen that may distort the air flow.
Important: Do Not Reuse the old throttle body gasket.
- Position the new throttle body gasket (2) on throttle body (1).
- Install the throttle body (1) to throttle body spacer (3) and finger tighten 2 lower bolts.
- Install the 3 accelerator controls cable bracket bolts to the throttle body.
- Install the throttle body coolant hoses (1) at the throttle body.
- Install the IAC valve electrical connector to the IAC valve.
- Install the TP sensor electrical connector to the TP sensor.
- Install the accelerator control cable (3) at the throttle body lever (1). Refer to Accelerator Control Cable Replacement .
- Install the cruise control cable (2) at the throttle body lever (1).
- Install the transaxle shift cable into the clip on the accelerator controls cable bracket.
- Install the cruise control cable (1) to the accelerator controls cable bracket.
- Install the accelerator cable (2) to the accelerator controls cable bracket (3). Refer to Accelerator Control Cable Replacement .
- Install the transaxle vent hose to the clip on to the accelerator controls cable bracket.
- Install the MAF sensor to the throttle body. Refer to Mass Airflow Sensor Replacement .
- Install the MAF sensor electrical connector to the MAF sensor.
- Install the air intake duct (1) clamp (5) to the MAF sensor (4).
- Install the air intake duct (1) clamp (2) to the air cleaner assembly (3).
- Install the negative battery cable.
- Check and add coolant as necessary. Refer to Cooling System Draining and Filling .

Notice: Use the correct fastener in the correct location. Replacement fasteners must be the correct part number for that application. Fasteners requiring replacement or fasteners requiring the use of thread locking compound or sealant are identified in the service procedure. Do not use paints, lubricants, or corrosion inhibitors on fasteners or fastener joint surfaces unless specified. These coatings affect fastener torque and joint clamping force and may damage the fastener. Use the correct tightening sequence and specifications when installing fasteners in order to avoid damage to parts and systems.
Tighten
Tighten the throttle body and accelerator controls bracket bolts to
12 N·m (106 lb in).





Tighten
Tighten the clamps (2), (5), to 3 N·m (27 lb in).
Notice: When adding coolant, it is important that only Dex-Cool™ (silacate-free) coolant be used. If coolant other than Dex-Cool™ coolant is added to the system, premature engine, heater core, or radiator corrosion may result.
