Removal Procedure
- Disable the SIR system. Refer to Disabling the SIR System in SIR.
- Remove the steering column from the vehicle. Refer to Steering Column Replacement in Steering Wheel and Column-Tilt.
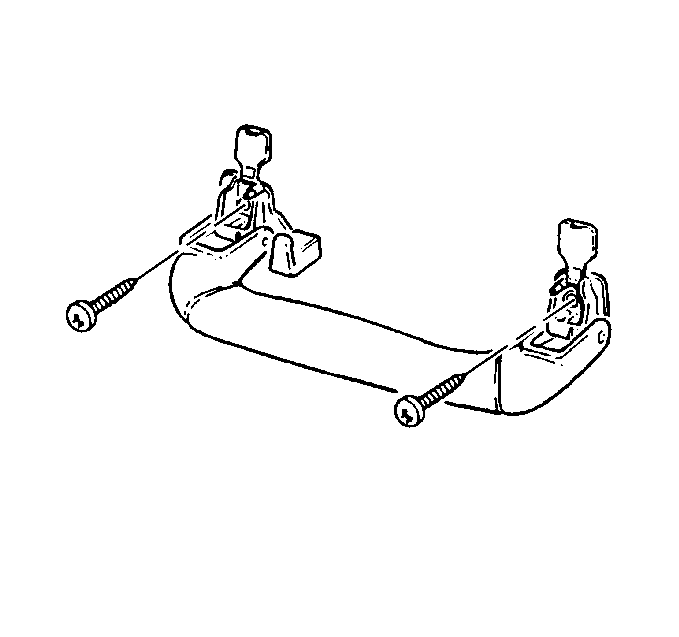
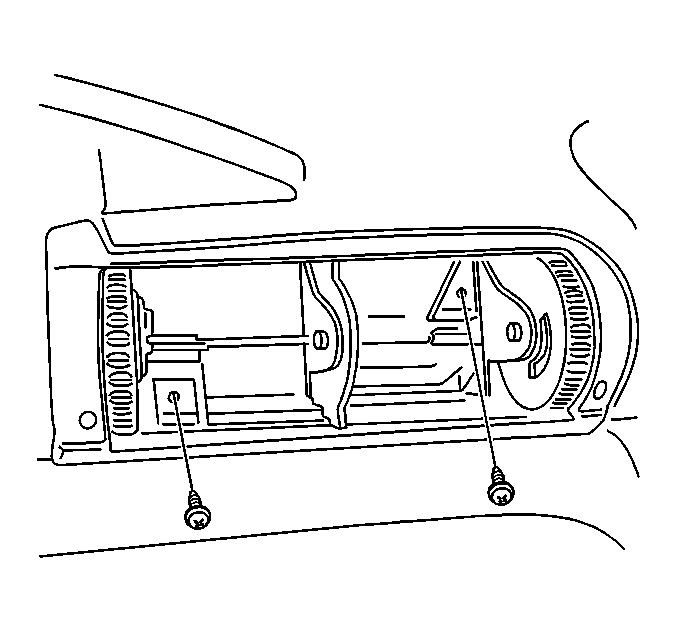
- Remove the LH front assist handle screws.
- Remove the LH front assist handle.
- Remove the RH front assist handle screws.
- Remove the RH front assist handle.
- Remove the windshield pillar moldings. Refer to Windshield Garnish Molding Replacement in Stationary Windows.
- Remove the passenger side SIR module. Refer to Inflatable Restraint Instrument Panel Module Replacement in SIR.
- Remove the center console. Refer to Console Replacement .
- Remove the center console air duct screw.
- Remove the center console air duct.
- Remove the climate control head.
- Remove the center air outlet deflector.
- Remove the center air outlet screws.
- Remove the headlamp switch. Refer to Headlamp Switch Replacement in Lighting Systems.
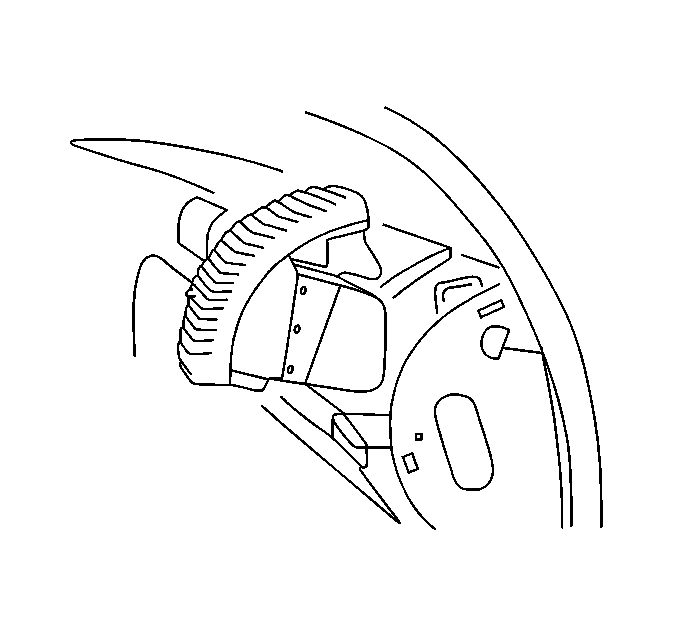
- Remove the driver's side air outlet deflector.
- Remove the driver's side air deflector housing screws.
- Remove the driver's side air deflector housing.
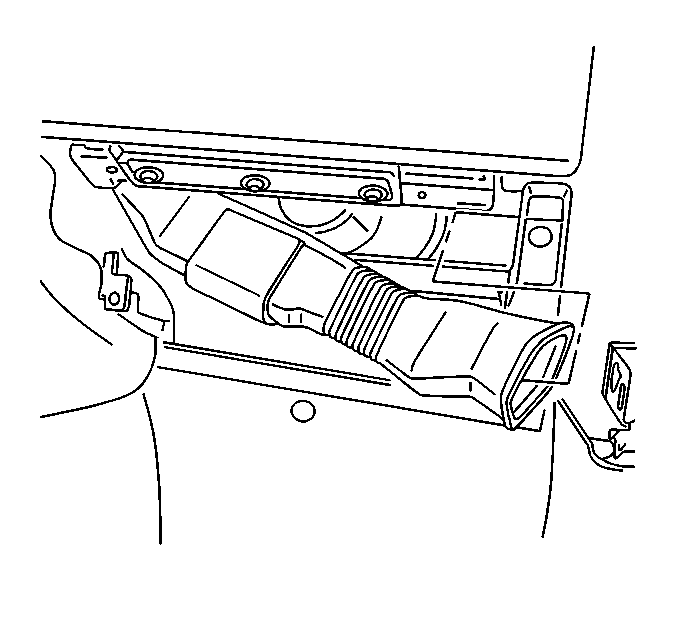
- Remove the driver's side lower outlet duct.
- Remove the instrument cluster. Refer to Instrument Cluster Replacement .
- Remove the fuse and relay panels screws.
- Remove the fuse and relay panels from the I/P.
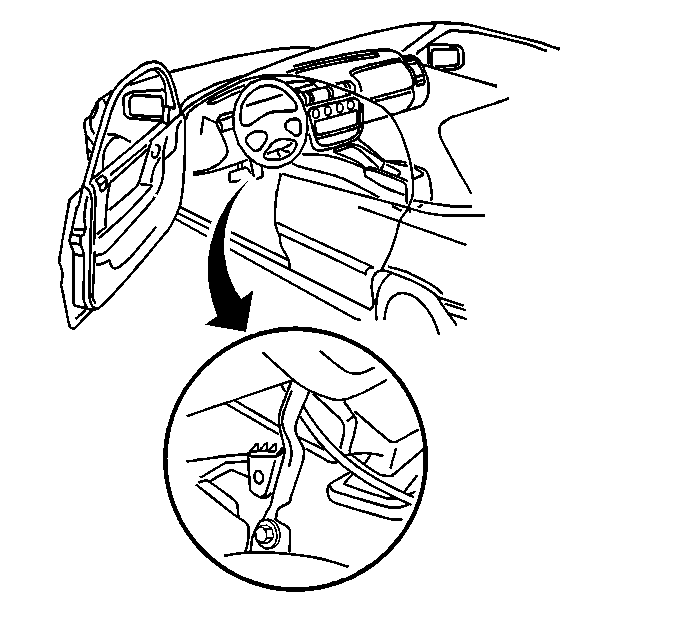
- Remove the steering column support bracket nut.
- Remove the steering column support bracket bolt.
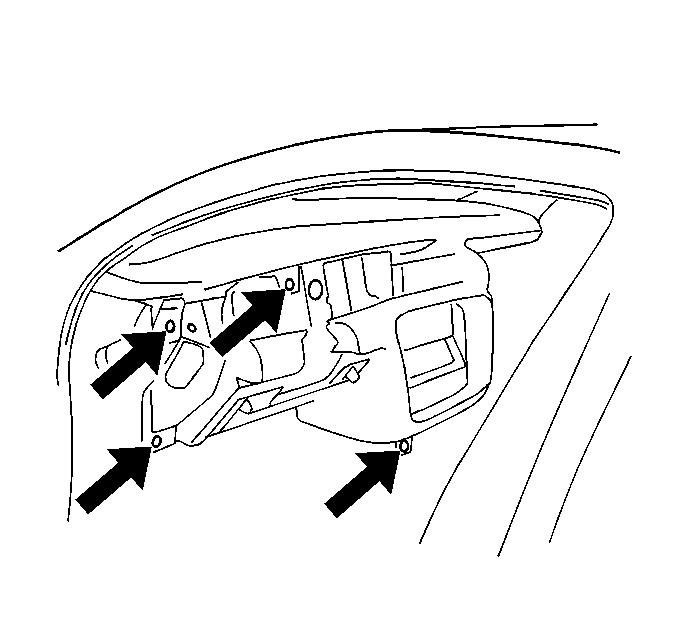
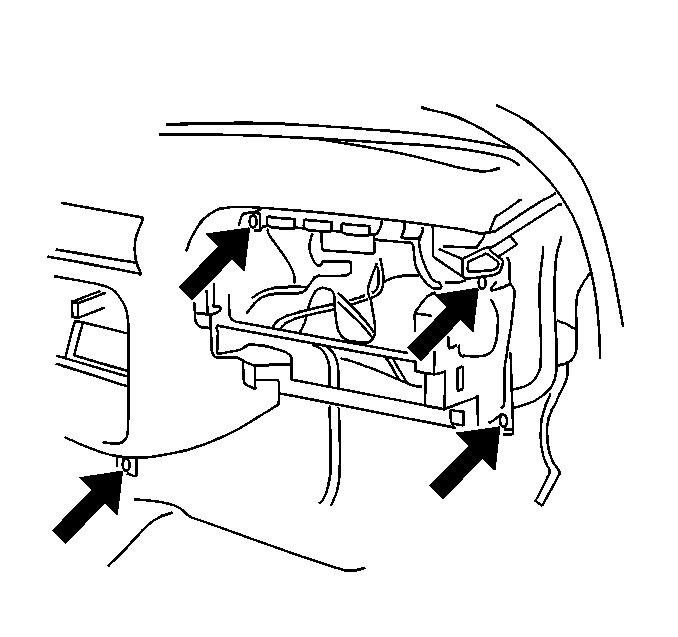
- Remove the I/P carrier bolts LH side.
- Remove the I/P carrier bolts RH side.
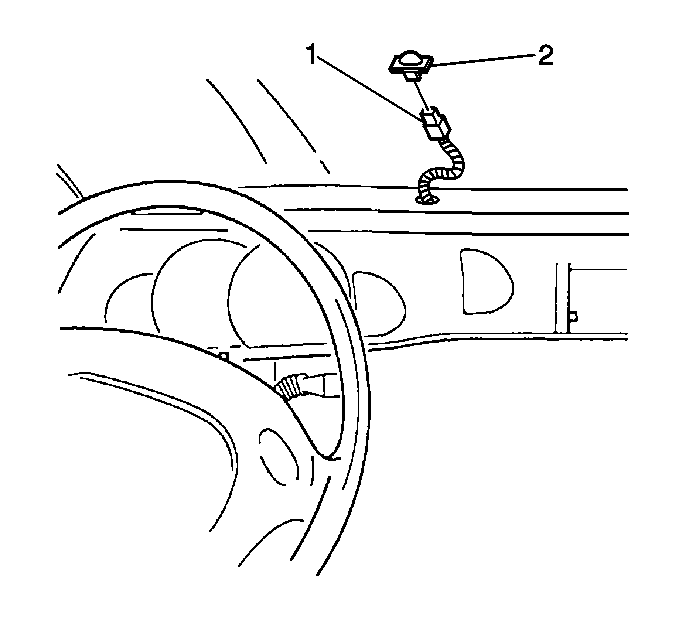
- Remove the headlamp automatic control ambient light sensor. Refer to Sun Load Sensor Replacement in HVAC Systems-Automatic.
- Remove the wiring harness connectors from the I/P carrier (headlamp switch, instrument cluster, and sun load sensor).
- Remove the wiring harness clips from the I/P carrier.
- Remove the I/P carrier from the vehicle.
Important: The wiring harness cannot be removed with the carrier.
Installation Procedure
- Install the I/P carrier into the mounting position.
- Install the wiring harness clips to the I/P carrier.
- Install the wiring harness connectors to the I/P carrier (headlamp switch, instrument cluster, and sun load sensor).
- Install the headlamp automatic control ambient light sensor. Refer to Sun Load Sensor Replacement in HVAC Systems-Automatic.
- Install the I/P carrier bolts LH side.
- Install the I/P carrier bolts RH side.
- Install the steering column support bracket bolt.
- Install the steering column support bracket nut.
- Install the fuse and the relay panels to the I/P.
- Install the fuse and the relay panel screws.
- Install the instrument cluster. Refer to Instrument Cluster Replacement .
- Install the driver's side outlet duct.
- Install the driver's side air deflector outlet housing.
- Install the driver's side air deflector outlet screw.
- Install the driver's side air outlet deflector.
- Install the driver's side access panel.
- Install the headlamp switch. Refer to Headlamp Switch Replacement in Lighting System.
- Install the climate control head.
- Install the center console air duct.
- Install the center console air duct screw.
- Install the center console. Refer to Console Replacement .
- Install the passenger side SIR module. Refer to Inflatable Restraint Instrument Panel Module Replacement in SIR.
- Install the passenger side air outlet duct.
- Install the passenger side air deflector housing.
- Install the passenger side air deflector housing screw.
- Install the passenger side instrument panel (I/P) access panel.
- Install the windshield pillar moldings. Refer to Windshield Garnish Molding Replacement in Stationary Windows.
- Install the RH front assist handle.
- Install the RH front assist handle screws.
- Install the LH front assist handle.
- Install the LH front assist handle screws.
- Install the steering column. Refer to Steering Column Replacement in Steering Wheel and Column.
- Enable the SIR system. Refer to Enabling the SIR System in SIR.
Notice: Use the correct fastener in the correct location. Replacement fasteners must be the correct part number for that application. Fasteners requiring replacement or fasteners requiring the use of thread locking compound or sealant are identified in the service procedure. Do not use paints, lubricants, or corrosion inhibitors on fasteners or fastener joint surfaces unless specified. These coatings affect fastener torque and joint clamping force and may damage the fastener. Use the correct tightening sequence and specifications when installing fasteners in order to avoid damage to parts and systems.
Tighten
Tighten the instrument panel carrier bolts to 22 N·m (16 lb ft).
Tighten
Tighten the instrument panel carrier bolts to 22 N·m (16 lb ft).
Tighten
Tighten the steering column support bracket bolt 22 N·m
(16 lb ft).
Tighten
Tighten the steering column support bracket nut to 22 N·m
(16 lb ft).
Tighten
Tighten the fuse and relay panel screws to 2 N·m (18 lb in).
Tighten
Tighten the drivers air deflector screws to 2 N·m (18 lb in).

Tighten
Tighten the center console air duct screws to 2 N·m (18 lb in).
Tighten
Tighten the housing screws to 2 N·m (18 lb in).

Tighten
Tighten the RH front assist handle to 3 N·m (27 lb in).
Tighten
Tighten the LH front assist handle screws to 3 N·m (27 lb in).
