For 1990-2009 cars only
Removal Procedure
- Disconnect the battery negative cable. Refer to Battery Negative Cable Disconnection and Connection in Engine Electrical.
- Remove the intake plenum. Refer to Intake Plenum Replacement .
- Remove the intake manifold. Refer to Intake Manifold Replacement .
- Remove the relevant valve cover. Refer to Camshaft Cover Replacement .
- Remove the intake air resonator. Refer to Intake Air Resonator Replacement in Engine Controls.
- Remove the front timing belt cover. Refer to Timing Belt Cover Replacement .
- Remove the timing belt. Refer to Timing Belt Replacement .
- Remove the relevant camshaft sprockets. Refer to Camshaft Drive Sprocket Replacement .
- Remove the relevant camshafts. Refer to Camshaft Replacement .
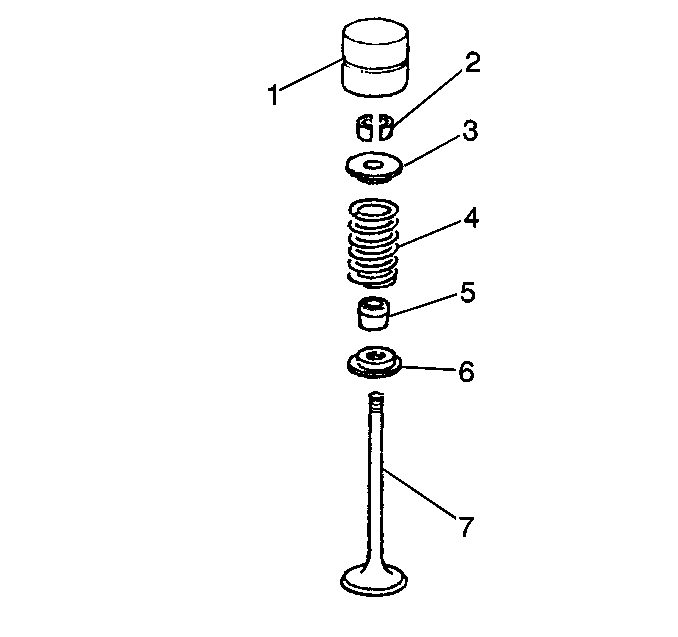
- Remove the lifters (1). Place the lifters in a rack sequentially so they can be reinstalled in their original order if the lifters is to be reused.

Installation Procedure
- Lubricate the lifters (1) with prelube, GM P/N 12345501 or equivalent.
- Install the lifters in their original position if not replaced.
- Install the relevant camshafts. Refer to Camshaft Replacement .
- Install the relevant camshaft sprockets. Refer to Camshaft Drive Sprocket Replacement .
- Install the timing belt. Refer to Timing Belt Replacement .
- Install the front timing belt cover. Refer to Timing Belt Cover Replacement .
- Install the intake air resonator. Refer to Intake Air Resonator Replacement in Engine Controls.
- Install the relevant valve cover. Refer to Camshaft Cover Replacement .
- Install the intake manifold. Refer to Intake Manifold Replacement .
- Install the intake plenum. Refer to Intake Plenum Replacement .
- Connect the battery negative cable. Refer to Battery Negative Cable Disconnection and Connection in Engine Electrical.

