For 1990-2009 cars only
Removal Procedure
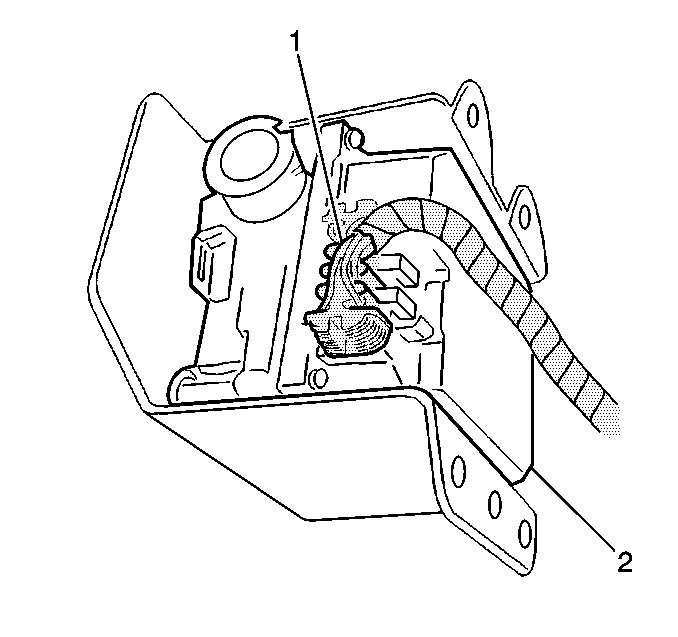
- Remove the cruise control cable from the actuator clip (2).
- Twist the cruise control cable guide tube ¼ turn counterclockwise in order to remove from the actuator.
- Remove the cruise control cable end from the actuator ribbon, being careful not to twist the ribbon.
- Slide the evaporative emission filter/solenoid off of the RH strut tower mounting bracket.
- Slide down the evaporative emission filter/solenoid hose clamp about 76.2 mm (3.0 in).
- Remove the hoses.
- Swing the evaporative emission canister up and out of the way.
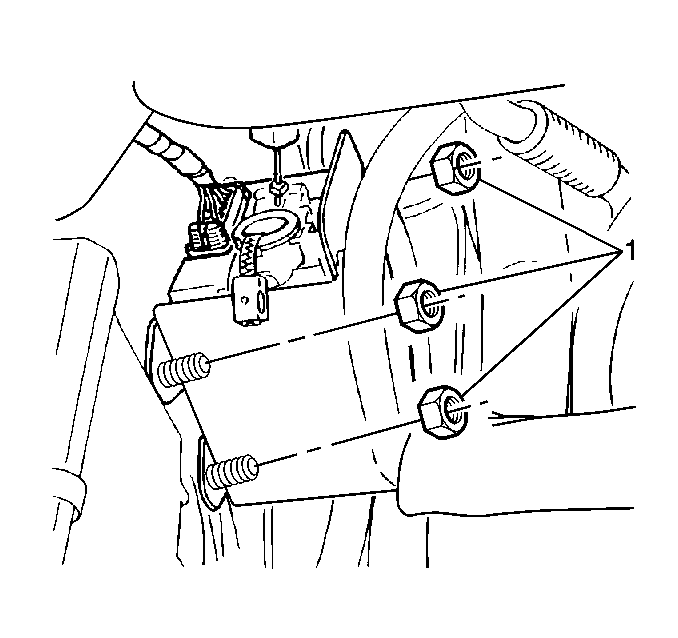
- Remove the nuts from the actuator mounting studs.
- Lift the actuator up and out of the engine compartment in order to access the harness connector.
- Disconnect the harness connector (1).


Installation Procedure
- Connect the actuator connector (1).
- Position the actuator (2) in the engine compartment.
- Install the nuts on the actuator mounting studs.
- Swing the evaporative emission canister into position.
- Install the evaporative emission filter/solenoid hoses.
- Slide up the hose clamp to the original position.
- Slide the evaporative emission filter/solenoid onto the RH strut tower mounting bracket.
- Install the cruise control cable end to the actuator ribbon, being careful not to twist the ribbon.
- Twist the guide tube ¼ turn clockwise in order to install into the actuator.
- Program the cruise control actuator with the scan tool by following the instructions in the PROGRAMMING menu under CRUISE CONTROL.
- Adjust the cruise control cable. Refer to Cruise Control Cable Adjustment .


Notice: Use the correct fastener in the correct location. Replacement fasteners must be the correct part number for that application. Fasteners requiring replacement or fasteners requiring the use of thread locking compound or sealant are identified in the service procedure. Do not use paints, lubricants, or corrosion inhibitors on fasteners or fastener joint surfaces unless specified. These coatings affect fastener torque and joint clamping force and may damage the fastener. Use the correct tightening sequence and specifications when installing fasteners in order to avoid damage to parts and systems.
Tighten
Tighten the nuts to 8 N·m (71 lb in).


