For 1990-2009 cars only
Rear Bumper Fascia Replacement Oldsmobile
Removal Procedure
- Raise and support the vehicle. Refer to Lifting and Jacking the Vehicle in General Information.
- Remove the rear compartment sill plate. Refer to Rear Compartment Sill Trim Plate Replacement in Body Rear End.
- Remove the rear compartment rear trim. Refer to Rear Compartment Trim Panel Replacement in Body Rear End.
- Remove the rear compartment RH side trim. Refer to Rear Compartment Side Trim Replacement - Right Side in Body Rear End.
- Position the LH portion of the floor trim inboard in order to access the fascia retaining nuts.
- Remove the taillamps. Refer to Tail Lamp Replacement in Lighting Systems.
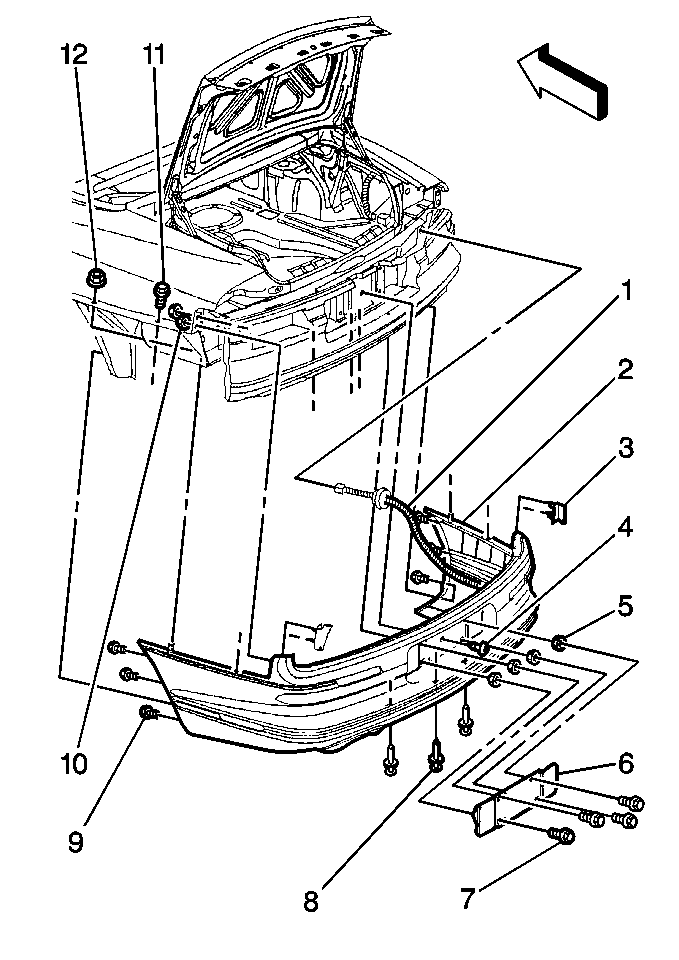
- From inside the rear compartment, remove the nuts (10, 12) and the bolts(9. 11) retaining the fascia (2) to the quarter panels.
- Disconnect the tail lamp electrical connector (1).
- Press the grommet from the rear end panel.
- Remove the push-in retainers (8) from the fascia (2).
- Remove the rear wheelhouse extensions. Refer to Wheelhouse Extension Replacement - Rear in Exterior Trim.
- Remove the rear bumper fascia.

Installation Procedure
- Install the rear bumper fascia.
- Install the rear wheelhouse extensions. Refer to Wheelhouse Extension Replacement - Rear in Exterior Trim.
- Install the push-in retainers (8) to the fascia (2).
- Install the grommet to the rear end panel
- Connect the tail lamp electrical connector
- From inside the rear compartment, install the nuts (10, 12) and the bolts(9. 11) in order to retain the fascia (2) to the quarter panels.
- Install the taillamps. Refer to Tail Lamp Replacement in Lighting Systems.
- Reposition the LH portion of the floor trim.
- Remove the rear compartment RH side trim. Refer to Rear Compartment Side Trim Replacement - Right Side in Body Rear End.
- Install the rear compartment rear trim. Refer to Rear Compartment Side Trim Replacement - Right Side in Body Rear End.
- Install the rear compartment sill plate. Refer to Rear Compartment Sill Trim Plate Replacement in Body Rear End.
- Lower the vehicle.

Rear Bumper Fascia Replacement Buick
Removal Procedure
- Raise and support the vehicle. Refer to Lifting and Jacking the Vehicle in General Information.
- Remove the rear compartment sill plate. Refer to Rear Compartment Sill Trim Plate Replacement in Body Rear End.
- Remove the rear compartment rear trim. Refer to Rear Compartment Trim Panel Replacement in Body Rear End.
- Remove the rear compartment RH side trim. Refer to Rear Compartment Side Trim Replacement - Right Side in Body Rear End.
- Position the LH side of the floor trim inboard in order to access the fascia retaining nuts.
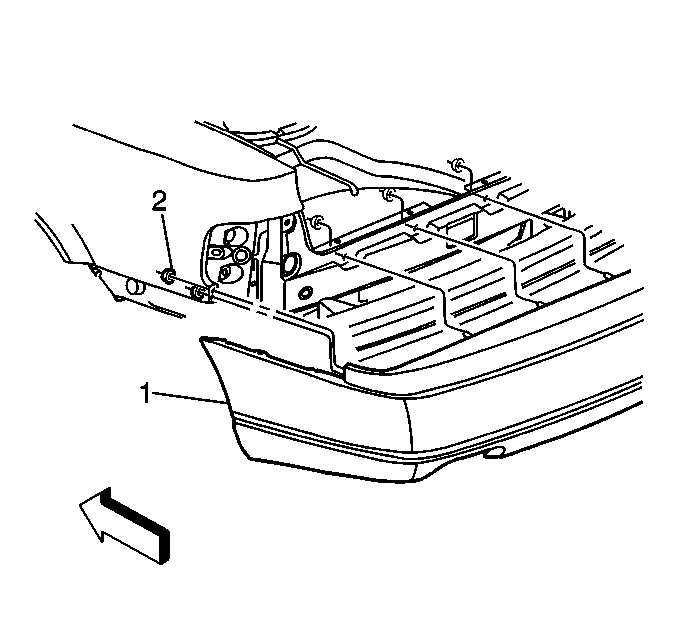
- From inside the rear compartment, remove the nuts (2) retaining the fascia (1) to the quarter panels.
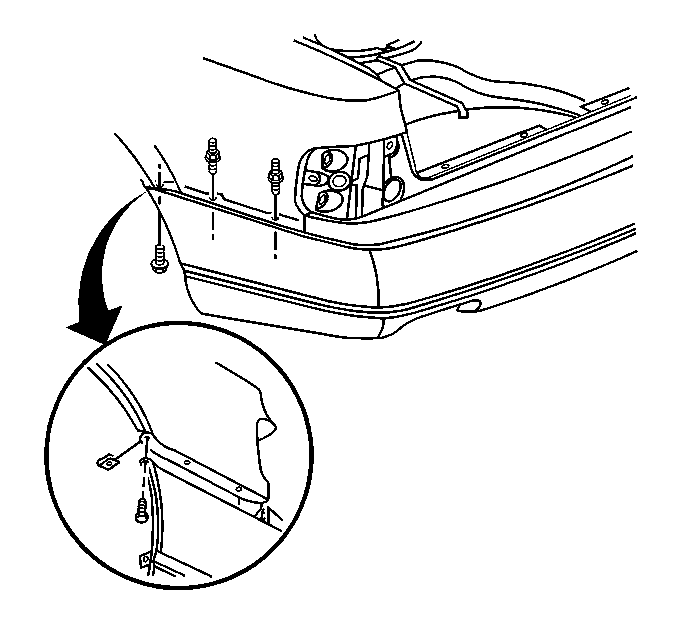
- Remove the rear wheel opening molding. Refer to Rear Wheel Opening Molding Replacement in Exterior Trim.
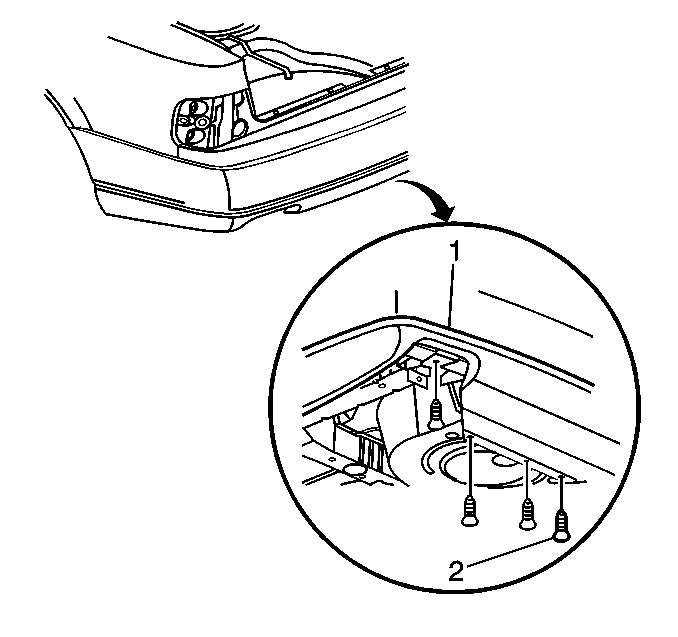
- Remove the push-in retainers from the fascia.
- Remove the rear wheelhouse extensions. Refer to Wheelhouse Extension Replacement - Rear in Exterior Trim.
- Remove the rear bumper fascia.


Installation Procedure
- Install the rear bumper fascia.
- Install the rear wheelhouse extensions. Refer to Wheelhouse Extension Replacement - Rear in Exterior Trim.
- Install the push-in retainers from the fascia.
- Install the rear wheel opening molding. Refer to Rear Wheel Opening Molding Replacement in Exterior Trim.
- From inside the rear compartment, install the nuts (2) in order to retain the fascia (1) to the quarter panels.
- Reposition the LH side of the floor trim.
- Install the rear compartment RH side trim. Refer to Rear Compartment Side Trim Replacement - Right Side in Body Rear End.
- Install the rear compartment rear trim. Refer to Rear Compartment Trim Panel Replacement in Body Rear End.
- Install the rear compartment sill plate. Refer to Rear Compartment Sill Trim Plate Replacement in Body Rear End.
- Lower the vehicle.


