For 1990-2009 cars only
Engine Front Cover Replacement LAT
Removal Procedure
- Remove the drive belt tensioner. Refer to Drive Belt Tensioner Replacement.
- Remove the crankshaft balancer. Refer to Crankshaft Balancer Replacement.
- Install the engine support fixture. Refer to Engine Support Fixture.
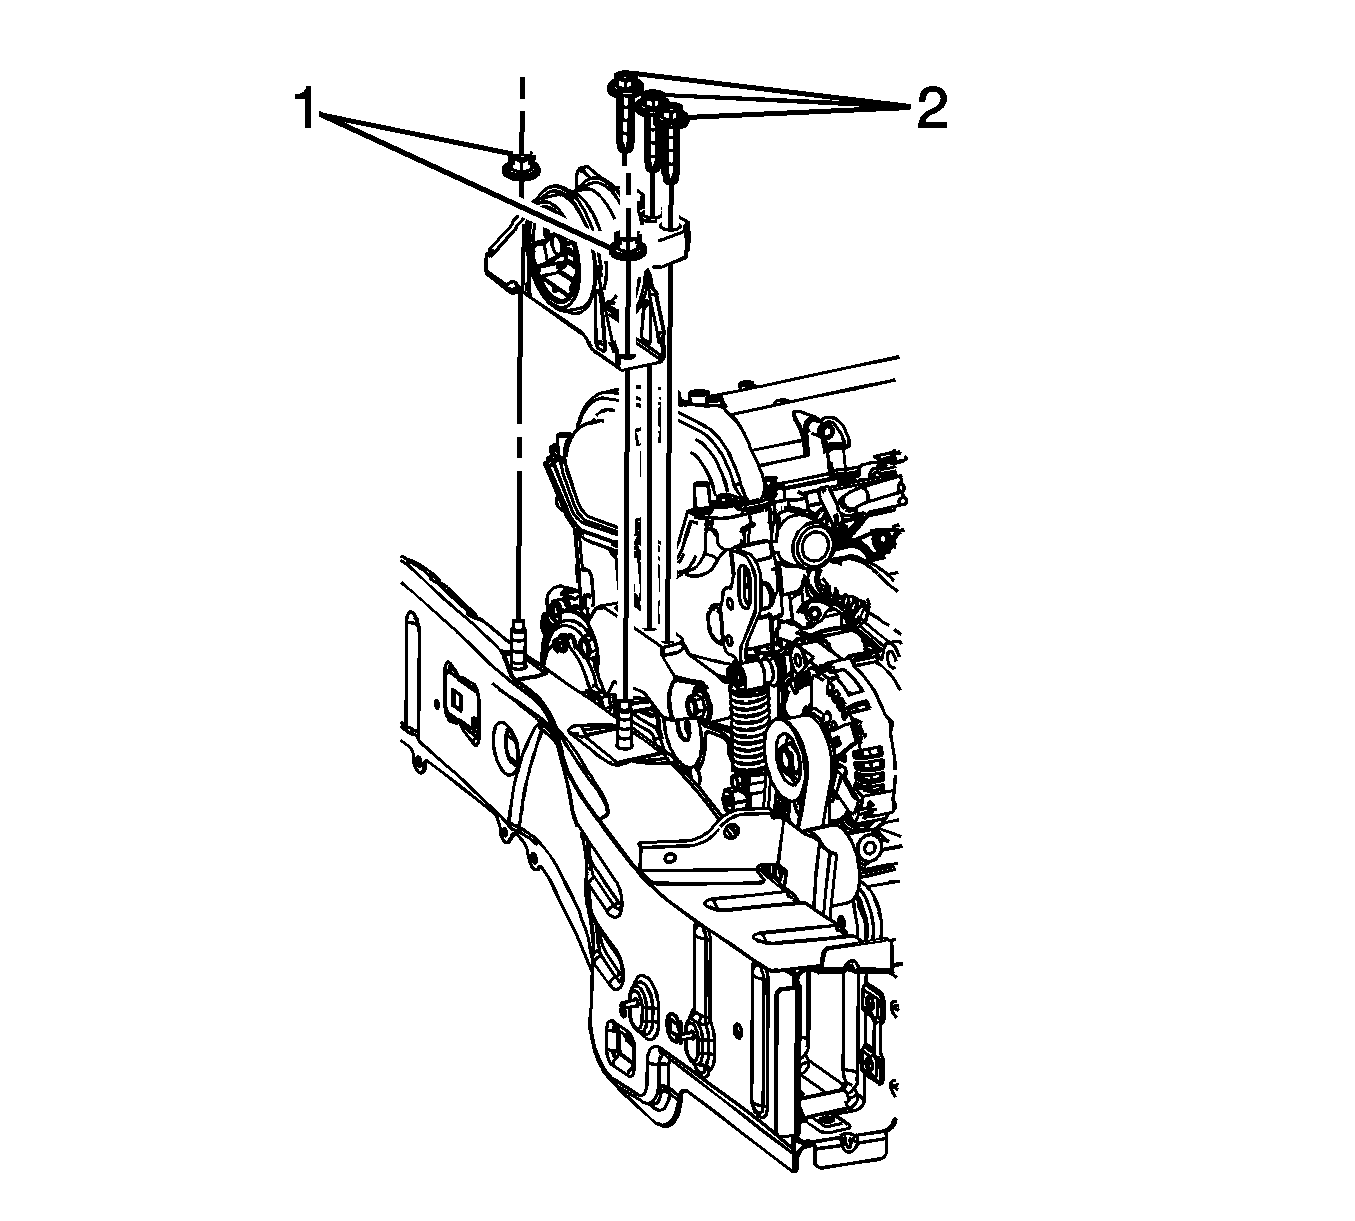
- Remove the engine mount to bracket bolts (2).
- Remove the engine mount to side rail nuts (1).
- Remove the engine mount from the engine compartment.
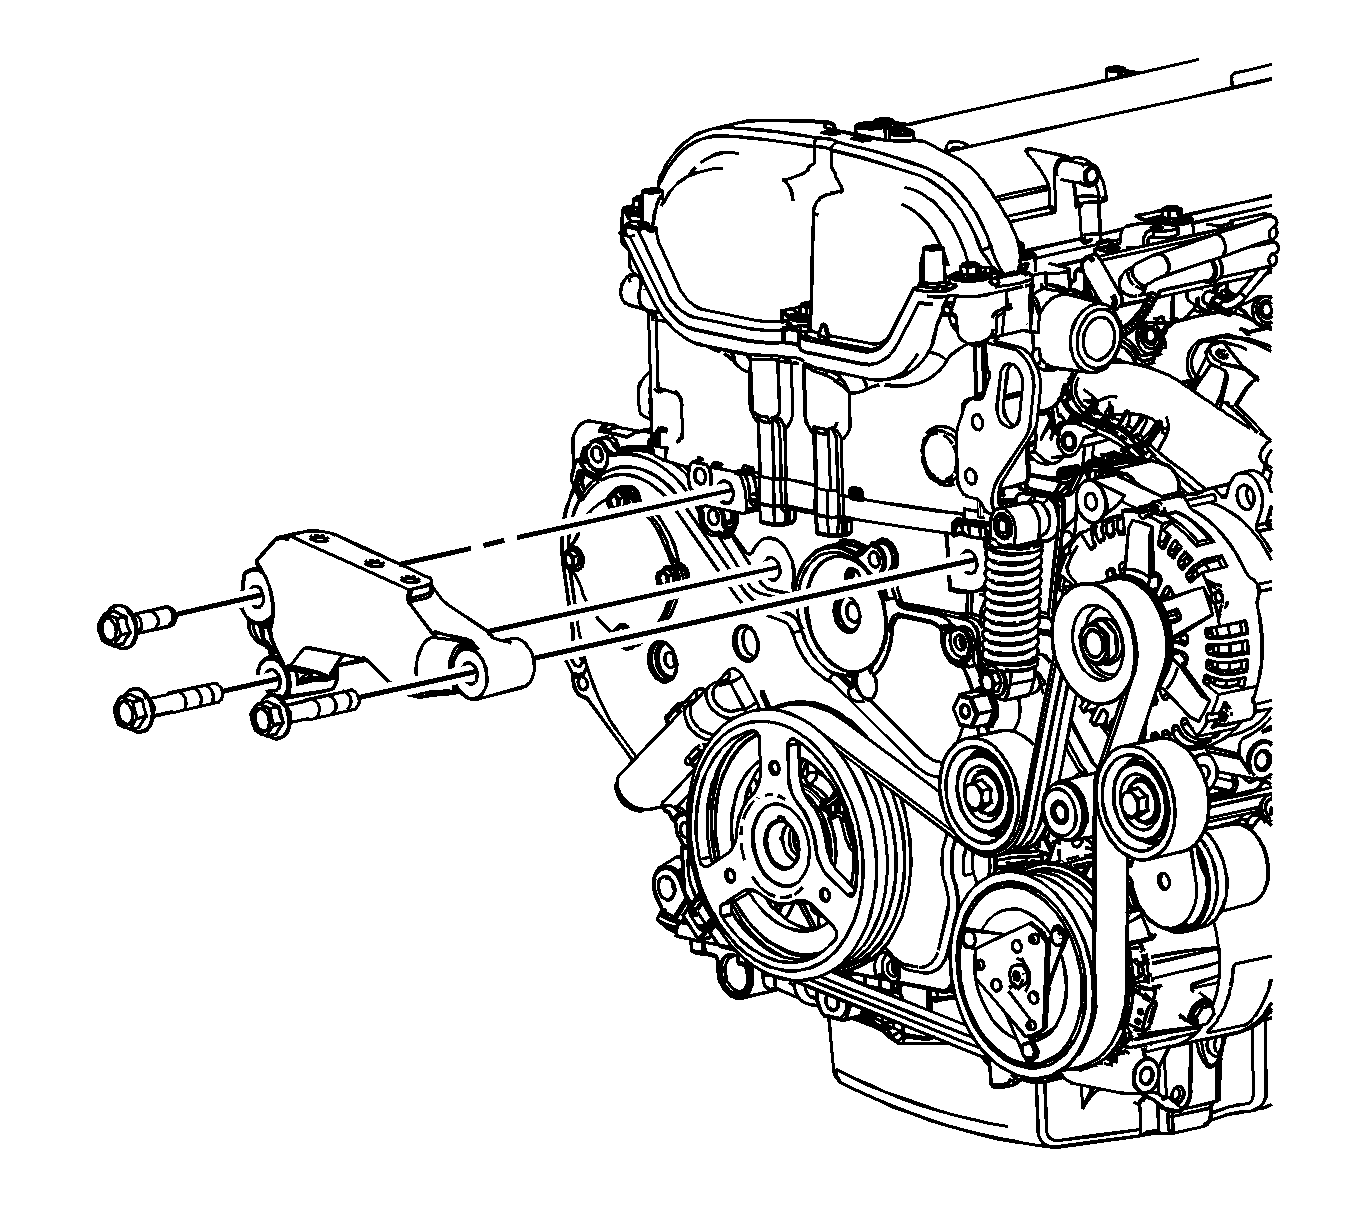
- Remove the engine mount bracket to engine bolts.
- Remove the engine mount bracket.
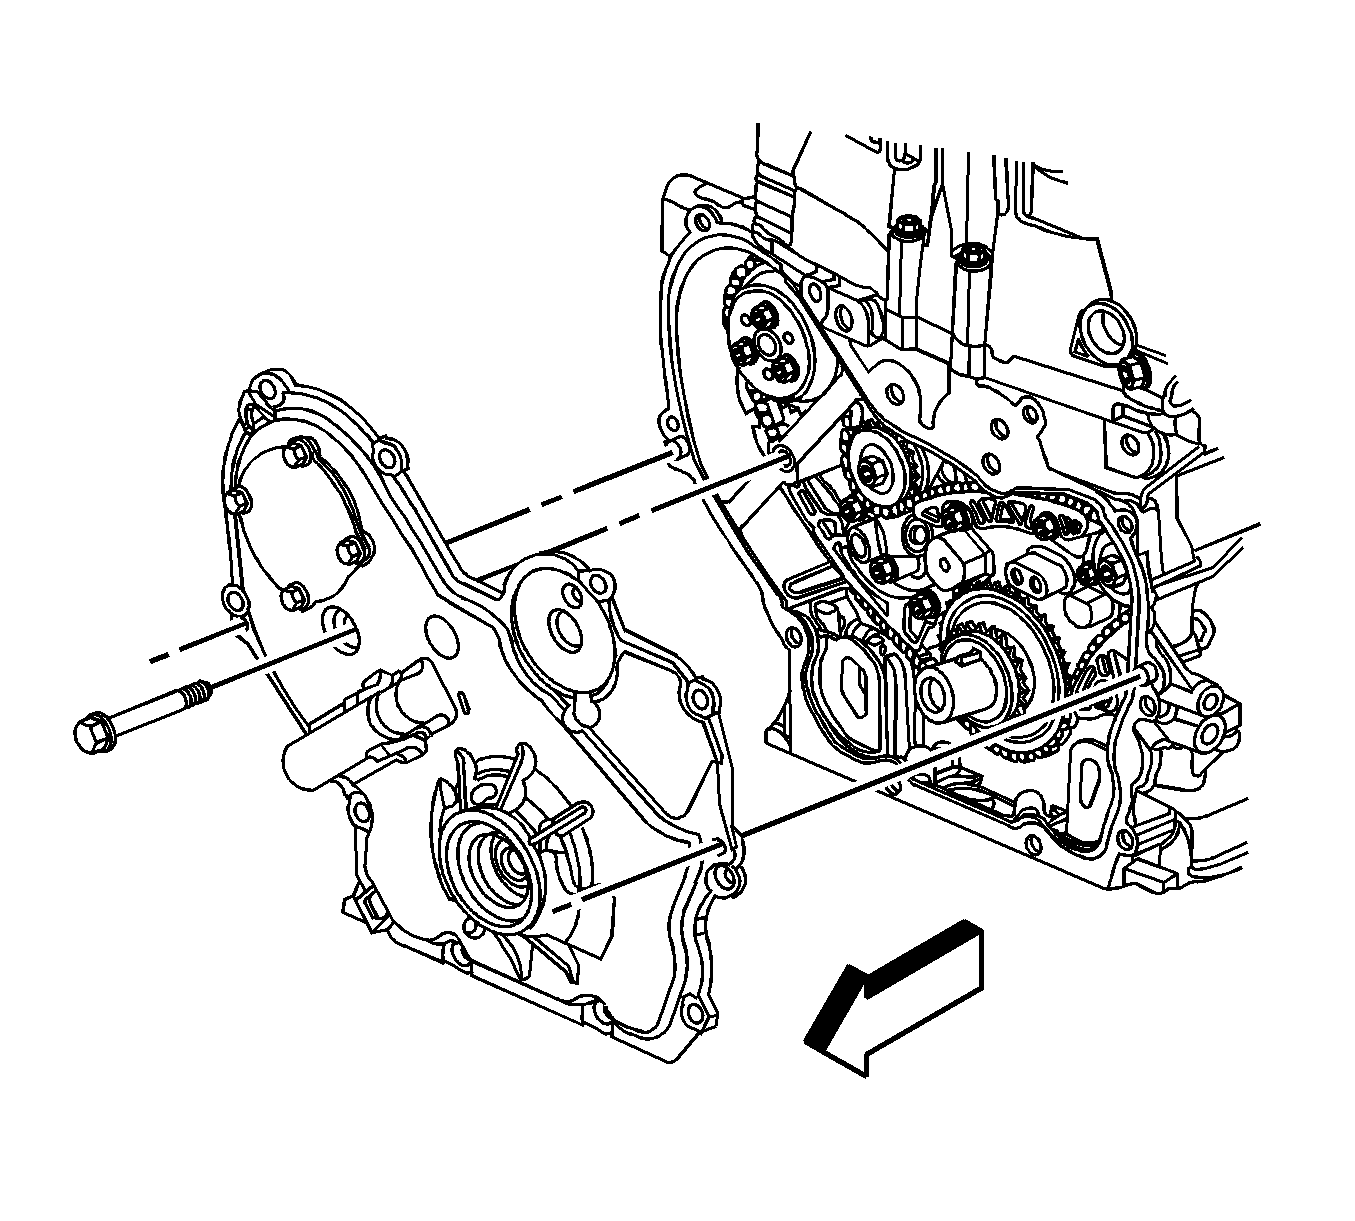
- Remove the engine front cover to water pump bolt.
- Raise and suitably support the vehicle. Refer to Lifting and Jacking the Vehicle.
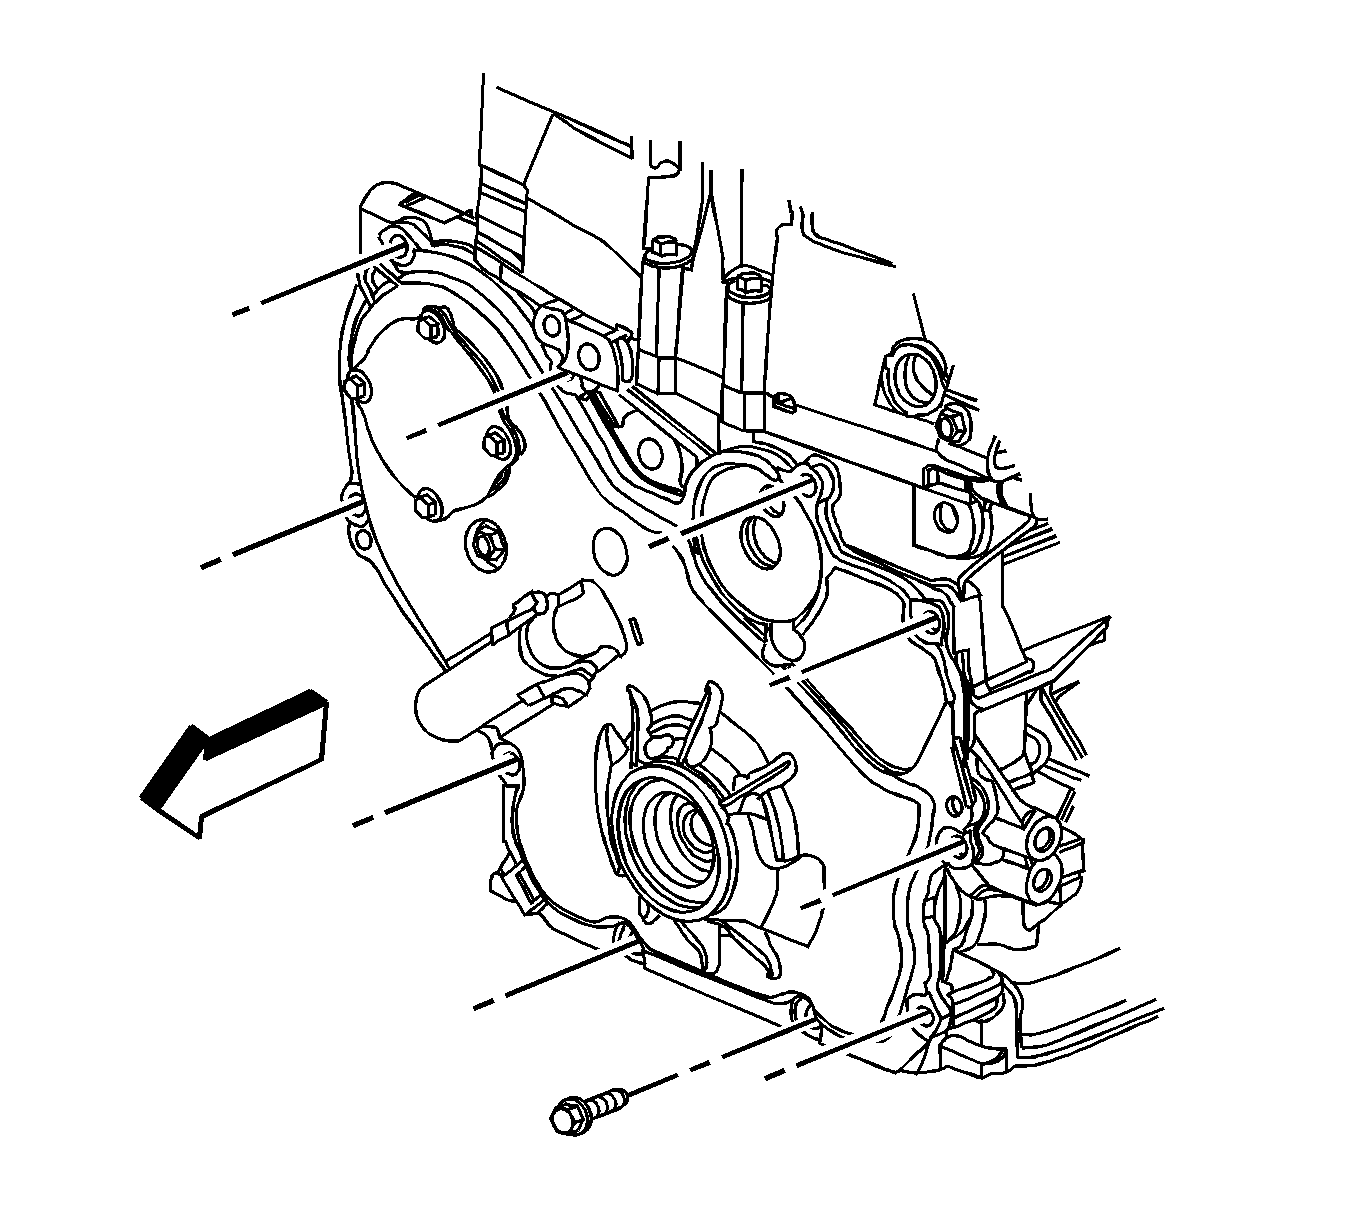
- Remove the engine front cover bolts.
- Remove the engine front cover.
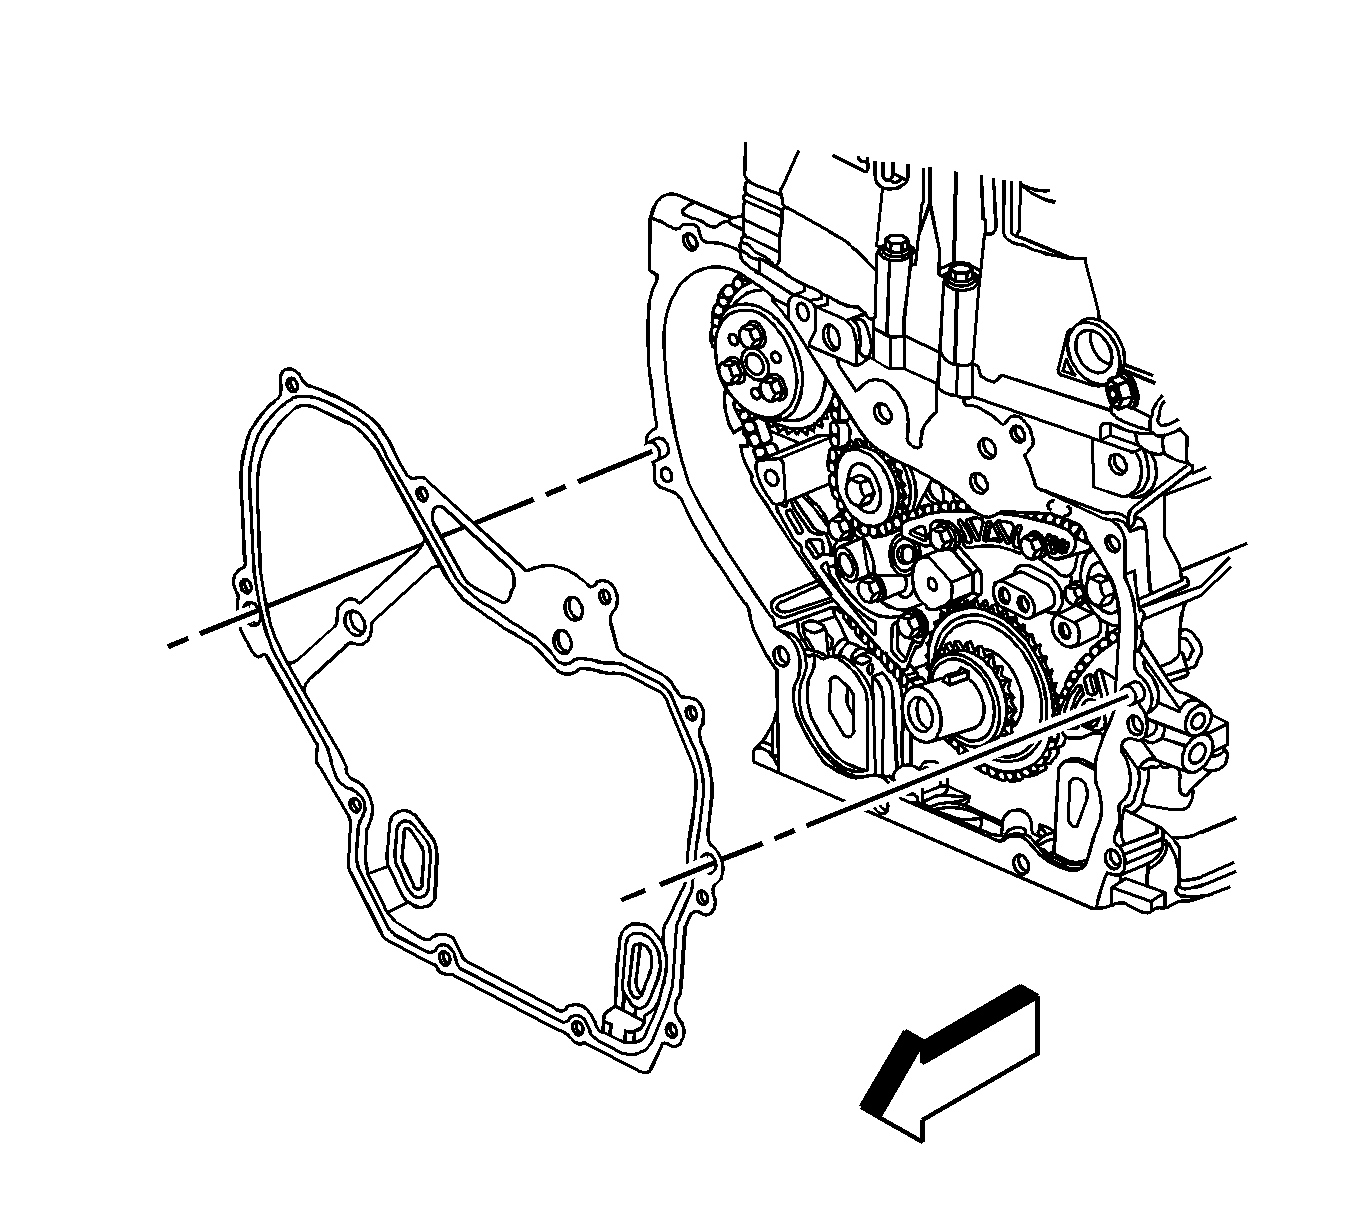
- Remove and discard the engine front cover gasket.
Installation Procedure
- Install a NEW engine front cover gasket to the dowel pins.
- Install the engine front cover.
- Install the engine front cover bolts and tighten to 25 N·m (18 lb ft).
- Lower the vehicle.
- Install the engine front cover to water pump bolt and tighten to 25 N·m (18 lb ft).
- Position the engine mount bracket to the engine.
- Install the engine mount bracket bolts in the following locations:
- Tighten the engine mount bracket bolts in the following sequence:
- Install the engine mount to the engine compartment.
- Install the engine mount to side rail nuts (1) and tighten to 100 N·m (74 lb ft).
- Install the engine mount to bracket bolts (2).
- Tighten the engine mount to bracket bolts in the following sequence:
- Remove the engine support fixture. Refer to Engine Support Fixture.
- Install the crankshaft balancer. Refer to Crankshaft Balancer Replacement.
- Install the drive belt tensioner. Refer to Drive Belt Tensioner Replacement.

Caution: Refer to Fastener Caution in the Preface section.


| • | The long bolts in the forward and lower rear holes |
| • | The short bolt in the upper rear hole |
| 8.1. | Upper left |
| 8.2. | Lower left |
| 8.3. | Right |
Tighten the bolts to 100 N·m (74 lb ft).

| 12.1. | Middle |
| 12.2. | Rear |
| 12.3. | Front |
Tighten the bolts to 50 N·m (37 lb ft).
Engine Front Cover Replacement LE5
Removal Procedure
- Remove the drive belt tensioner. Refer to Drive Belt Tensioner Replacement.
- Remove the crankshaft balancer. Refer to Crankshaft Balancer Replacement.
- Remove the air cleaner assembly. Refer to Air Cleaner Assembly Replacement.
- Install the engine support fixture. Refer to Engine Support Fixture.
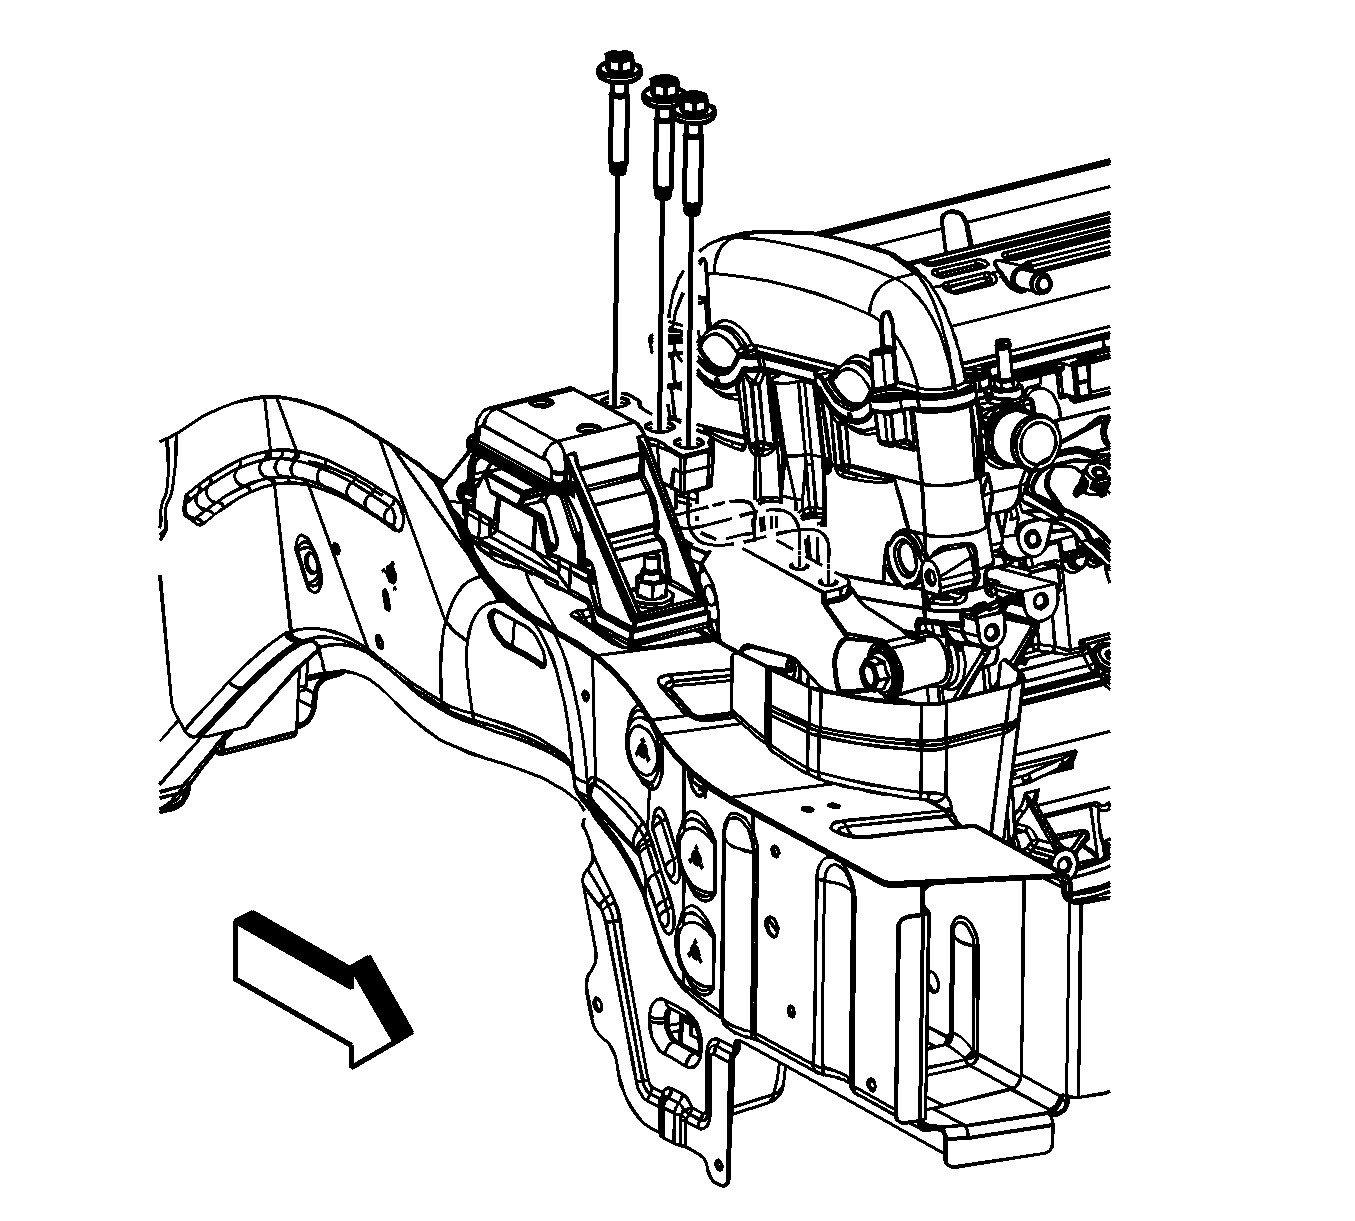
- Remove the engine mount to bracket bolts.
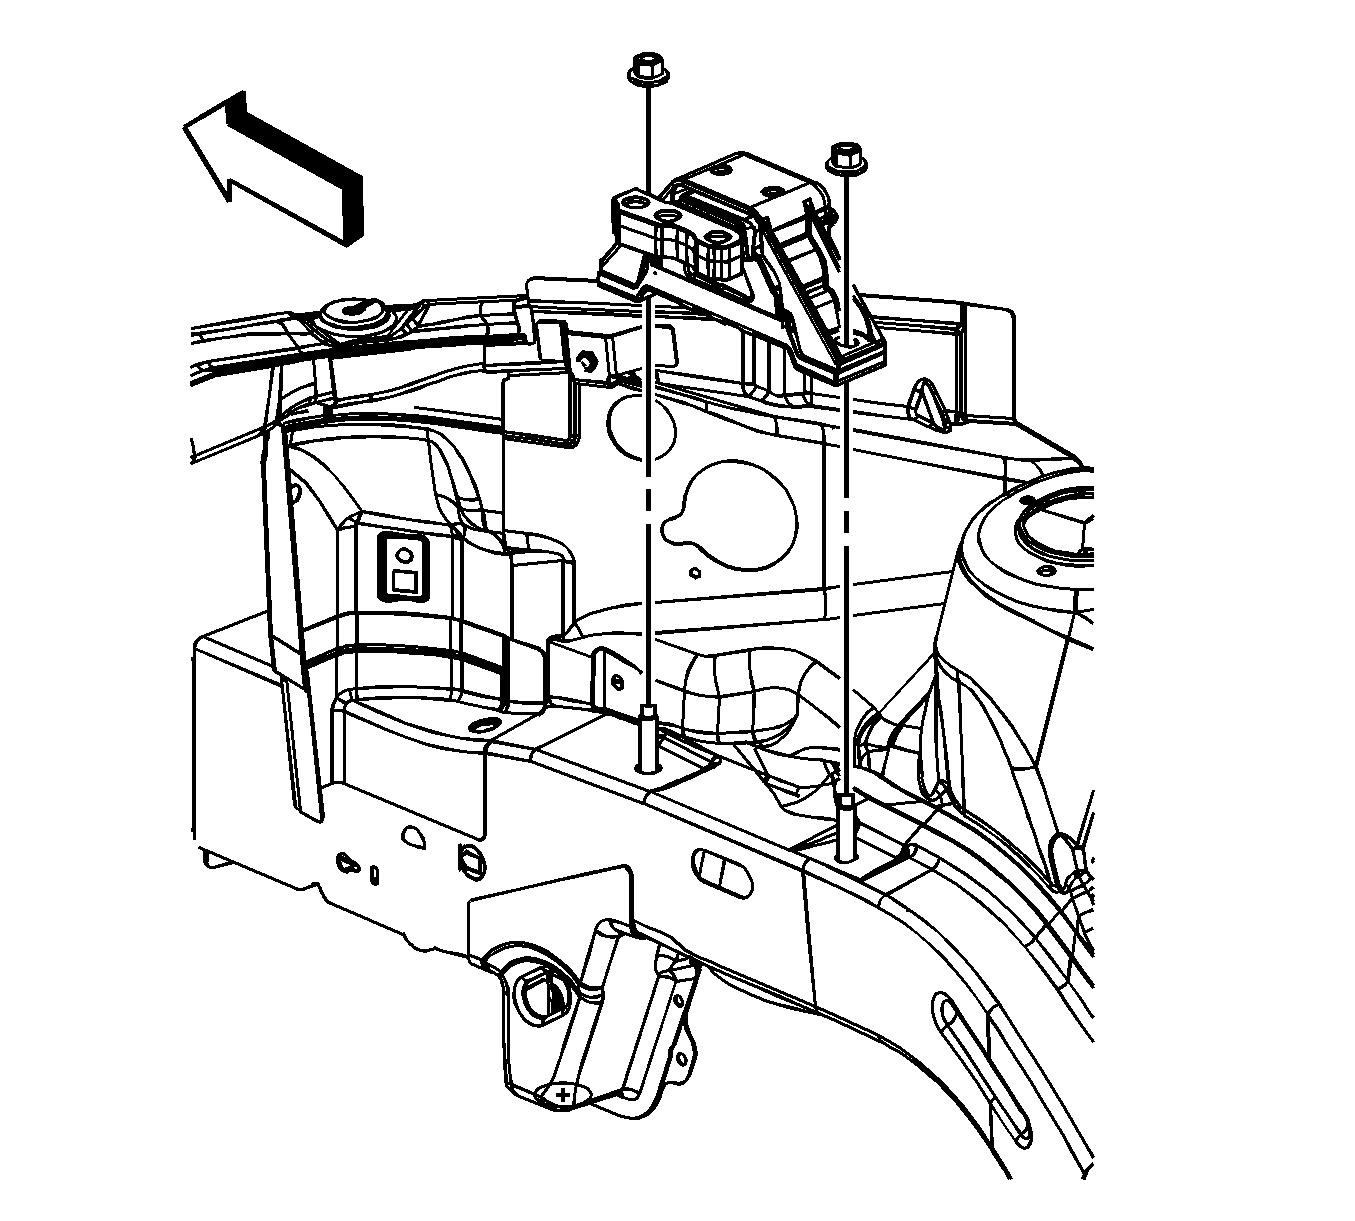
- Remove the engine mount to side rail nuts.
- Remove the engine mount from the engine compartment.
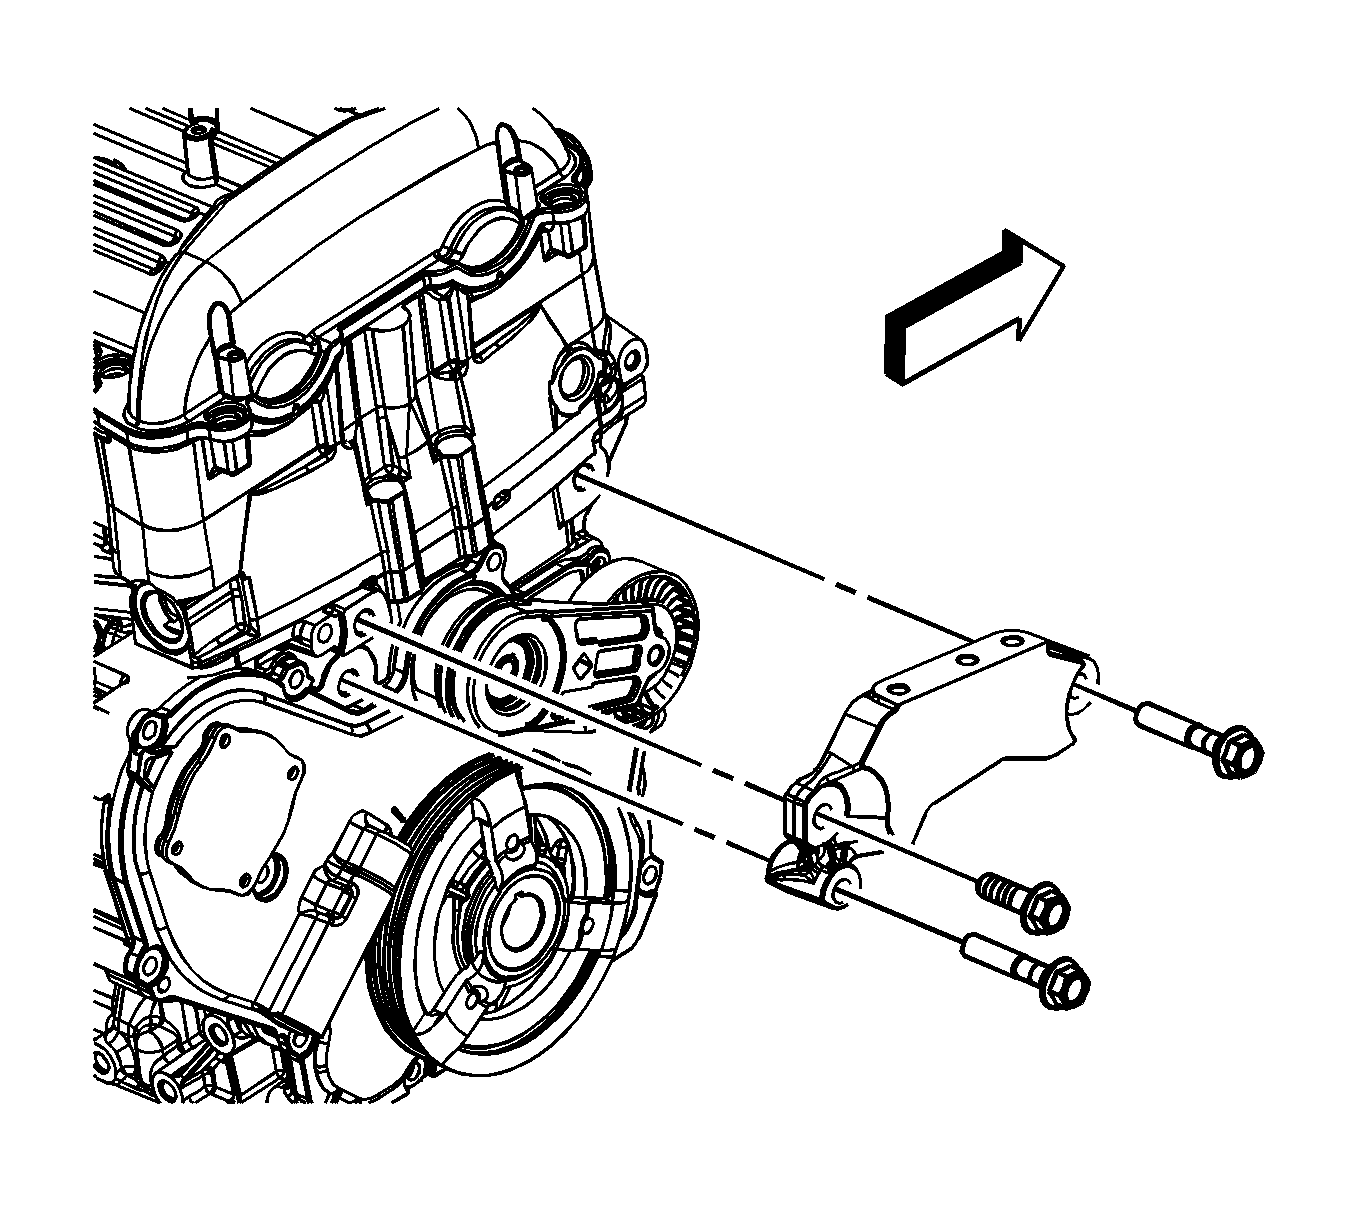
- Remove the engine mount bracket to engine bolts.
- Remove the engine mount bracket.
- Remove the engine front cover to water pump bolt.
- Raise and suitably support the vehicle. Refer to Lifting and Jacking the Vehicle.
- Remove the engine front cover bolts.
- Remove the engine front cover.
- Remove and discard the engine front cover gasket.


Installation Procedure
- Install a NEW engine front cover gasket to the dowel pins.
- Install the engine front cover.
- Install the engine front cover bolts and tighten to 25 N·m (18 lb ft).
- Lower the vehicle.
- Install the engine front cover to water pump bolt and tighten the bolt to 25 N·m (18 lb ft).
- Position the engine mount bracket to the engine.
- Install the engine mount bracket bolts in the following locations:
- Tighten the engine mount bracket bolts in the following sequence:
- Install the engine mount to the engine compartment.
- Install the engine mount to side rail nuts and tighten to 100 N·m (74 lb ft).
- Install the engine mount to bracket bolts.
- Tighten the engine mount to bracket bolts in the following sequence:
- Remove the engine support fixture. Refer to Engine Support Fixture.
- Install the air cleaner assembly. Refer to Air Cleaner Assembly Replacement.
- Install the crankshaft balancer. Refer to Crankshaft Balancer Replacement.
- Install the drive belt tensioner. Refer to Drive Belt Tensioner Replacement.

Caution: Refer to Fastener Caution in the Preface section.


| • | The long bolts in the forward and lower rear holes |
| • | The short bolt in the upper rear hole |
| 8.1. | Upper rear |
| 8.2. | Lower rear |
| 8.3. | Forward |
Tighten the bolts to 50 N·m (37 lb ft).


| 12.1. | Middle |
| 12.2. | Rear |
| 12.3. | Front |
Tighten the bolts to 50 N·m (37 lb ft).
