For 1990-2009 cars only
Transfer Case Assembly Replacement LZ4
Removal Procedure
- Raise and support the vehicle. Refer to Lifting and Jacking the Vehicle.
- Drain the transfer case fluid. Refer to Transfer Case Fluid Replacement.
- Remove the propeller shaft. Refer to Propeller Shaft Replacement.
- Remove the right wheel drive shaft. Refer to Front Wheel Drive Shaft Replacement.
- Remove both catalytic converters. Refer to Catalytic Converter Replacement - Right Side and Catalytic Converter Replacement - Left Side.
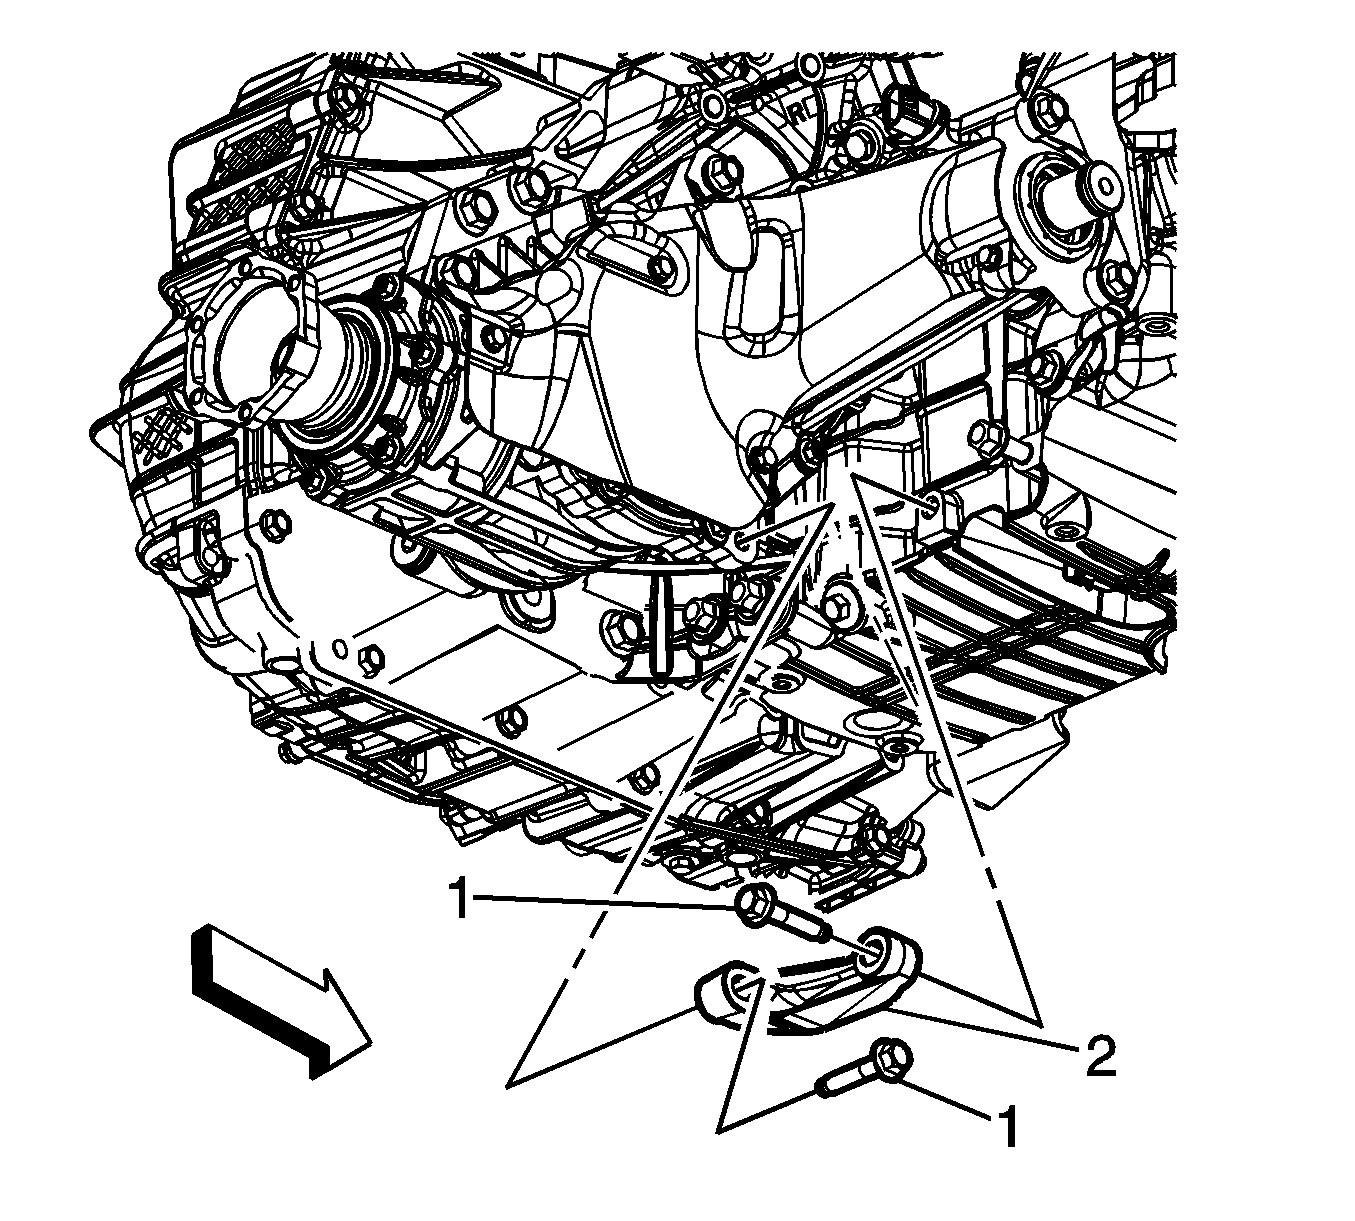
- Remove the transfer case mounting bracket bolts (1).
- Remove the transfer case mounting bracket (2).
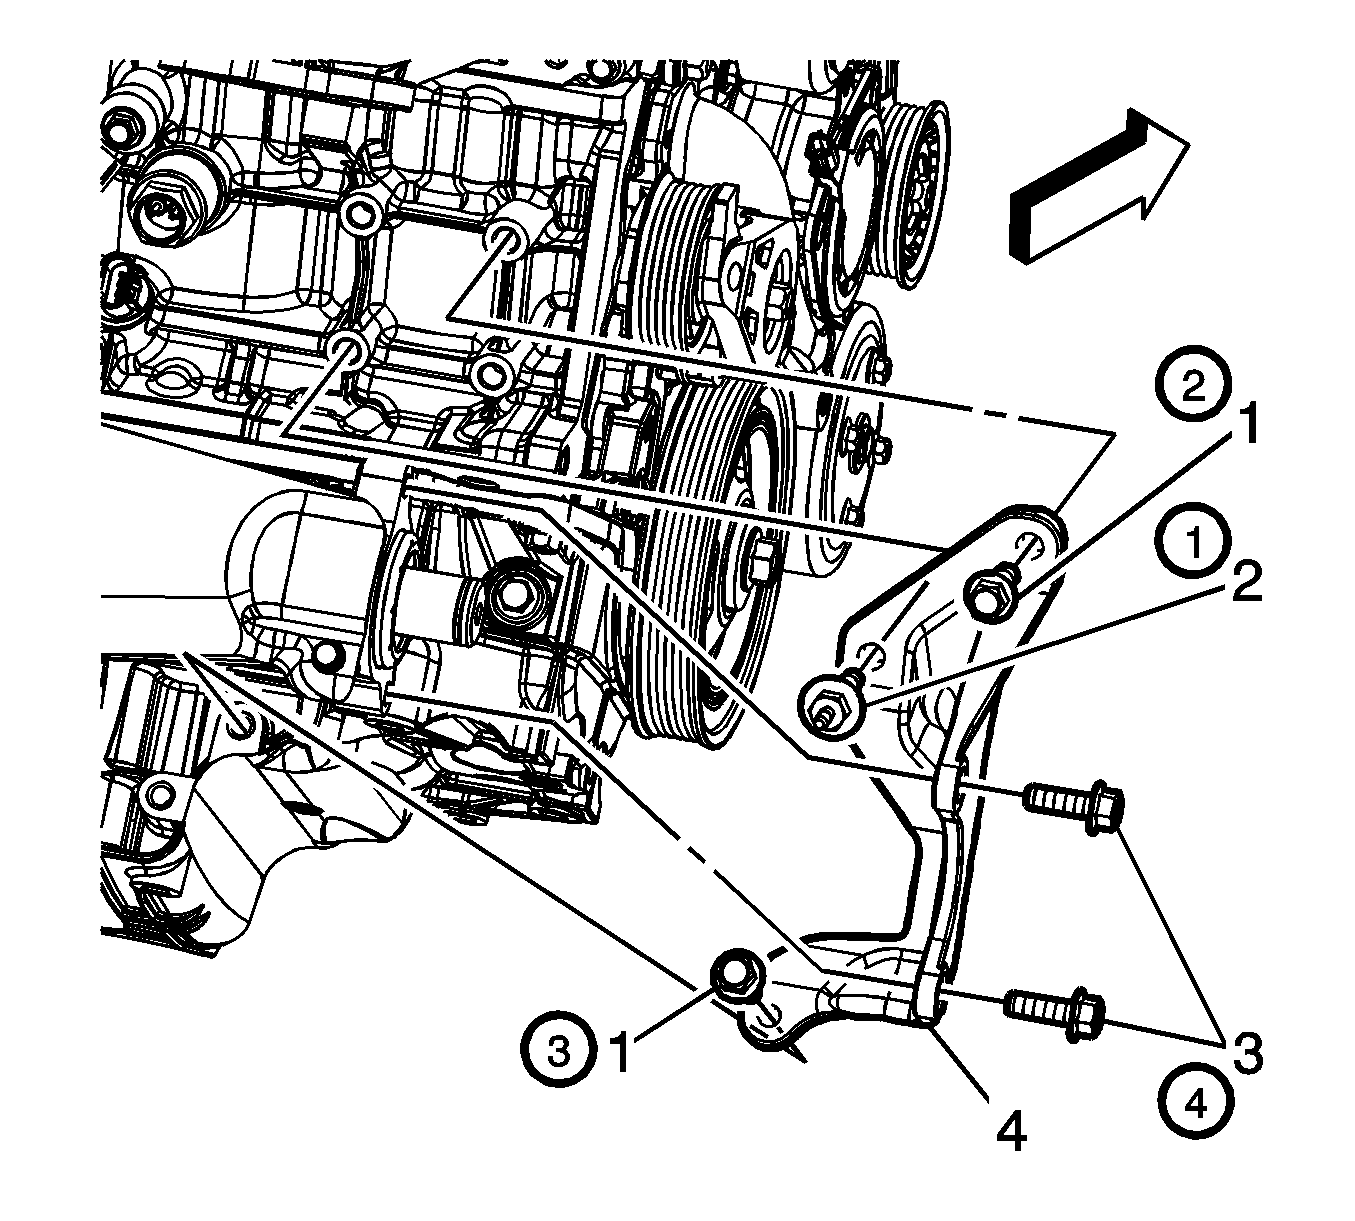
- Remove the transfer case mounting bracket bolts (1, 3) and stud (2).
- Remove the transfer case mounting bracket (4).
- Support the transaxle with a jackstand.
- Remove the rear transmission mount and bracket. Refer to Transmission Mount Bracket Replacement - Rear.
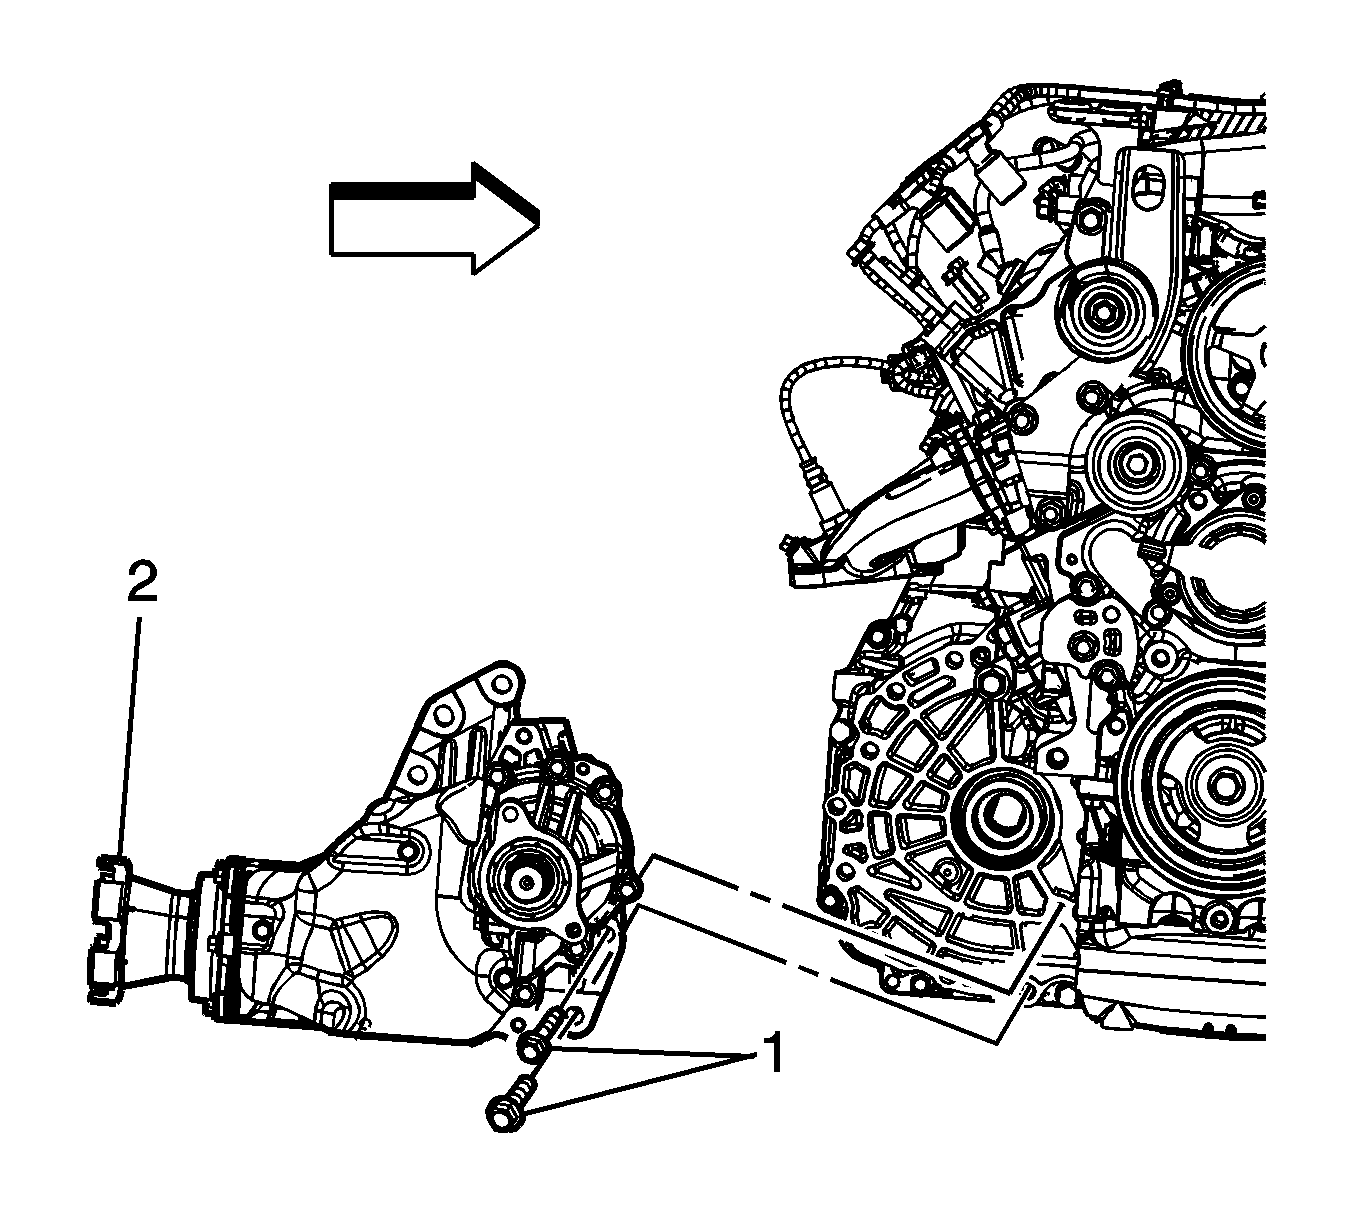
- Remove the bolts (1) securing the transfer case to the transaxle.
- Remove the transfer case (2) from the transaxle.
- If replacing the transfer case, complete the following steps.
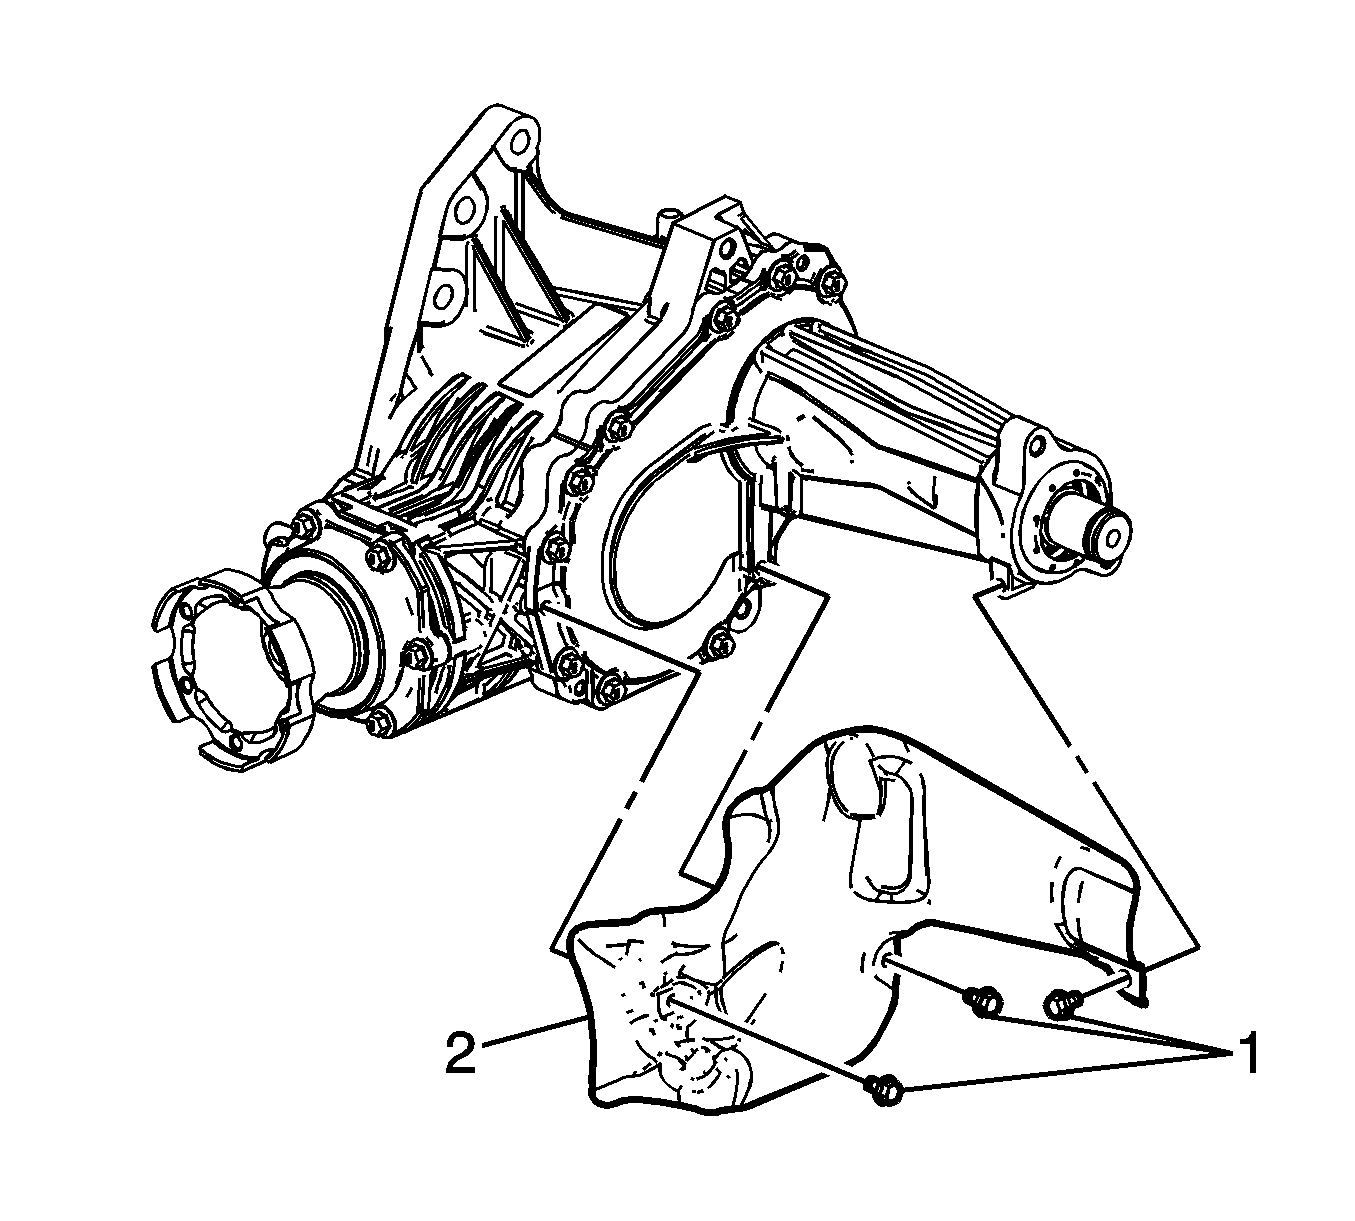
| • | Remove the transfer case heat shield bolts (1). |
| • | Remove the transfer case heat shield (2). |
Installation Procedure
- If the transfer case heat shield was previously removed, complete the following steps.
- Install the transfer case (2) from the transaxle.
- Install the bolts (1) securing the transfer case to the transaxle. Tighten the bolts to 50 N·m (37 lb ft).
- Install the rear transmission mount and bracket. Refer to Transmission Mount Bracket Replacement - Rear.
- Remove the jackstand supporting the transaxle.
- Install the transfer case mounting bracket (4).
- Install the transfer case mounting bracket bolts (1) and stud (2) and tighten the bolts/studs in specified sequential order to 50 N·m (37 lb ft).
- Install the transfer case mounting bracket bolt (3) and tighten to 23 N·m (17 lb ft).
- Install the transfer case mounting bracket (2).
- Install the transfer case mounting bracket bolts (1) and tighten to 50 N·m (37 lb ft).
- Install both catalytic converters. Refer to Catalytic Converter Replacement - Right Side and Catalytic Converter Replacement - Left Side.
- Install the right wheel drive shaft. Refer to Front Wheel Drive Shaft Replacement.
- Install the propeller shaft. Refer to Propeller Shaft Replacement.
- Fill the transfer case with fluid. Refer to Transfer Case Fluid Replacement.
- Lower the vehicle.
Caution: Refer to Fastener Caution in the Preface section.

| • | Install the transfer case heat shield (2). |
| • | Install the transfer case heat shield bolts (1) and tighten to 10 N·m (89 lb in). |

Note: Tighten the bolts in the specified sequential order.


Transfer Case Assembly Replacement LY7
Removal Procedure
- Raise and support the vehicle. Refer to Lifting and Jacking the Vehicle.
- Drain the transfer case fluid. Refer to Transfer Case Fluid Replacement.
- Remove the propeller shaft. Refer to Propeller Shaft Replacement.
- Remove the right wheel drive shaft. Refer to Front Wheel Drive Shaft Replacement.
- Remove both catalytic converters. Refer to Catalytic Converter Replacement - Right Side and Catalytic Converter Replacement - Left Side.
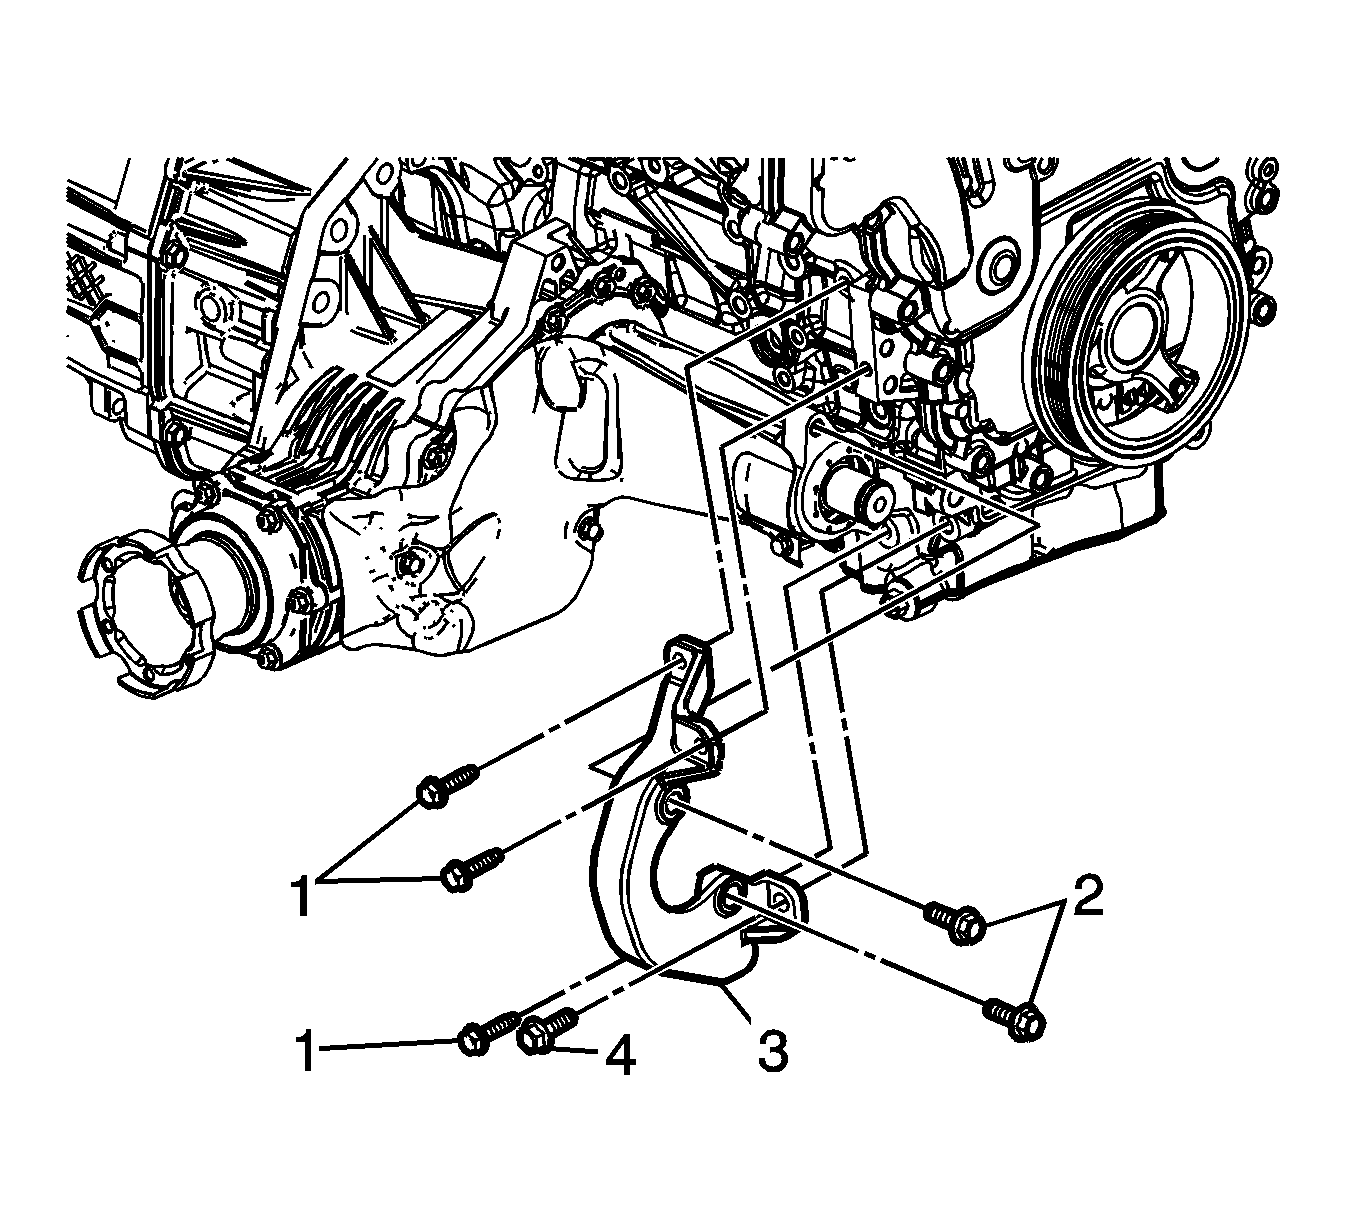
- Remove the transfer case mounting bracket bolts (1, 2, 4).
- Remove the transfer case mounting bracket (3).
- Support the transaxle with a jackstand.
- Remove the rear transmission mount and bracket. Refer to Transmission Mount Bracket Replacement - Rear.
- Remove the bolts (1) securing the transfer case to the transaxle.
- Remove the transfer case (2) from the transaxle.
- If replacing the transfer case, complete the following steps.


| • | Remove the transfer case heat shield bolts (1). |
| • | Remove the transfer case heat shield (2). |
Installation Procedure
- If the transfer case heat shield was previously removed, complete the following steps.
- Install the transfer case (2) from the transaxle.
- Install the bolts (1) securing the transfer case to the transaxle and tighten the bolts to 50 N·m (37 lb ft).
- Install the rear transmission mount and bracket. Refer to Transmission Mount Bracket Replacement - Rear.
- Remove the jackstand supporting the transaxle.
- Install the transfer case mounting bracket (3).
- Install the transfer case mounting bracket bolts (1) and tighten to 23 N·m (17 lb ft).
- Install the transfer case mounting bracket bolt (4) and tighten to 50 N·m (37 lb ft).
- Install the transfer case mounting bracket bolt (2) and tighten to 50 N·m (37 lb ft).
- Install both catalytic converters. Refer to Catalytic Converter Replacement - Right Side and Catalytic Converter Replacement - Left Side.
- Install the right wheel drive shaft. Refer to Front Wheel Drive Shaft Replacement.
- Install the propeller shaft. Refer to Propeller Shaft Replacement.
- Fill the transfer case with fluid. Refer to Transfer Case Fluid Replacement.
- Lower the vehicle.
Caution: Refer to Fastener Caution in the Preface section.

| • | Install the transfer case heat shield (2). |
| • | Install the transfer case heat shield bolts (1) and tighten to 10 N·m (89 lb in). |

Note: Tighten the bolts in the specified sequential order.

