For 1990-2009 cars only
Control Assembly Replacement LHD HVAC Controller
Removal Procedure
- Depress the center pins inward to release radio/HVAC controller cover push pin fasteners.
- Remove the fasteners and pull radio/HVAC controller cover rearward.
- Disconnect the traction control/fog lamps/rear defog electrical connector if equipped.
- Remove the radio screws.
- Push the spring clips in through D-holes on both sides of the radio brace.
- Pull the radio out slightly to access the rear of the radio
- Disconnect the electrical connector and antenna.
- Remove the radio.
- Disconnect the blower switch, A/C-Recirc and lighting and electrical connectors. Remove electrical harness clip from module boss.
- Remove the temperature and mode cables from HVAC controller by squeezing lock tabs together while pulling cable housing straight up.
- Remove the cables from pins by pulling straight up.
- Remove the screws and HVAC controller.

Important: Do not push center pins through fasteners.


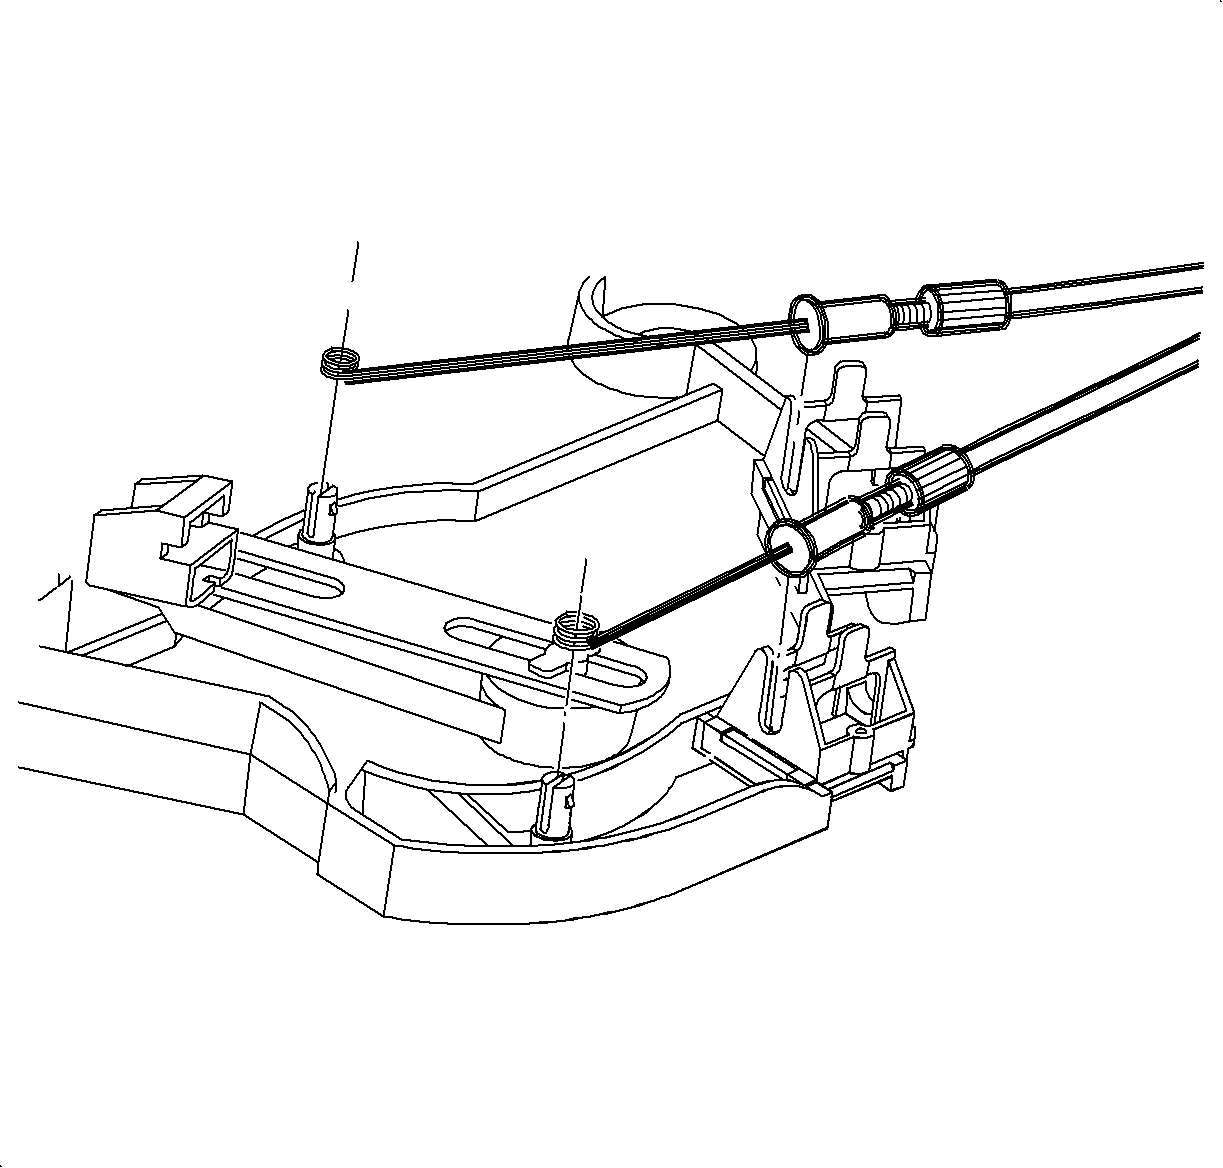
(Service cables shown in illustration.

Installation Procedure
- Install the HVAC controller.
- Install and tighten the screws.
- Install the temperature and mode cables over the pins.
- Install the cable housings into the channel and push down to lock.
- Connect the blower switch, A/C-Recirc and lighting electrical connectors.
- Install the electrical harness clip to module boss.
- Connect the electrical connector and antenna to the radio.
- Install the radio.
- Install and tighten the screws.
- Connect the traction control/fog lamp/rear defog electrical connector, if equipped.
- Install the radio/HVAC controller cover. Push in at clip locations.
- Install the push pins and lock.
Tighten
Tighten to 2.5 N·m (22 lbs in)
Cable Identification:
| • | Temperature cable -- white |
| • | Mode cable -- black |
Important: Make sure wiring harnesses do not interfere with control lever movement.
Important: Make sure the spring clips are seated in D-holes on both sides.
Tighten
Tighten to 2.5 N·m (22 lbs in)
Control Assembly Replacement Bulbs
Removal Procedure
- Remove the HVAC controller. (Refer to "HVAC Controller" in this service manual.)
- Turn the bulb socket counterclockwise to remove from control.
- Wrap a small piece of scotch tape around bulb and pull out of socket.

Installation Procedure
- Push the bulb straight into the socket.
- Align the tabs on the socket with the control and insert the socket into the control.
- Turn clockwise to lock.
- Install the HVAC controller. (Refer to "HVAC Controller" in this service manual.)
Control Assembly Replacement Wiring Harness
Removal Installation
- Remove the HVAC controller. (Refer to "HVAC Controller" in this manual.)
- Remove the bulb sockets, electrical connector and wiring harness from HVAC control.

Installation Procedure
- Install the wiring harness, electrical connector and the bulb sockets to control.
- Install the HVAC controller. (Refer to "HVAC Controller" in this service manual.)
Control Assembly Replacement RHDD HVAC Controller
Removal Procedure
- Depress the center pins inward to release radio/HVAC controller cover push pin fasteners.
- Remove the fasteners and pull radio/HVAC controller cover rearward.
- Disconnect the traction control/fog lamps/rear defog electrical connector if equipped.
- Remove the radio screws.
- Push the spring clips in through D-holes on both sides of the radio brace.
- Pull the radio out slightly to access the rear of the radio
- Disconnect the electrical connector and antenna.
- Remove the radio.
- Disconnect the blower switch, A/C-Recirc and lighting and electrical connectors. Remove electrical harness clip from module boss.
- Remove the temperature and mode cables from HVAC controller by squeezing lock tabs together while pulling cable housing straight up.
- Remove the cables from pins by pulling straight up.
- Remove the screws and HVAC controller.
Important: Do not push center pins through fasteners.


Installation Procedure
- Install the HVAC controller.
- Install and tighten the screws.
- Install the temperature and mode cables over the pins.
- Install the cable housings into the channel and push down to lock.
- Connect the blower switch, A/C-Recirc and lighting electrical connectors.
- Install the electrical harness clip to module boss.
- Connect the electrical connector and antenna to the radio.
- Install the radio.
- Install and tighten the screws.
- Connect the traction control/fog lamp/rear defog electrical connector, if equipped.
- Install the radio/HVAC controller cover. Push in at clip locations.
- Install the push pins and lock.
Tighten
Tighten to 2.5 N·m (22 lbs in)
Cable Identification:
| • | Temperature cable -- white |
| • | Mode cable -- black |
Important: Make sure wiring harnesses do not interfere with control lever movement.
Important: Make sure the spring clips are seated in D-holes on both sides.
Tighten
Tighten to 2.5 N·m (22 lbs in)
