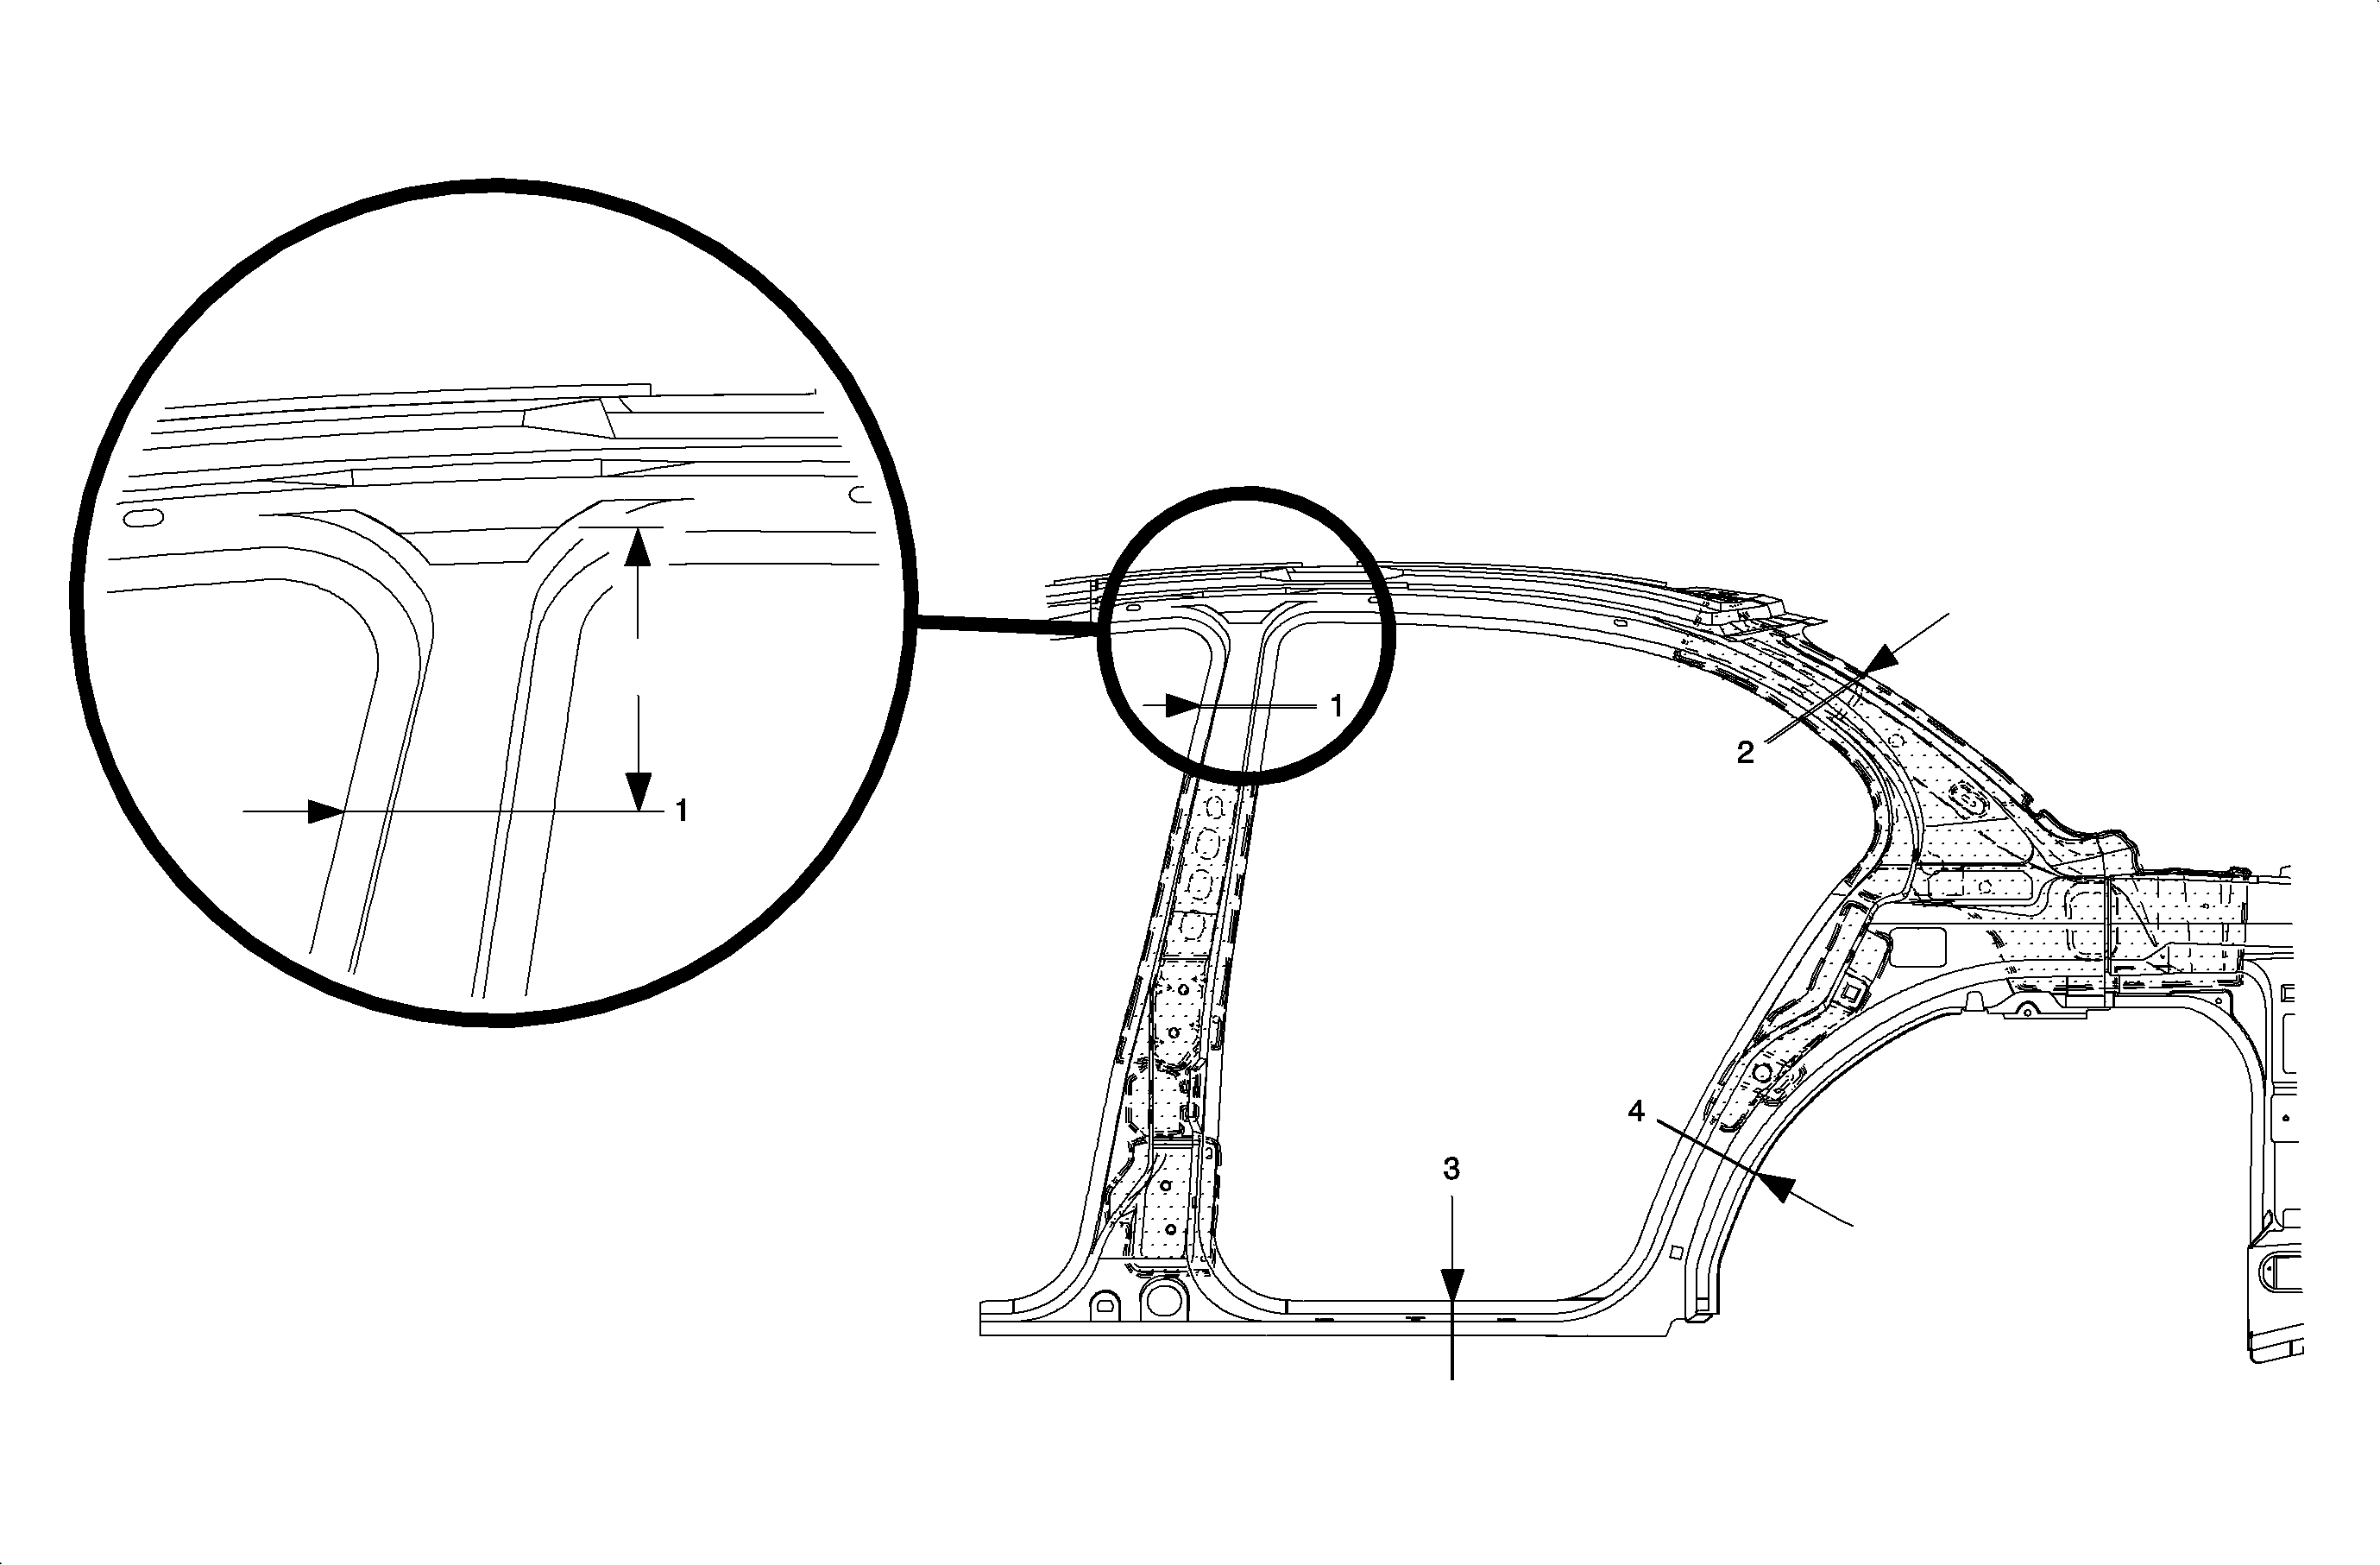
Panel Rear Side Door Ring - Sectioning Sedan
- Note the amount and location of the spot welds.
- Remove the sealer and drill spot welds from the areas necessary to place the joint in the areas specified 1-3.
- Cut the service part along the joint area. DO NOT damage the inner reinforcements.
- Clean all of the weld seams with a wire brush, prime, and seal all repair areas.
- Apply a permanent underbody sealant.
- Prime with a 2-part catalyzed primer.
- Apply sealers and corrosion protection materials according to the information in the Body Paint section of this service manual or the paint manufacturer's recommendations.
- Perform additional procedures as necessary to remove unused areas of the service part.
- Drill 8 mm (5/16 in) plug weld holes as necessary in the locations noted from the original section.
- Construct a joint reinforcement 100 mm (3-15/16 in) long to back up and reinforce the joint. Unused sections of the service part can be modified to fit behind the joint area.
- Clean the surface for welding and grind the ELPO primer off of the new part at the connecting points. Apply 3M® Weld-Thru Coating P/N 05913, or equivalent, to all areas to be welded.
- On the back, stitch weld along the entire joint. Make 25 mm (1 in) gaps between, then go back and complete the stitch weld. This will create a solid joint with minimal heat distortion. Refer to Space Frame Sectioning .

Important: Only the panel rear side door ring may be sectioned in the areas specified. Repair and restoration of as much structure as possible before cutting and preparing the joint for welding is imperative. No reinforcements may be sectioned.
Important: If the joint selected is inconvenient, select the next joint area to perform a quality repair.
The center of joint at (1) is measured along the centerline of the center pillar downward 160 mm (6-5/16 in) from the roof edge. The center of joint (2) is measured 10 mm (25/64 in) downward from the center applique hole. The center of joint (3) is measured 50 mm (2 in) rearward of the center trim attach hole along the door opening. It is not necessary to reinforce this joint. Buttweld this joint. The center of joint (4) is measured 160 mm (6-5/16 in) downward from the lower edge of the door stabilizer pin hole.
Important: Ensure that proper corrosion protection processes are used on all repair areas.
Important: To ensure a secure weld, the sectioning joint should have a gap of approximately one and a half times the thickness of the metal. Trim the parts as necessary to achieve this.
