For 1990-2009 cars only
Rear Disc Brake Pads Replacement J65, JL9
Caution: Refer to Brake Dust Caution in the Preface section.
Removal Procedure
- Inspect the fluid level in the brake master cylinder reservoir.
- If the brake fluid level is midway between the maximum-full point and the minimum allowable level, no brake fluid needs to be removed from the reservoir before proceeding.
- If the brake fluid level is higher than midway between the maximum-full point and the minimum allowable level, remove brake fluid to the midway point before proceeding.
- Raise and support the vehicle . Refer to Lifting and Jacking the Vehicle in General Information.
- Remove the tire and wheel assembly. Refer to Tire and Wheel Removal and Installation in Tires and Wheels.
- Remove the wheel speed sensor (WSS) harness from the lower control arm.
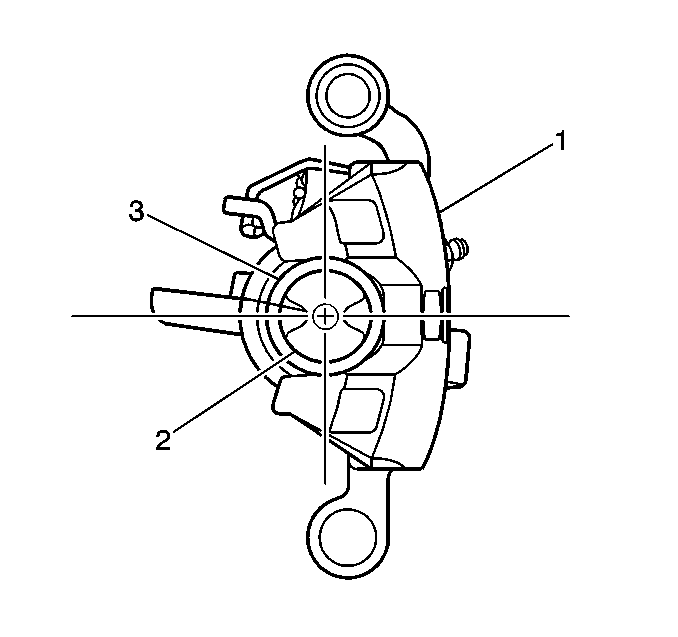
- Remove both upper and lower caliper bolts (3) from the caliper (1).
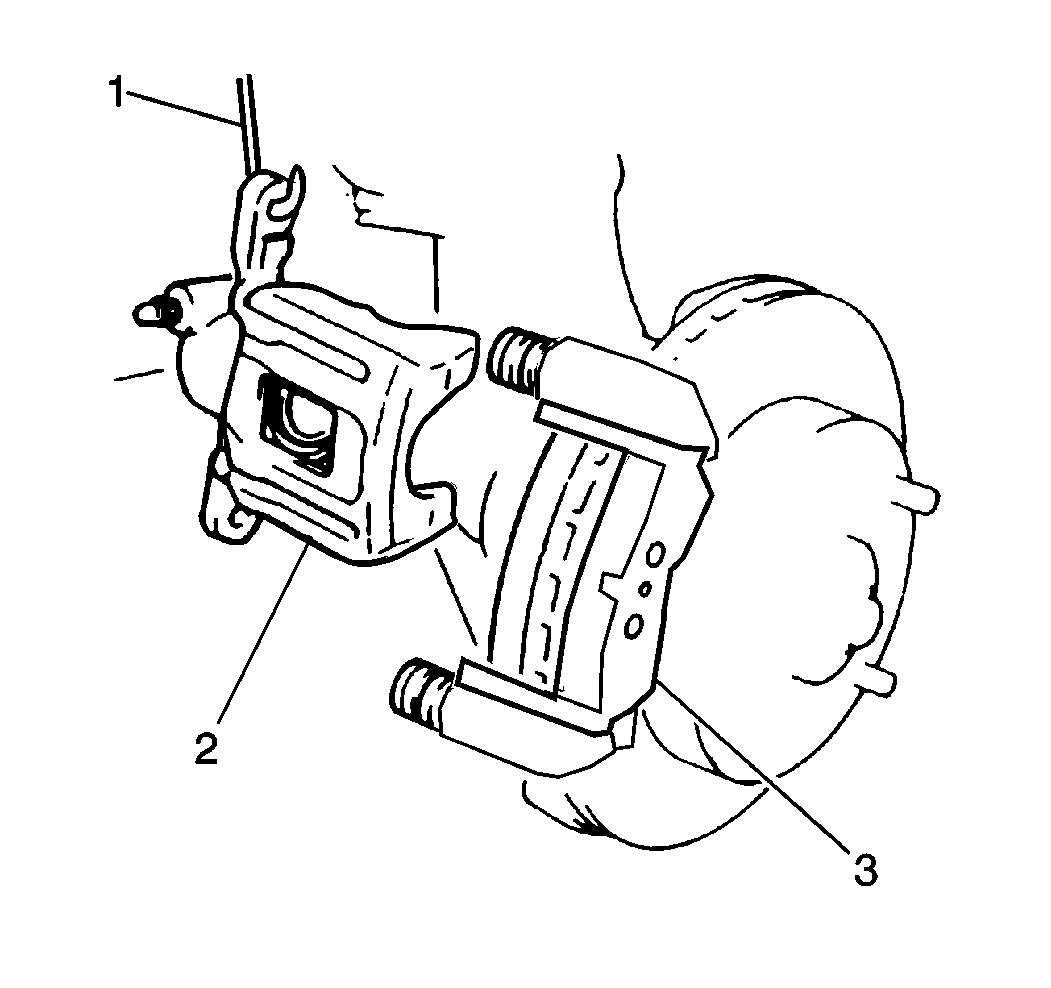
- Pull the caliper (2) straight off of the bracket and secure out of the way with heavy mechanics wire (1). DO NOT disconnect the hydraulic brake flexible hose from the caliper.
- Remove the inboard and outboard pads from the brake caliper bracket.

Notice: Support the brake caliper with heavy mechanic wire, or equivalent, whenever it is separated from its mount and the hydraulic flexible brake hose is still connected. Failure to support the caliper in this manner will cause the flexible brake hose to bear the weight of the caliper, which may cause damage to the brake hose and in turn may cause a brake fluid leak.

Important:
• Clean the brake pad hardware mating surfaces on the caliper bracket of any debris or corrosion. • Inspect the brake pad retainer clips for condition and replace, if necessary.
Installation Procedure
- Retract the brake caliper piston (2) into the brake caliper bore. Use a suitable spanner type wrench and turn the piston clockwise until it bottoms out fully in the brake caliper (Mac® Tools DBC 25 C 2500 MA Disc Brake Caliper Tool Set, or equivalent).
- Align the indents on the piston face to match the pin on the back of the inboard brake pads.
- Install the brake pad retainers into the brake caliper bracket.
- Install the inboard and outboard brake pads into the brake caliper bracket ensuring that the pad with the metallic wear sensor is placed on the inboard side of the bracket.
- Slide the caliper onto the bracket ensuring that the bracket guide boots are not damaged.
- Insert the brake caliper bolts.
- Install the WSS harness onto the lower control arm.
- Install the tire and wheel assembly. Refer to Tire and Wheel Removal and Installation in Tires and Wheels.
- Lower the vehicle. Refer to Lifting and Jacking the Vehicle in General Information.
- With the engine OFF, gradually apply the brake pedal to approximately 2/3 of its travel distance.
- Slowly release the brake pedal.
- Wait 15 seconds, then repeat steps 10-11 until a firm brake pedal apply is obtained. This will properly seat the brake caliper pistons and brake pads.
- Fill the brake master cylinder reservoir to the proper level. Refer to Master Cylinder Reservoir Filling in Hydraulic Brakes.
- Burnish the pads and rotors. Refer to Brake Pad and Rotor Burnishing .

Notice: Refer to Fastener Notice in the Preface section.
Tighten
Tighten the brake caliper bolts to 34 N·m (25 lb ft).
