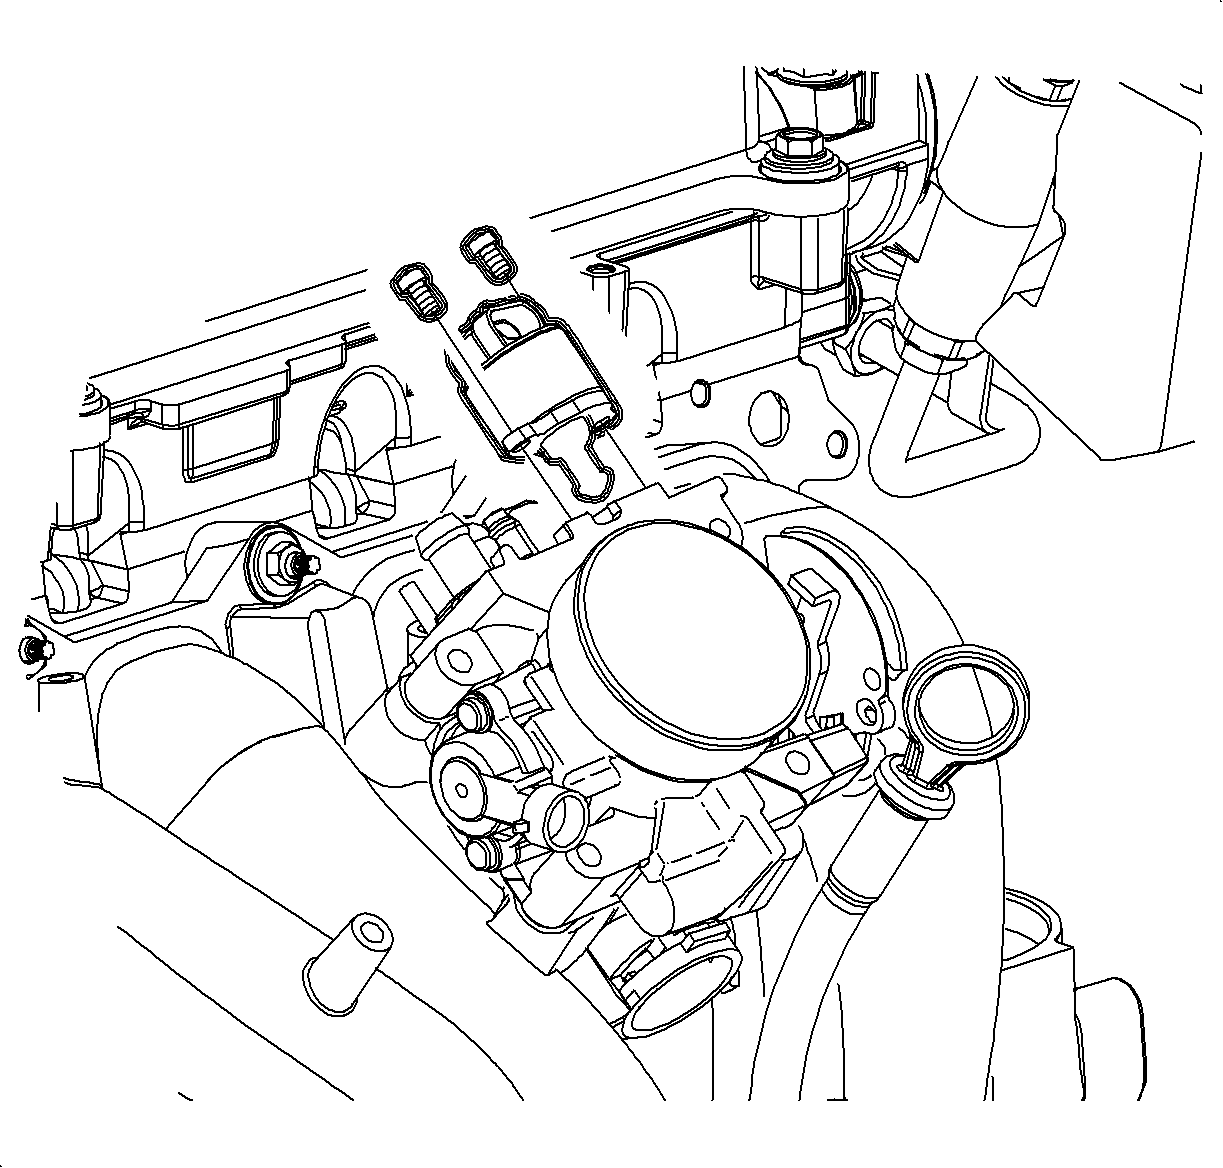
Removal Procedure

- Turn the ignition OFF.
- Disconnect the IAC valve harness connector.
- Remove the IAC valve attachment screws and remove the IAC.
Notice: The IAC valve is an electrical component and must not be soaked in any liquid
solvent, otherwise damage could result.
Notice: Do not unnecessarliy push or pull on the pintle valve. The force reqired moving
the pintle of an in-service IAC valve may damage the threads on the worm drive.
- Clean the IAC valve O-ring sealing surface, pintle valve seat, and air passage
in the throttle body.
| • | If the IAC valve is going to be reused, the IAC valve may be cleaned using
a shop towel or cleaning solvent to remove heavy carbon deposits. DO NOT submerge
the IAC valve in solvent. |
| • | If the IAC valve O-ring is going to be reused, make sure it is free from
cuts, cracks, or distortion. |
| • | Shiny spots on the pintle or seat are normal and do not indicate misalignment
or a bent pintle shaft. |
| • | Whenever the IAC valve throttle body air passage contains heavy deposits,
remove the throttle body assembly for complete cleaning. |
IAC Measurement Procedure
The following measurement procedure should only be performed if installing a
new IAC valve.

Important: Only replace an old IAC valve with an identical
part. The IAC valve pintle and shape are designed for specific applications.
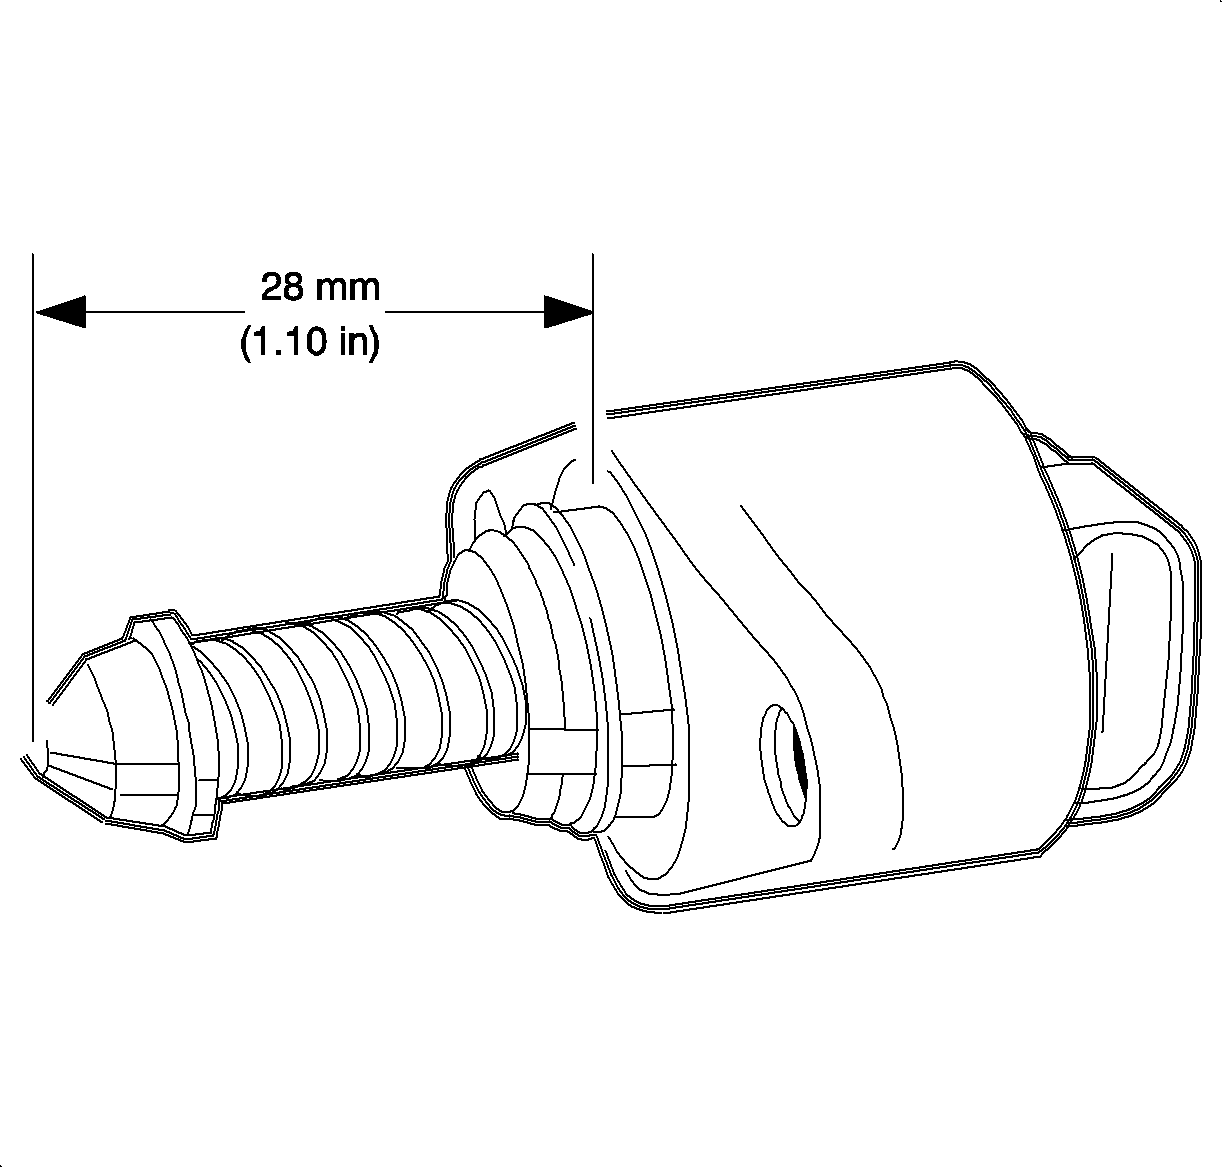
- Measure the distance between the tip of the IAC valve and the IAC valve mounting
flange as shown in the illustration.
- If the measurement is greater than 28 mm (1.10 in), use
finger pressure to slowly retract the pintle until the distance becomes at least 20 mm
(0.79 in). The force required to retract the pintle of a new IAC valve will
not damage the worm drive.
Installation Procedure

- Lubricate the IAC valve O-ring with clean engine oil.
- Install the IAC valve with the O-ring by installing the assembly slightly
counterclockwise from the attachment screw holes.
- Twist the assembly clockwise until the IAC valve is seated properly and
aligned with the attachment screw holes.
Notice: Refer to Fastener Notice in the Preface section.
- Install the IAC valve attachment screws.
Tighten
Tighten the IAC valve attachment screws to 3 N·m
(27 lb in).
- Connect the IAC valve harness connector. Push in the connector until a
click is heard, then pull back to confirm a positive engagement.
- Perform the following procedure, which will allow the PCM to relearn the
IAC valve position.
| 6.1. | Turn the ignition ON with the engine OFF for 10 seconds, then turn
the ignition OFF for 10 seconds. |
| 6.2. | Start the engine and let the engine idle for 30 seconds. |
| 6.3. | Accelerate the engine slowly between idle and 3,500 RPM five times. |
| 6.4. | Let the engine return to idle. The IAC valve position should be relearned. |


