Tools Required
J 43655 Camshaft Sprocket Holding Tool
The L61 engine camshafts, rocker arms, lash adjusters, valve springs, and seals can be serviced without removing the exhaust system, vibration damper, front mount, or front cover. The following procedure must be followed to prevent damage to the camshafts, lash adjusters, cylinder head, and lower timing chain guides.
Removal Procedure
- Disconnect the negative battery cable.
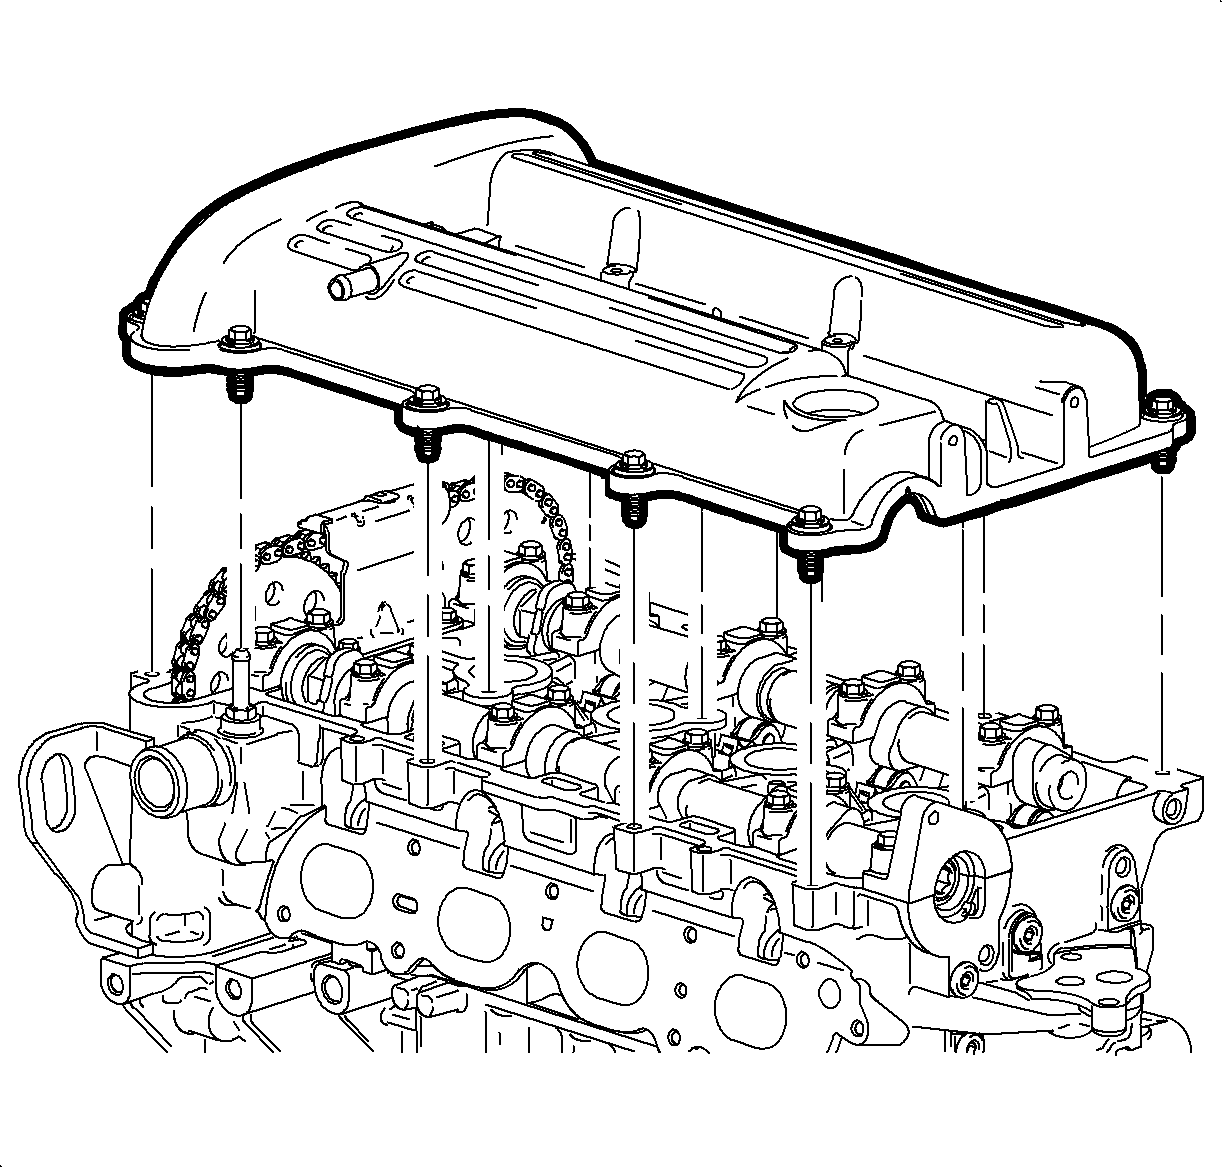
- Remove the ignition coil, PCV fresh air hose, ground strap, fuel line, harness bracket, and cam cover assembly.
- Remove the power steering pump if removing the intake camshaft.
- Locate the No. 1 piston to approximately 60 degrees before top dead center. The diamond shaped hole on the intake camshaft sprocket is at the 12 o'clock position. Spark plugs can be removed to ease the rotation effort.
- Remove the upper timing chain guide.
- Remove the front camshaft caps.
- Install the J 43655 through the sprocket holes from the timing chain side of the sprocket towards the rear of the engine.
- With the guide pins installed in the sprocket, align the guide pins into the slot on the support head.
- Install the wingnuts and tighten.
- Hold each camshaft in place using a 24 mm open end wrench and carefully remove the camshaft timing sprocket retaining bolts and washers. Discard the torque-to-yield (TTY) bolt.
- Slide the camshaft sprockets away from the camshaft.
- To release the spring tension, rotate the camshaft being serviced.
- Uniformly loosen and remove the remaining camshaft bearing cap bolts.
- Carefully pull the camshafts straight up to avoid damaging the cylinder head thrust surface when removing the camshafts.

Notice: To avoid valve piston contact, No. 1 cylinder piston must be positioned at approximately 60 degrees before-top dead center (BTDC). Pistons are properly positioned when the diamond shaped hole on the intake camshaft sprocket is located at 12 o'clock.
Important: To rotate the camshafts, use a 24 mm open-end wrench on the camshaft flats. Camshafts should be rotated in a clockwise direction only, facing the camshaft sprockets from the passenger side of the vehicle.

Important: Lubricate the sprocket pins with clean motor oil. This will allow the sprockets to easily slide on the sprocket pins. Align the diamond shaped hole straight up on the intake camshaft.
Tighten
Tighten the support plate-to-engine block to 10 N·m
(89 lb in).


Important: When sliding the timing chain and sprockets onto the guide pins, be sure the timing chain is positioned properly on the adjustable and fixed guide or guide damage will occur. Care should be taken when removing the camshaft sprockets from the camshafts.

Important: Camshafts are spring loaded and may rotate.
Installation Procedure
- Lubricate the camshaft bearing journals with clean engine oil and install both camshafts and all bearing caps, except the front cap on each camshaft.
- When installing camshafts, attempt to position the camshaft slot up with the notches on the camshaft sprockets.
- Install all bearing caps except the front caps and the rear intake camshaft cap, if serviced. Tighten down the bearing caps uniformly.
- Slide the camshaft sprockets and the timing chain on the guide pins toward the camshafts. Rotate the camshafts with a 24 mm open-end wrench to properly align the camshafts and sprockets.
- Install the new camshaft sprocket bolt and tighten. This will pull the camshaft sprockets into the cams. Hold the camshaft with a 24 mm open end wrench during tightening.
- Remove the J 43655 .
- Install the front camshaft caps.
- Install the upper timing chain guide.
- Install the rear intake camshaft bearing cap.
- Install the power steering pump.
- Install the ignition coil, PCV fresh air hose, ground strap, fuel line, harness bracket, and cam cover assembly.
- Connect the negative battery cable.

Tighten
Tighten the camshaft bearing cap bolts to 10 N·m
(89 lb in).

Tighten
Tighten the camshaft sprocket bolts to 85 N·m
(63 lb ft) plus 30 degrees.
Tighten
Tighten the camshaft bearing cap bolts to 10 N·m
(89 lb in).

Important: Apply LOCTITE 242® to the upper timing chain guide bolts.
Tighten
Tighten the timing chain guide (upper) bolts to
10 N·m (89 lb in).
Tighten
Tighten the intake camshaft rear bearing cap bolts
to 25 N·m (18 lb ft).
Tighten
Tighten the power steering pump bolts to 25 N·m
(18 lb ft).
