Removal Procedure
- Disconnect the negative battery cable.
- Remove the front cover. Refer to Engine Front Cover Replacement .
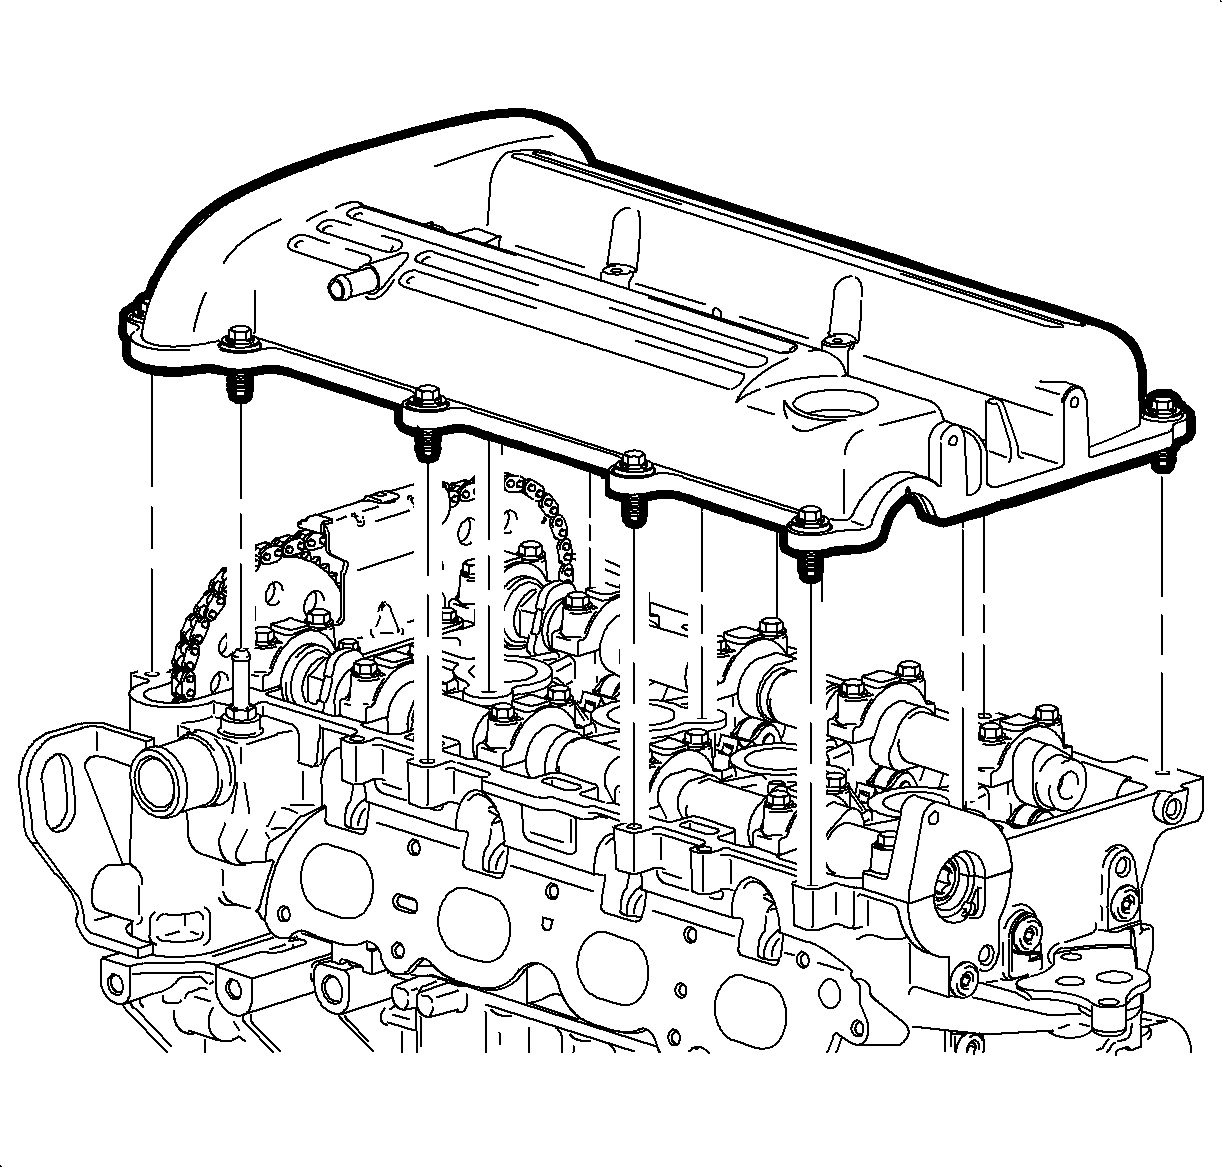
- Remove the camshaft cover assembly. Refer to Camshaft Cover Replacement .
- Remove the timing chain. Refer to Camshaft Timing Chain, Sprocket, and Tensioner Replacement .
- Remove the balance shaft drive chain tensioner.
- Remove the adjustable balance shaft chain guide.
- Remove the small balance shaft chain guide.
- Remove the upper balance shaft chain guide.
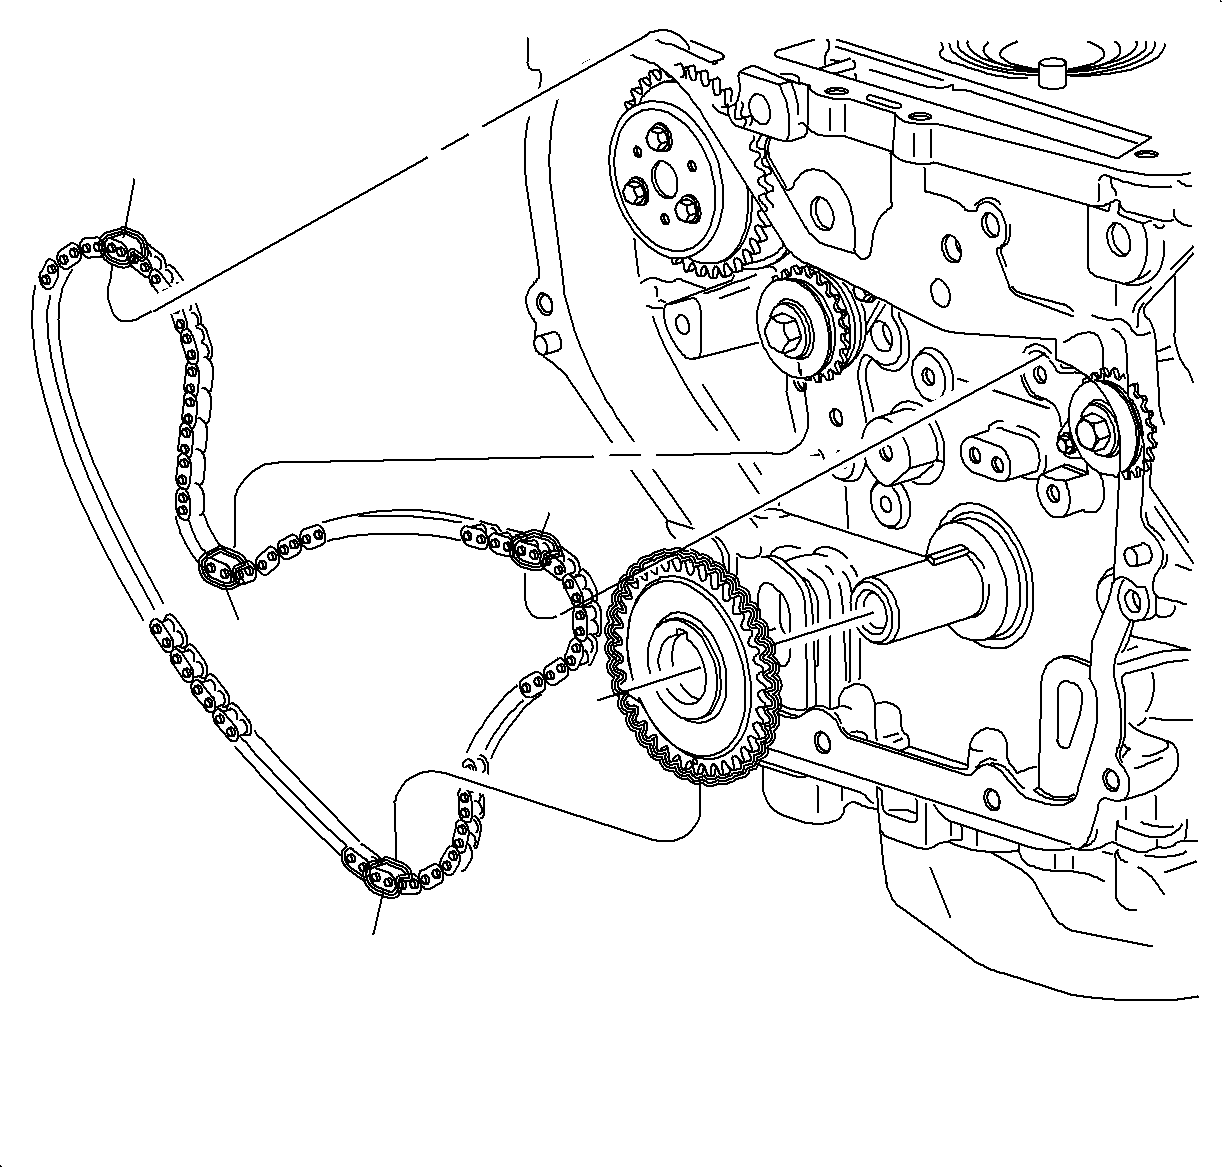
- Remove the balance shaft drive chain.
- Remove the crankshaft drive sprocket.
- Inspect the balance shaft drive chain guides for cracking or wear.
- Inspect the balance shaft drive chain tensioner shoe for excessive wear.
- Inspect the balance shaft drive chain and sprockets for wear.
- Inspect the camshaft sprocket faces for signs of movement.
- Inspect the alignment notch in the camshaft for cracking or damage.
- Inspect the water pump, crankshaft, and balance shaft sprocket teeth and chain for signs of excessive wear, chipping, or seizure of the balance shaft drive chain links.


Important: Push on the chain between the water pump and the camshaft sprockets so that all of the slack is between these 2 points. This will allow easier removal of the chain.

Important: Replace the balance shaft drive chain guide if wear exceeds 1.12 mm (0.045 in).
Important: Replace the balance shaft drive chain tensioner shoe if wear exceeds 1.12 mm (0.045 in).
Installation Procedure
- Orient the timing marks on the balance shafts.
- With the balance shafts oriented, install the balance shaft crankcase sprocket onto the crankshaft.
- Place the number 1 piston at top dead center (TDC).
- Install the balance shaft chain with the colored links lined up with the marks on the balance shaft sprockets with the mark on the crankshaft sprocket.
- Install the upper chain guide and bolt.
- Install the small chain guide and bolt.
- Tighten the chain guide bolt.
- Install the adjustable chain guide and bolts.
- Rotate the plunger on the chain tensioner 90°. Compress the plunger and lock in place by inserting a thin wire, or paper clip, into the hole on the side of the plunger body.
- Install the balance shaft drive chain tensioner and bolts.
- Tighten the balance shaft drive chain tensioner bolts.
- Remove the thin wire or paper clip from the chain tensioner to release the plunger.
- Install the timing chain. Refer to Camshaft Timing Chain, Sprocket, and Tensioner Replacement .
- Install the camshaft cover. Refer to Camshaft Cover Replacement .
- Install the front cover. Refer to Engine Front Cover Replacement .
- Connect the negative battery cable.
Important: If the balance shafts are not correctly timed to the crankshaft the engine may vibrate or make excessive noise.
| 1.1. | The intake side balance shaft timing mark should be pointing up. |
| 1.2. | The exhaust side balance shaft timing mark should be pointing down. |
Important: The crankshaft keyway slot will be pointing up (12 o'clock position) when set at TDC.

| Important: There is 1 copper link (1) and 2 chrome links (2) on the balance shaft chain. |
| 4.1. | Orient the chain so that the copper (1) and chrome (2) links are visible. |
| 4.2. | Place the copper colored link (1) onto the timing mark on the intake side balance shaft sprocket. |
| 4.3. | Working clockwise along the chain, place the first chrome link in line with the timing mark on the crankshaft sprocket. |
| 4.4. | Align the last chrome link with the timing mark on the exhaust side balance shaft sprocket. |
Tighten
Tighten the balance shaft chain guide (upper) bolts
to 10 N·m (89 lb in).
Tighten
Tighten the balance shaft chain guide (fixed) bolts
to 10 N·m (89 lb in).
Tighten
Tighten the balance shaft chain guide (adjustable)
bolt to 10 N·m (89 lb in).

Tighten
Tighten the balance shaft chain tensioner bolts
to 10 N·m (89 lb in).
Tighten
Tighten the camshaft cover bolts to 10 N·m
(89 lb in).
Tighten
Tighten the battery terminal bolts to 17 N·m
(13 lb ft).
