If a tire goes flat, avoid further tire and wheel damage by driving slowly to a level place. Turn on your hazard warning flashers.
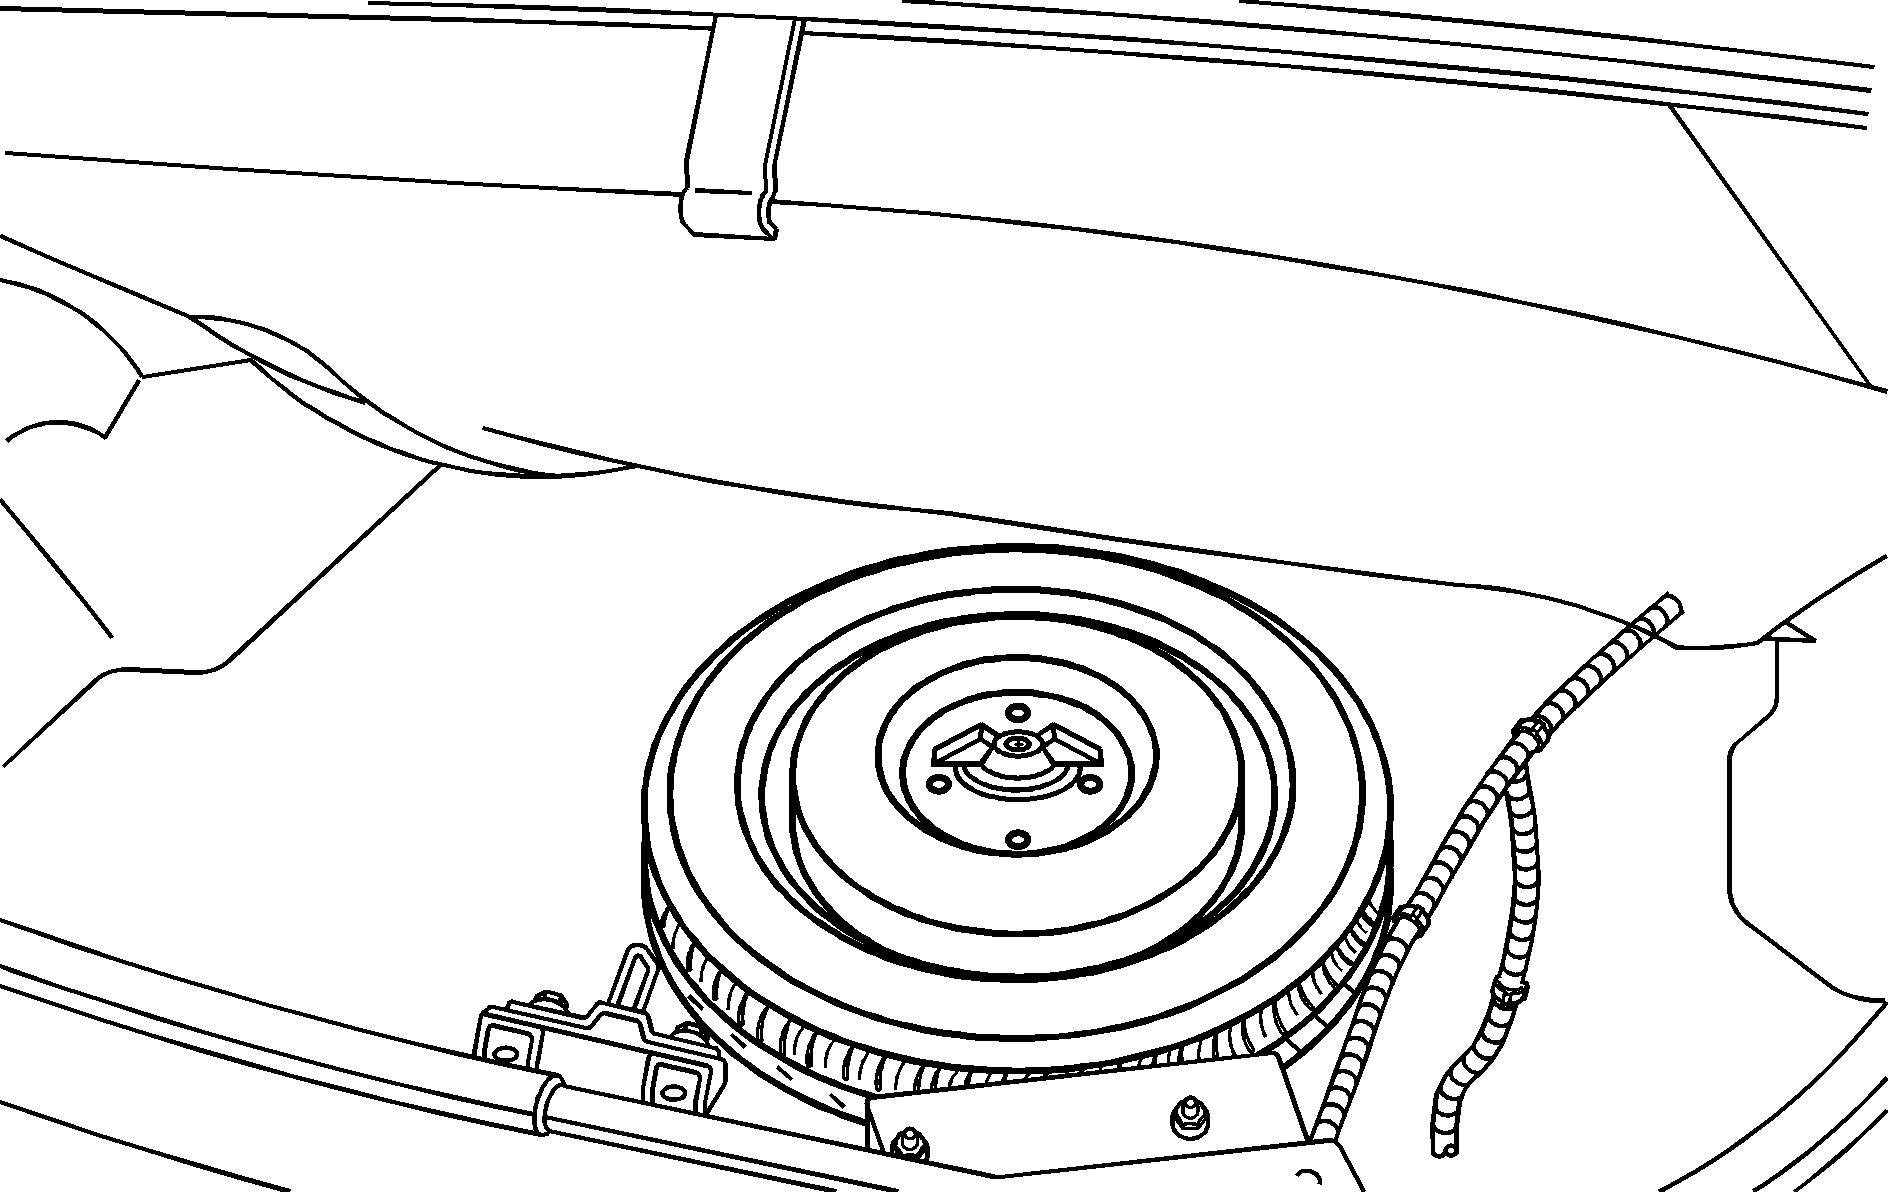
Removing the Spare Tire and Tools
The following steps will tell you how to use the jack and change a tire.
The equipment you'll need is located in the trunk.
- Lift the trunk liner and place the plastic hook in the lip of the trunk lid.
- Remove the nut that holds down the spare tire.
- Remove the spare tire. See for more information about the spare tire, by placing your hands at the four and eight o'clock positions.
- When removing the spare tire from the trunk, place your hands on the tire at the four and eight o'clock positions. Gently pull it up and out of the trunk.
- Remove the wing nut that holds the jack and remove the jack and wheel wrench.
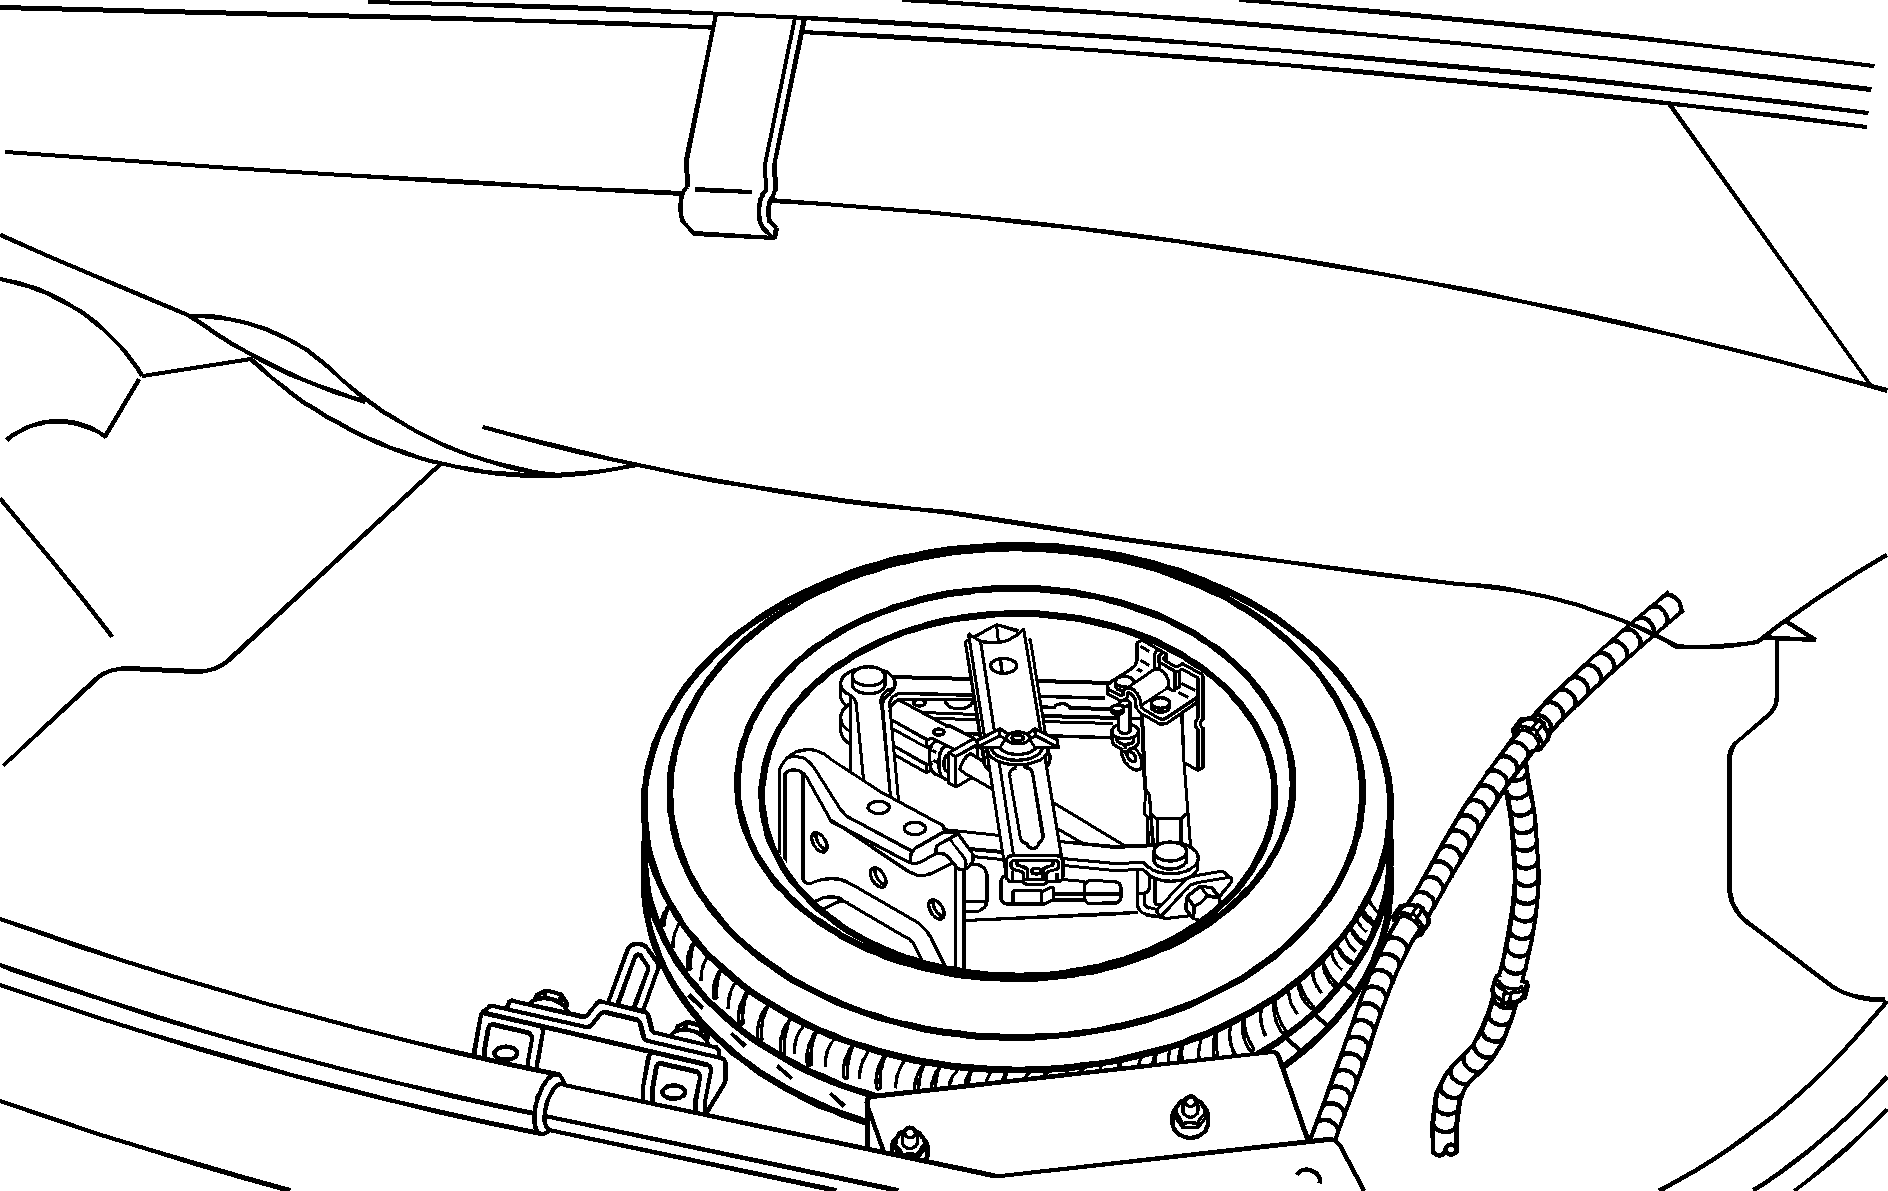
Tire Changing Tools
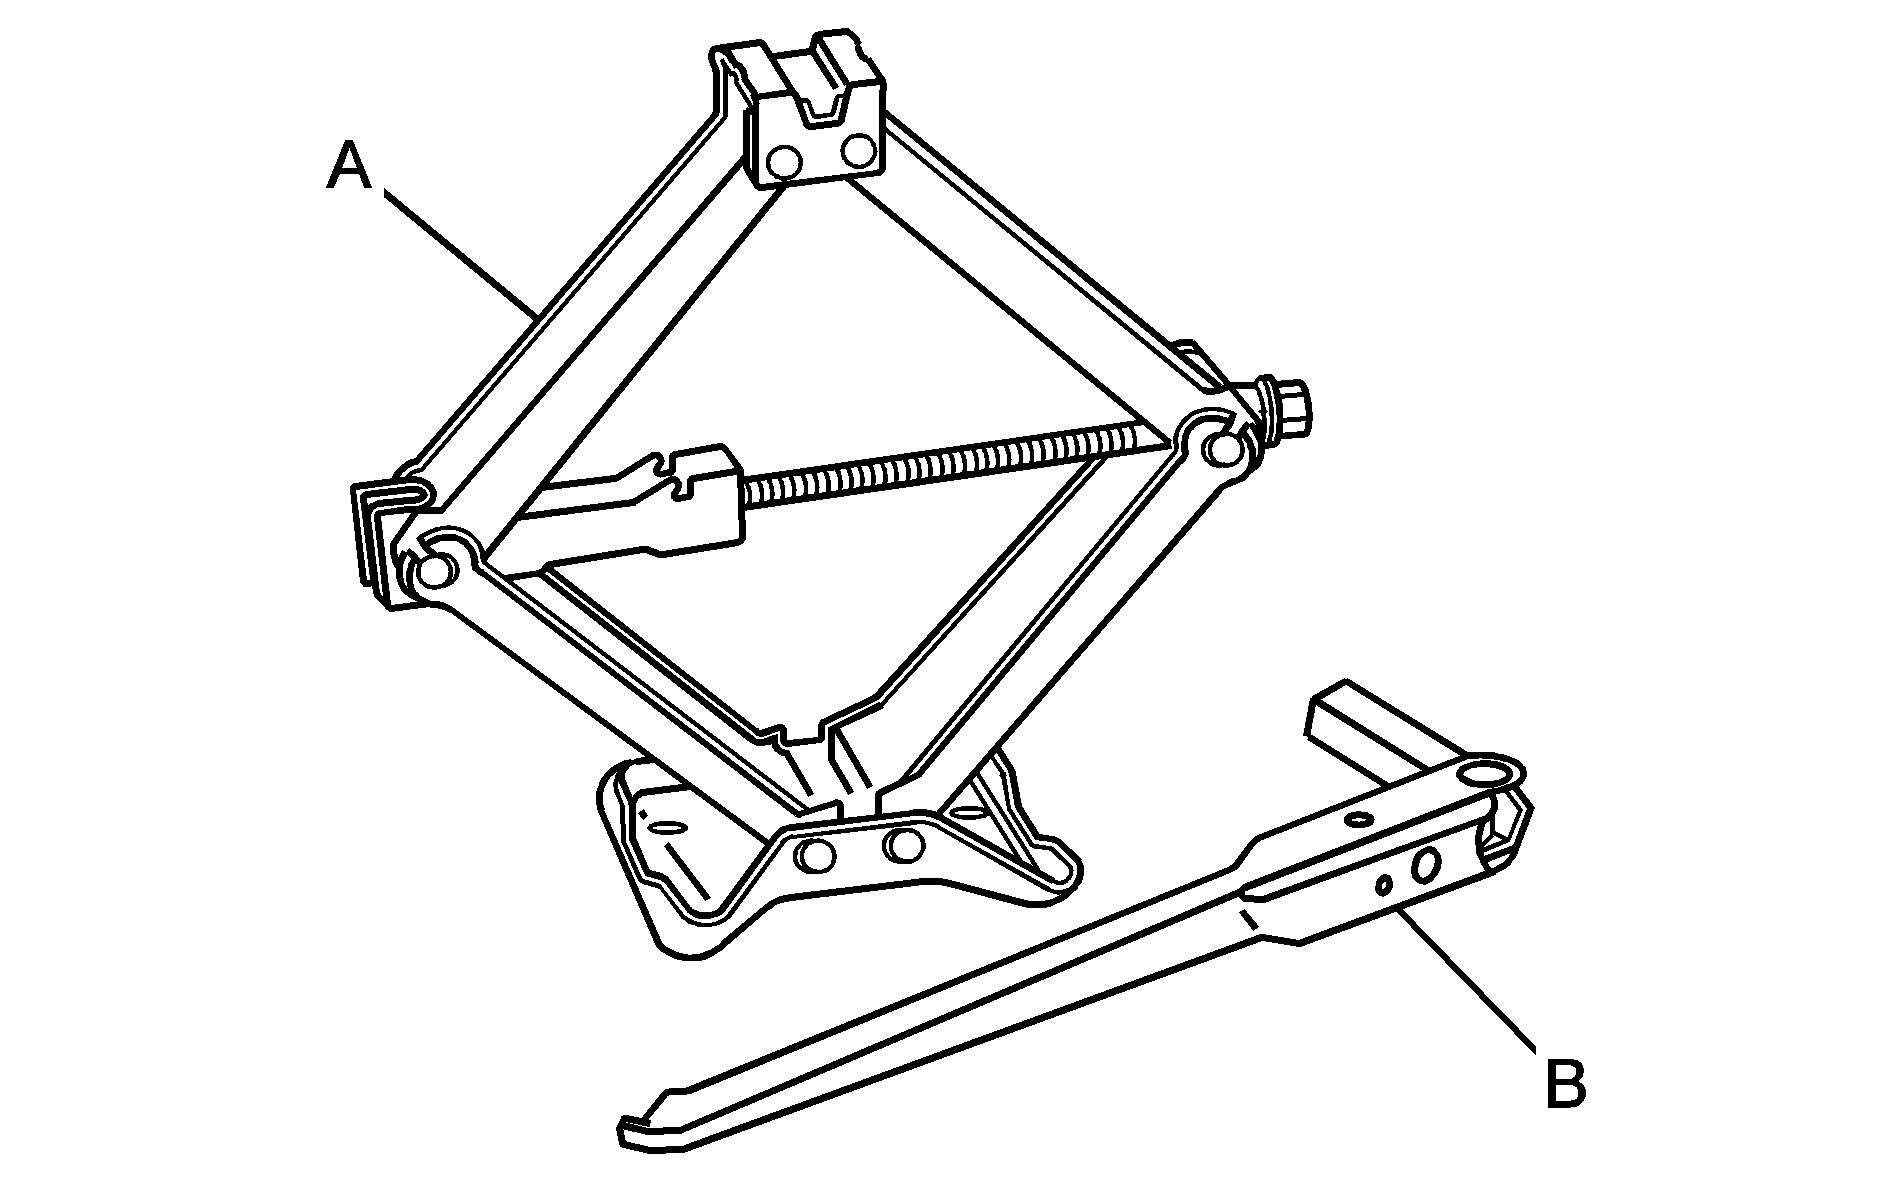
- The tools you'll be using include the jack (A) and wheel wrench (B).
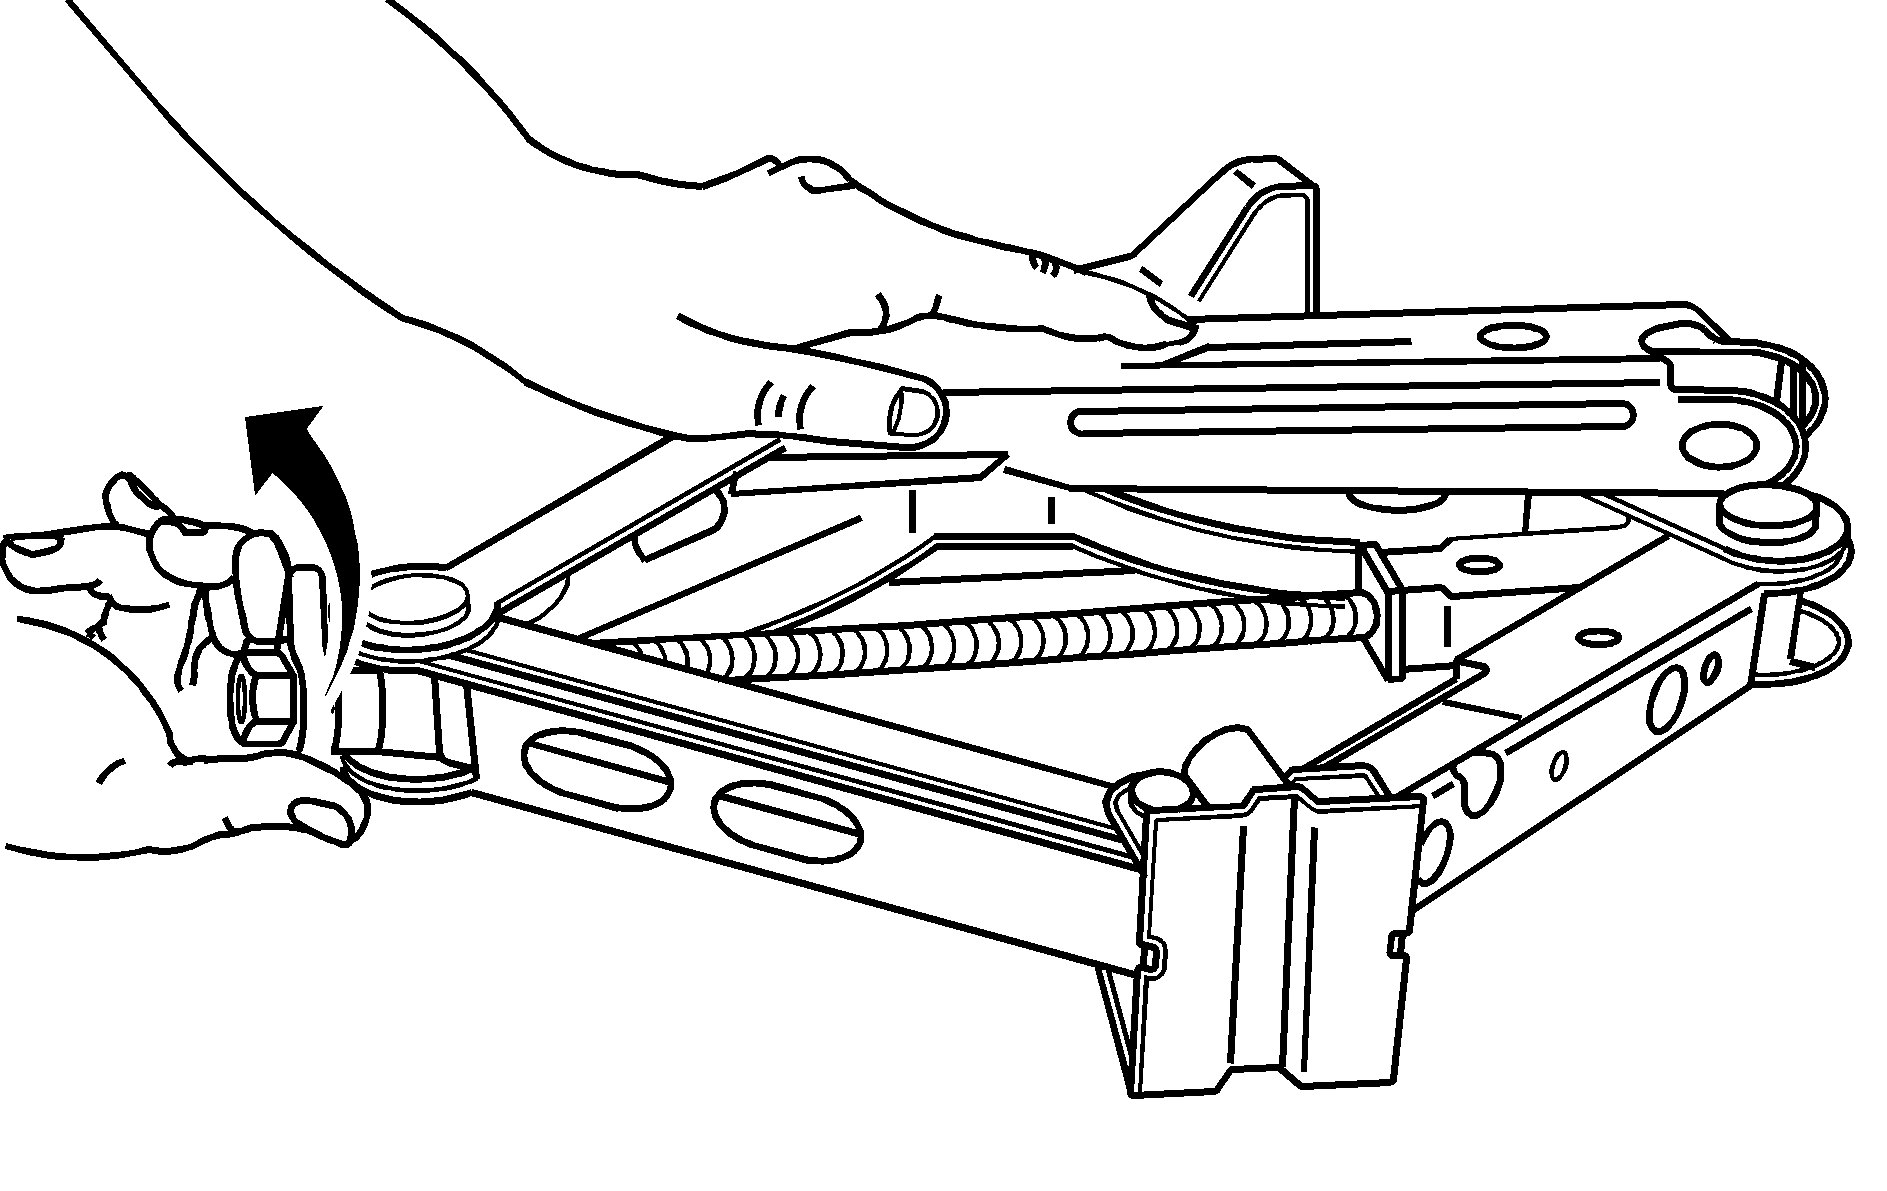
- Turn the plastic wing-nut counterclockwise to loosen the wheel wrench.
- Unhook wheel wrench from the jack.
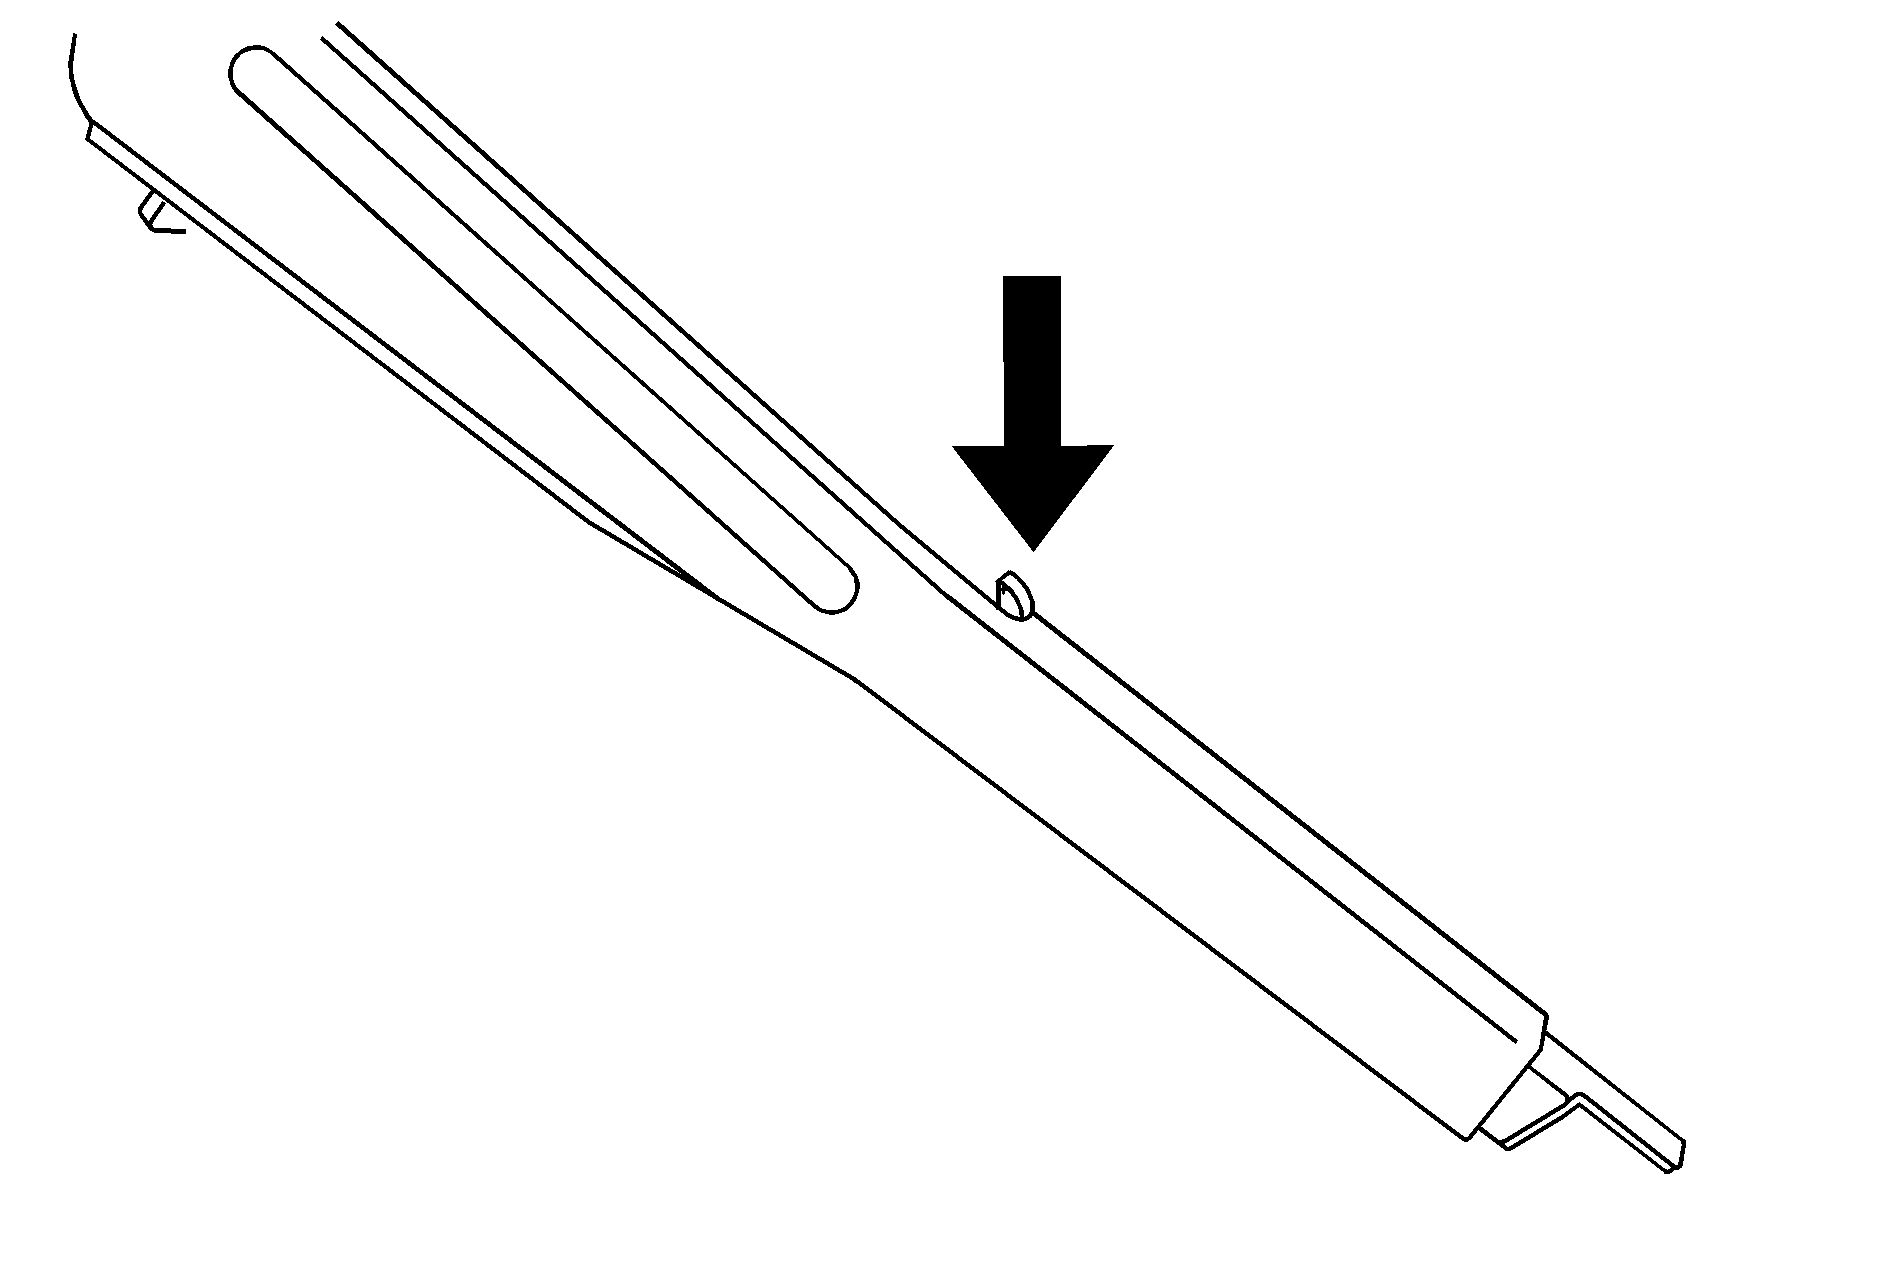
- Press on the button with the index finger and then pull on the end of the wheel wrench to extend the handle.
Removing Wheel Trim
Steel wheels with full plastic covers:
| • | Loosen all four hex shaped plastic caps by turning the wrench counterclockwise. Do not try to remove plastic caps from the cover or center cap. |
| • | When reinstalling full plastic covers, tighten all four plastic caps hand sung with the aid of a socket and tighten them with a wrench an additional quarter turn (90 °). |
Aluminum wheels with center caps:
| • | 15" Wheels: Pry the center cap away from the wheel using the flat tab on the end of the wheel wrench. |
| • | 16" Wheels: Pull the center cap away from the wheel using your fingertips. |
| • | When reinstall the center caps, simply place it into the center of the wheel and snap it into place. |
Caution: Raising your vehicle with the jack improperly positioned can damage the vehicle and even make the vehicle fall. To help avoid personal injury and vehicle damage, be sure to fit the jack lift head into the proper location before raising the vehicle.
Caution: Changing a tire can be dangerous. The vehicle
can slip off the jack and roll over or fall on you or other people. You and they could
be badly injured or even killed. Find a level place to change your tire. To help prevent
the vehicle from moving:
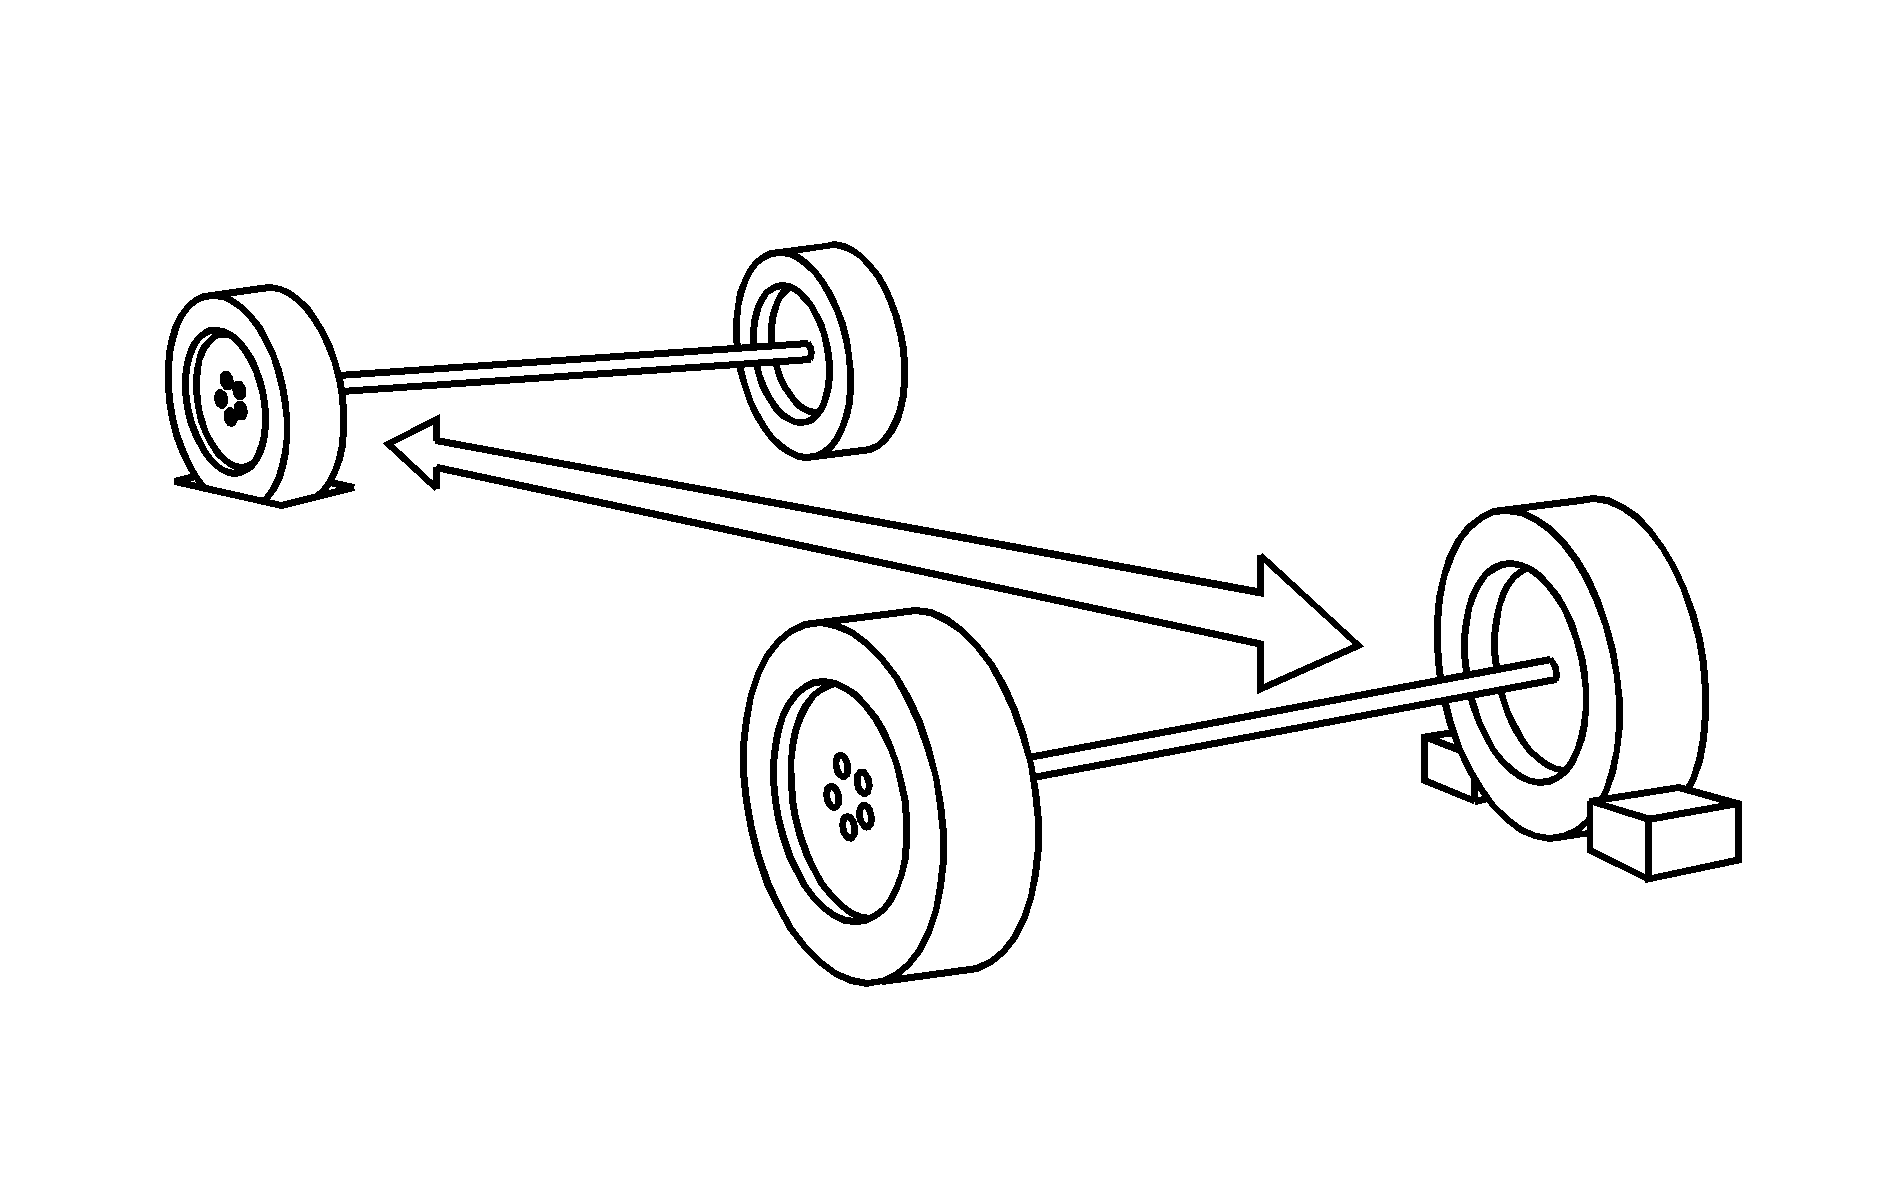
To be even more certain the vehicle will not move, you should put blocks at
the front and rear of the tire farthest away from the one being changed. That would
be the tire on the other side, at the opposite end of the vehicle.
- Now loosen all the wheel nuts, but DO NOT remove them. Now move the jack over to where the flat tire location.
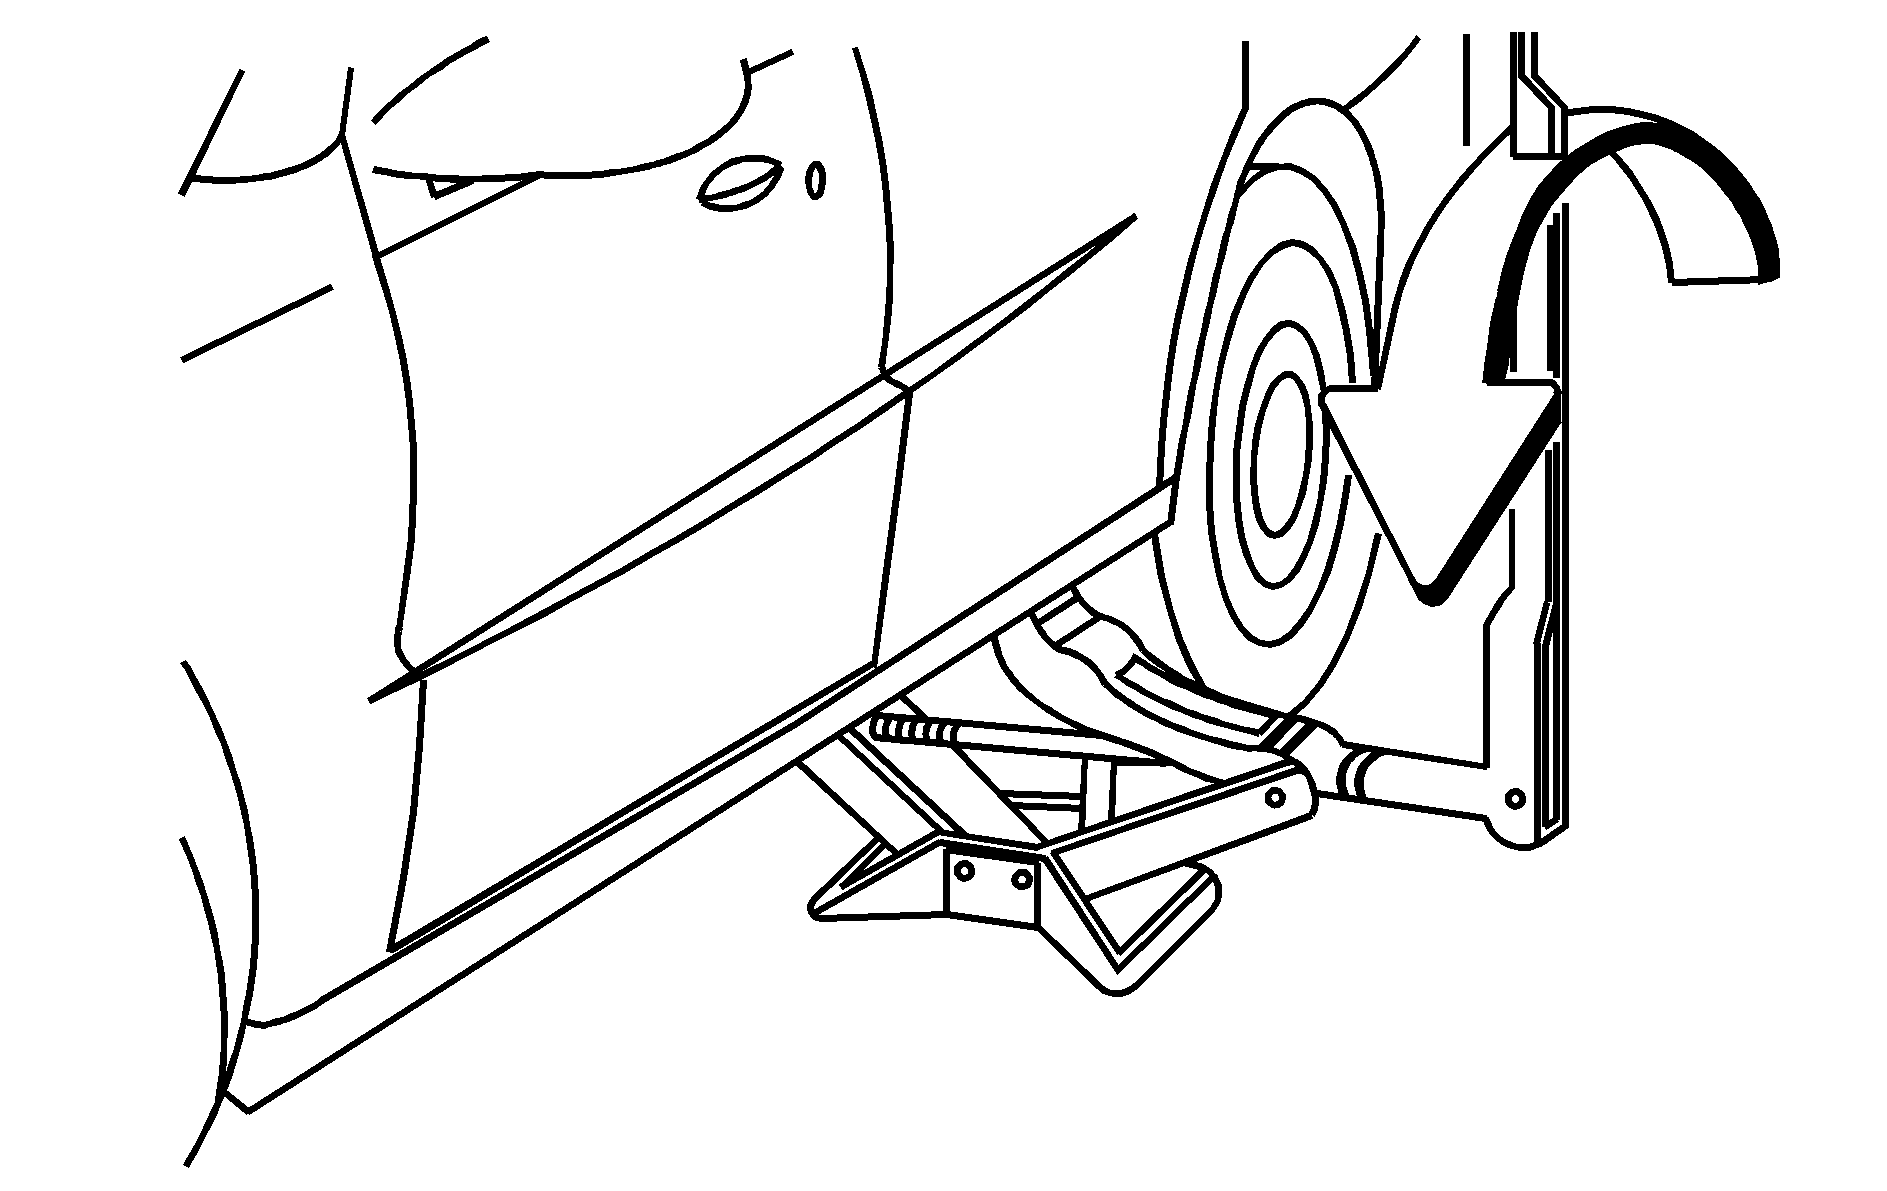
- Position the jack lift head at the jack location nearest the flat tire. Saturn vehicles do not have jack notches. Using the illustration above, locate the jack head, approximately:
- Put the compact spare tire near you.
- Raise the vehicle by rotating the wheel wrench on the jack to the right (clockwise). Stop when the flat tire and wheel are just off the ground.
- Remove the wheel nuts. Keep them near you. Take off the tire and wheel.
- Remove the rust, corrosion, or dirt from the wheel, studs, mounting surfaces and spare wheel.
- Place on the compact spare tire.
- Put the wheel nuts back on. The tapered end of the nut goes toward the wheel. Tighten each nut by hand until the wheel is held against the hub.
- Lower the vehicle until the spare tire touches the ground. To do so, move the wheel wrench to the left (counter-clockwise), like this.
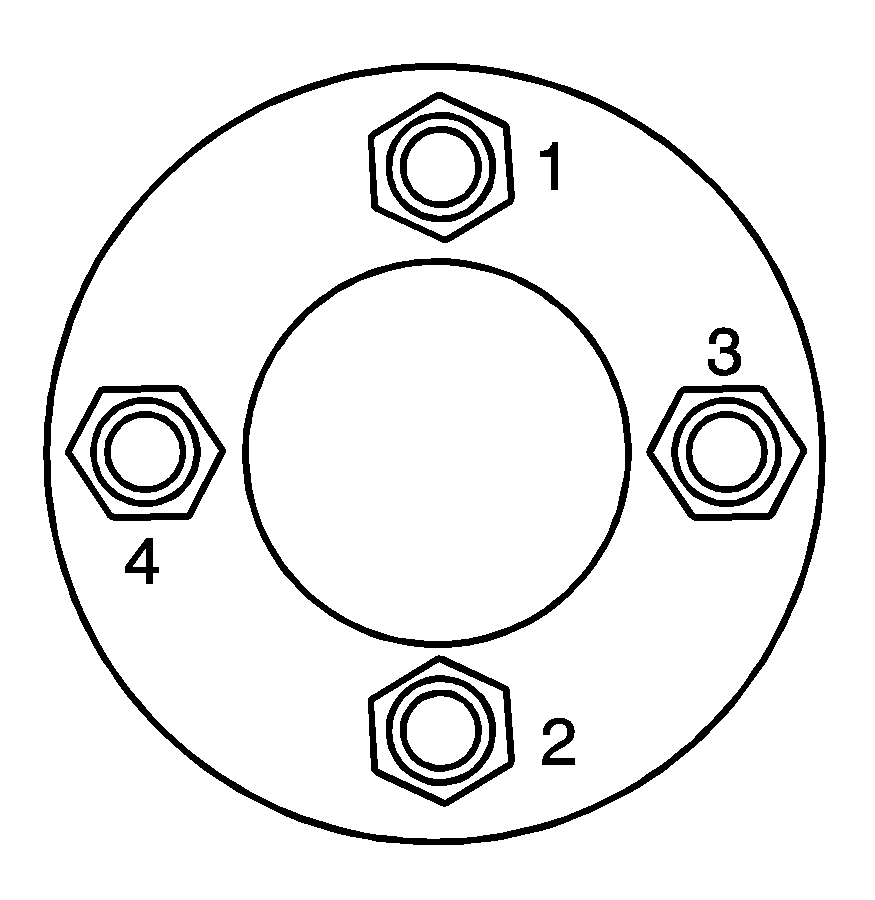
- Then, tighten the wheel nuts firmly in a crisscross sequence as shown.
- Lower the jack all the way and remove the jack from underneath the car.
- Tighten the nuts firmly with the wheel wrench.
- Now put all the equipment back in the car.
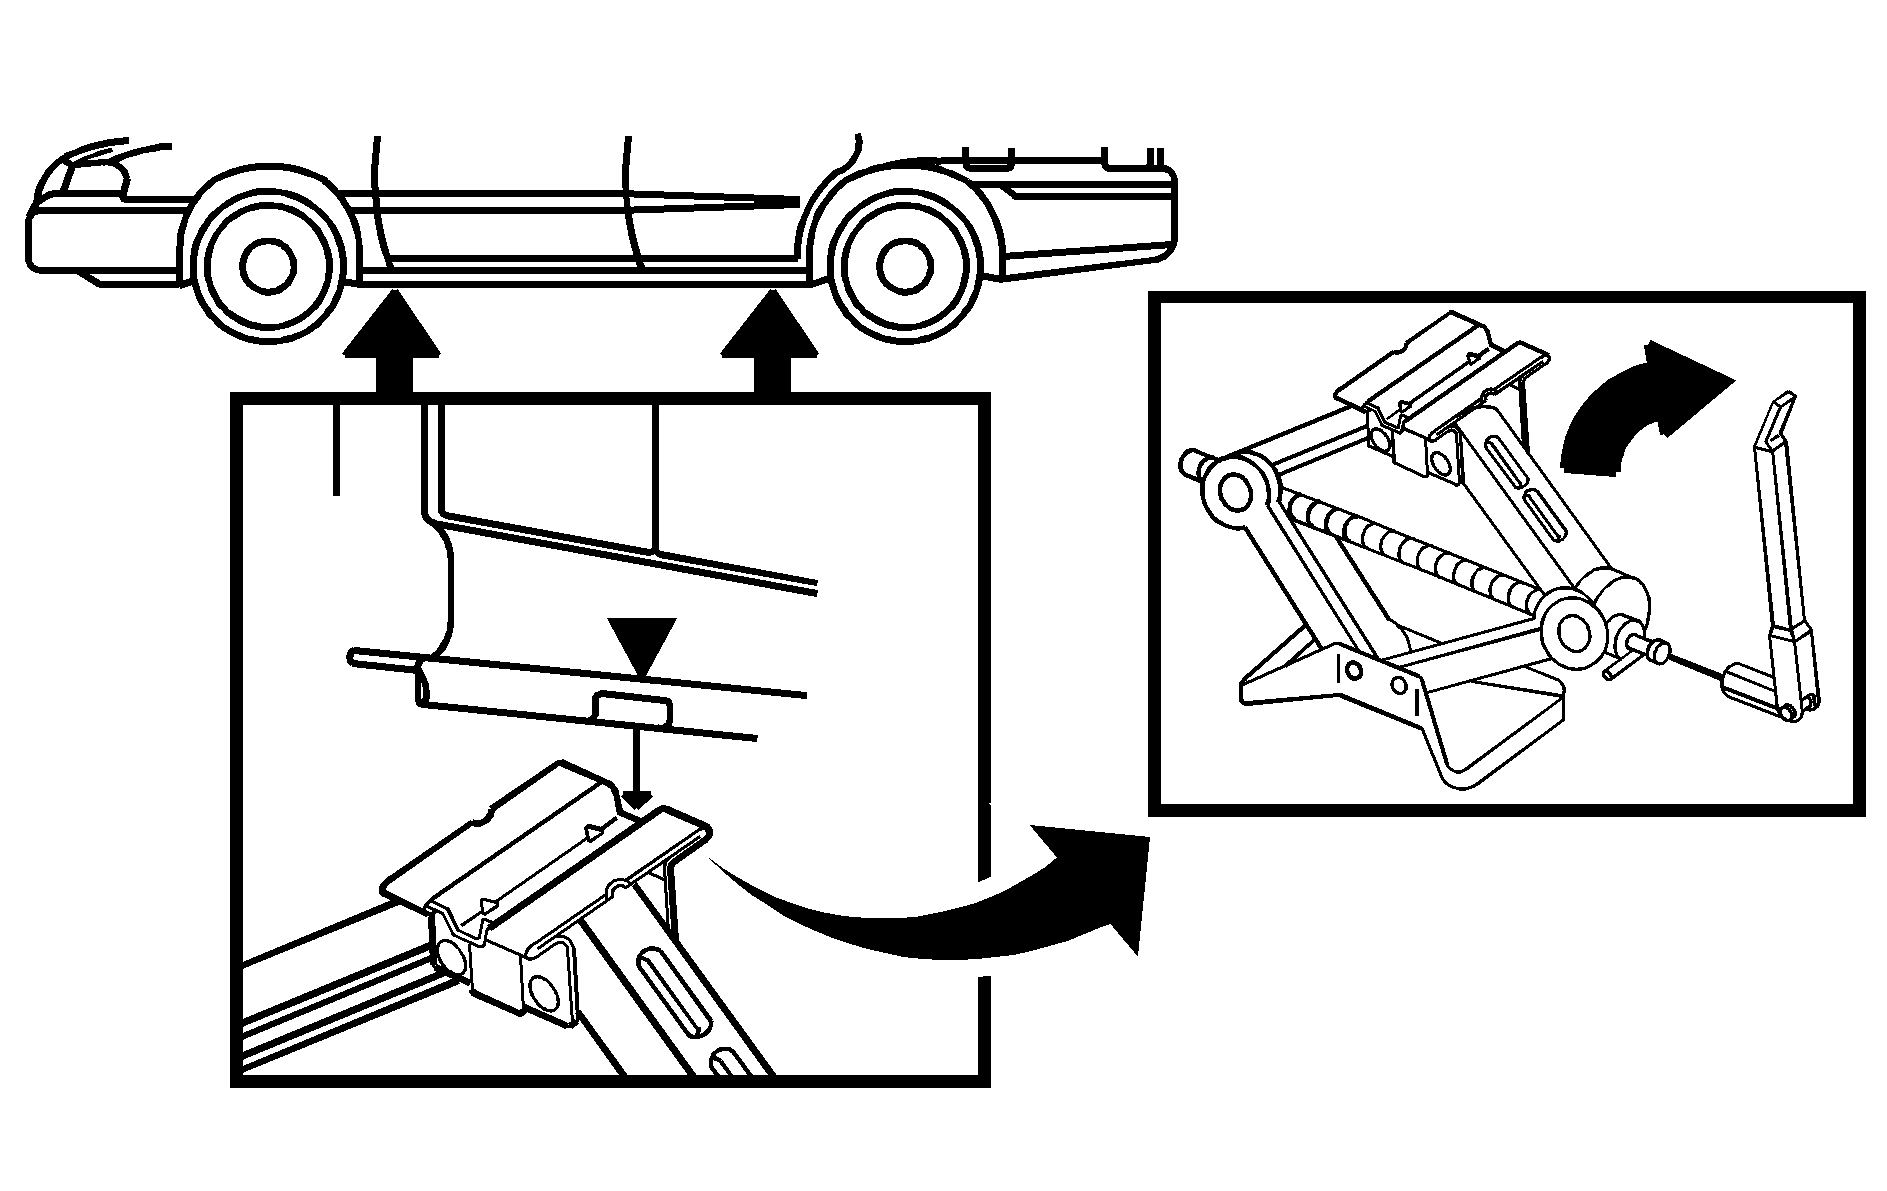
· 7 inches (17.7 mm) rearward from the front wheel opening.
· 2 inches (50 mm) forward from the rear wheel opening.
Make sure the jack head is touching the metal jacking flange under the body. Do not place the jack under the plastic body panel.

Caution: Rust or dirt on a wheel or other parts to which it is fastened, can make the wheel nuts become loose and eventually the wheel could come off and cause a crash. Always remove all rust and dirt from wheels and other parts.
Caution: Never use oil or grease on bolts or nuts because the nuts might come loose. The vehicle's wheel could fall off, causing a crash.
Caution: Incorrect or improperly tightened wheel nuts can cause the wheel to come loose and even come off. This could lead to a crash. If you have to replace them, be sure to get new original equipment wheel nuts. Stop somewhere as soon as you can and have the nuts tightened with a torque wrench to the proper torque specification. See Capacities and Specifications for wheel nut torque specification.
Notice: Improperly tightened wheel nuts can lead to brake pulsation and rotor damage. To avoid expensive brake repairs, evenly tighten the wheel nuts in the proper sequence and to the proper torque specification. See Capacities and Specifications for the wheel nut torque specification.
Don't try to put a wheel cover on your compact spare tire.
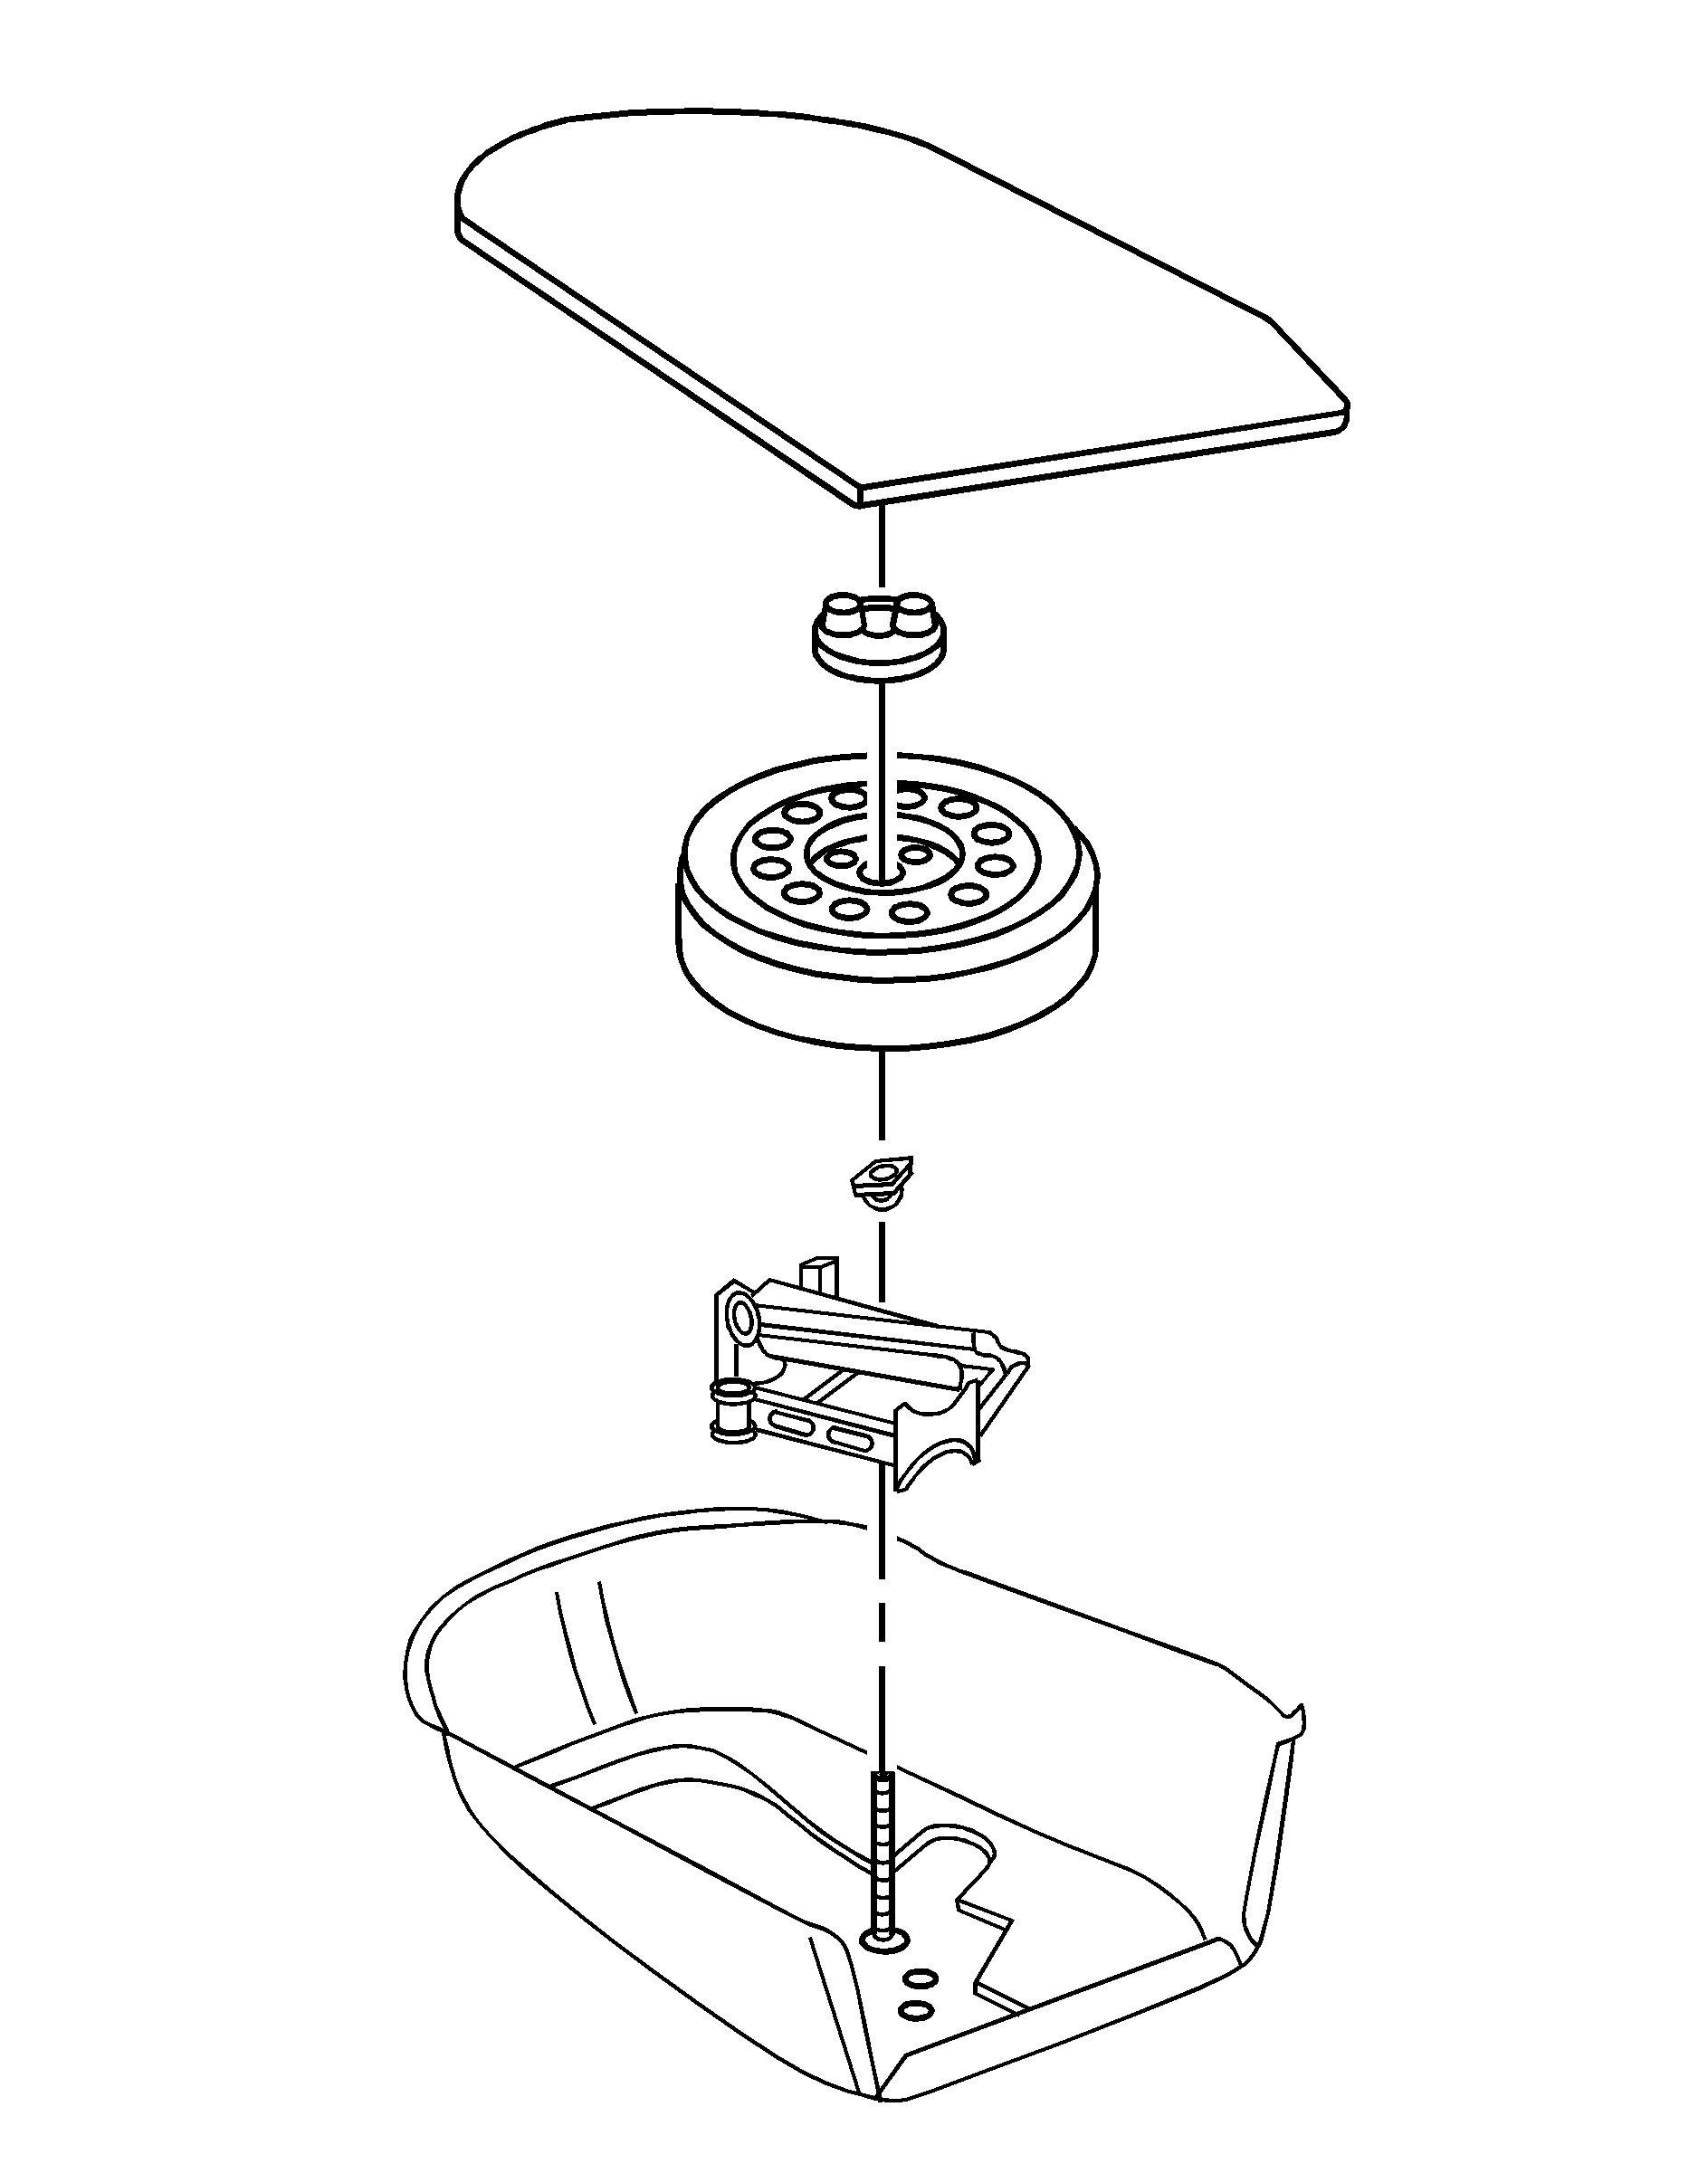
Storing the Flat or Spare Tire and Tools
- Remove the stow bolt extension rod and sleeve from the jack.
- Place the wheel wrench into the clips on the jack.
- Screw the stow bolt extension rod and the sleeve into the existing spare tire hold-down bolt.
- Place the road wheel, face down, into the spare tire tube. Be very careful to avoid scraping the aluminum wheel face on the hold-down bolt and other hard surfaces. The hold-down bolt should pass through the center hole in the wheel.
- Place the jack into the center of the flat tire, being careful not to scratch the inside of the wheel.
- Place the smaller jack hold-down nut in a safe place for re-use later.
- Remove the plastic sleeve from the stow bolt extension rod. Secure the jack and road wheel using the larger plastic retainer.

Caution: Storing a jack, a tire, or other equipment in the passenger compartment of the vehicle could cause injury. In a sudden stop or collision, loose equipment could strike someone. Store all these in the proper place.
The compact spare tire is for temporary use only. Replace the compact spare with a full-size tire as soon as possible. See the storage instructions label to replace your compact spare into your trunk properly.
