Removal Procedure
- Remove the front bumper fascia. Refer to
Front Bumper Fascia Replacement
.
- Remove the headlamps. Refer to
Headlamp Replacement
.
- Remove the front fender liner of the fender. Refer to
Front Fender Liner Replacement
.
- Remove the fender insulation.
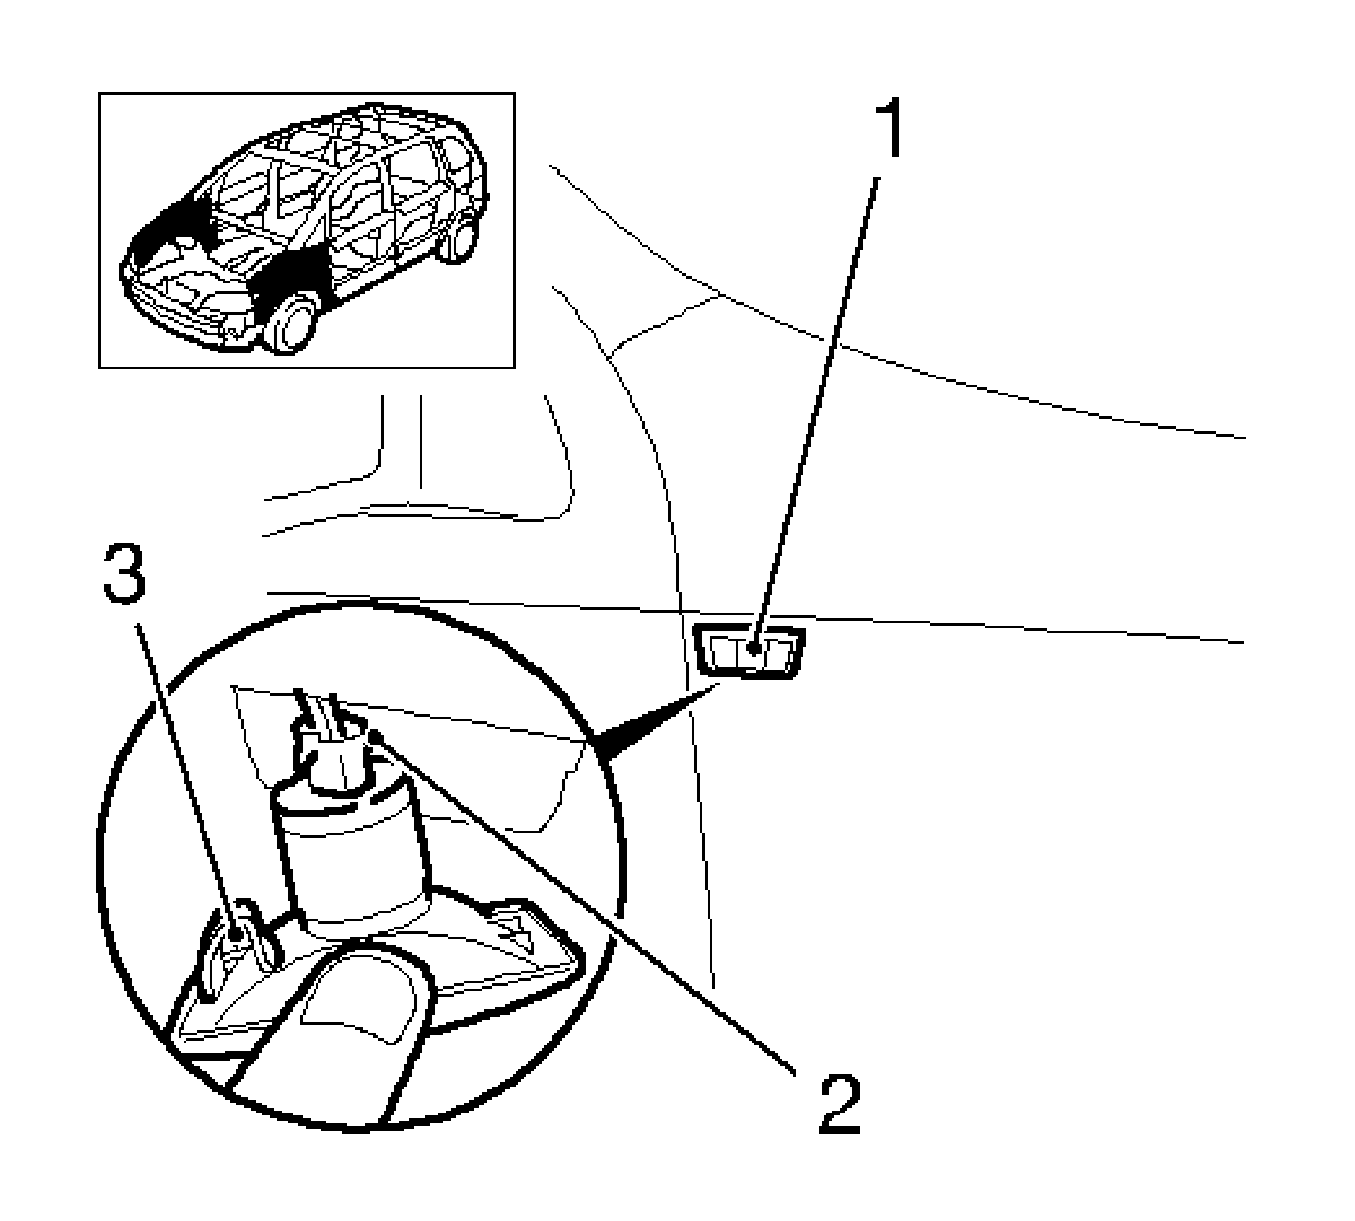
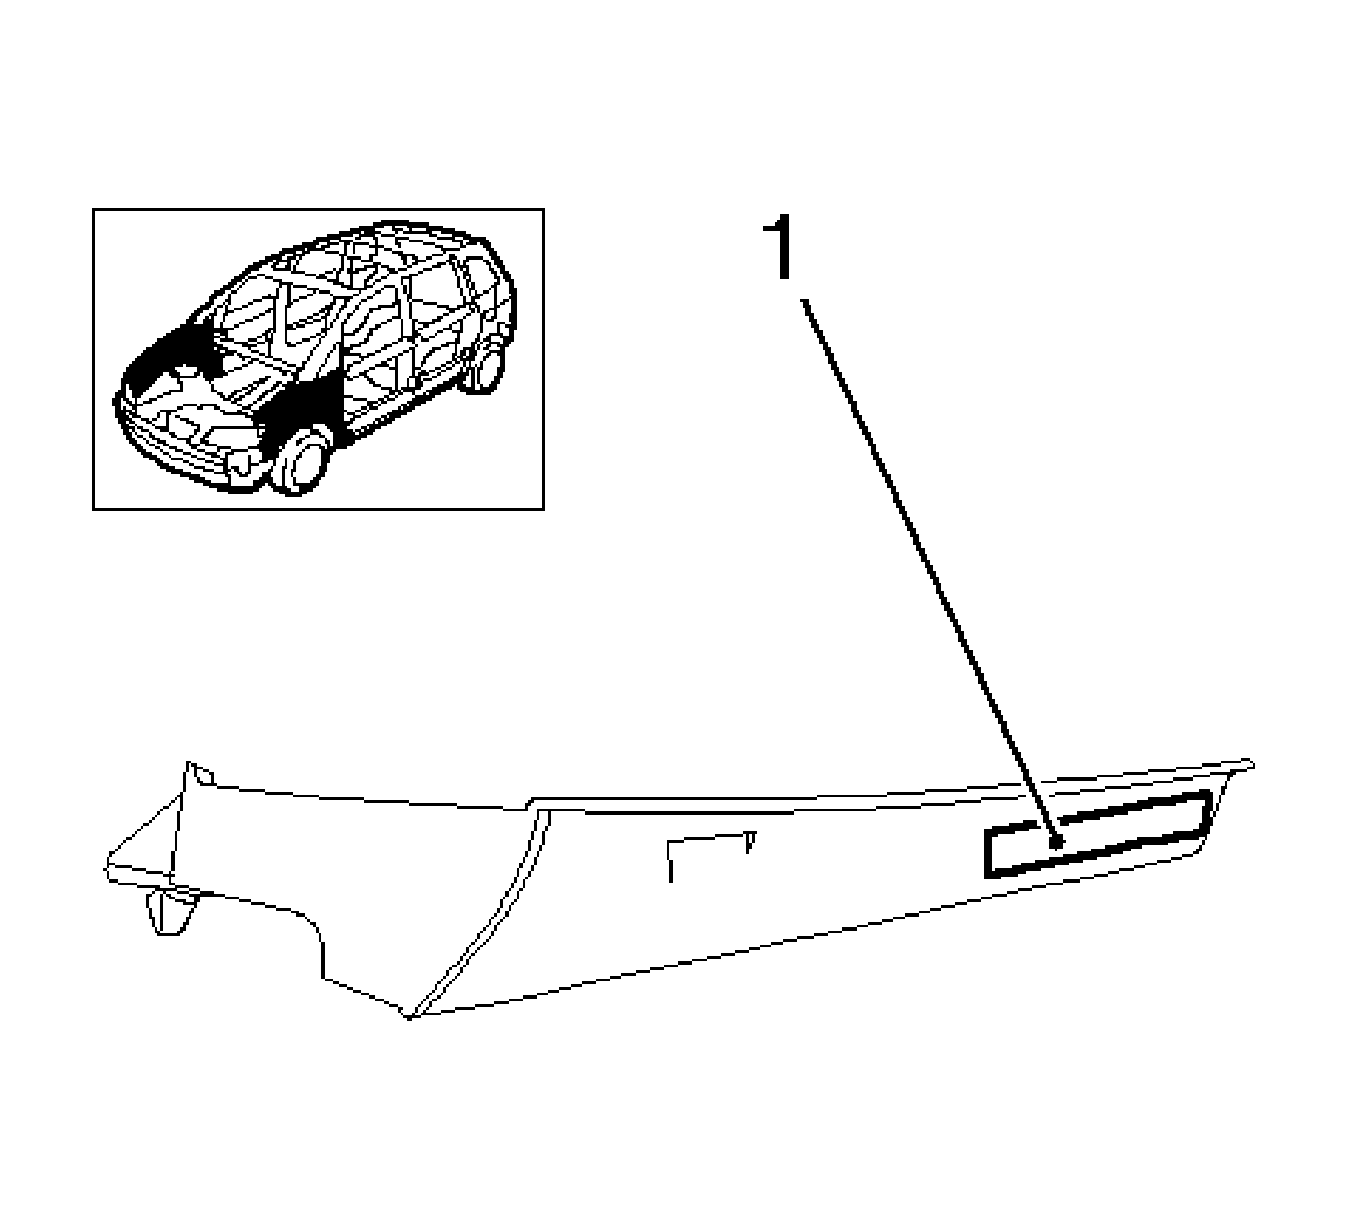
- Remove the repeater lamp (1).
| • | Disengage the repeater lamp (1) from the inside (3). |
| • | Disconnect the wiring harness plug (2). |
- When replacing the fender, transfer or replace the fascia support bracket.
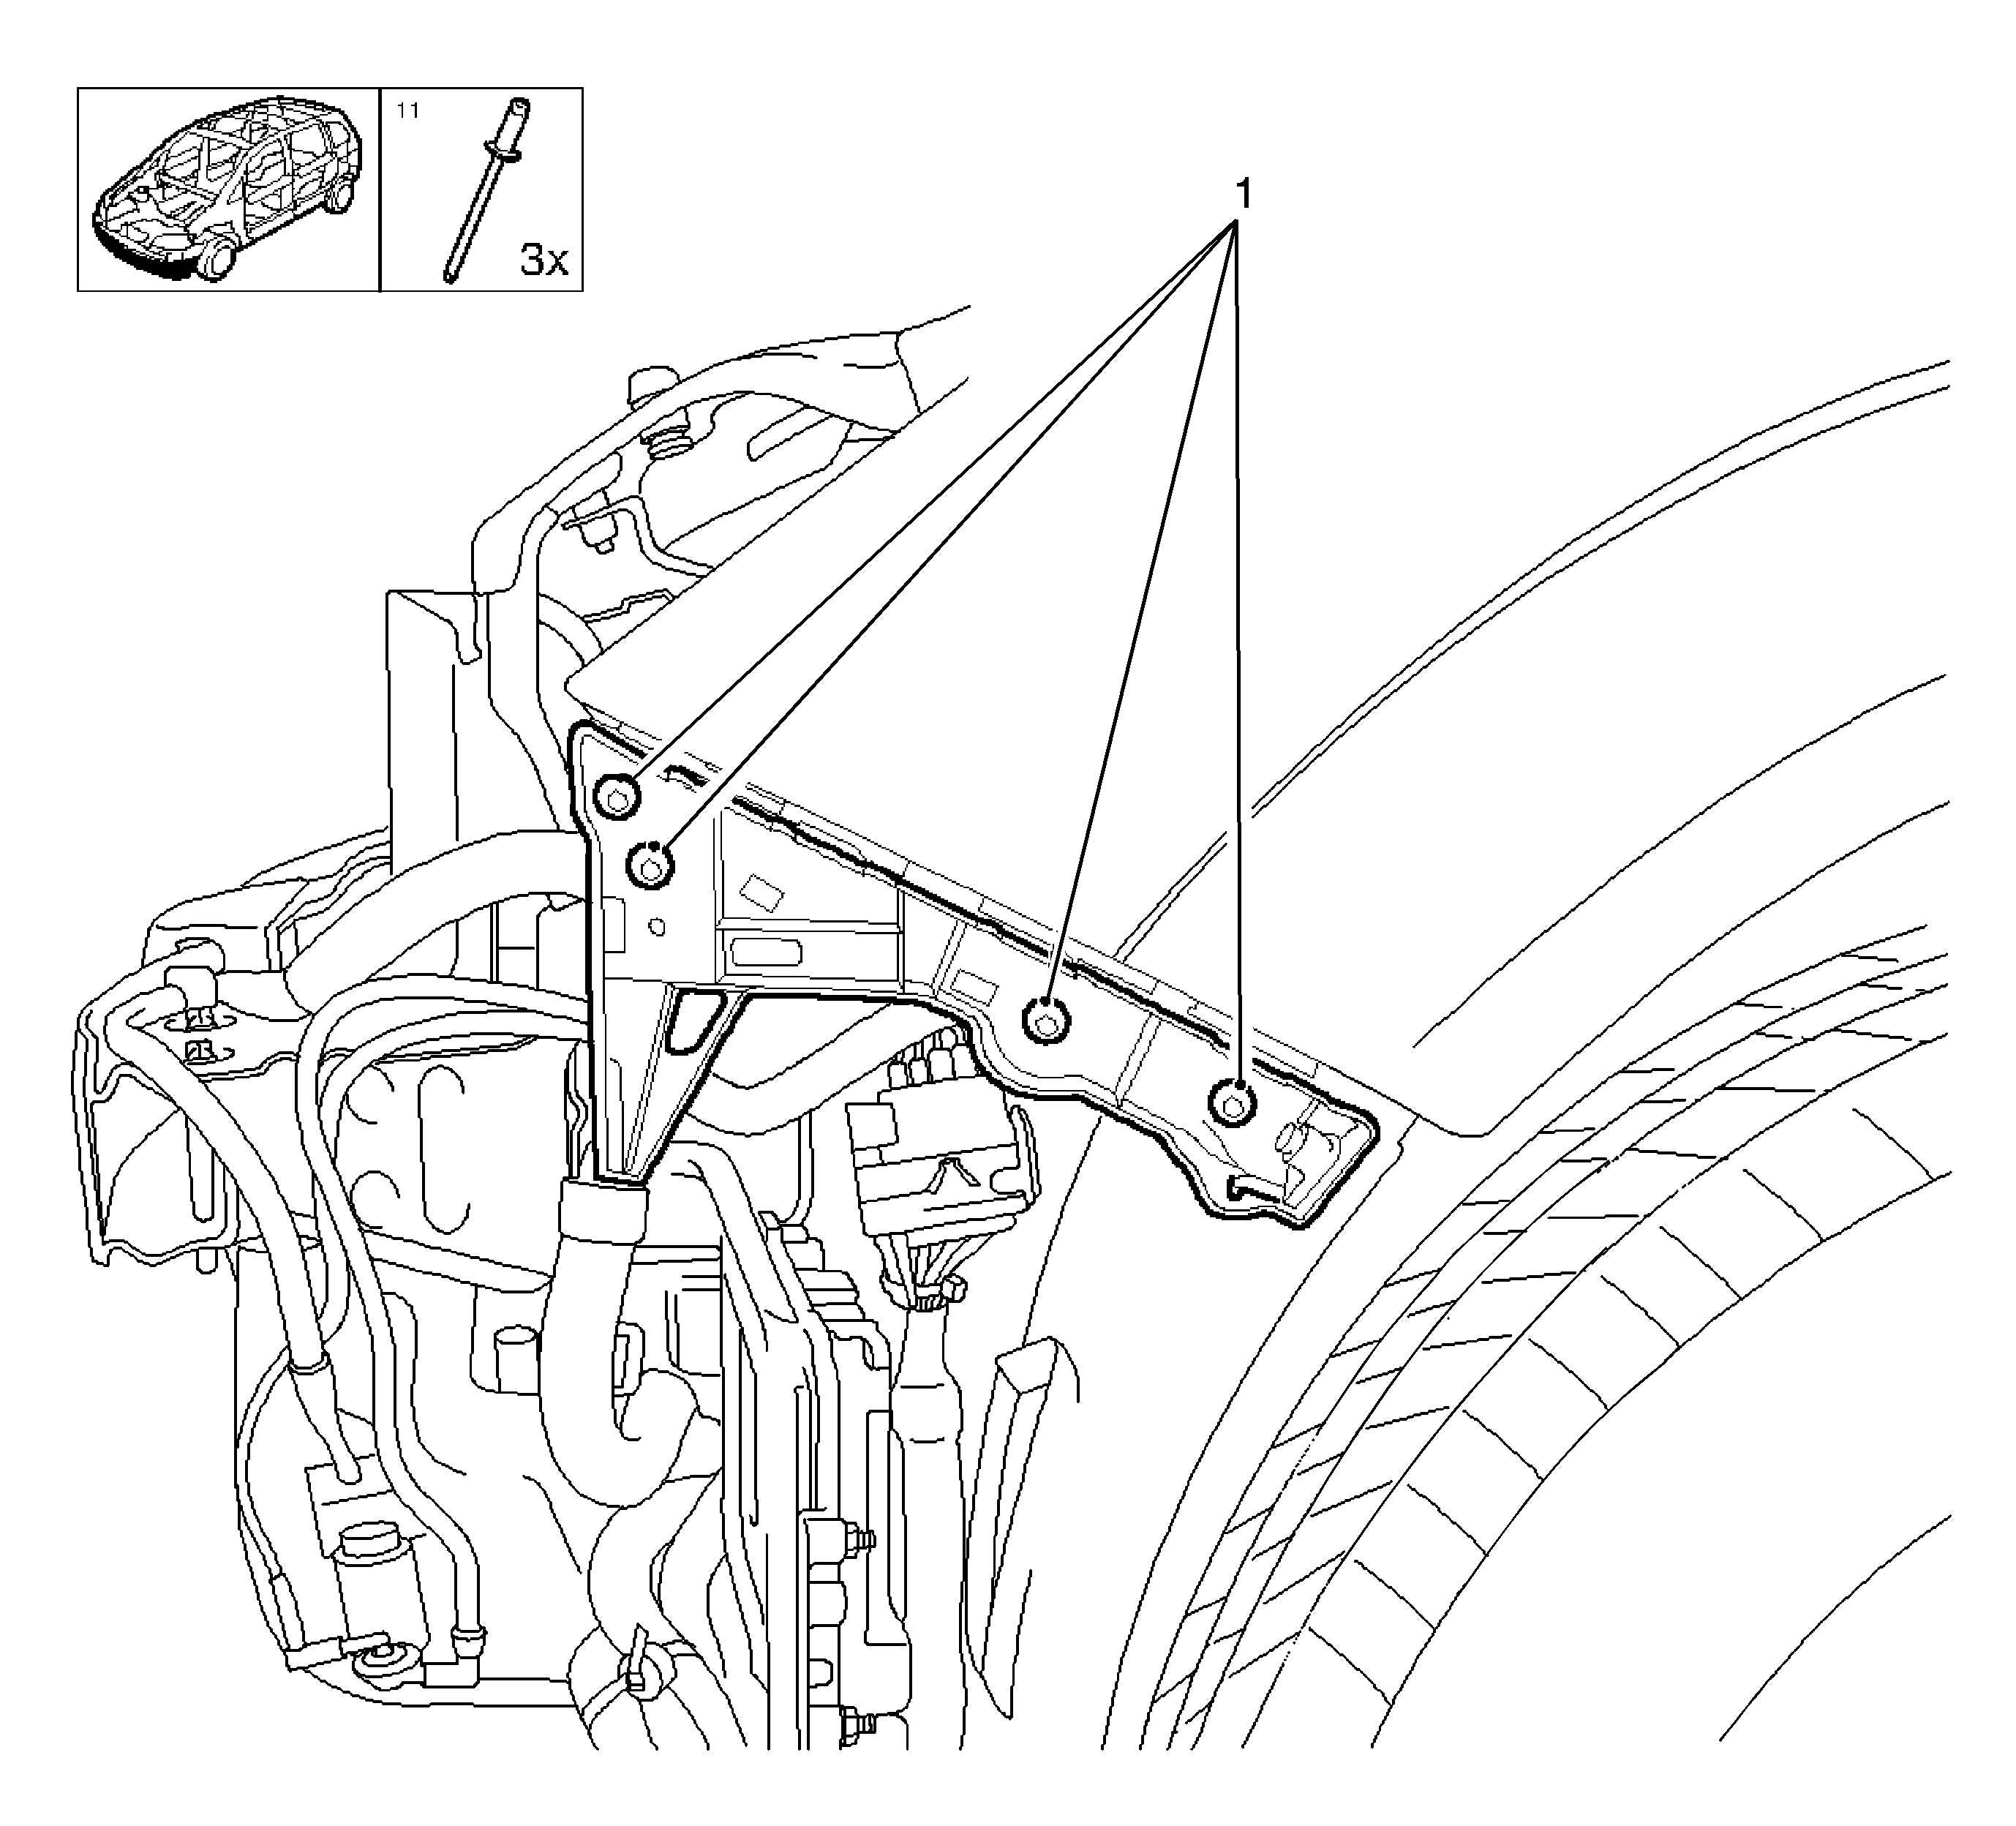
Drill out the 4 blind rivets (1).
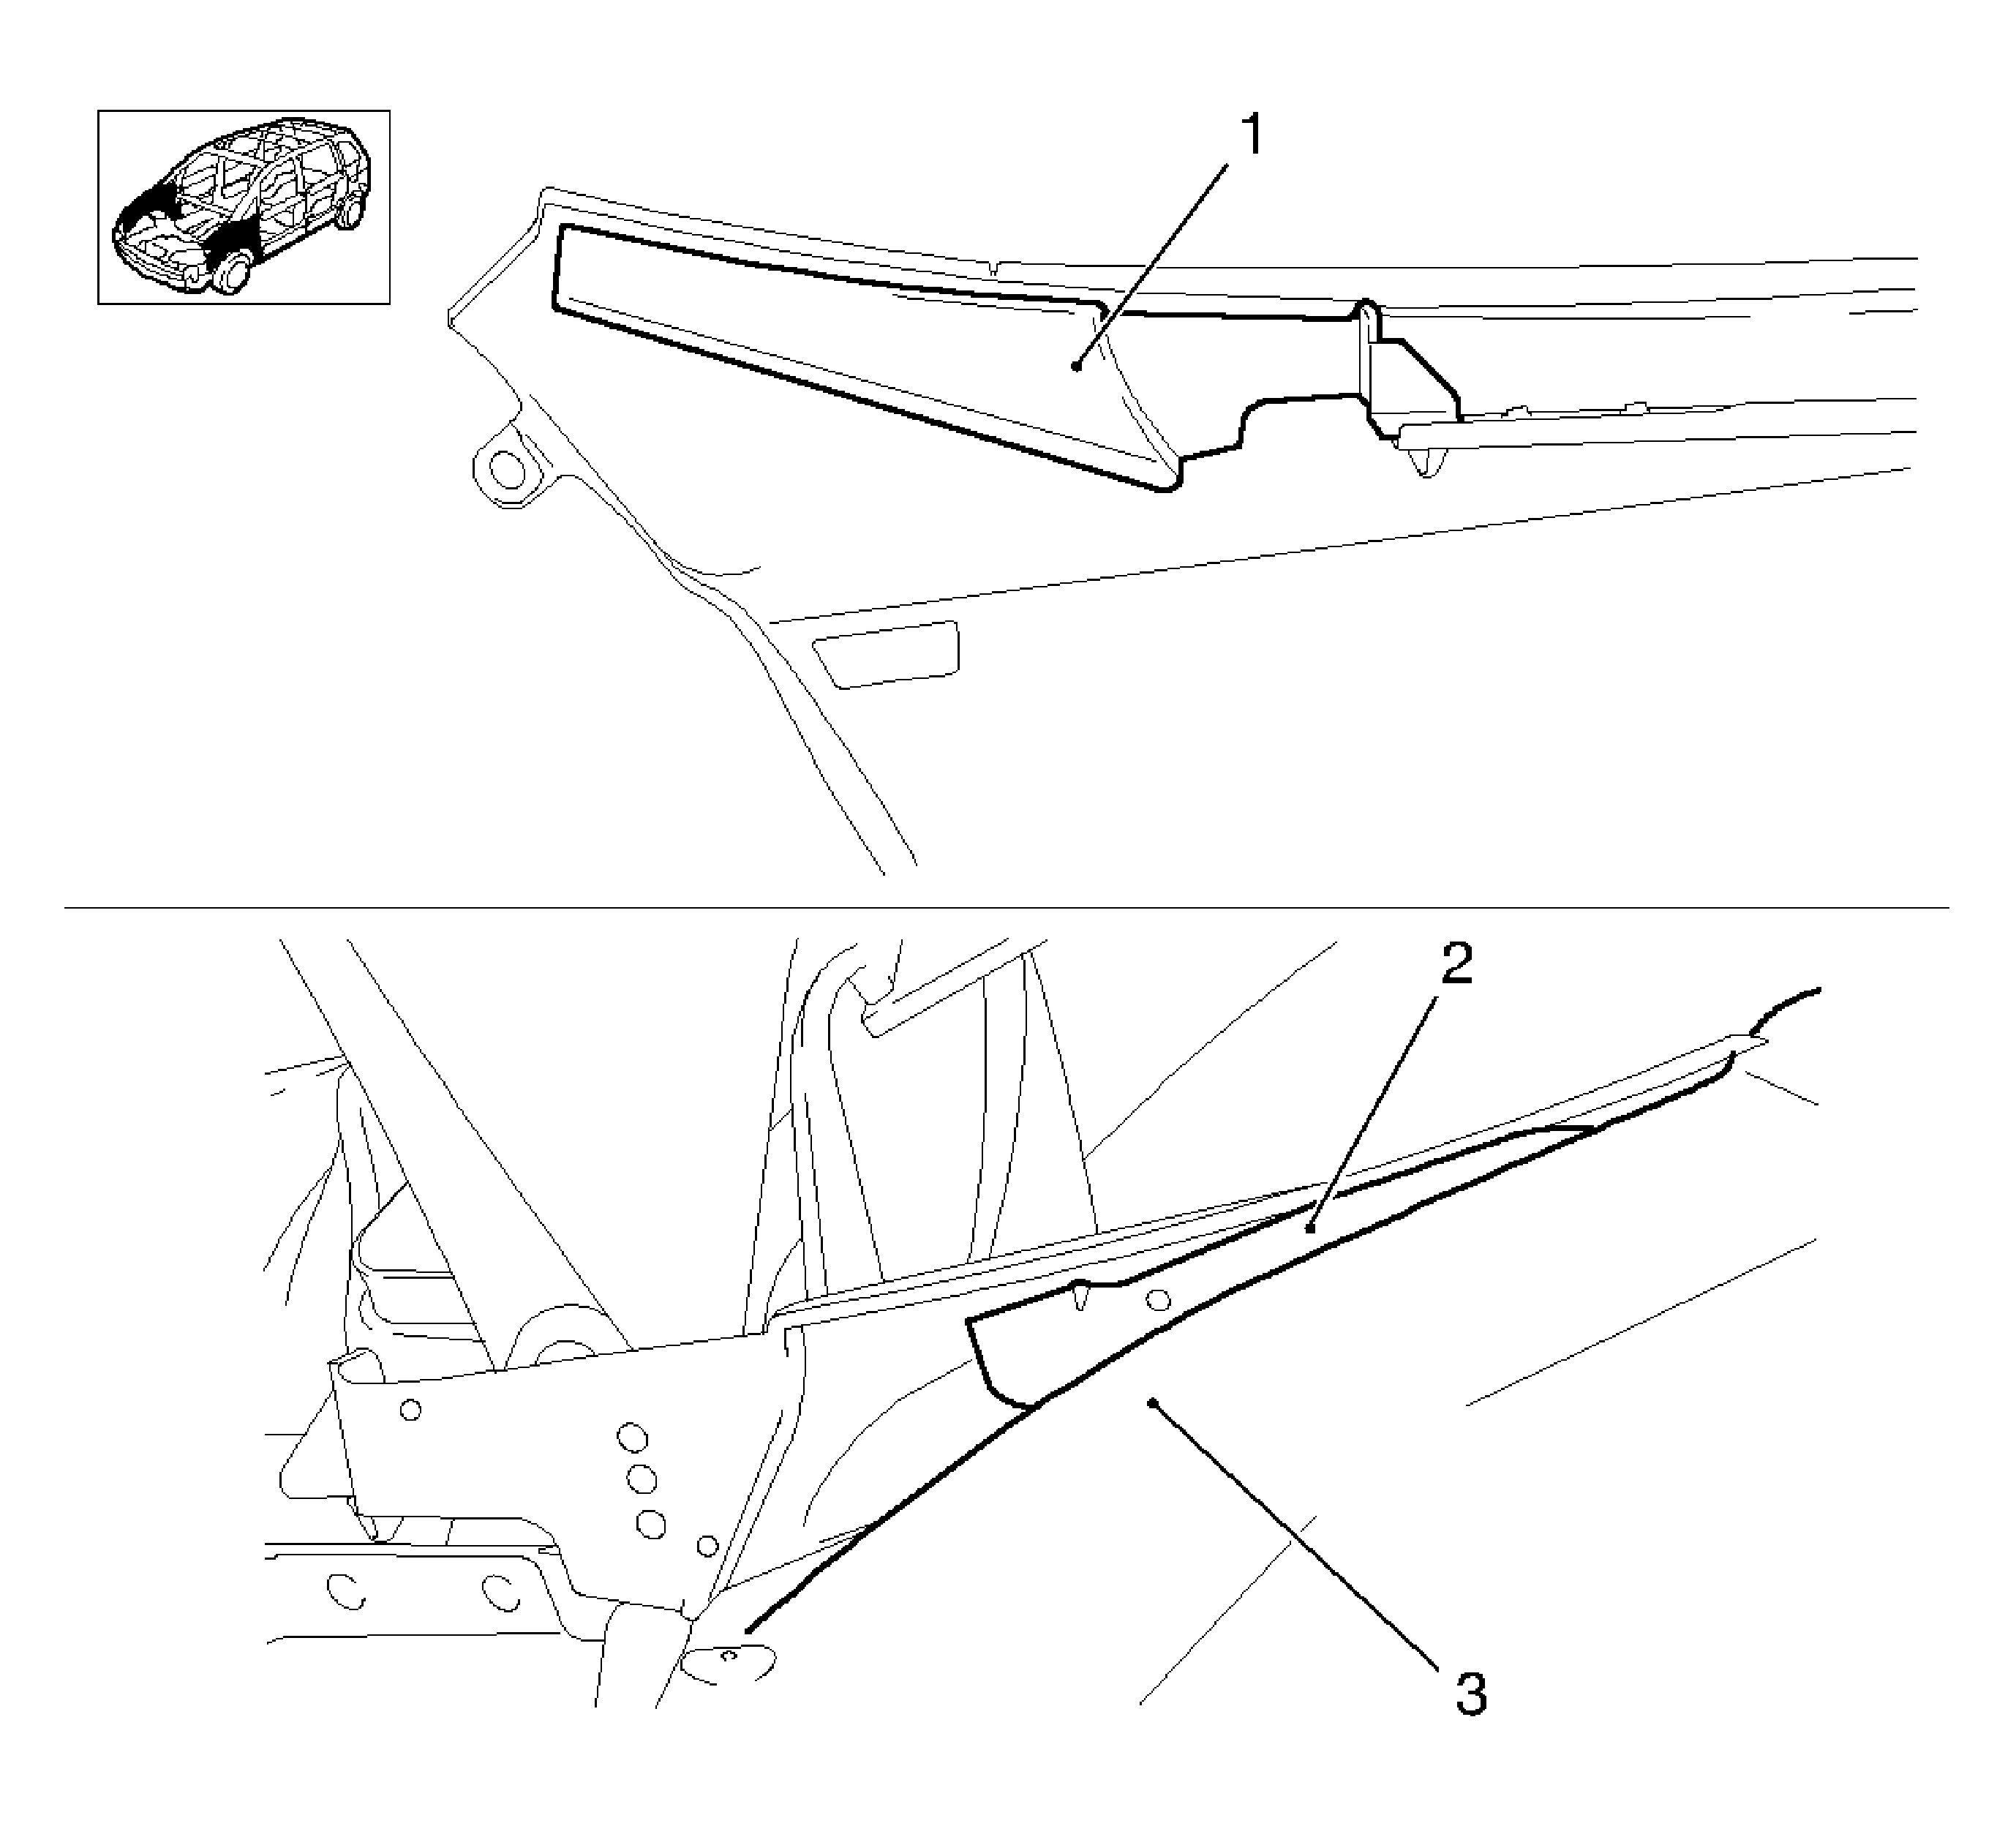
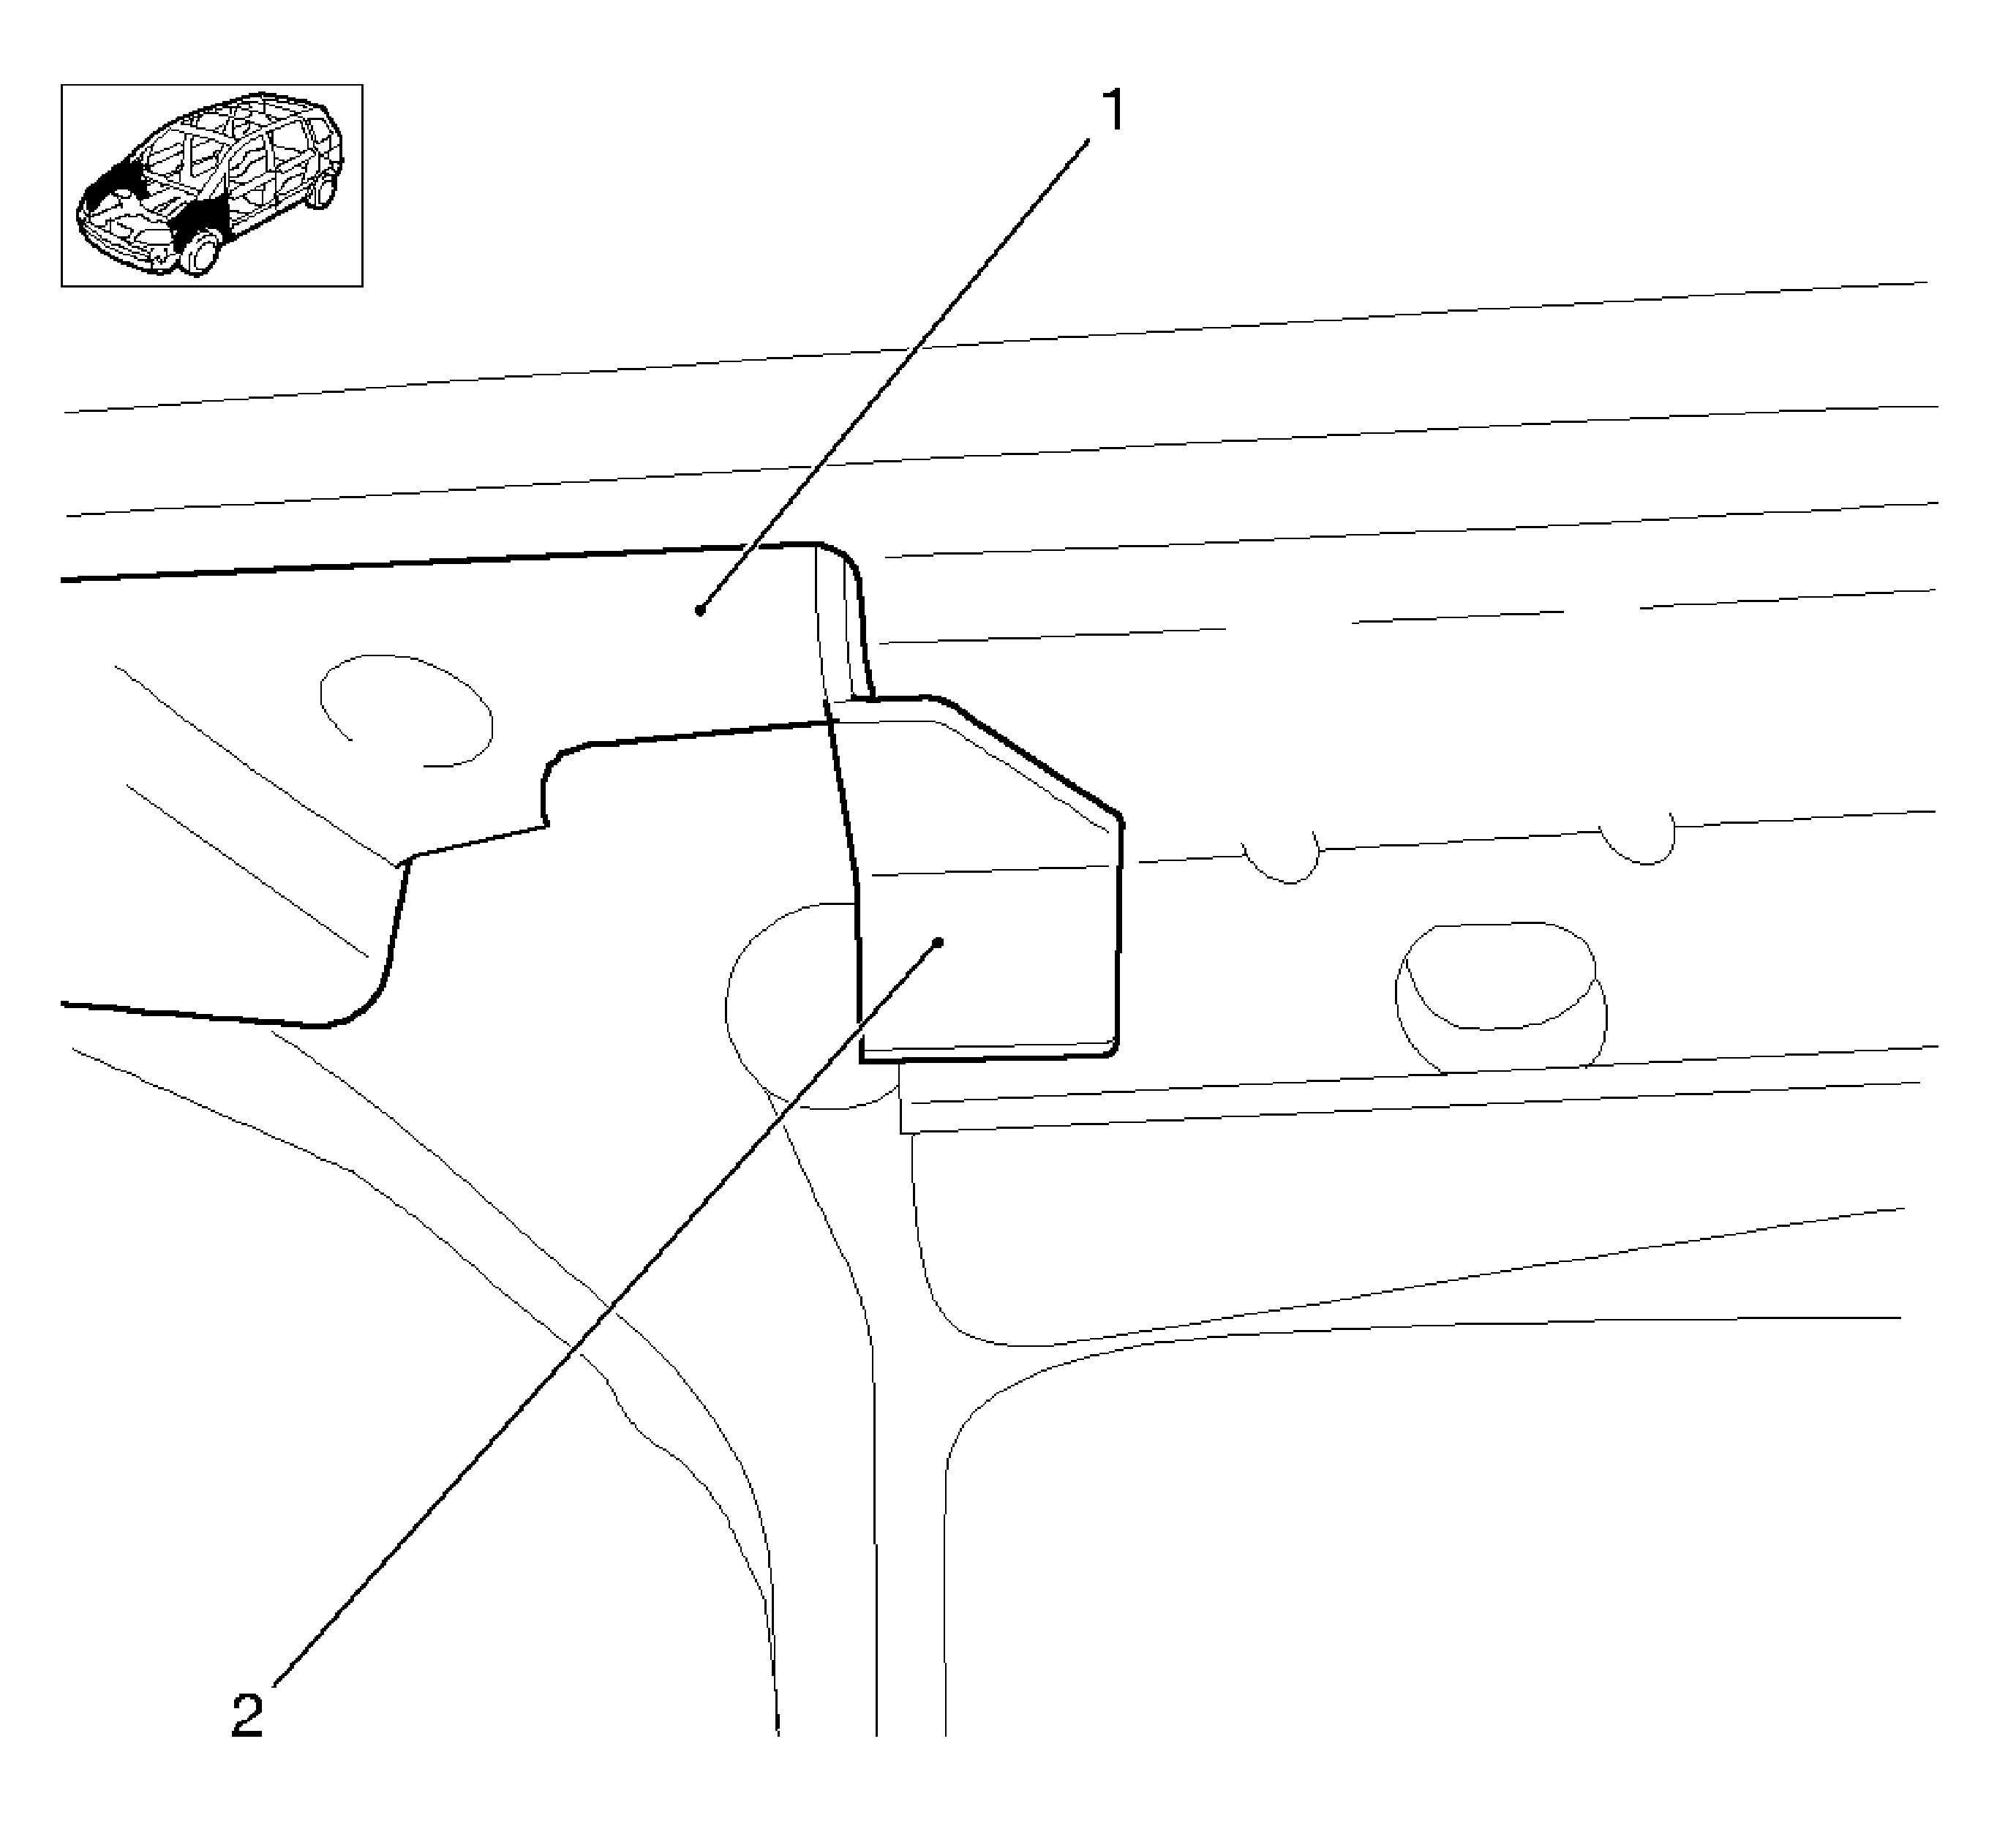
- Remove the front fender (1) from the outer windshield frame.
Remove the adhesive (2) from the A-pillar (3).
Important: Protect the edges of the fender with adhesive tape to avoid damaging the paint.
- Remove the fender.
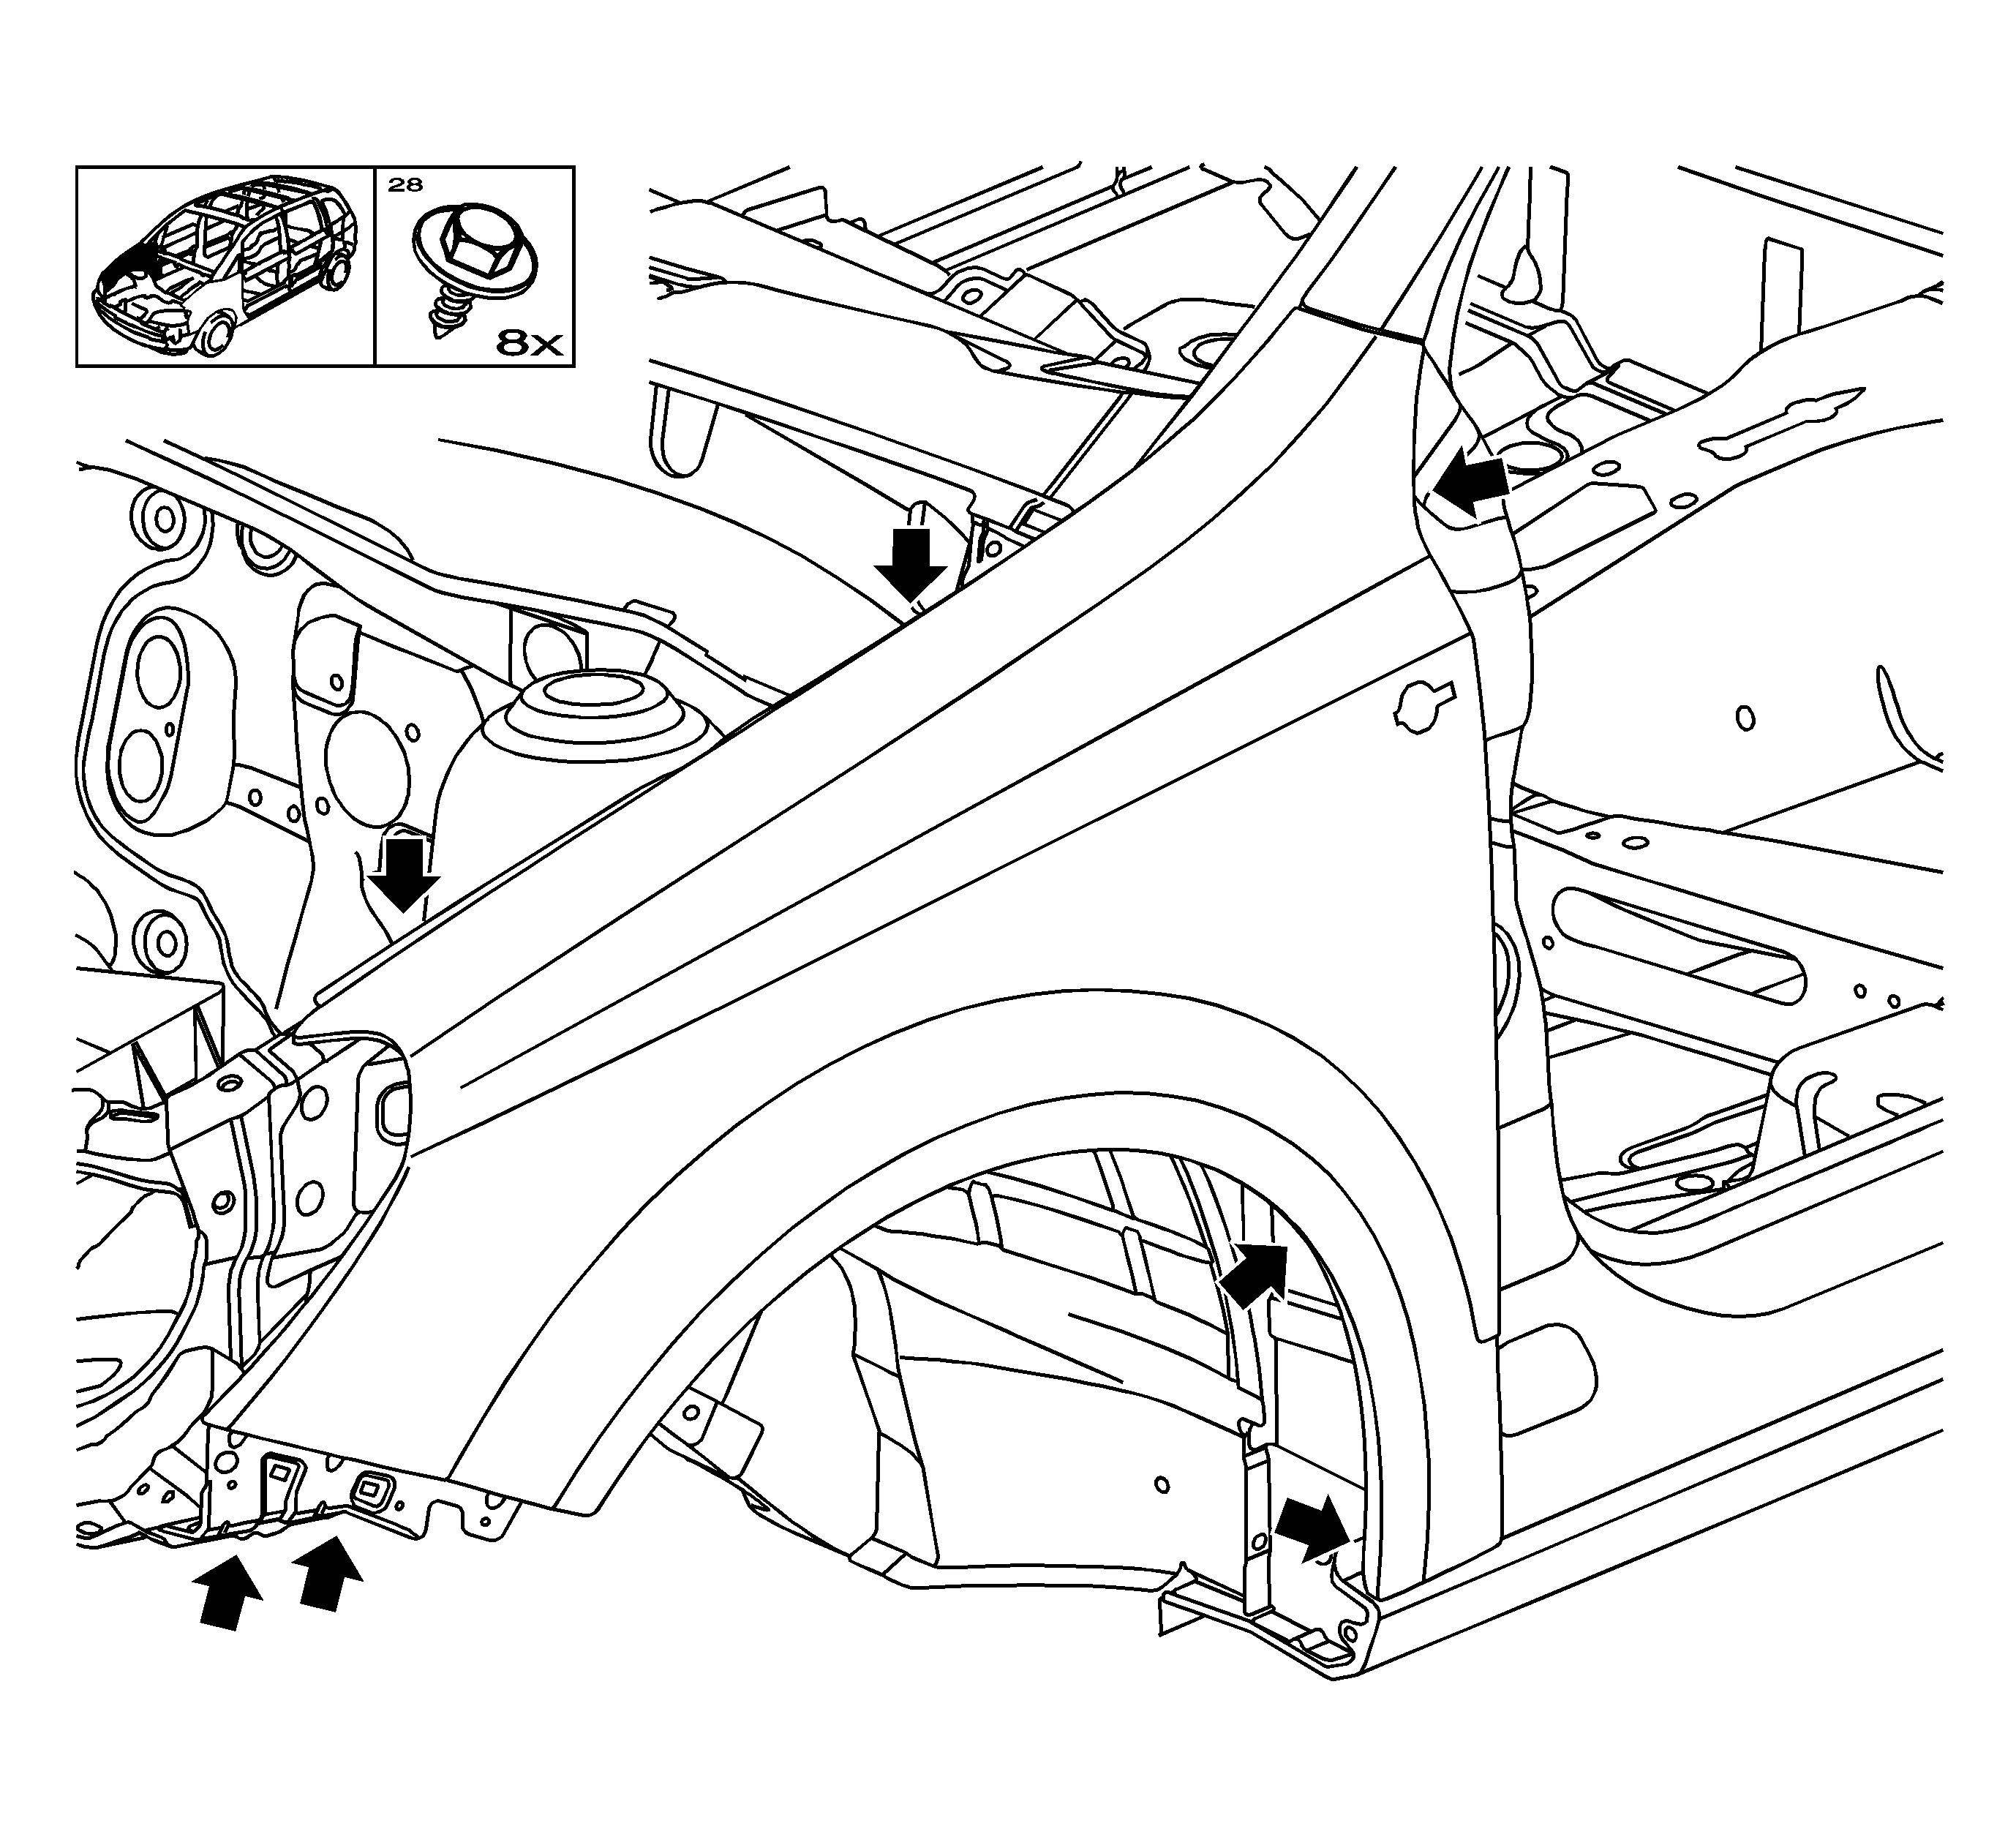
Remove the 7 bolts (arrow).
- Remove the small parts.
| • | Remove the plastic nut. |
| • | Remove the additional hood seal. |
| • | Remove the bracket (2) from fender. |
Installation Procedure
Important: Observe protective wax corrosion protection measures.
- When replacing the fender, seal cavity.
Important: Observe corrosion protection measures for PVC protection.
- Apply an underseal.
- Replace the fender adhesive tape (1).
Replace the 5 cm (2 in) double-sided adhesive tape (1).
Notice: Refer to Fastener Notice in the Preface section.
Important: Protect the edges of the fender with adhesive tape to avoid damaging the paint.
- Slide the fender under the windshield trim.
- Install the fender.
| • | Bond the fender to the windshield frame. |
| • | Install the fender bracket. |
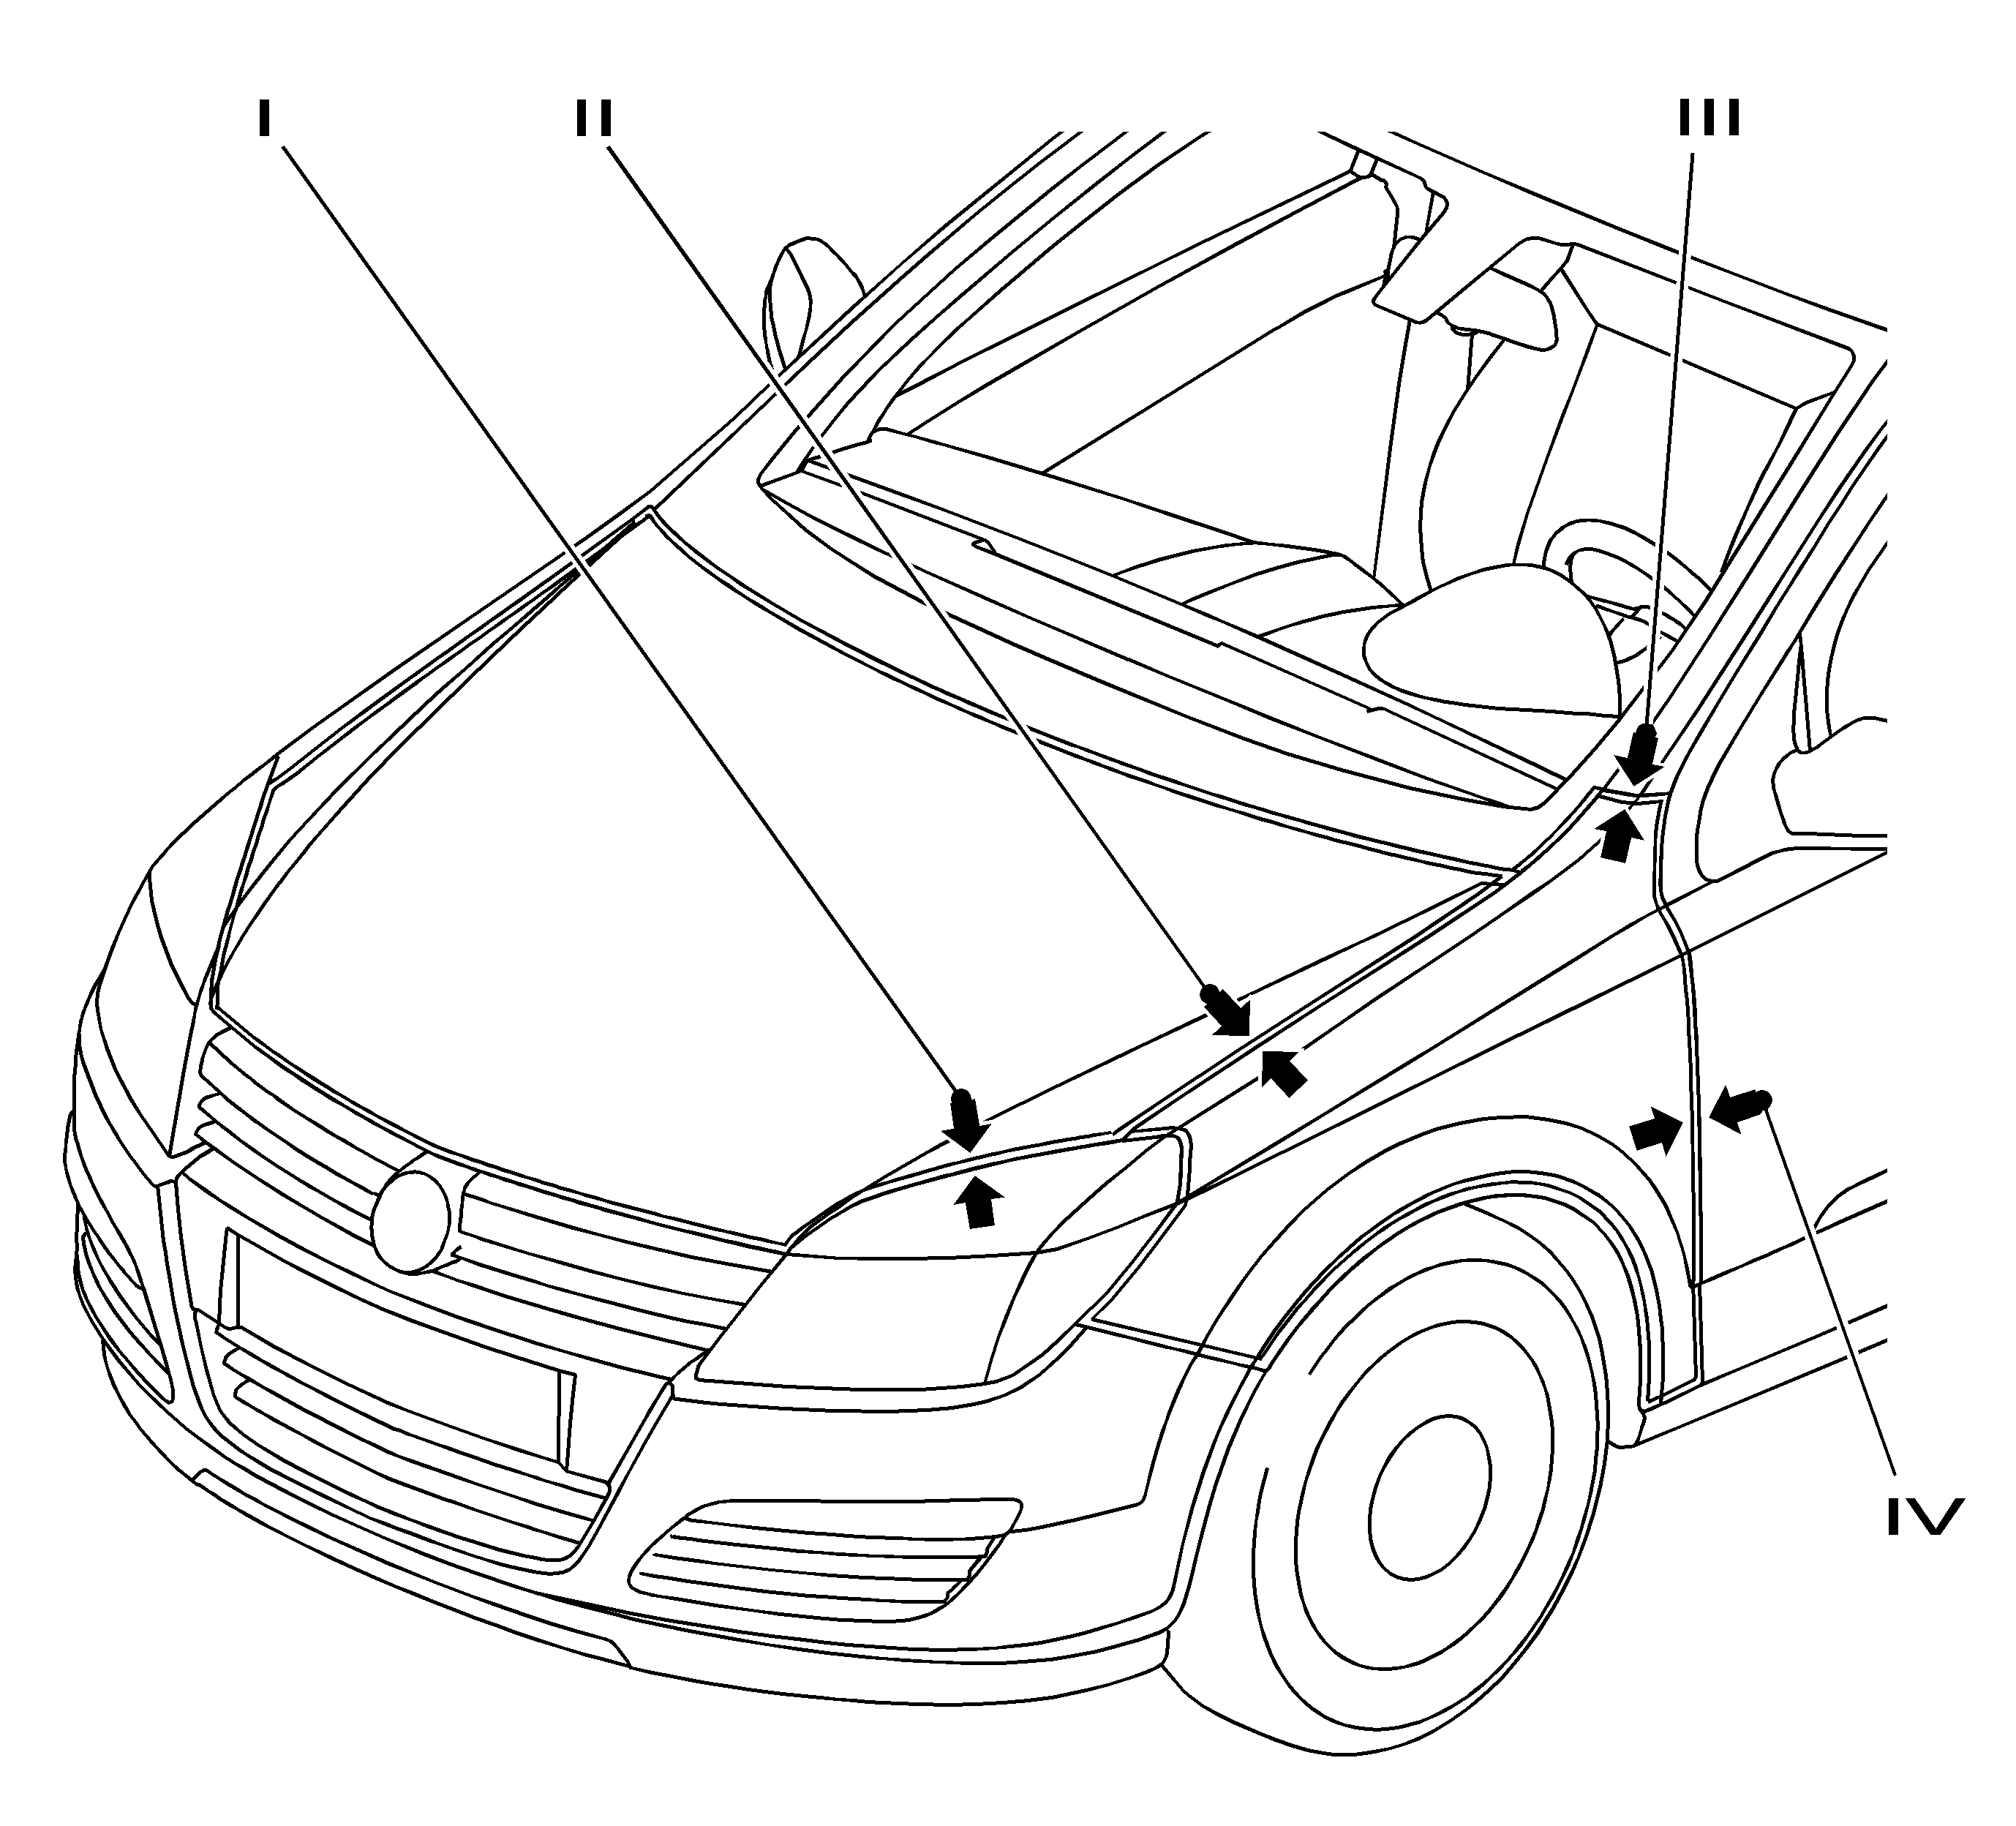
- Adjust the fender.
| • | (I) 4.5+/-1.0 mm (0.18+/-0.04 in) |
| • | (II) 3.5+/-0.8 mm (0.14+/-0.03 in) |
| • | (III) 3.0+/-1.0 mm (0.19+/-0.04 in) |
| • | (IV) 3.8+/-0.8 mm (0.15+/-0.03 in) |
- Install the fender.
Tighten
Tighten the 7 bolts (arrow) to 8 N·m (71 lb in).
- Mark the heads of the 8 bolts with paint.
- Connect the small parts.
| • | Install the additional hood seal. |
| • | Install the plastic nut. |
- Connect the guide rails.
| • | Install the guide rail. |
| • | Rivet on the 4 blind rivets. |
- Install the repeater lamp.
| • | Connect the wiring harness plug. |
| • | Install the repeater lamp. |
- Install the fender insulation to the A-pillar.
- Install the front fender liner. Refer to
Front Fender Liner Replacement
.
- Install the headlamps. Refer to
Headlamp Replacement
.
- Install the front bumper fascia. Refer to
Front Bumper Fascia Replacement
.
