For 1990-2009 cars only
Removal Procedure
- Remove the left front door sill plate. Refer to Front Side Door Sill Plate Replacement .
- Remove the left closeout/insulator panel. Refer to Instrument Panel Insulator Panel Replacement - Left Side .
- Loosen the hood close out filler panel. Refer to Front Bumper Upper Fascia Replacement .
- Remove the hood latch. Refer to Hood Primary and Secondary Latch Replacement .
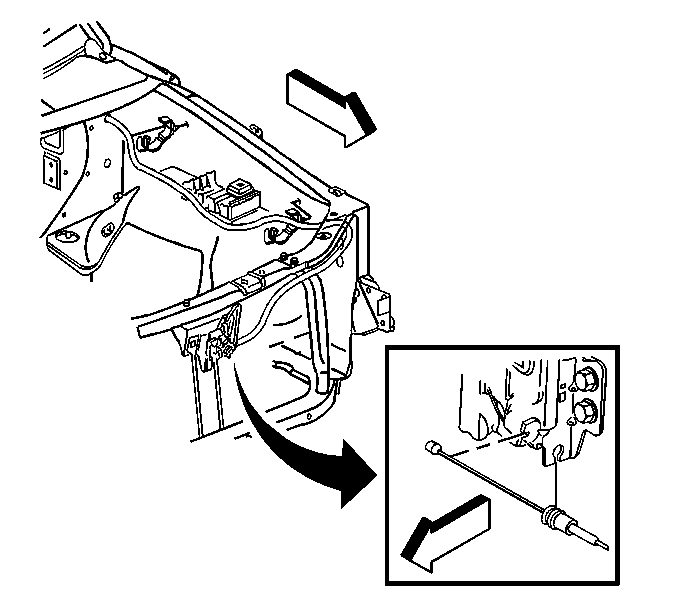
- Release the hood latch release cable from the hood latch assembly.
- Attach a length of mechanic's wire to the exterior end of the cable, and note the routing of the cable for later installation.
- Release the retainers securing the cable to the inner fender.
- Feed the cable out from between the headlamp housing panel and the radiator.
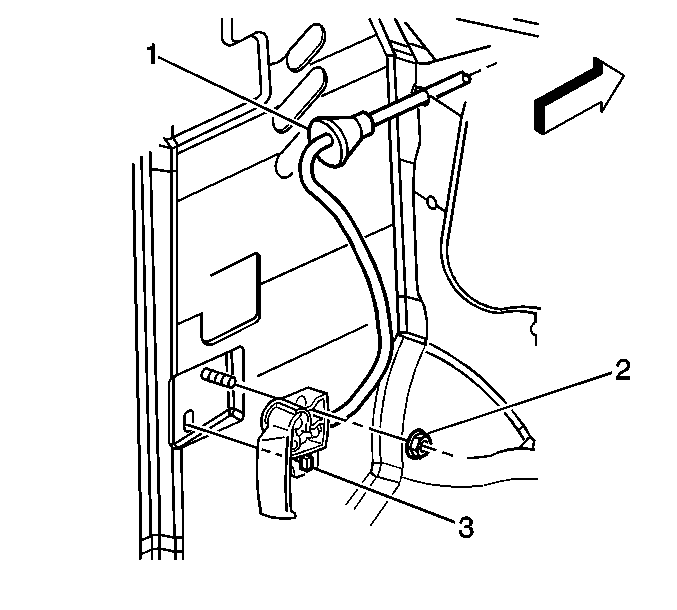
- Push the cable grommet (1) through the bulkhead and into the interior of the vehicle.
- Remove the nut (2) attaching the hood release handle (3) to the cowl trim panel on the left side.
- Remove the cable from the release handle (3).
- Pull the cable the rest of the way through the cowl panel and out from behind the sound insulation.
- Detach the mechanic's wire from the cable, leaving the wire in position for aid in installation of the cable.
- Remove the cable from the vehicle.


Installation Procedure
- Attach the mechanic's wire to the exterior end of the cable.
- Using the mechanic's wire as an aid, guide the cable underneath the sound insulation and pass the exterior portion of the cable through the cowl panel.
- Install the cable to the release handle (3).
- Seat the cable grommet (1) to the cowl panel.
- Install the release handle (3) to the left side kick panel.
- Install the nut (2) that retains the release handle (3) to the left side kick panel.
- Route the cable as previously noted, between the headlamp housing panel and the core support.
- Attach the cable to the retainers on the inner fender.
- Install the cable to the hood latch assembly.
- Install the hood latch. Refer to Hood Primary and Secondary Latch Replacement .
- Install the grille. Refer to Grille Replacement .
- Install the left closeout/insulator panel. Refer to Instrument Panel Insulator Panel Replacement - Left Side .
- Install the hood close out filler panel. Refer to Front Bumper Upper Fascia Replacement .
- Install the left front door sill plate. Refer to Front Side Door Sill Plate Replacement .
- Inspect the hood for proper alignment.

Notice: Refer to Fastener Notice in the Preface section.
Tighten
Tighten the nut to 7 N·m (62 lb in).

