Removal Procedure
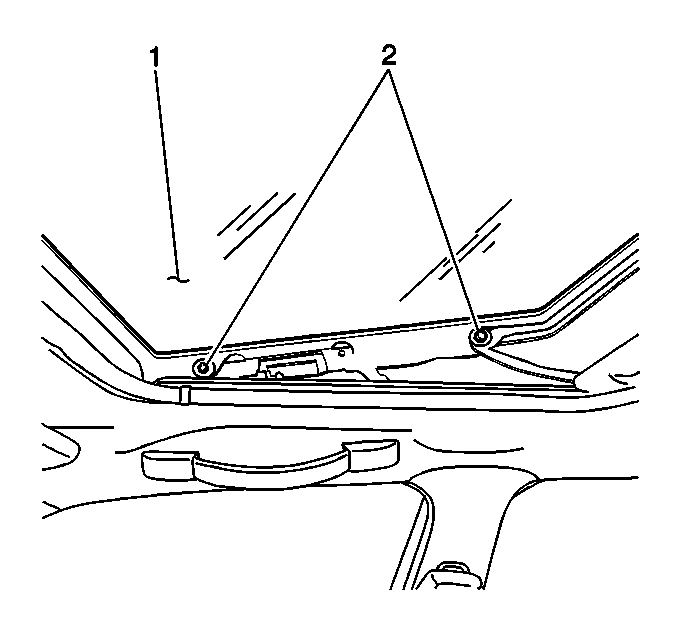
- Remove the headlining trim finish panel. Refer to
Headlining Trim Panel Replacement.
- Remove the following components from the vehicle:
| • | The 2 screws (2) from each side of the sunroof window |
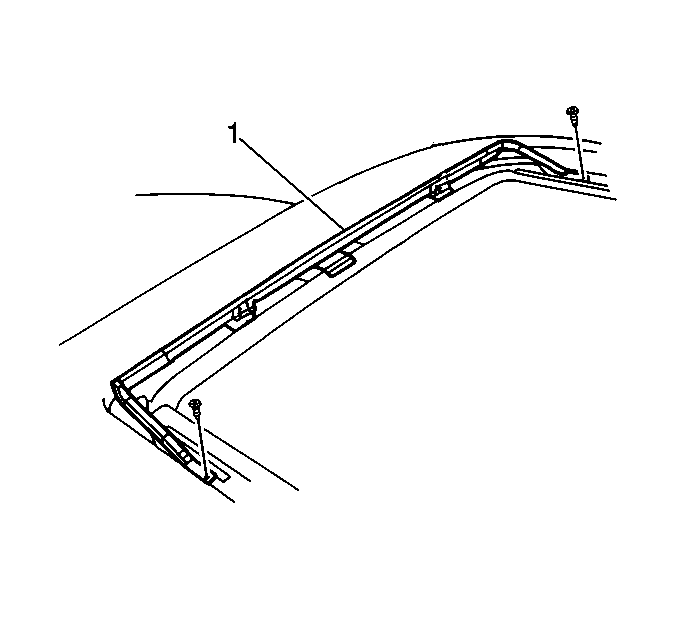
- Remove the following components from the sunroof housing:
| • | The sunroof air deflector (1) |
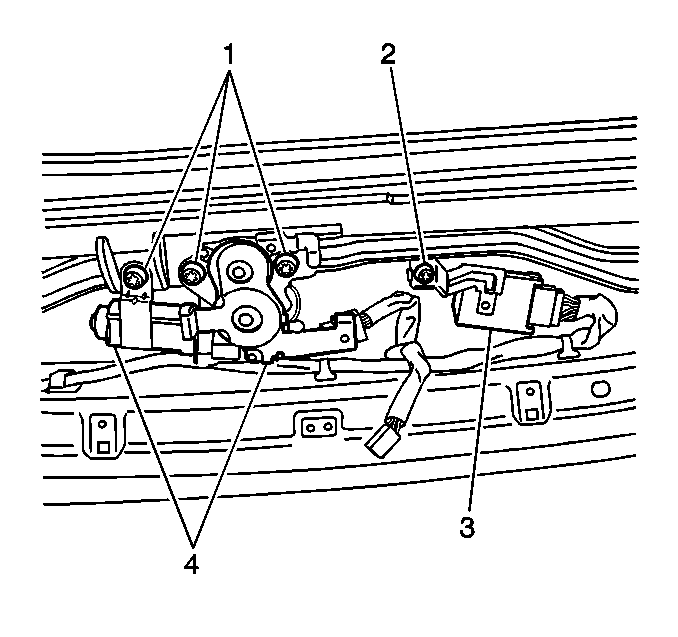
- Disconnect the sunroof control module and sunroof actuator electrical connectors.
Important: Remove the sunroof actuator with the motor in the fully closed position.
- Remove the following components from the vehicle:
| • | The sunroof actuator (4) |
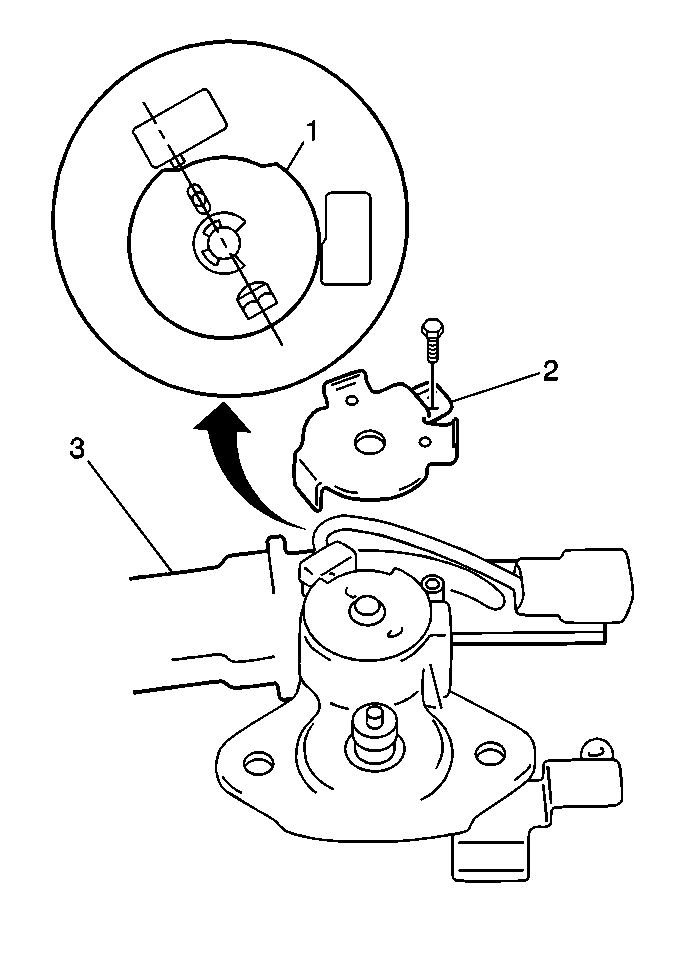
Important: If the sunroof window and the sunroof actuator full close position are not matched, the sunroof window will not operate properly.
- Remove the following components from the sunroof actuator (3):
| • | The cam plate cover (2) |
- Turn the actuator drive gear (1) to align the point marks.
- Install the cam plate cover (2) to the sunroof motor. Secure the cover with 1 screw.
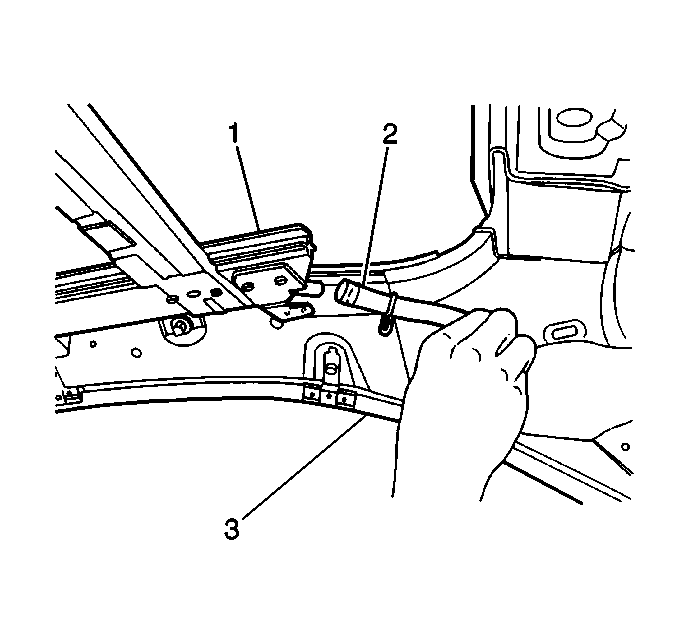
- Loosen the 4 sunroof housing drain hose clamps.
- Remove the 4 sunroof housing drain hoses (2) from the sunroof housing (1).
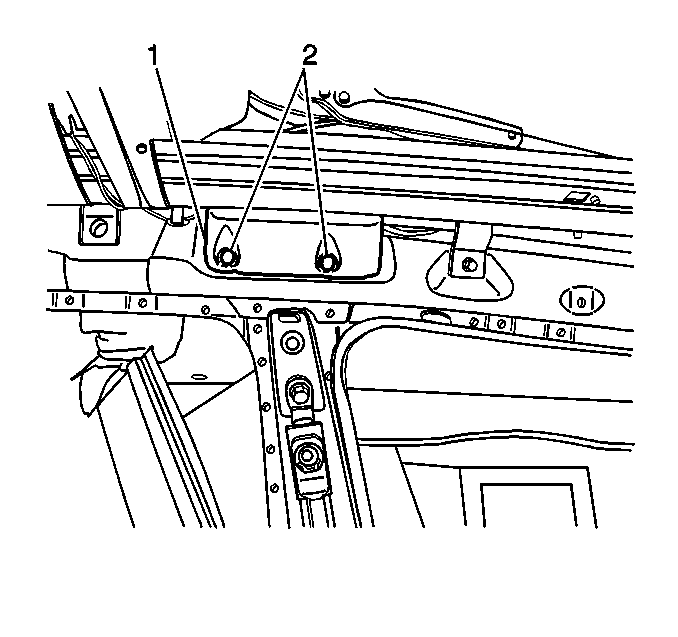
- Remove the following components from the vehicle:
| • | The 2 plastic retainers (2) which secure each of the side rail roof panel insulators |
| • | The 2 side rail roof panel insulators (1) |
- Remove the dome lamp wiring harness from the 2 hangers on the sunroof housing.
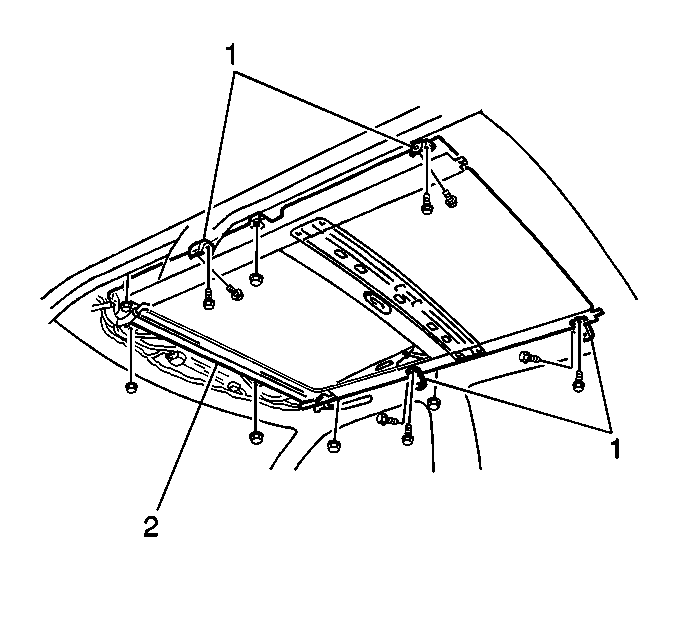
- Remove the following components from the vehicle:
| • | The sunroof housing (2) |
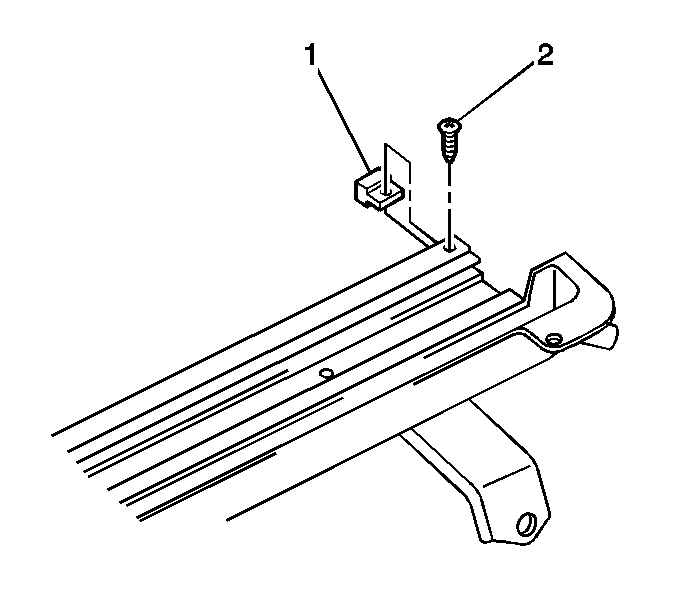
- Remove the following components from the sunroof housing:
| • | The screw (2) from each stop (1) |
| • | The 2 sunroof sunshade stops |
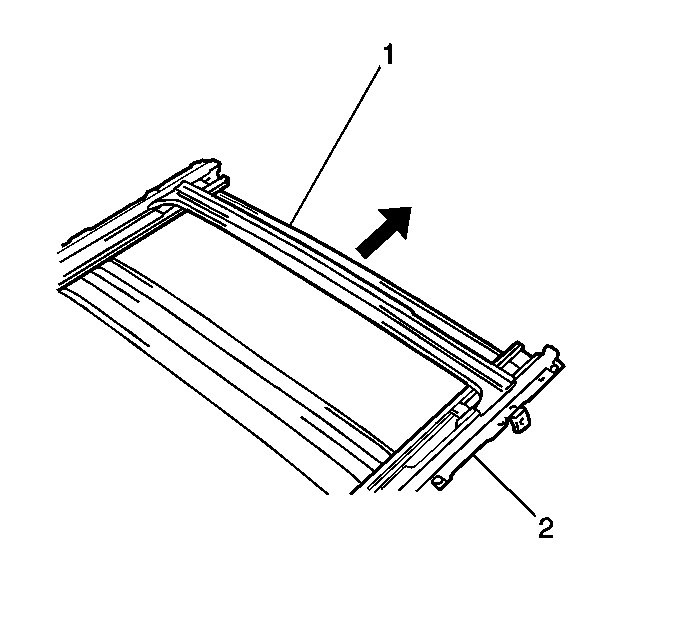
- Remove the sunroof housing rear support (1) by sliding the support from the sunroof housing (2).
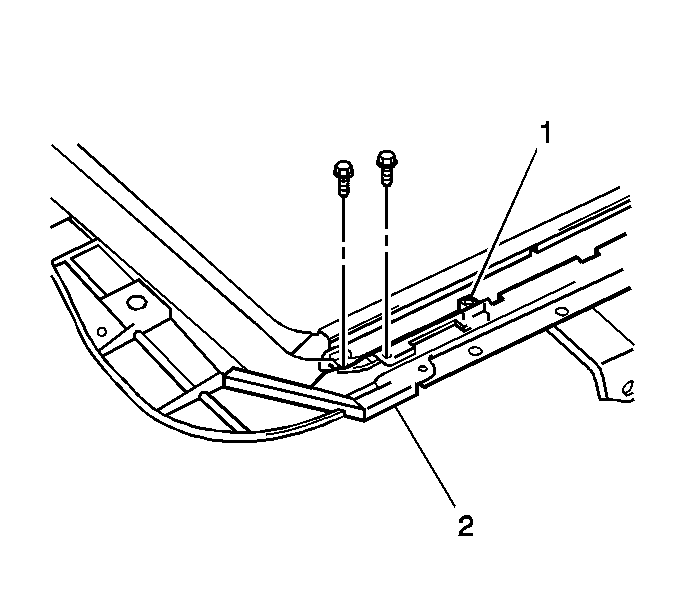
- Remove the 2 screws which secure each sunroof guide block (1) to the sunroof housing (2).
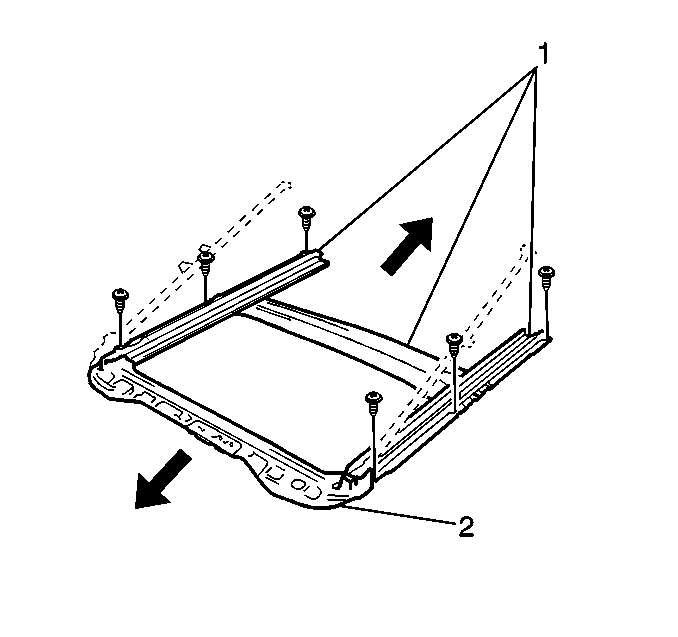
- Remove the following components from the sunroof housing (2):
| • | The sunroof housing front support (1) |
| • | The sunroof guide blocks |
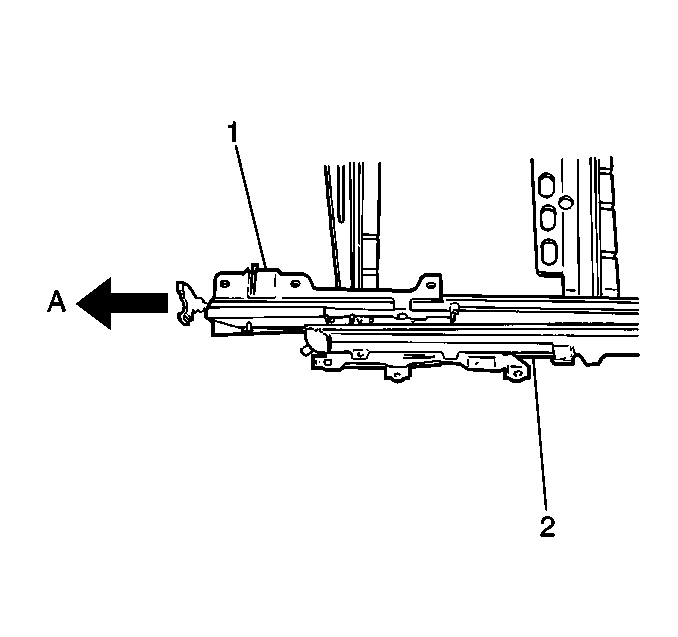
- Slide each drive cable bracket (1) forward, with the actuator cable attached, out of the sunroof housing (2) guide rails.
Installation Procedure
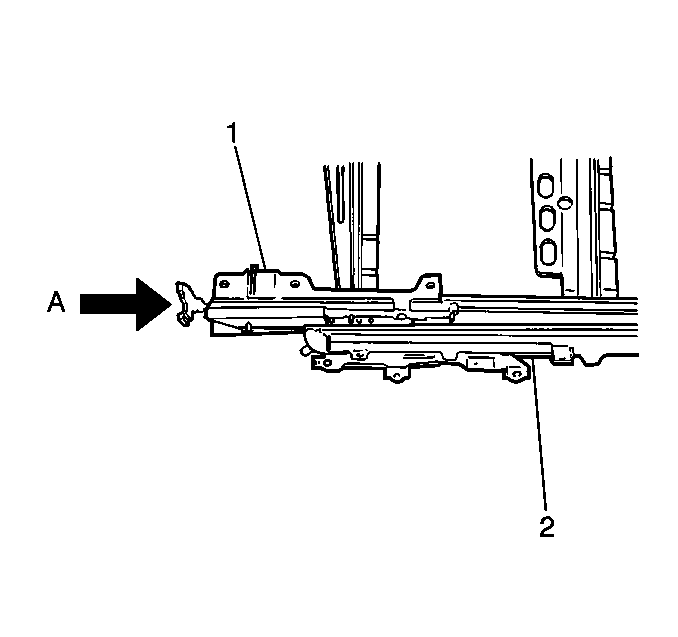
- Slide each drive cable bracket (1) rearward, with the actuator cable attached, into the sunroof housing (2) guide rails. Make sure the outer guide pins are inserted into the housing guide rail slots.
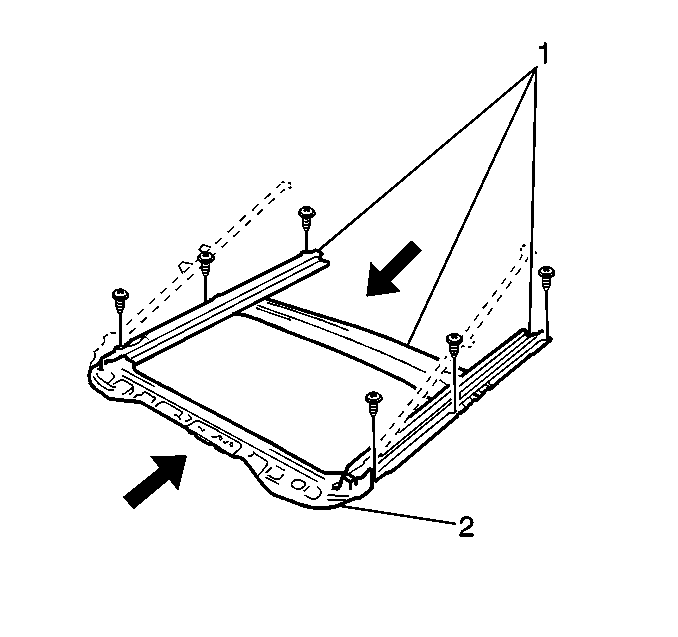
- Install the sunroof guide blocks to the housing.
- Install the sunroof housing front support (1) to the sunroof housing (2). Secure the support with the 6 screws.

- Install the 2 screws which secure each sunroof guide block (1) to the sunroof housing (2).
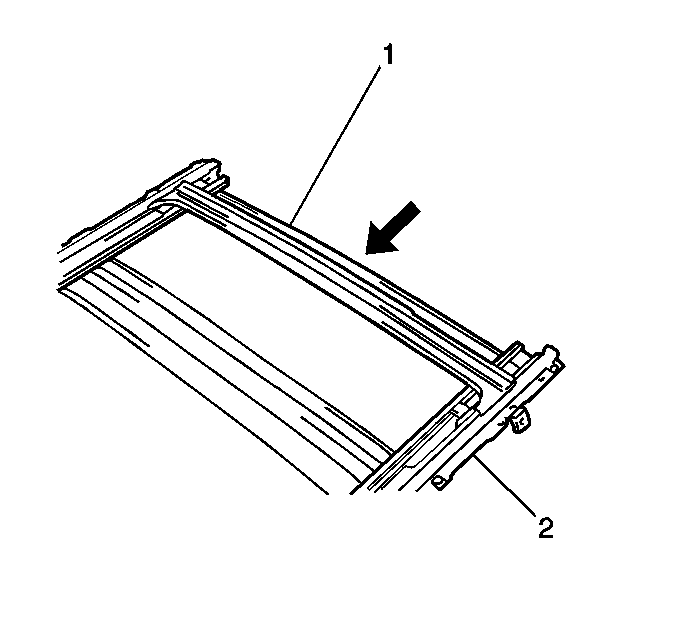
- Install the sunroof housing rear support (1) by sliding the support into the sunroof housing (2).

- Install the sunroof sunshade to the sunroof housing. Secure the sunshade with the following components:
| • | The 2 sunroof sunshade stops |
| • | The screw (2) which secures each stop (1) |

- With the aid of an assistant, install the sunroof housing (2) to the vehicle.
Notice: Use the correct fastener in the correct location. Replacement fasteners
must be the correct part number for that application. Fasteners requiring
replacement or fasteners requiring the use of thread locking compound or sealant
are identified in the service procedure. Do not use paints, lubricants, or
corrosion inhibitors on fasteners or fastener joint surfaces unless specified.
These coatings affect fastener torque and joint clamping force and may damage
the fastener. Use the correct tightening sequence and specifications when
installing fasteners in order to avoid damage to parts and systems.
- Install the 6 nuts, to the sunroof housing and hand tighten at this time.
- Install the 4 brackets (1) which secure the sunroof housing (2).
- Install the 8 bolts, to the brackets (1) and hand tighten at this time.
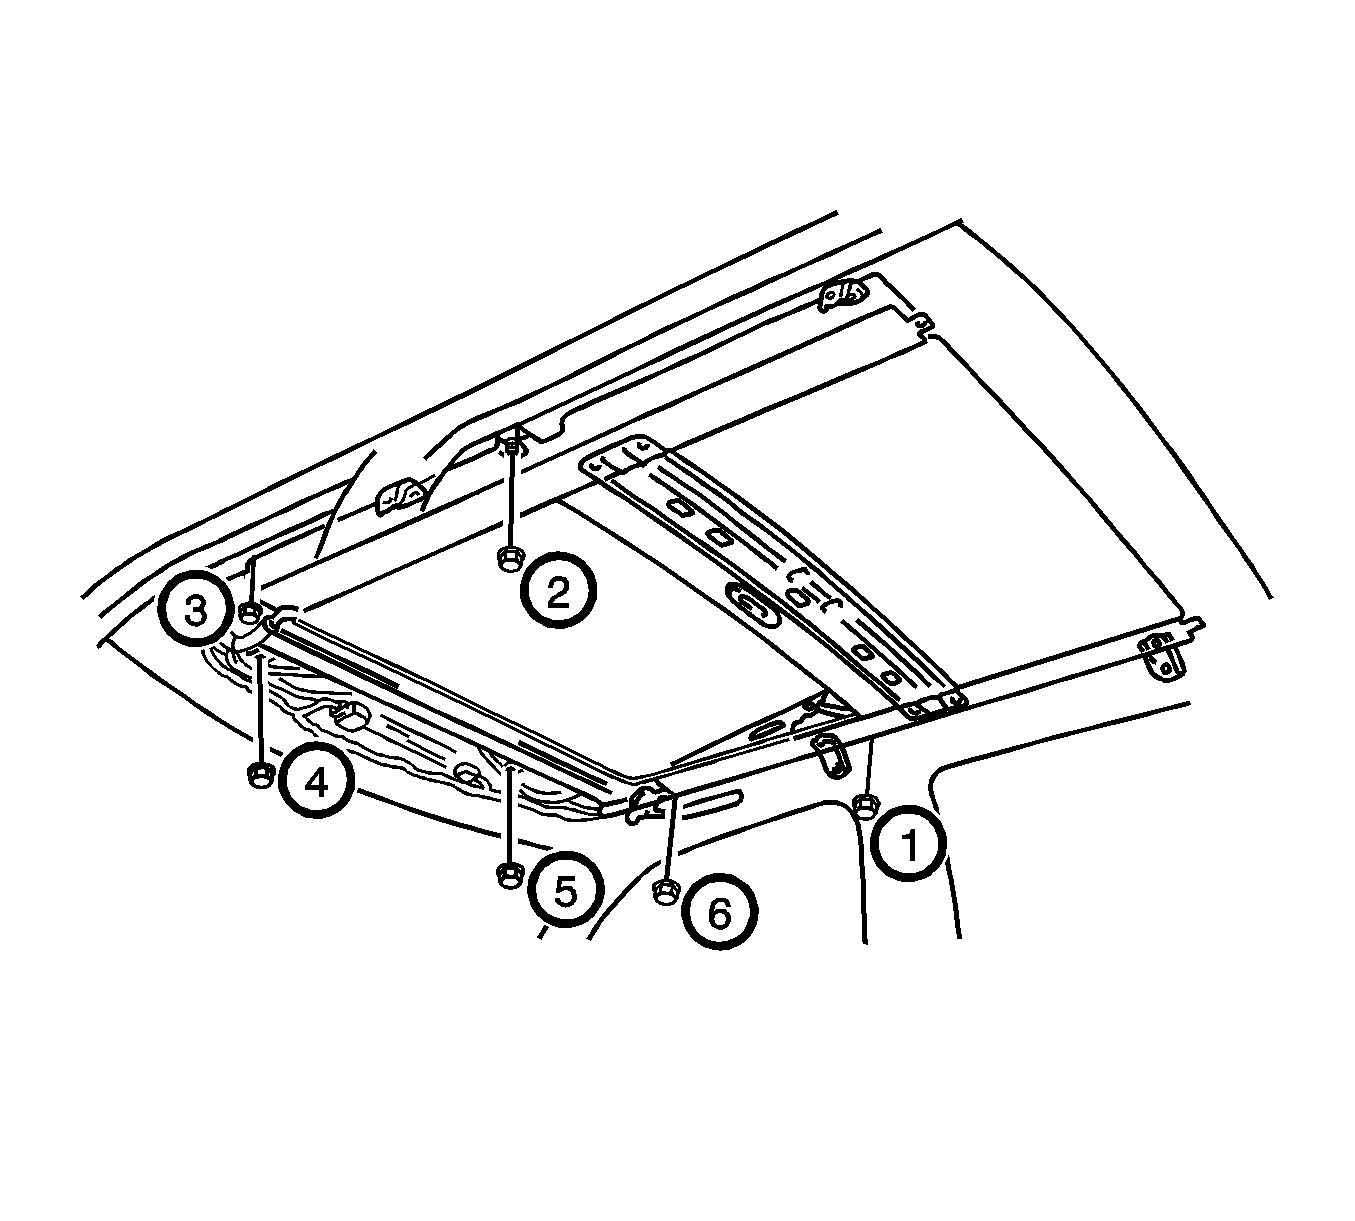
- Tighten the sunroof housing nuts according to the torque sequence.
Tighten
Tighten the sunroof housing nuts to 5.5 N·m (49 lb in).
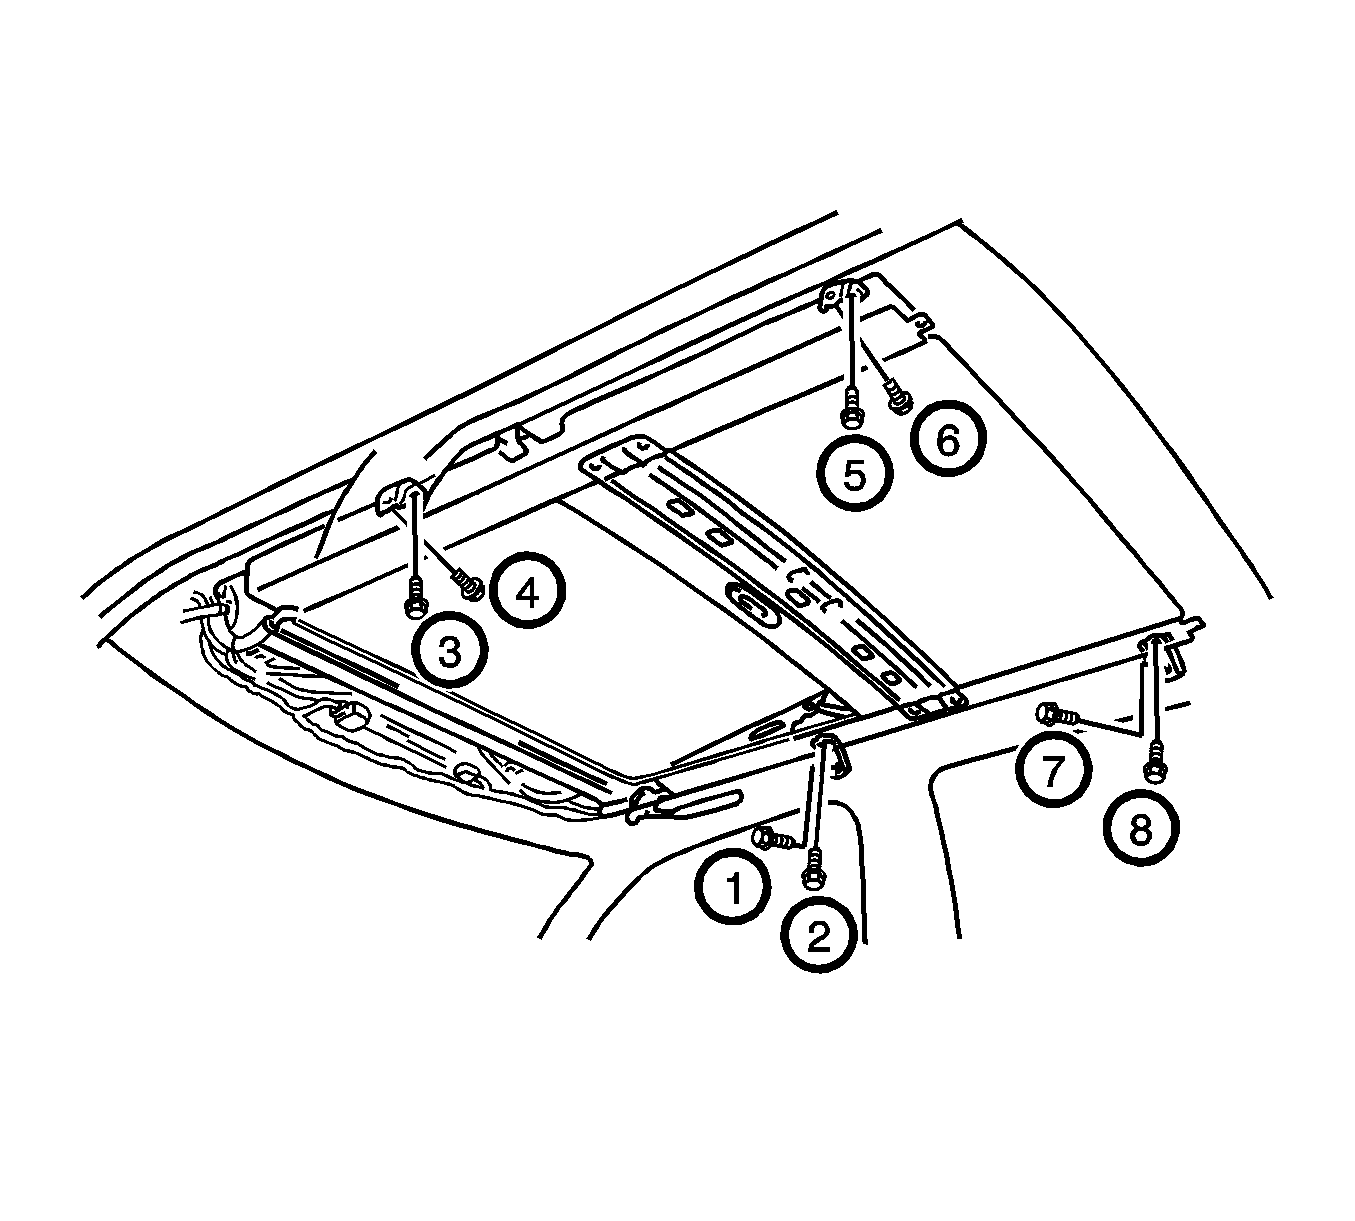
- Tighten the sunroof housing bracket bolts according to the torque sequence.
Tighten
Tighten the sunroof housing bracket bolts to 5 N·m (44 lb in)

- Install the dome lamp wiring harness to the 2 hangers on the sunroof housing.
- Install the 2 side rail roof panel insulators (1) to roof panel. Secure each of the insulators with 2 plastic retainers (2).

- Install the 4 sunroof housing drain hoses to the sunroof housing (1). Secure each drain hose (2) with the hose clamp.

- Install the sunroof actuator (4) to the roof panel. Secure the actuator with the 3 bolts (1).
Tighten
Tighten the sunroof actuator bolts to 5.4 N·m (48 lb in).
- Connect the sunroof actuator and sunroof control module electrical connectors.

- Install the sunroof air deflector (1) to the sunroof housing. Secure the deflector with the 2 screws.

- Install the sunroof window (1) to the vehicle. Secure the window with 2 screws (2) at each side. Do not tighten fully.
- Adjust the sunroof window as necessary. Refer to
Sunroof Window Height and Opening Fit Adjustment .
- Install the headlining trim finish panel. Refer to
Headlining Trim Panel Replacement.


