For 1990-2009 cars only
Special Tools
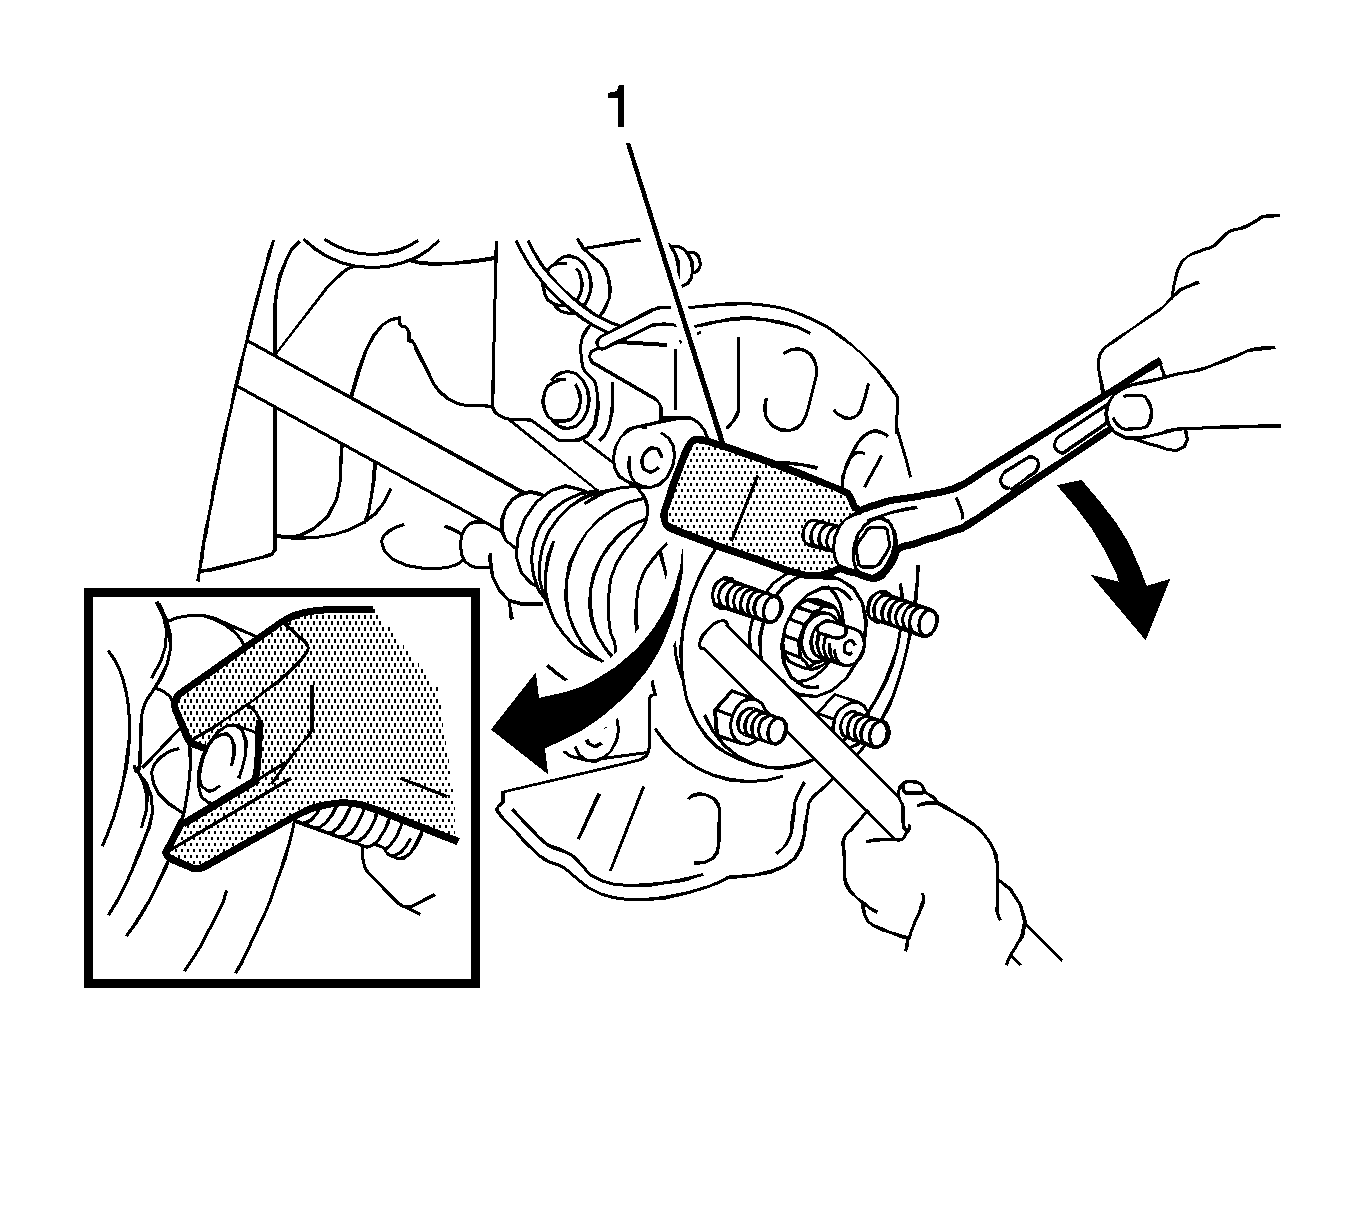
J 43631 Ball Joint Remover
Removal Procedure
- Raise and support the vehicle. Refer to Lifting and Jacking the Vehicle.
- Remove the front tire and wheel assembly. Refer to Tire and Wheel Removal and Installation.
- Remove the front brake rotor. Refer to Front Brake Rotor Replacement.
- Remove the front brake shield. Refer to Front Brake Shield Replacement.
- Install 2 wheel nuts onto 2 wheel studs.
- Use a pry bar on the 2 nuts in order to prevent the hub from turning.
- Using the remover J 43631 (1) , press out the wheel stud from the hub.

Installation Procedure
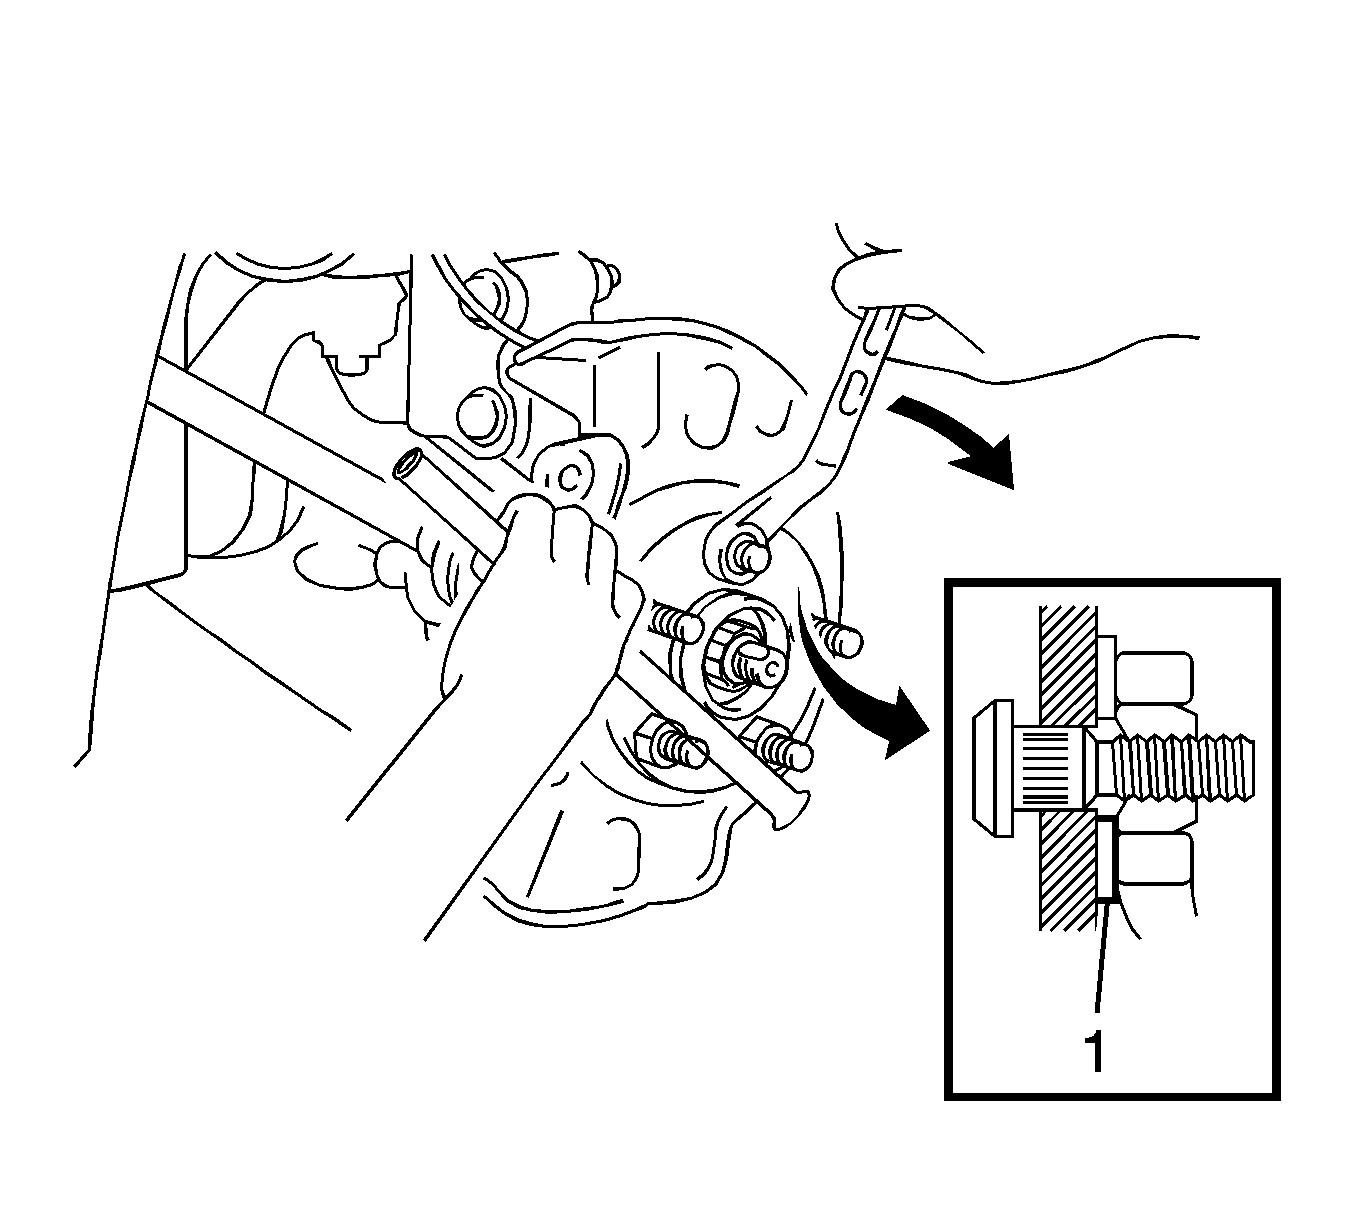
- Install the wheel stud to the stud hole in the hub flange from the bearing side of the hub flange.
- Place a flat washer (1) over the wheel stud being installed.
- Install the wheel nut or a hex head nut to the wheel stud.
- Use a pry bar on the 2 nuts in order to prevent the hub from turning.
- Gradually tighten the nut in order to draw the stud into the hub flange until the head of the wheel stud is fully seated against the hub flange.
- Remove the nuts and the flat washer.
- Install the front brake shield. Refer to Front Brake Shield Replacement.
- Install the front brake rotor. Refer to Front Brake Rotor Replacement.
- Install the front tire and wheel assembly. Refer to Tire and Wheel Removal and Installation.
- Lower the vehicle.

Warning: If one stud is damaged, replace all the studs. A loose-running wheel may cause only one stud to break, but the other studs could have internal fatigue. Replacing only the broken stud and remounting the wheel may cause further damage and personal injury. If the stud holes in the wheels have become enlarged or distorted, replace the wheel.
Specification
The thread diameter is 12.0 mm (0.472 in). The thread pitch is 1.5 mm (0.0591 in).
