For 1990-2009 cars only
Removal Procedure
- Turn the front wheels to face straight ahead.
- Disable the driver and passenger side SIR systems. Refer to SIR Disabling and Enabling.
- Remove the upper and lower steering column covers. Refer to Steering Column Trim Cover Replacement.
- Remove the steering wheel. Refer to Steering Wheel Replacement.
- Remove the radio. Refer to Radio Replacement.
- Remove the left I/P accessory trim plate. Refer to Instrument Panel Accessory Trim Plate Replacement - Left Side.
- Remove the I/P cluster assembly. Refer to Instrument Cluster Replacement.
- Remove the windshield garnish moldings. Refer to Windshield Pillar Garnish Molding Replacement.
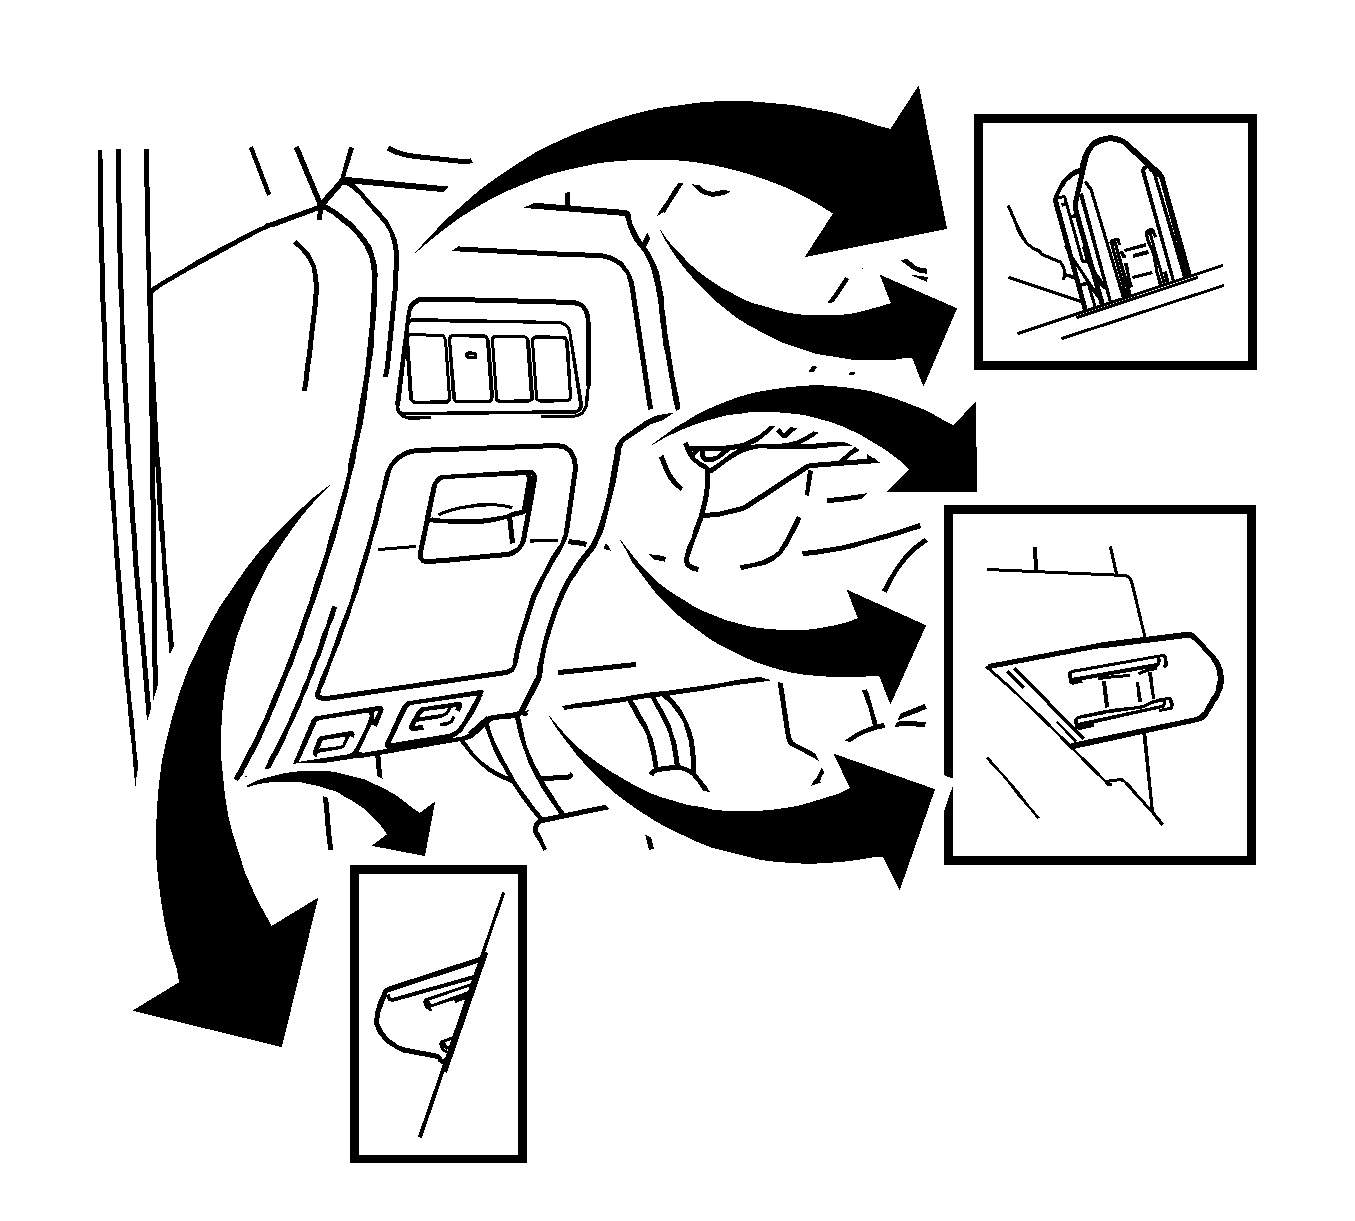
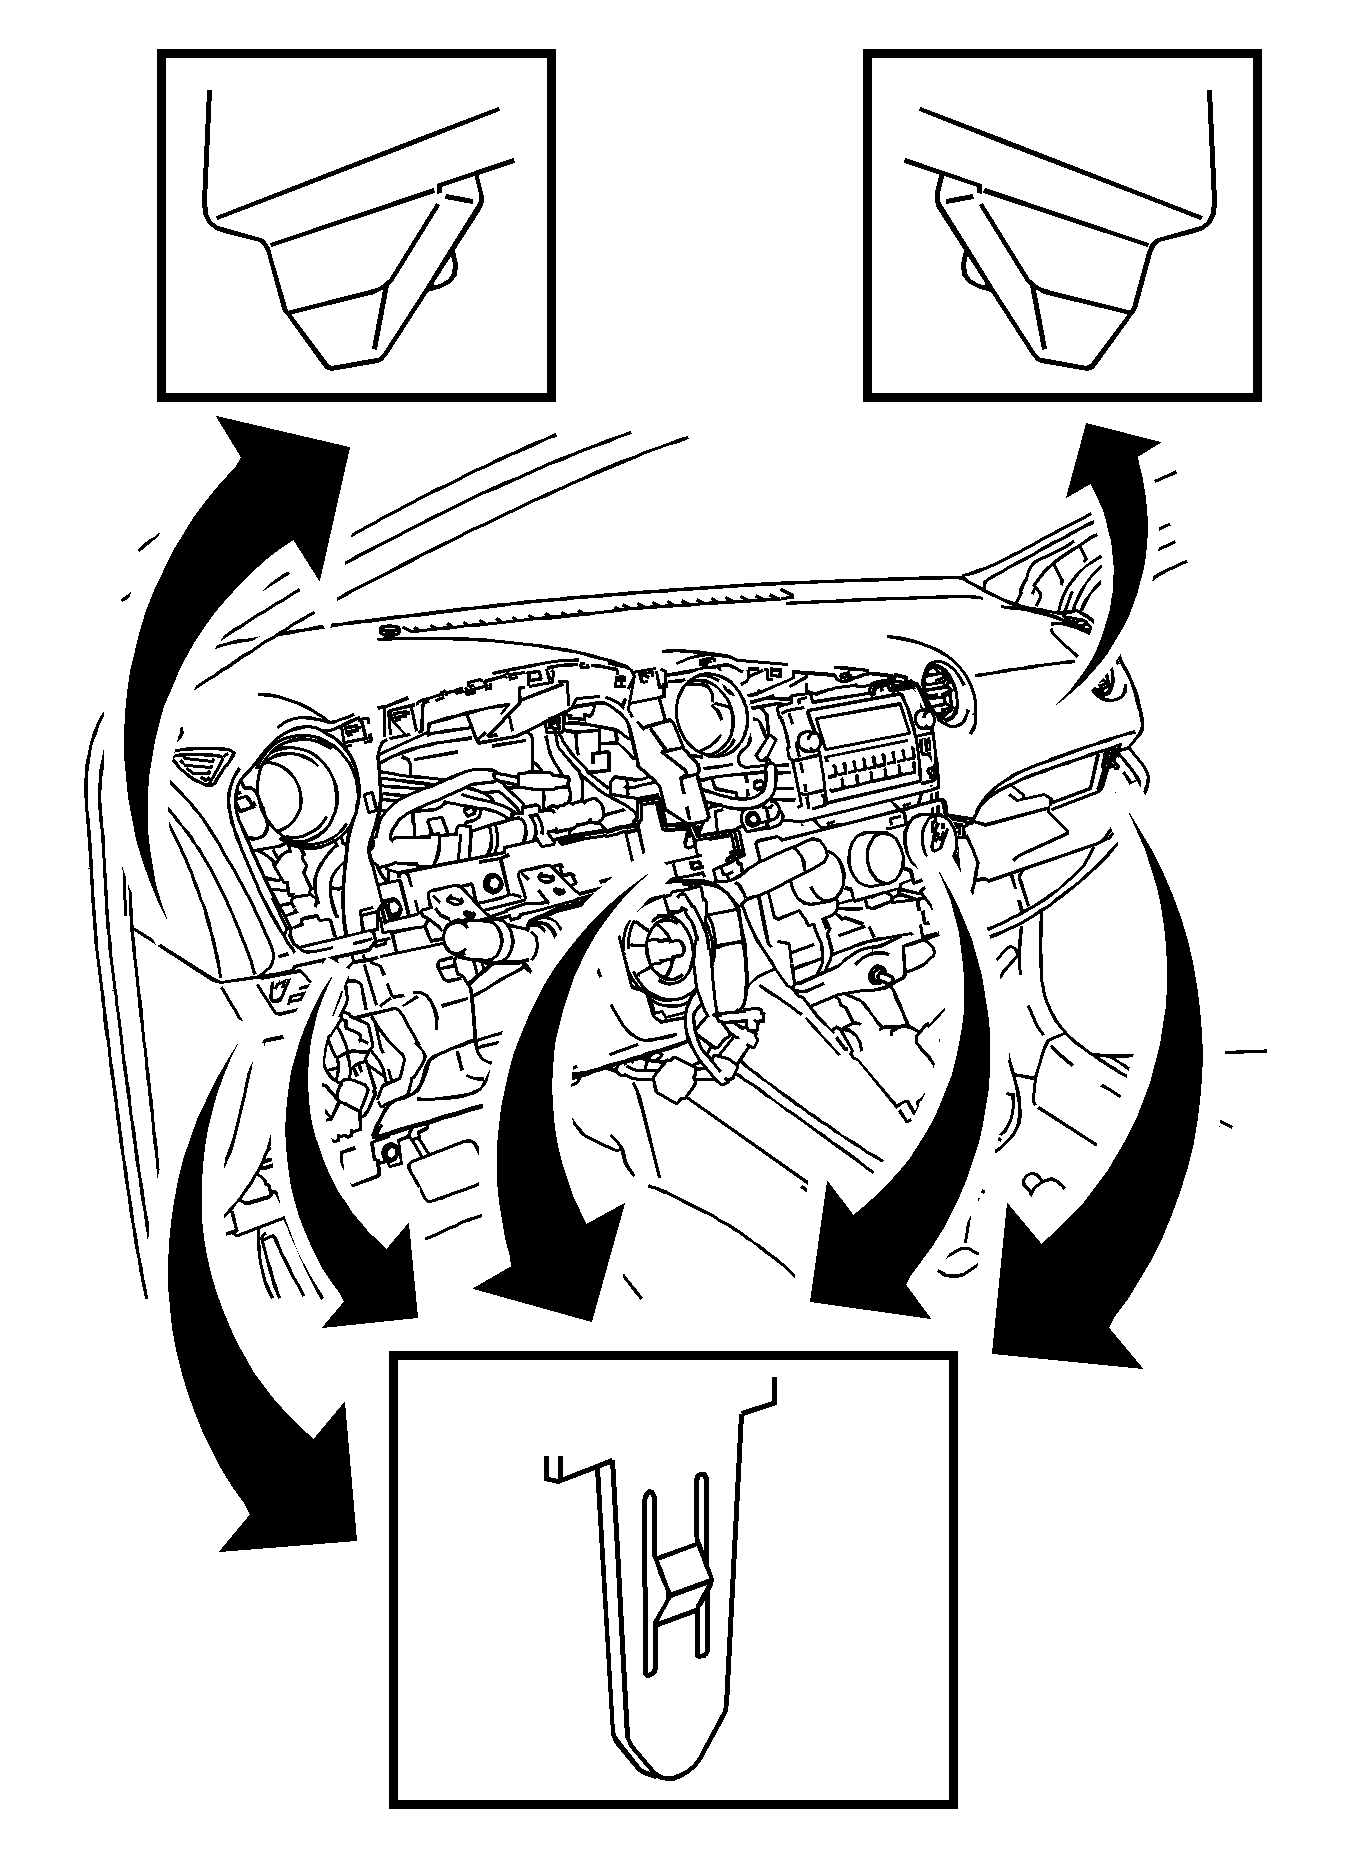
- Disengage the seven retaining tabs from the lower left instrument panel finish panel.
- Disconnect the electrical connectors and remove the lower left instrument panel finish panel.
- Remove the front floor console trim plate. Refer to Front Floor Console Trim Plate Replacement.
- Remove the instrument panel compartment. Refer to Instrument Panel Compartment Replacement.
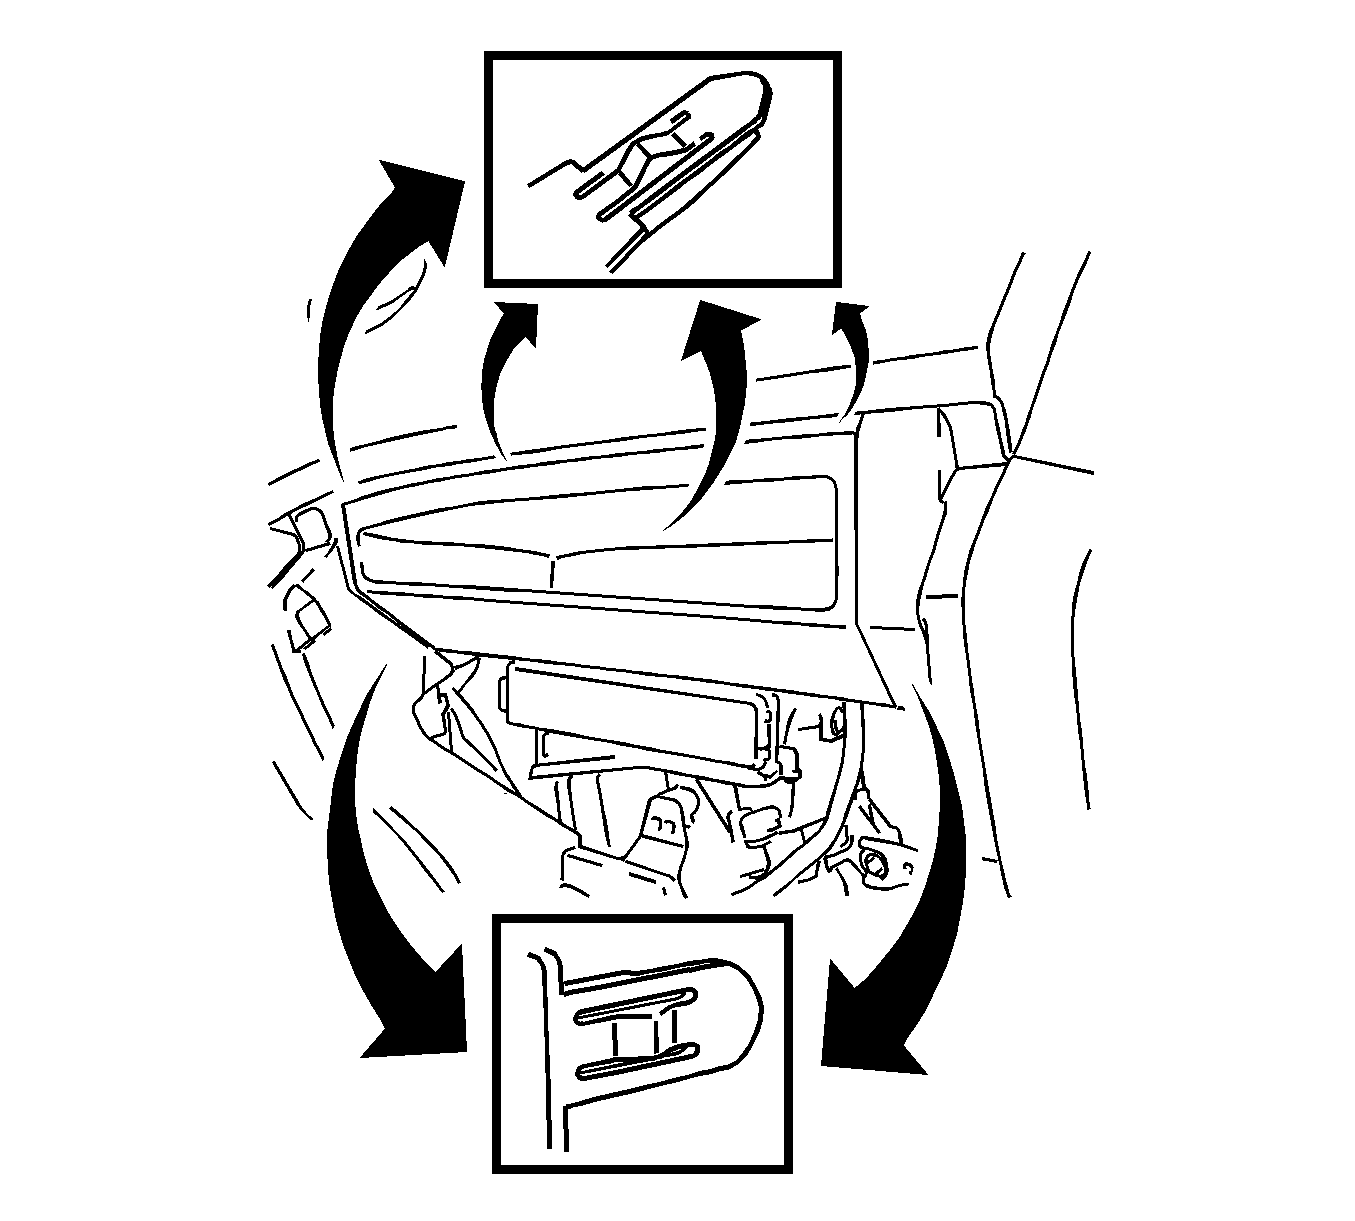
- Disengage the six retaining tabs and remove the instrument panel box door sub assembly.
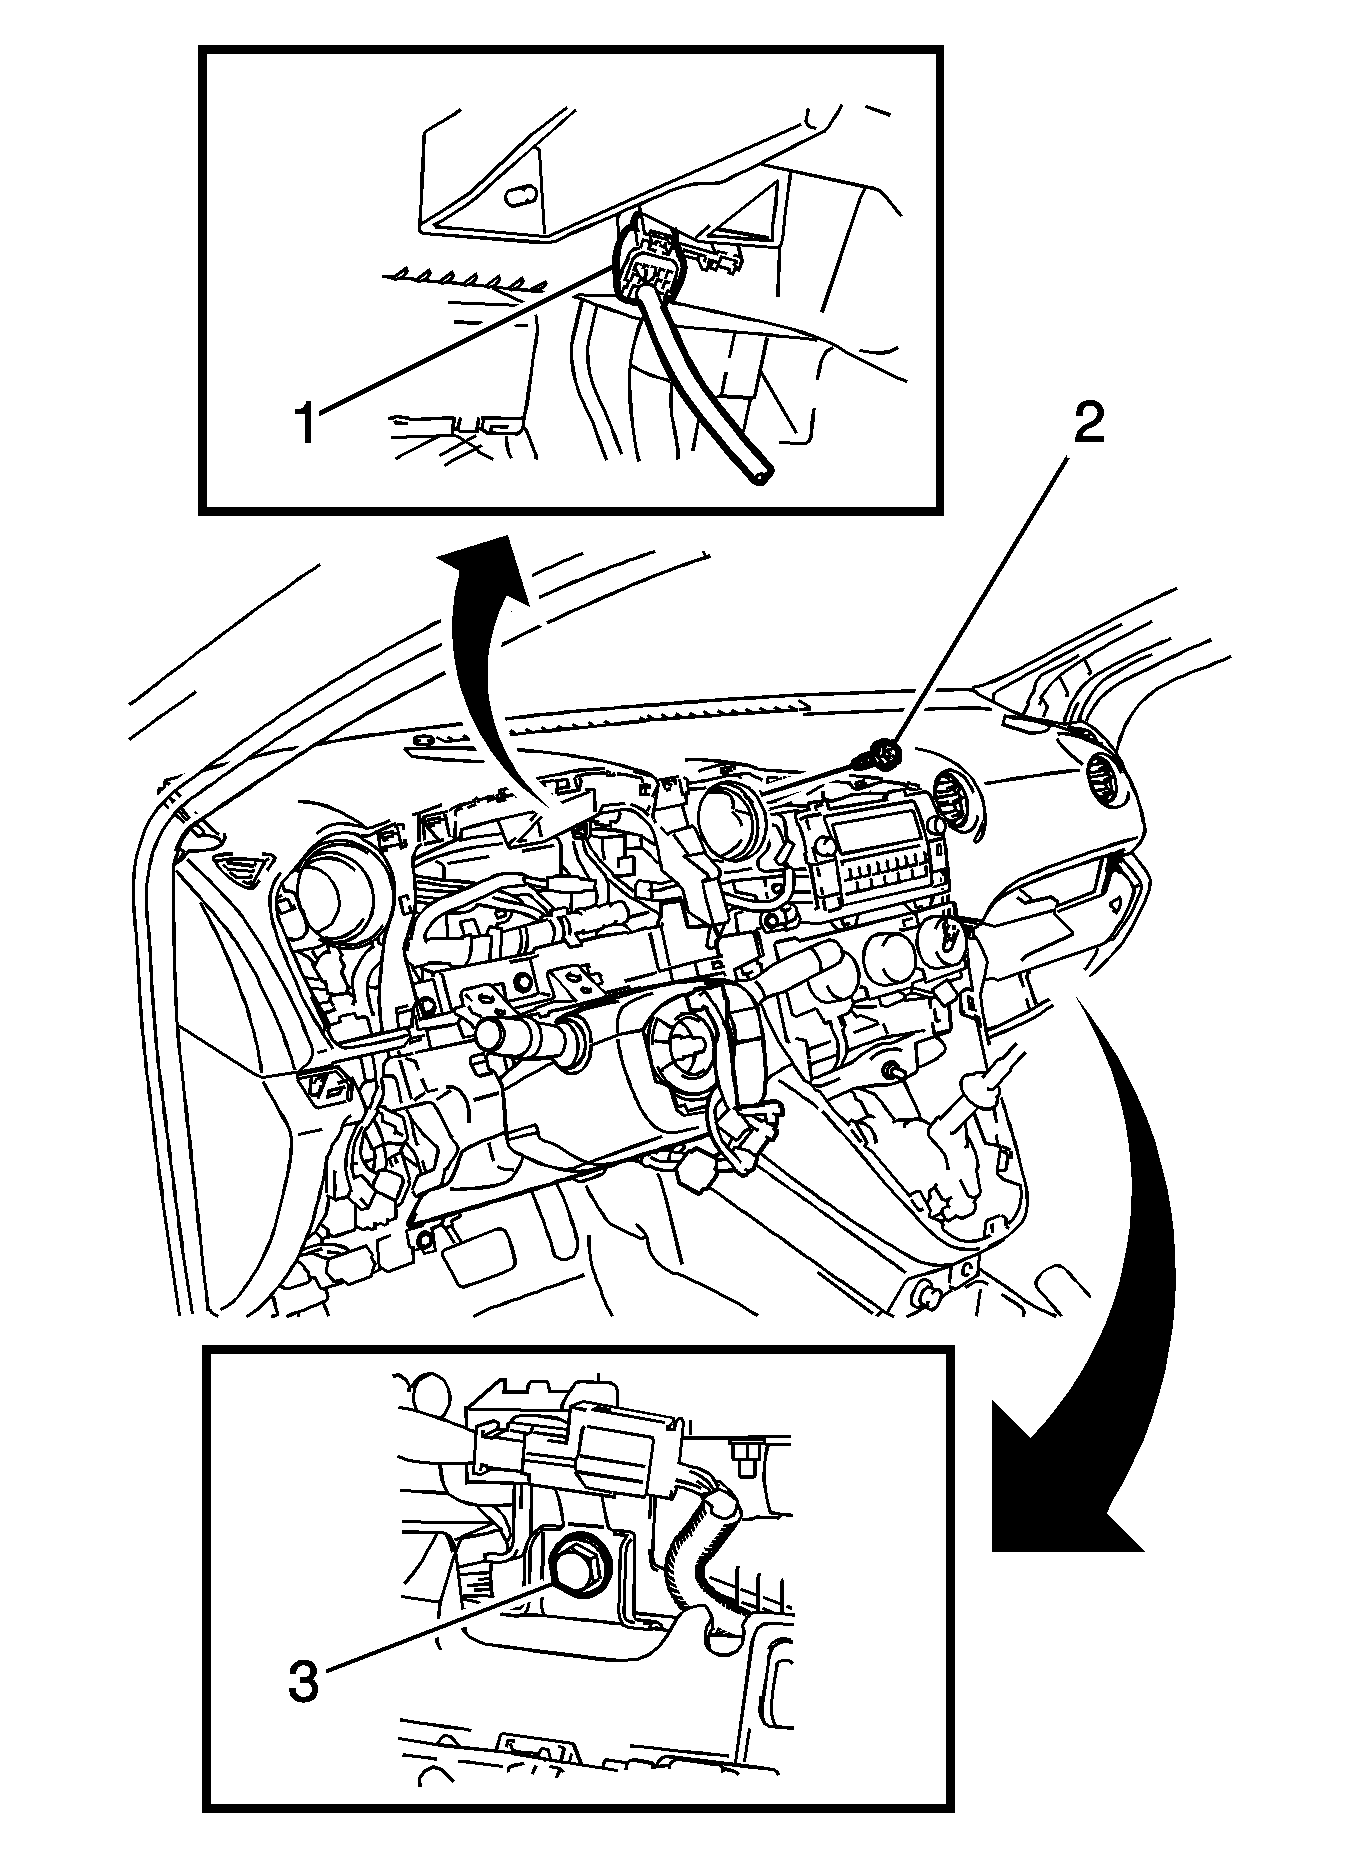
- Disconnect the electrical connector (1).
- Remove the upper bolt (2).
- Remove the passenger side SIR bolt (3).
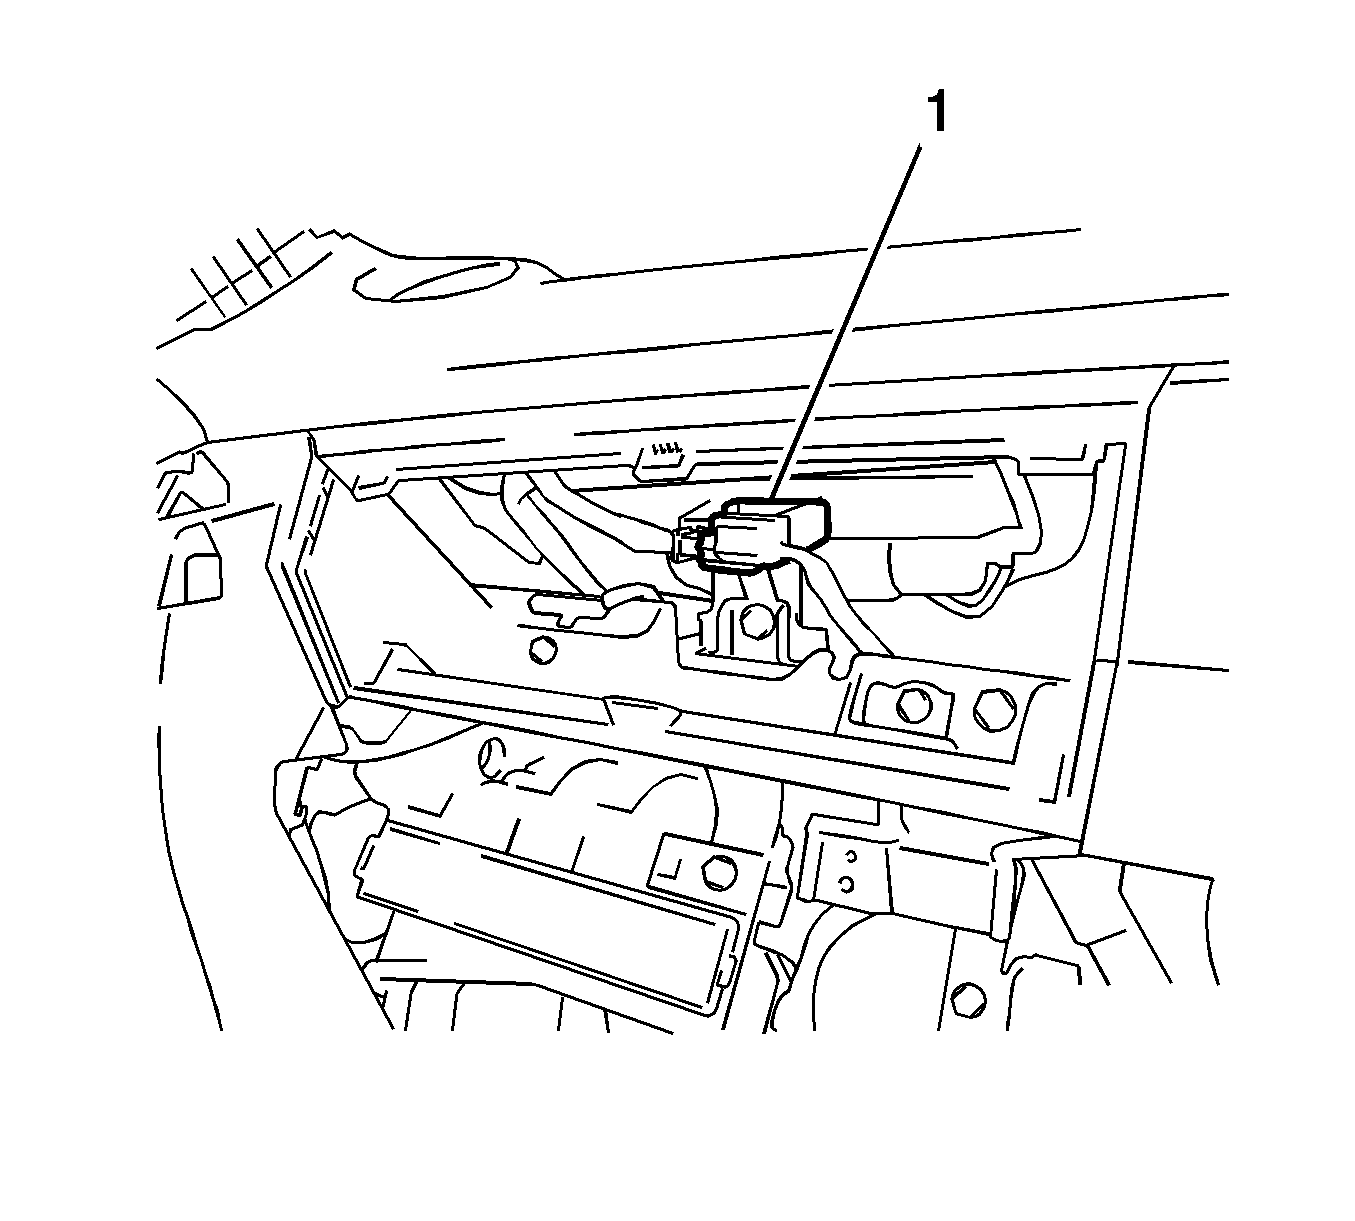
- Disconnect the passenger side SIR electrical connector (1).
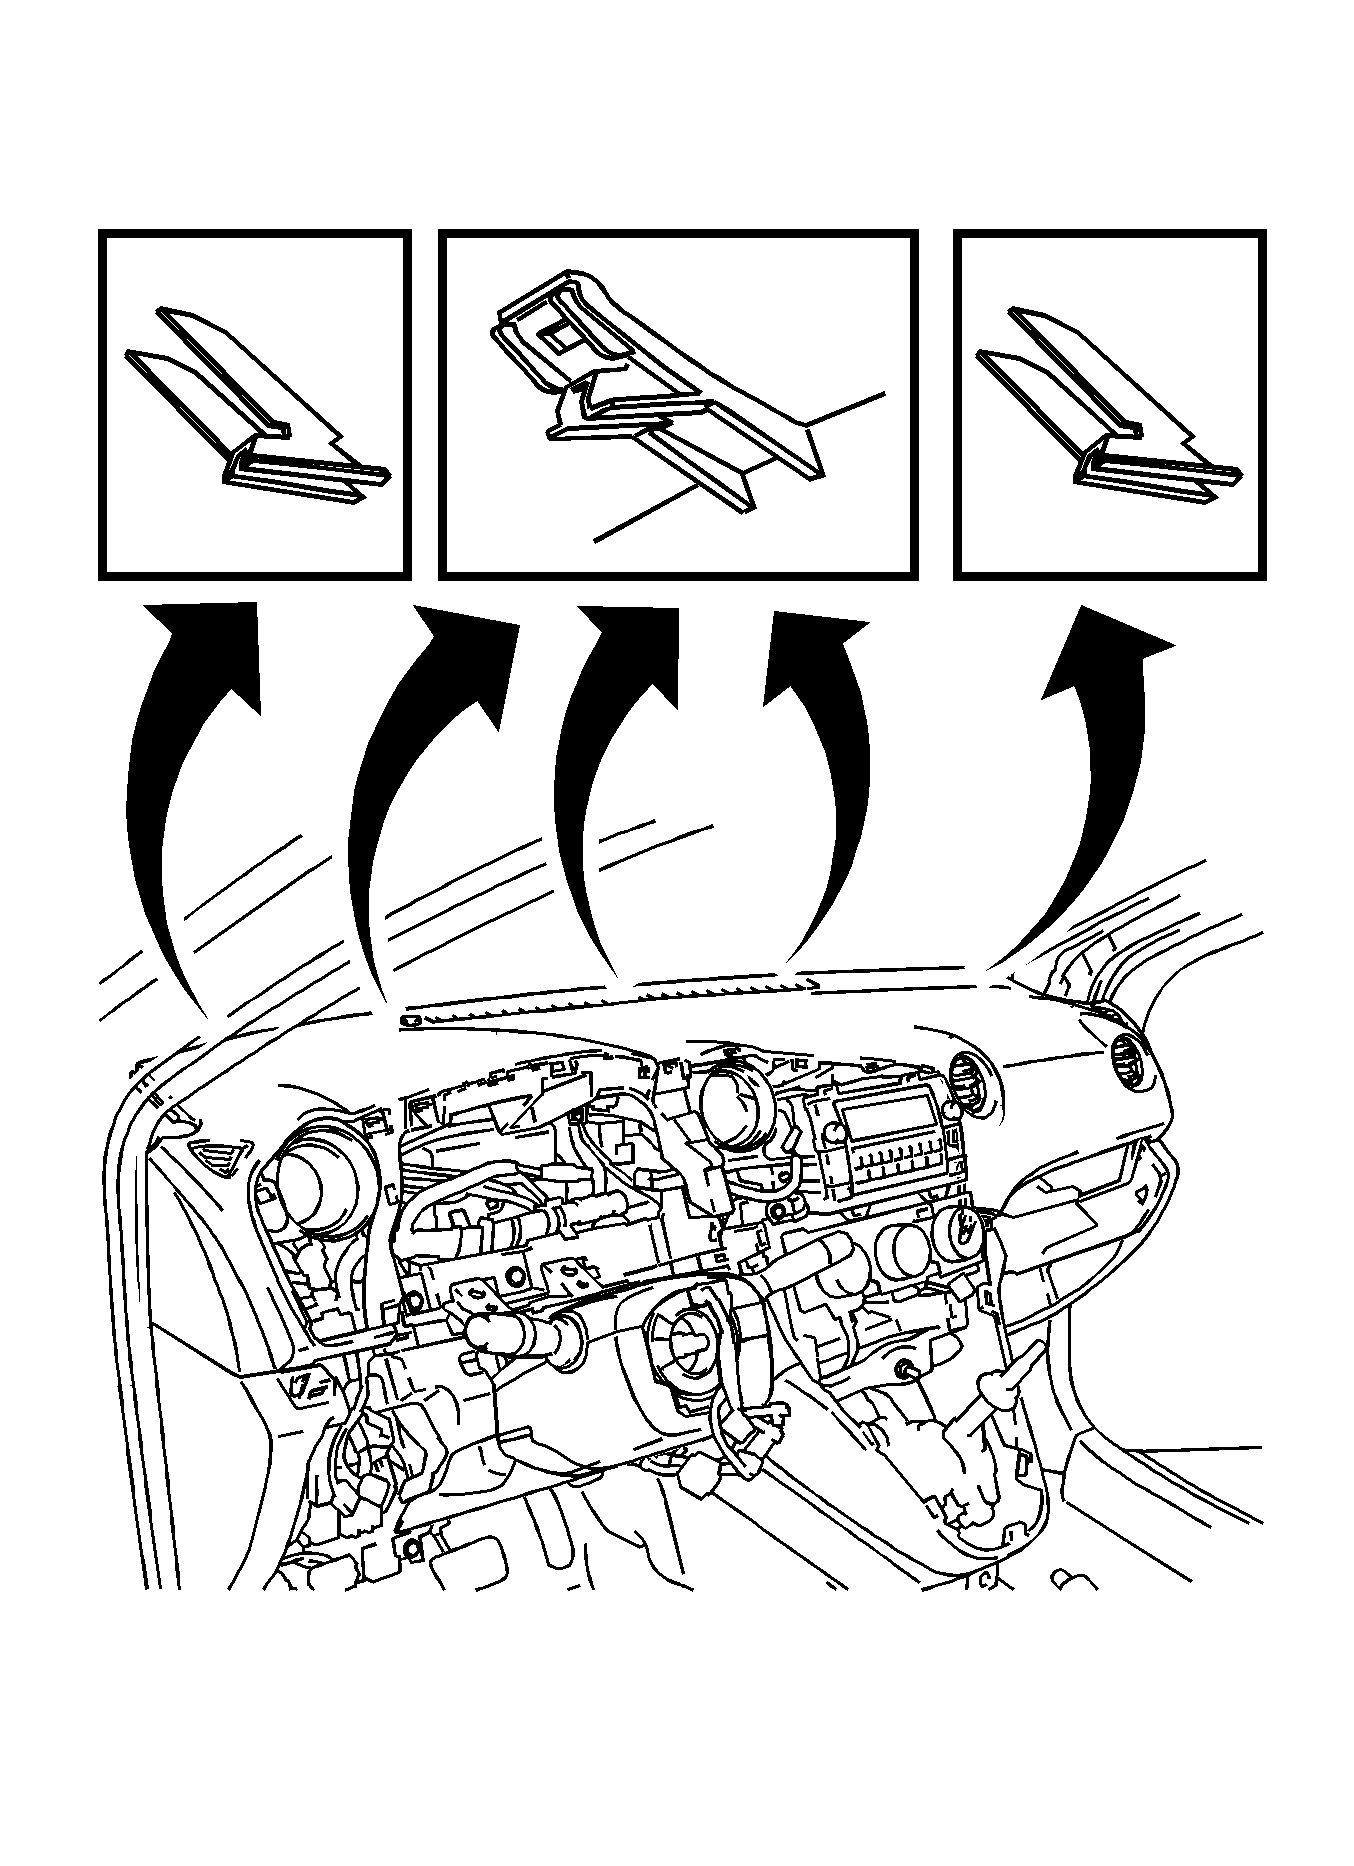
- Disengage the five retainers and the two guides.
- Disengage the five upper retainers and remove the upper instrument panel trim pad.
- Remove the windshield defrost duct. Refer to Windshield Defroster Duct Replacement.
- Remove the air distribution duct. Refer to Air Distributor Duct Replacement.
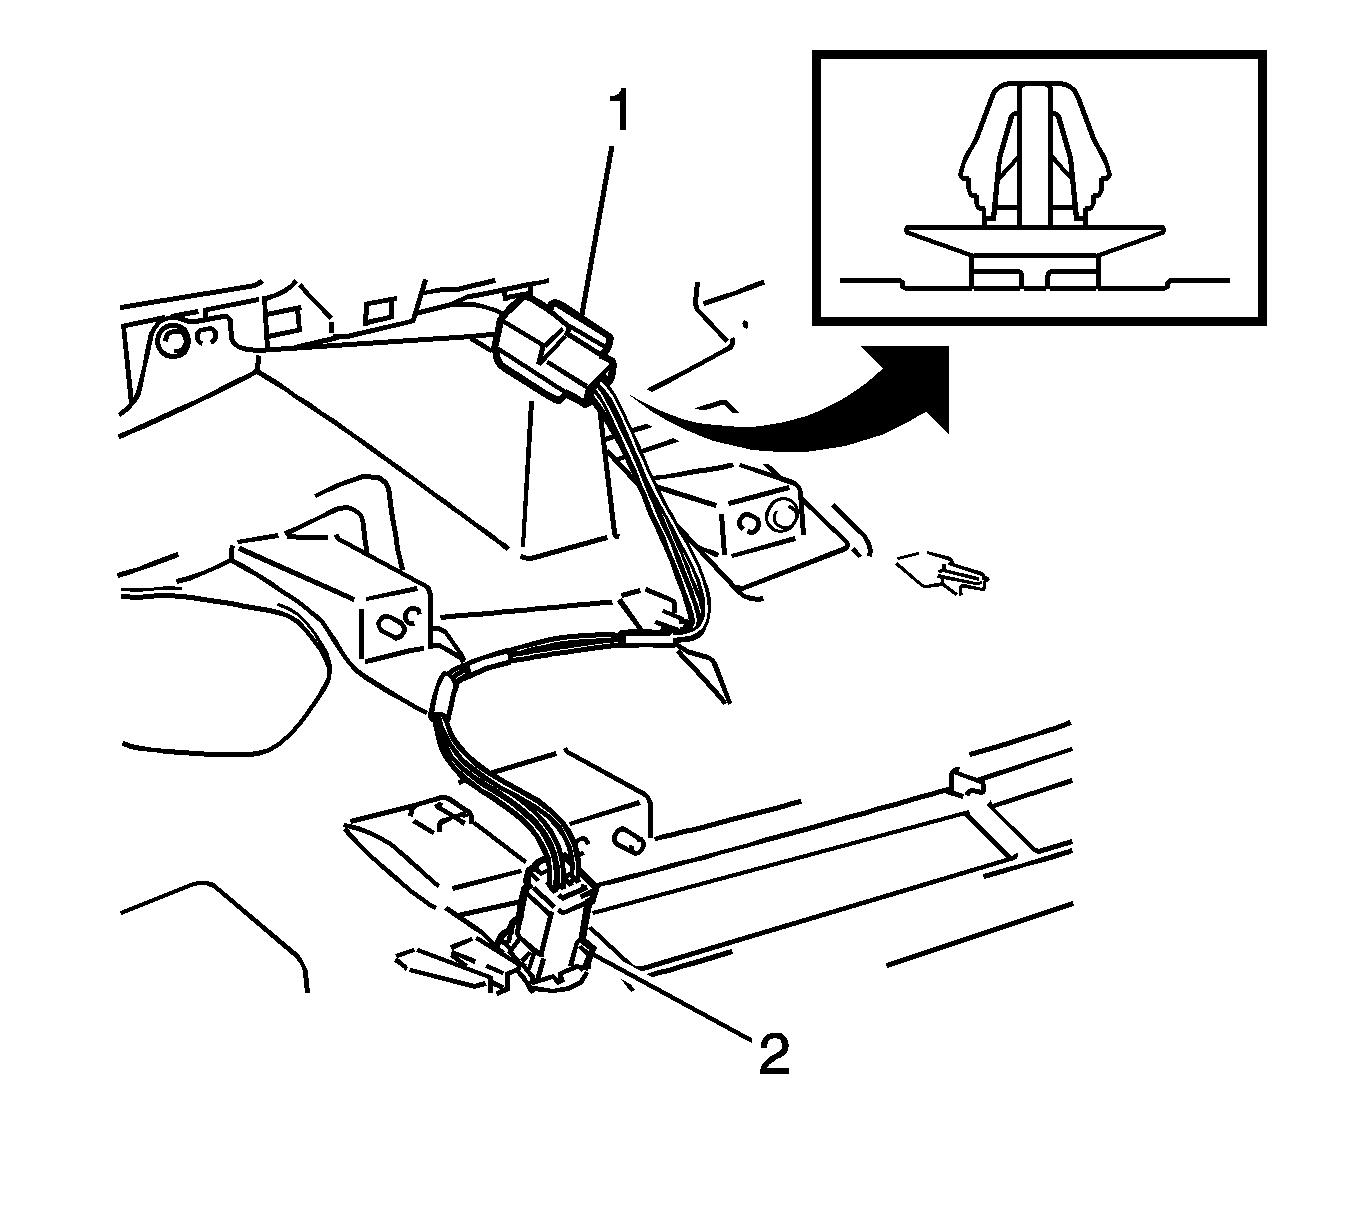
- Disconnect the daytime running lamp ambient sensor connector (2).
- Disengage the retainer (1) and remove the daytime running lamp ambient sensor harness.
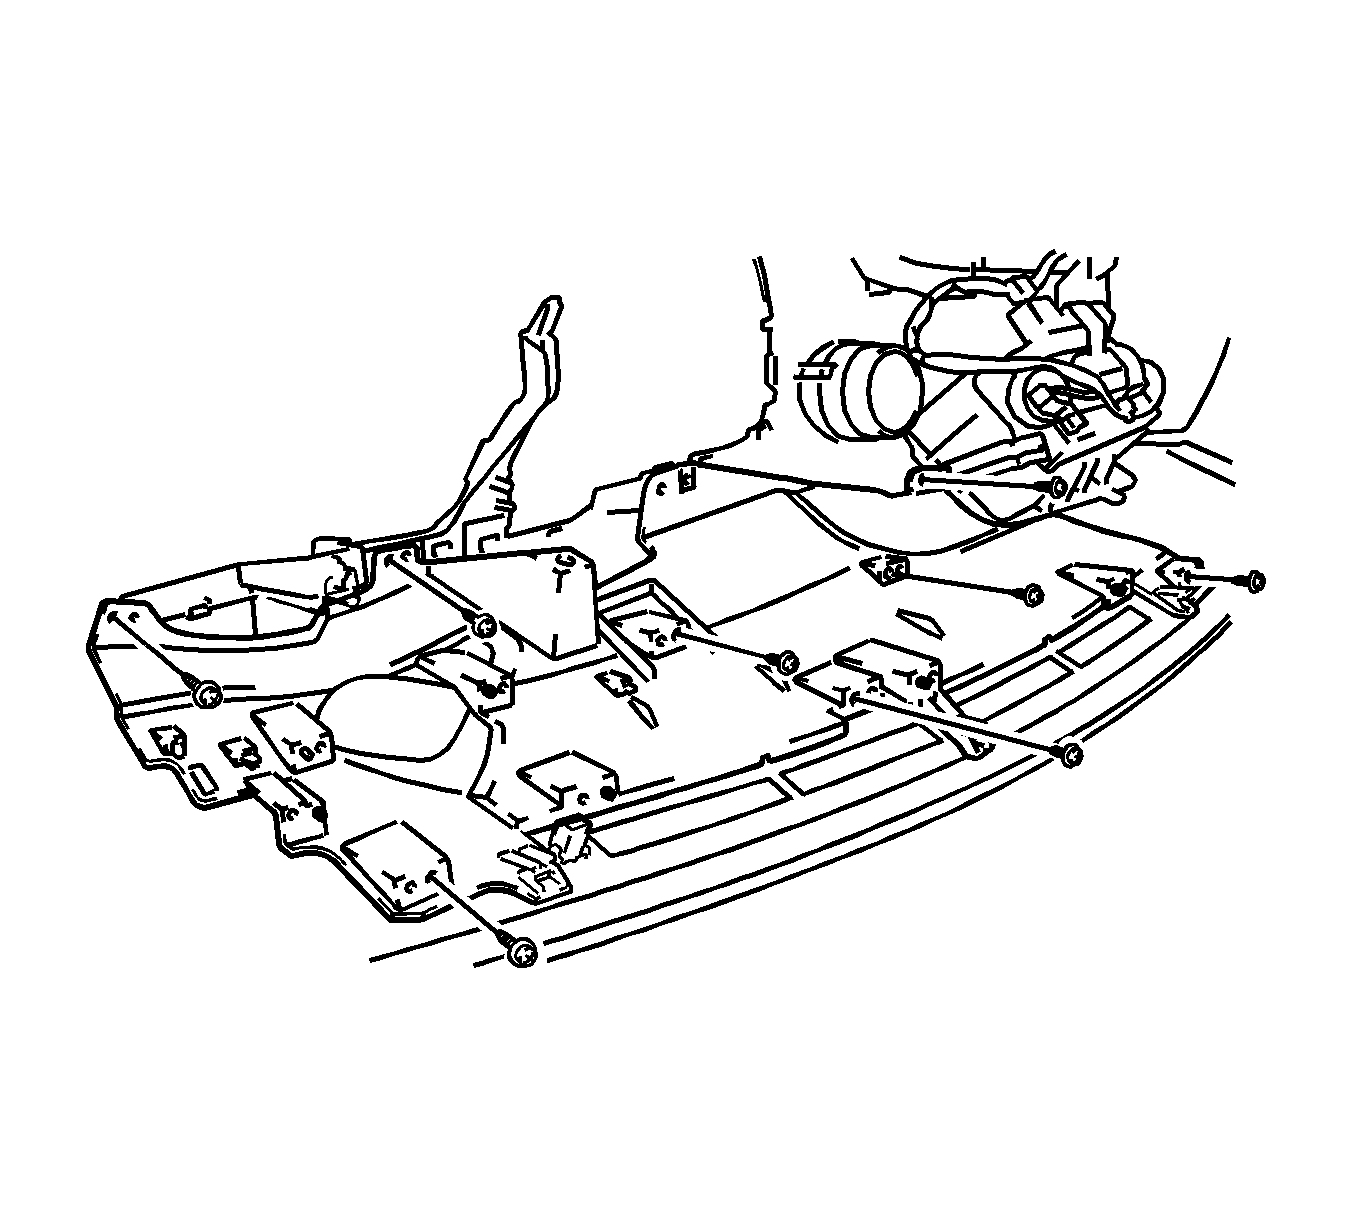
- Remove the eight screws.
- Disengage the six guides and remove the instrument panel safety plate.
- Remove the passenger side inflatable restraint. Refer to Instrument Panel Inflatable Restraint Module Replacement.
- Remove the right side instrument panel air outlets. Refer to Instrument Panel Outer Air Outlet Deflector Replacement - Right Side.
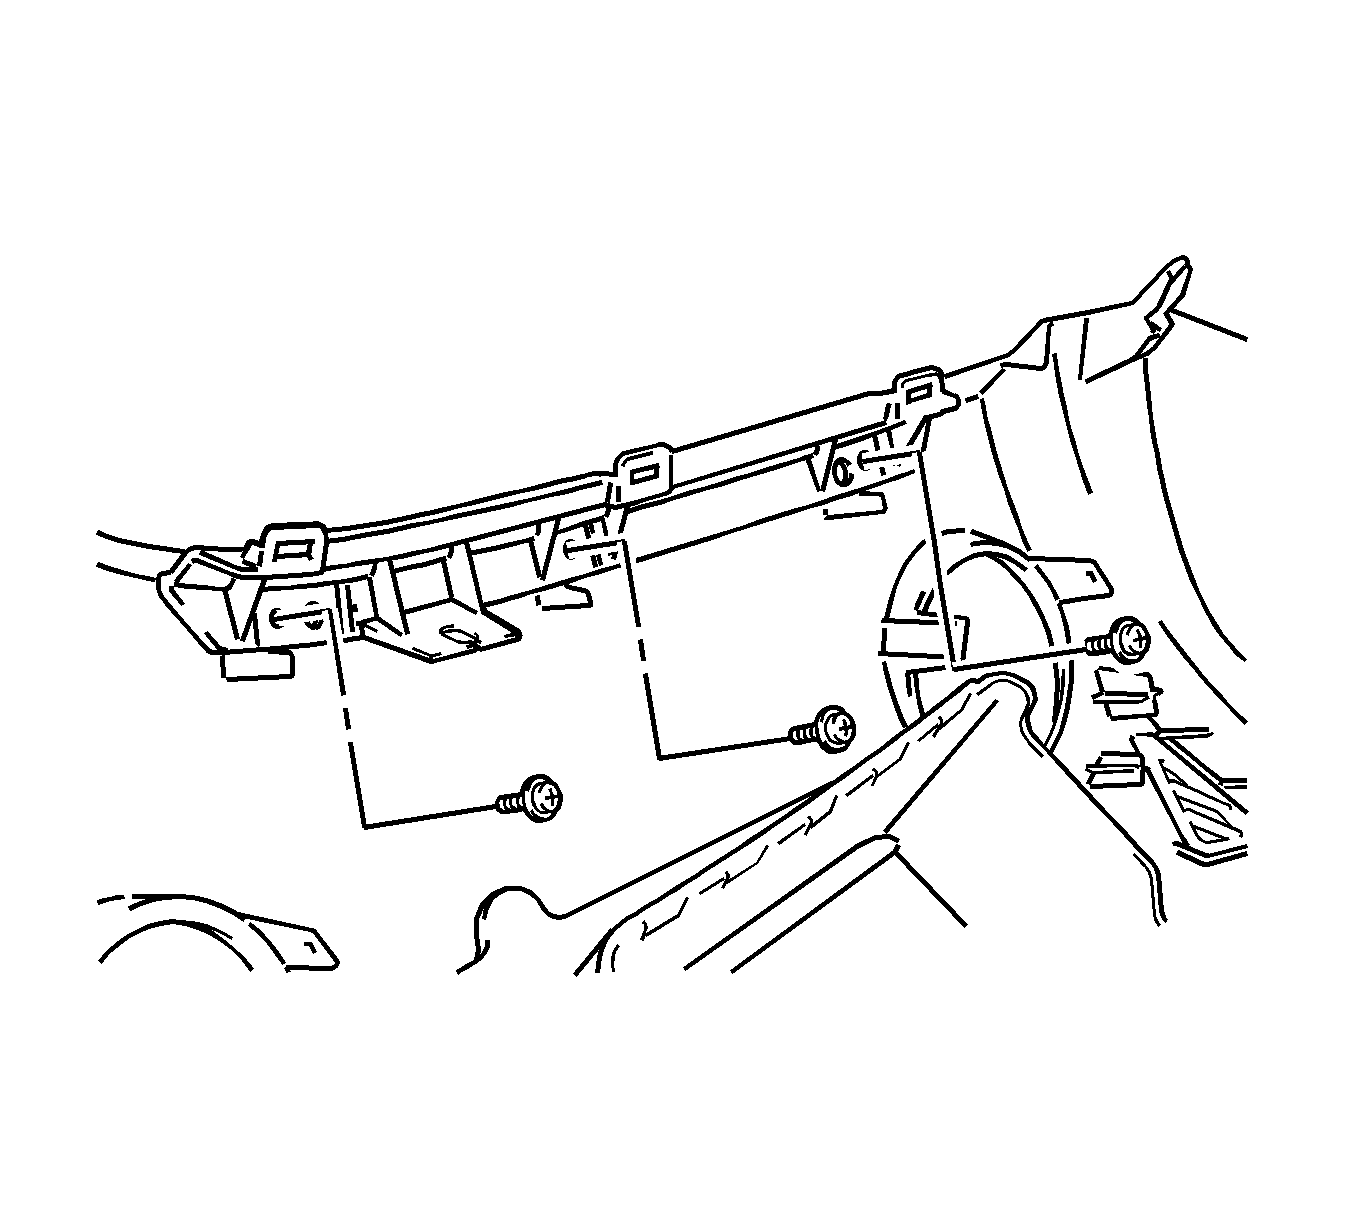
- Remove the three screws and the instrument panel finish plate.
- Remove the daytime running lamp ambient light sensor. Refer to Daytime Running Lamp (DRL) Ambient Light Sensor Replacement.
Installation Procedure
- Install the daytime running lamp ambient light sensor. Refer to Daytime Running Lamp (DRL) Ambient Light Sensor Replacement
- Install the three screws and the instrument panel finish plate.
- Install the right side instrument panel air outlets. Refer to Instrument Panel Outer Air Outlet Deflector Replacement - Right Side.
- Install the passenger side inflatable restraint. Refer to Instrument Panel Inflatable Restraint Module Replacement.
- Engage the six guides and install the instrument panel safety plate.
- Install the eight screws.
- Engage the retainer (1) and install the daytime running lamp ambient sensor harness.
- Connect the daytime running lamp ambient sensor connector (2).
- Install the air distribution duct. Refer to Air Distributor Duct Replacement.
- Install the windshield defrost duct. Refer to Windshield Defroster Duct Replacement.
- Engage the five upper retainers and install the upper instrument panel trim pad.
- Engage the five retainers and the two guides.
- Install the passenger side SIR bolt (3).
- Install the upper bolt (2).
- Connect the electrical connector (1).
- Connect the passenger side SIR electrical connector (1).
- Engage the six retaining tabs and install the instrument panel box door sub assembly.
- Install the instrument panel compartment. Refer to Instrument Panel Compartment Replacement.
- Install the front floor console trim plate. Refer to Front Floor Console Trim Plate Replacement.
- Connect the electrical connectors and install the lower left instrument panel finish panel.
- Engage the seven retaining tabs from the lower left instrument panel finish panel.
- Install the windshield garnish moldings. Refer to Windshield Pillar Garnish Molding Replacement.
- Install the I/P cluster assembly. Refer to Instrument Cluster Replacement.
- Install the upper and lower steering column covers. Refer to Steering Column Trim Cover Replacement.
- Install the left I/P accessory trim plate. Refer to Instrument Panel Accessory Trim Plate Replacement - Left Side.
- Install the radio. Refer to Radio Replacement.
- Install the steering wheel. Refer to Steering Wheel Replacement.
- Enable the driver and passenger side SIR systems. Refer to SIR Disabling and Enabling.


