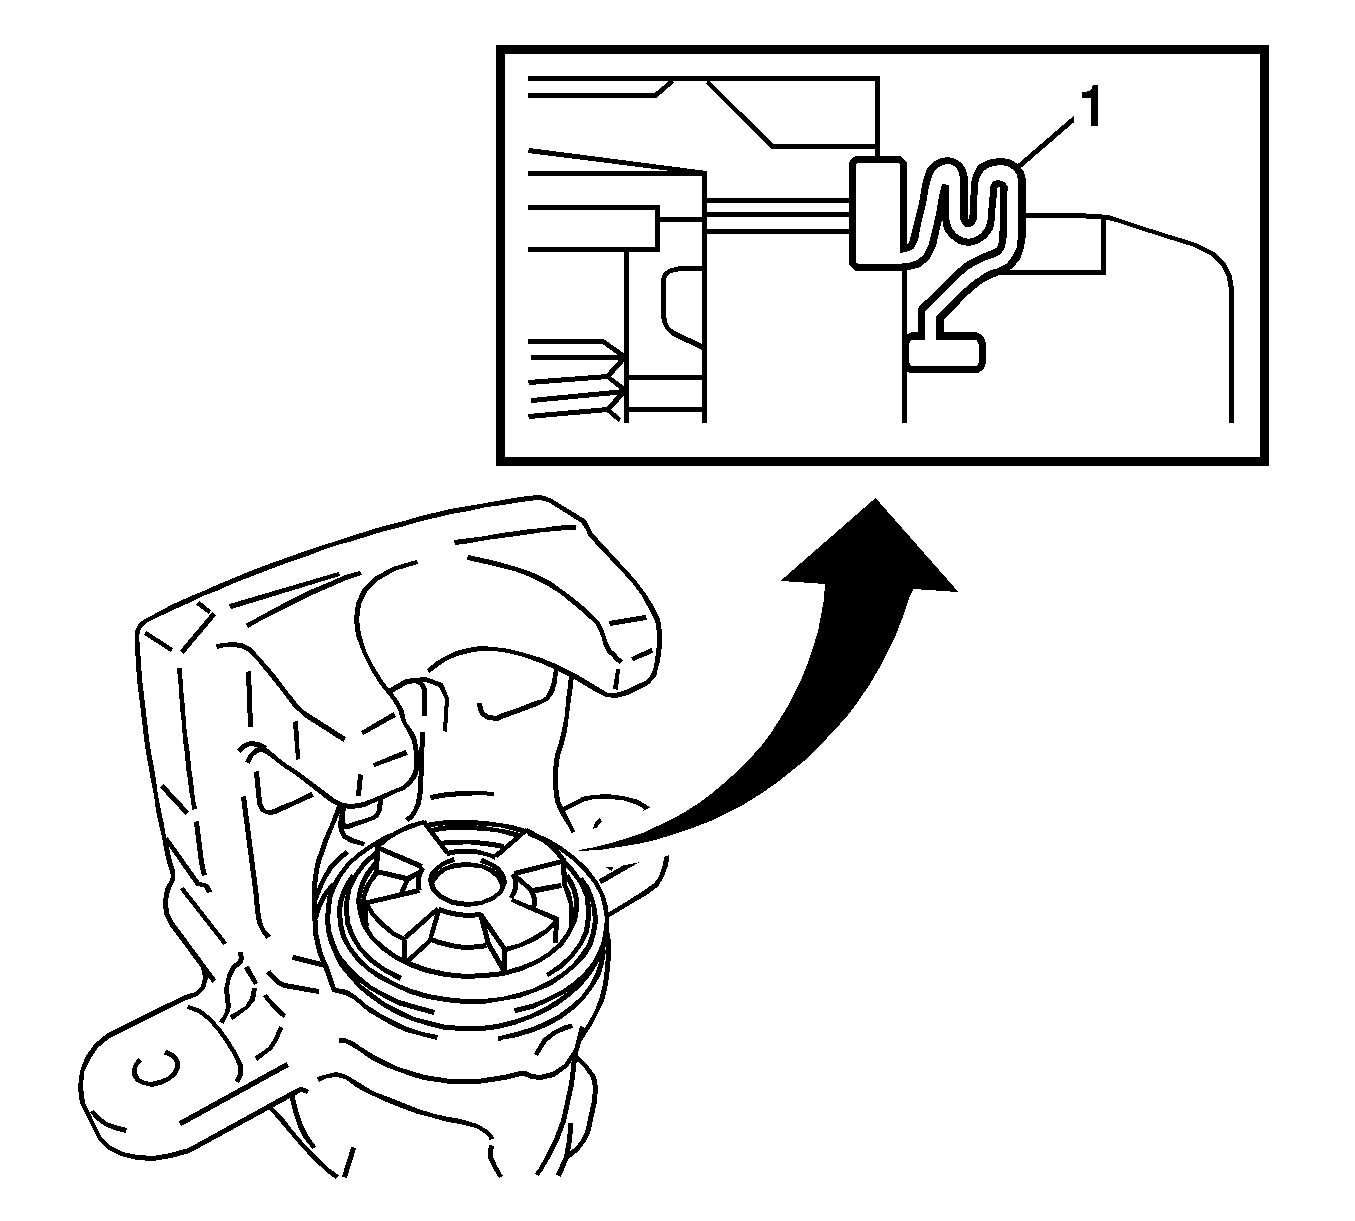
Rear Brake Caliper Overhaul All Wheel Drive and GT
Disassembly Procedure
- Remove the rear brake caliper from the vehicle. Refer to Rear Brake Caliper Replacement.
- Wrap tape on a flat blade tool.
- Use a taped flat blade tool in order to remove the caliper set ring (3).
- Use a taped flat blade tool in order to remove the piston boot (2).
- Insert a shop cloth (2) into the caliper (1) in order to catch the piston.
- Apply compressed air to the caliper brake hose connector hole in order to remove the piston from the caliper.
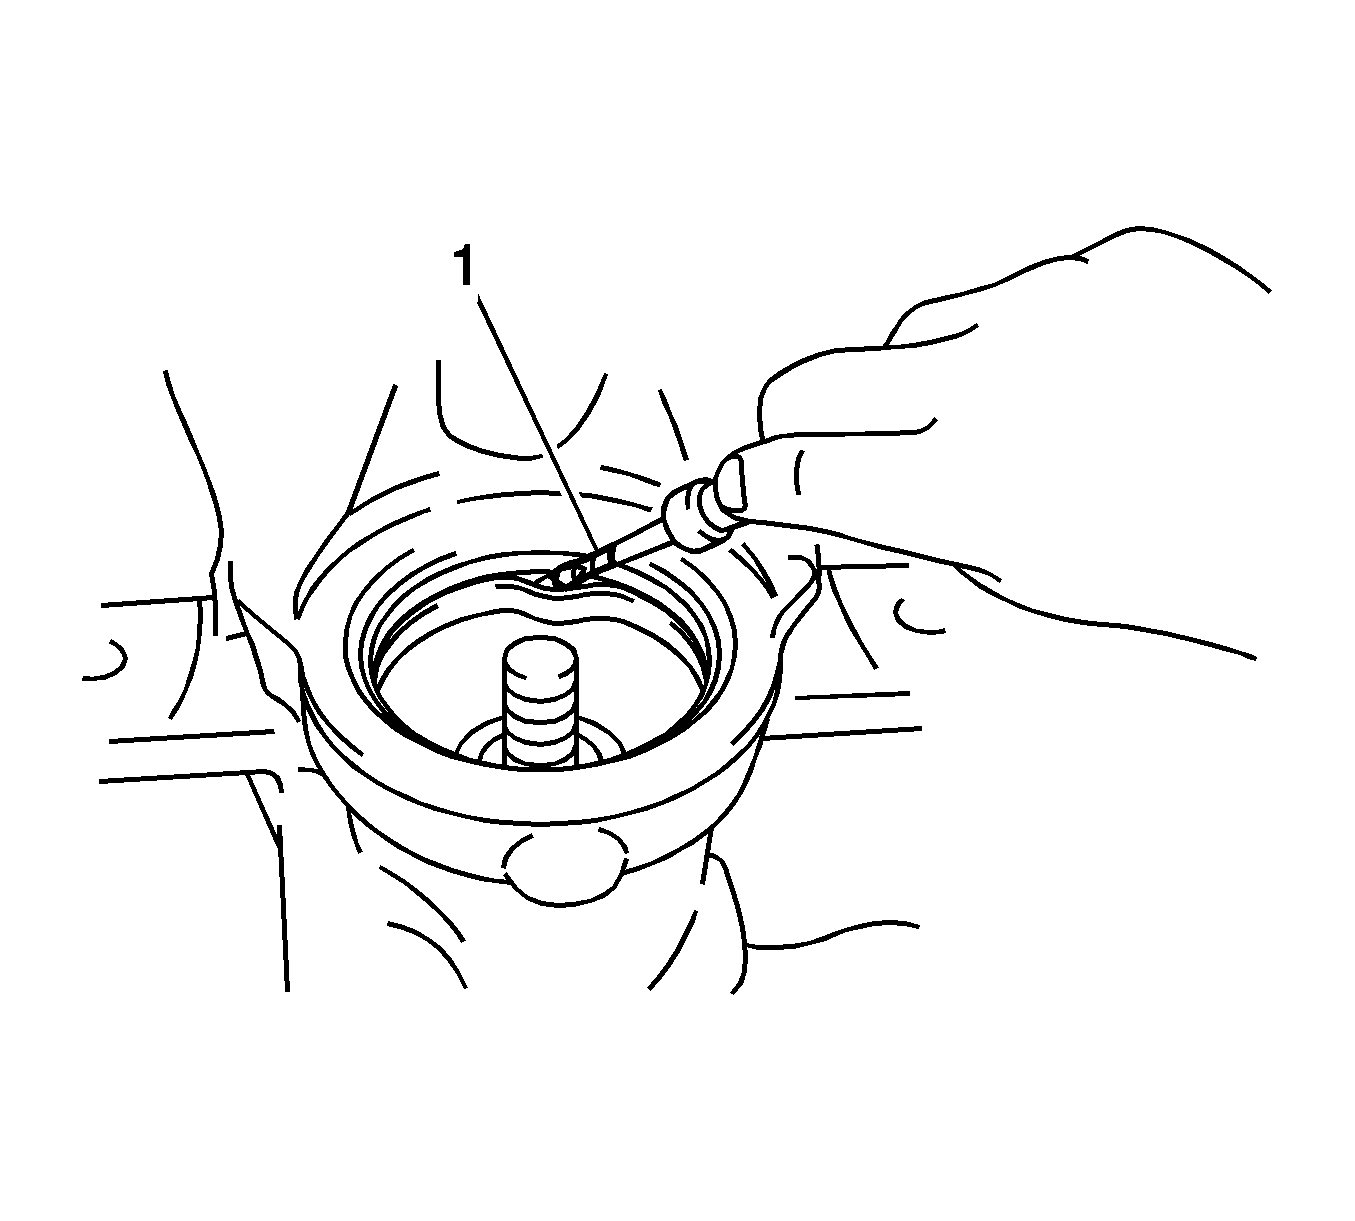
- Use a taped flat blade tool in order to remove the piston seal.
- Remove the bleeder valve cap.
- Remove the bleeder valve.
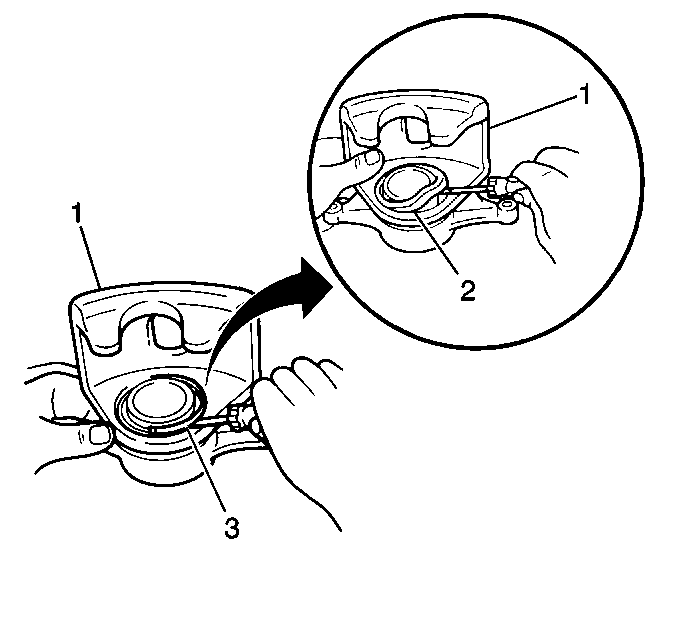
Discard the piston boot.
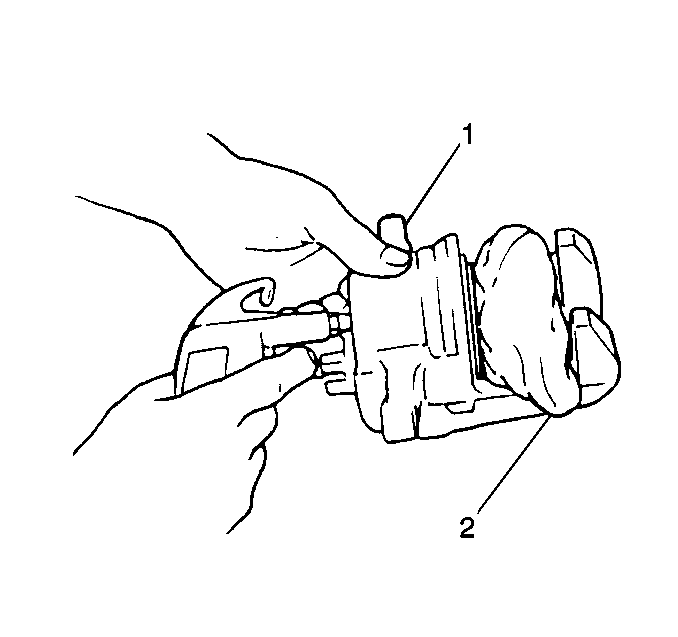
Warning: Wear safety glasses when using compressed air in order to prevent eye injury.
Warning: Do not place fingers in front of the caliper piston(s) in an attempt to catch or protect it when applying compressed air. The piston(s) can fly out with force and could result in serious bodily injury.
Caution: Use just enough air pressure to ease the piston out of the bore. You can damage a blown-out piston even with the padding.
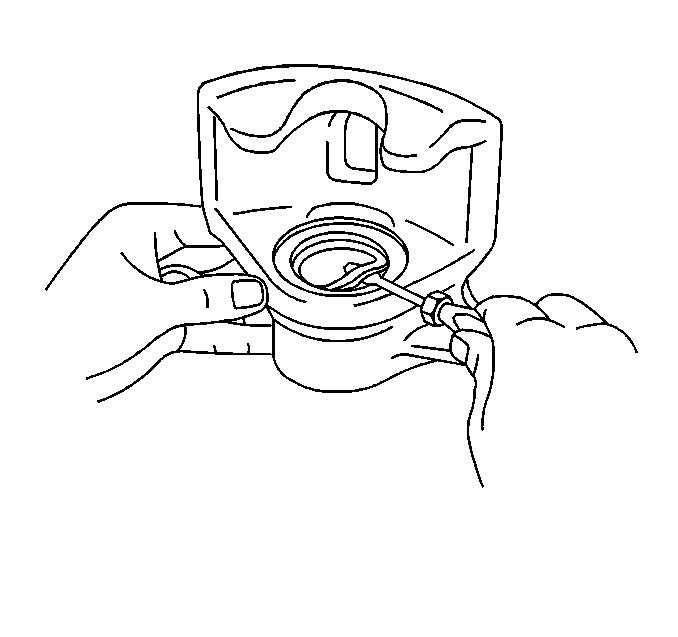
Discard the piston seal.
Inspection Procedure
- Clean the following components in denatured alcohol or an equivalent brake parts cleaner:
- Dry the components and all the passages in the caliper housing using unlubricated, compressed air.
- Inspect the piston bore and the slide pin bores of the caliper for damage, wear or corrosion. Replace the caliper assembly if damage, wear or corrosion is evident.
- Inspect the piston and the caliper housing for damage, wear or corrosion. Replace the components if damage, wear or corrosion is evident.
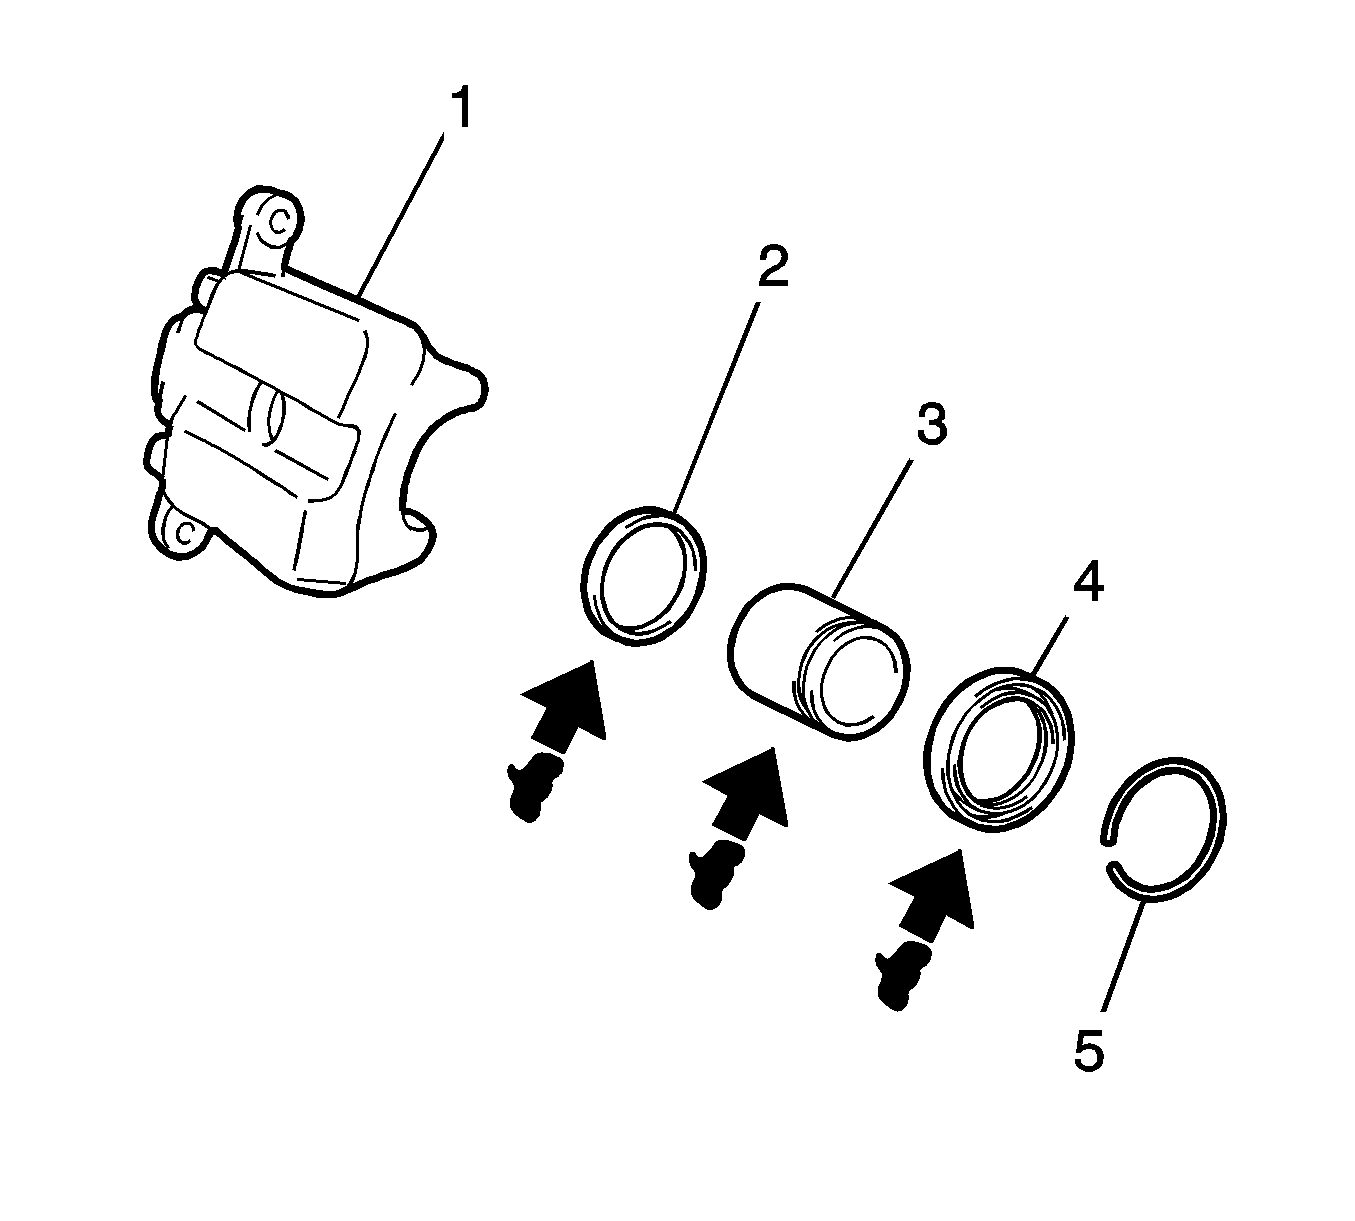
| • | The caliper housing (1) |
| • | The caliper piston (3) |
| • | The caliper set ring (5) |
Assembly Procedure
- Install the bleeder valve to the caliper.
- Install the bleeder valve cap.
- Apply lithium soap base glycol grease to the NEW piston seal.
- Install the piston seal into the caliper bore. Verify the seal is not twisted.
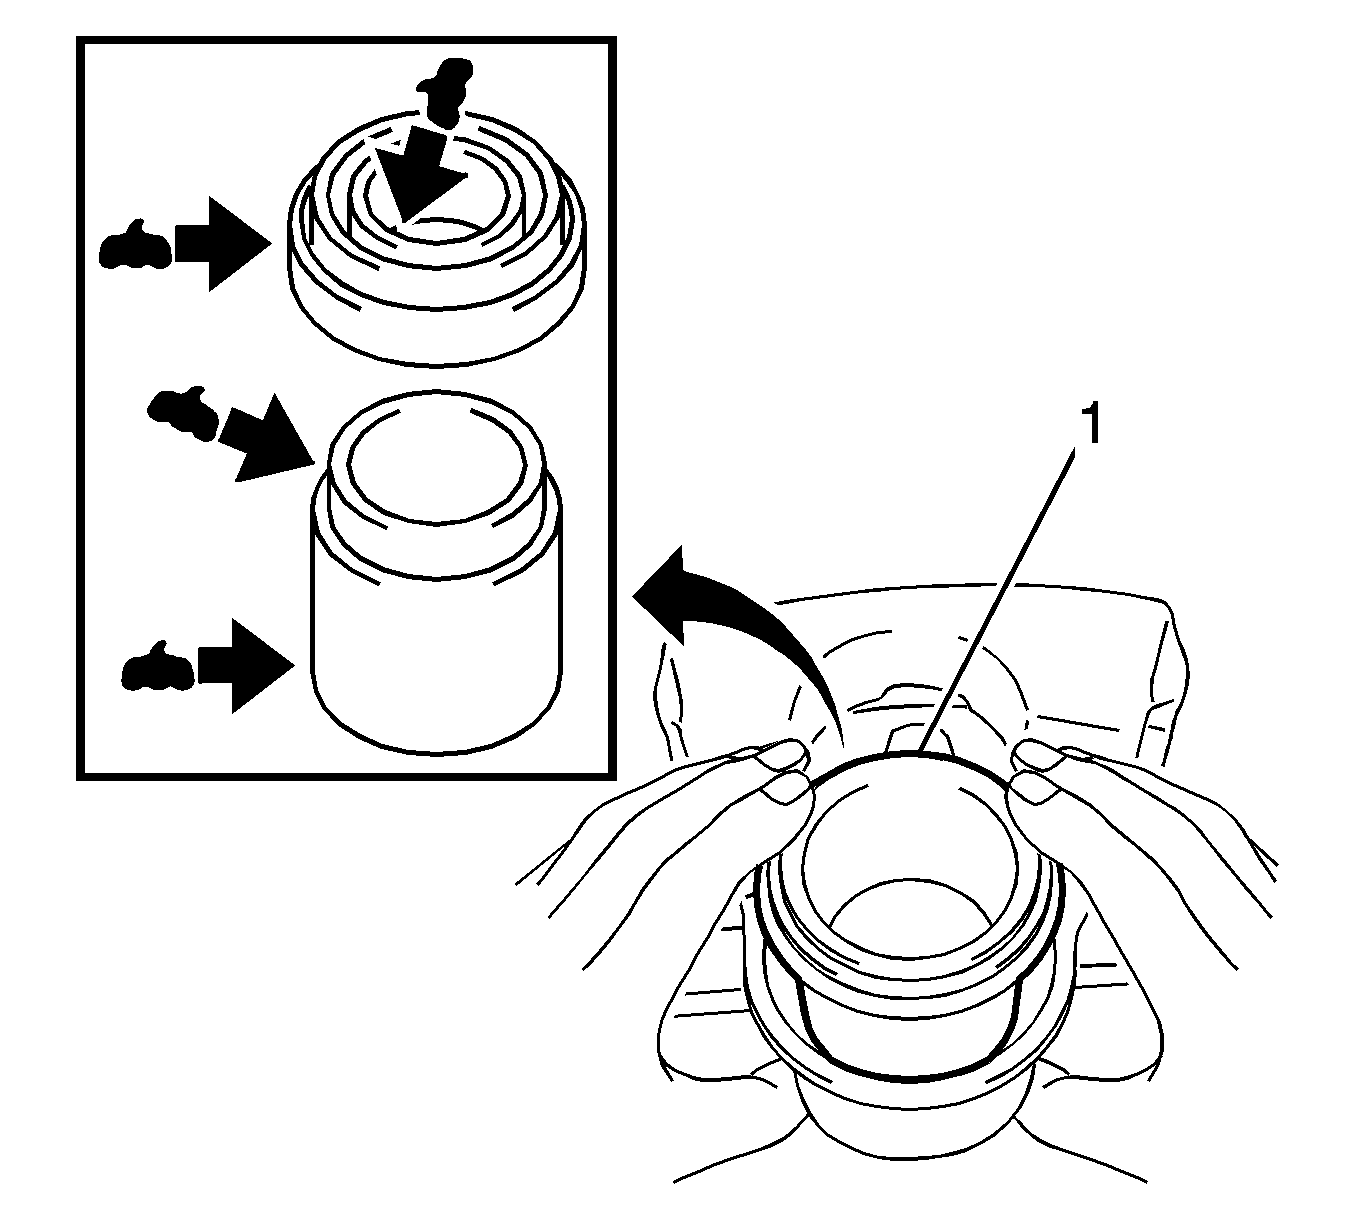
- Apply lithium soap base glycol grease to the NEW piston boot (1).
- Apply lithium soap base glycol grease to the caliper piston.
- Install the piston boot to the grooves on the piston.
- Lubricate the caliper bore and the NEW set ring with Delco Supreme 11 brake fluid, GM P/N 12377967 (Canadian P/N 992667), or an equivalent DOT 3 brake fluid.
- Install the piston into the caliper bore.
- Install the piston boot (1) to the grooves on the caliper housing.
- Use a taped flat blade tool in order to install the set ring (2) securely in the grooves of the piston boot.
- Install the caliper to the vehicle. Refer to Rear Brake Caliper Replacement.
Note: Do not tighten the bleeder valve yet. Tighten the bleeder valve after installing the caliper and bleeding the brake system.
Rear Brake Caliper Overhaul Except All Wheel Drive and GT
Disassembly Procedure
- Remove the rear brake caliper from the vehicle. Refer to Rear Brake Caliper Replacement.
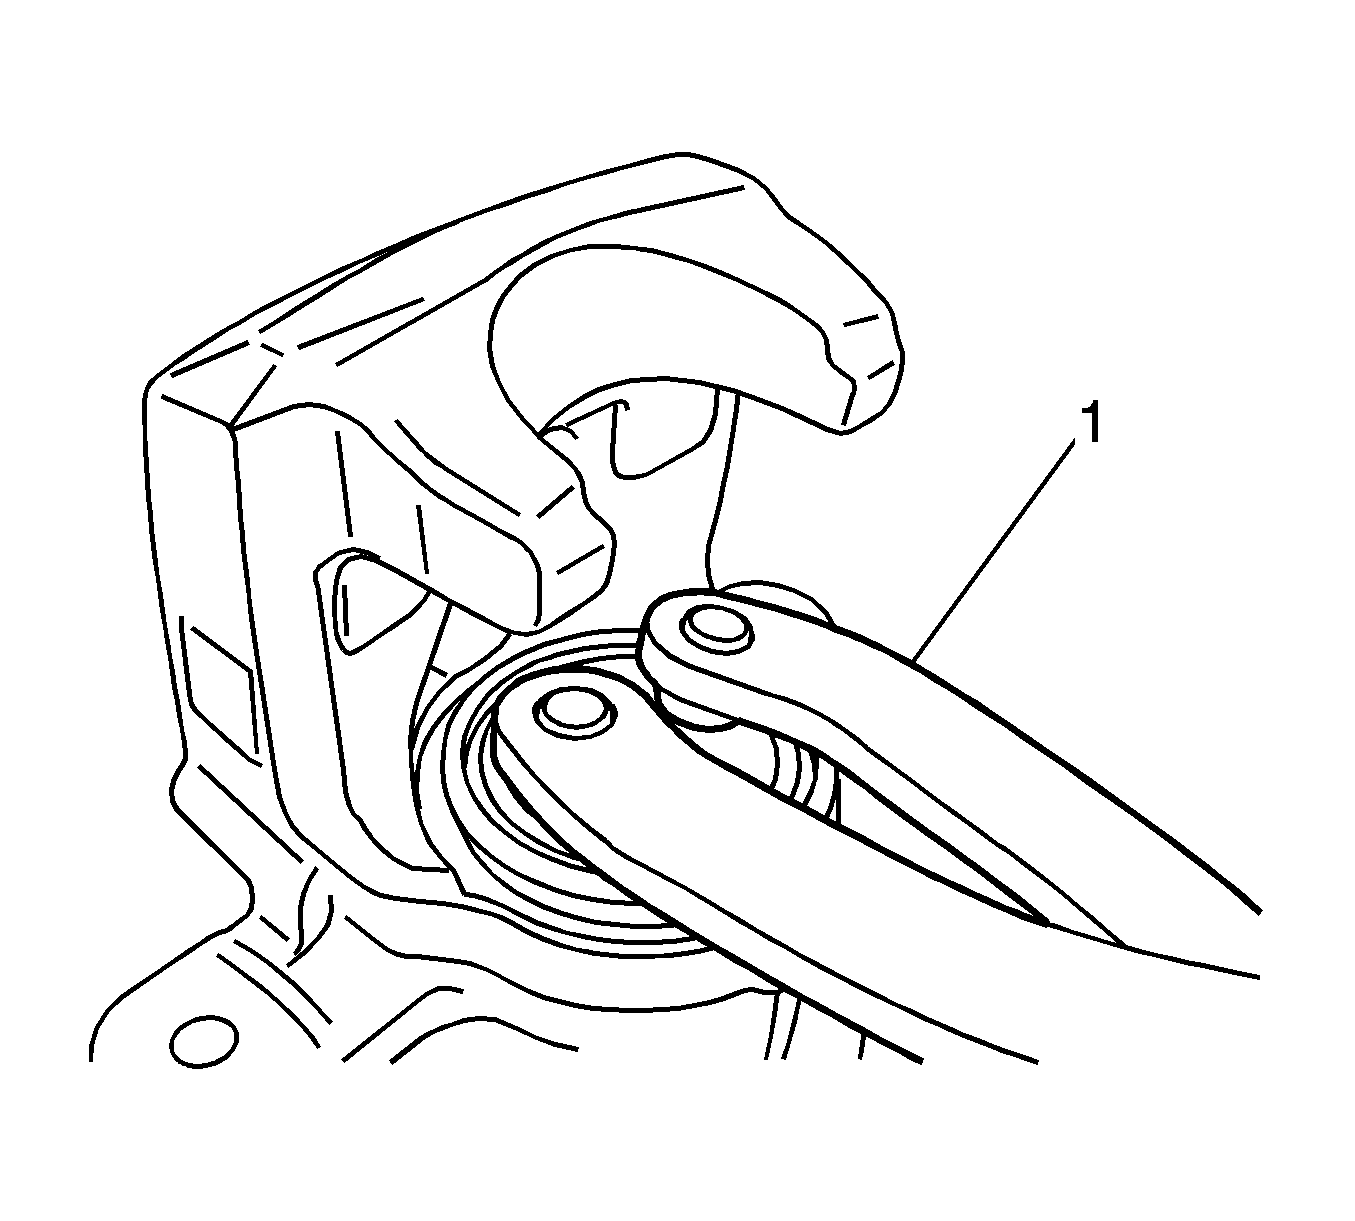
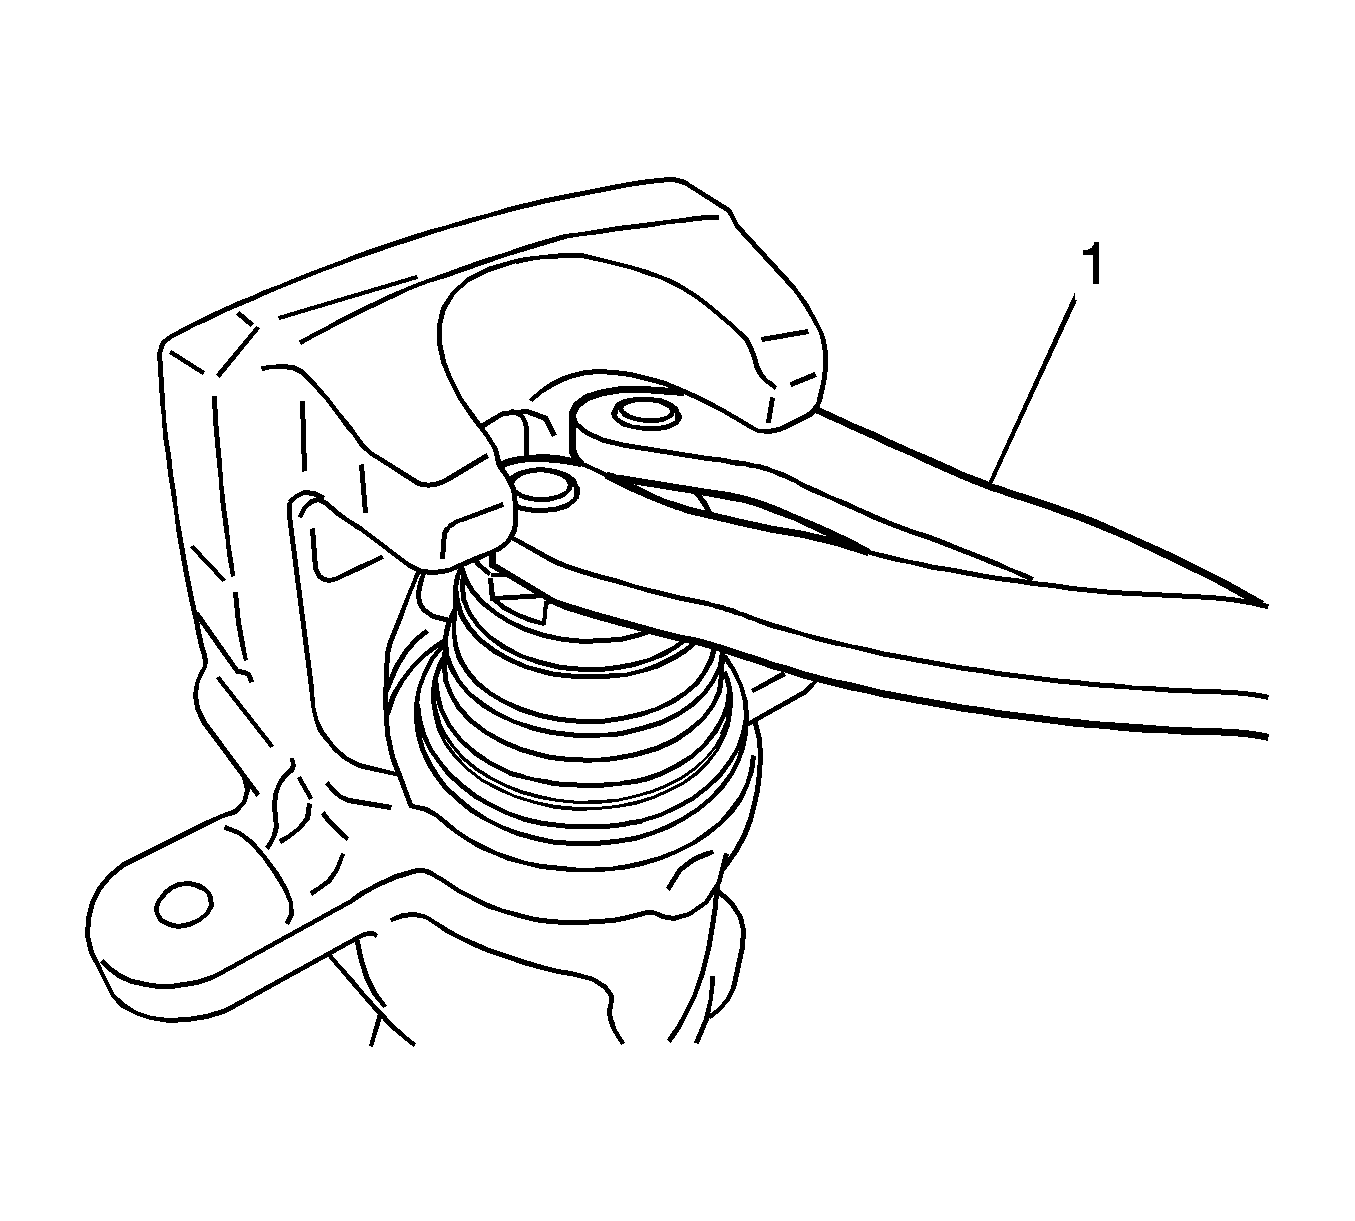
- Use a commercially available caliper piston tool (1) in order to turn and remove the caliper piston.
- Remove the piston boot from the piston.
- Wrap tape on a flat blade tool.
- Use a taped flat blade tool (1) in order to remove the piston seal from the caliper.
- Remove the bleeder valve cap.
- Remove the bleeder valve.
Discard the piston boot.
Discard the piston seal.
Inspection Procedure
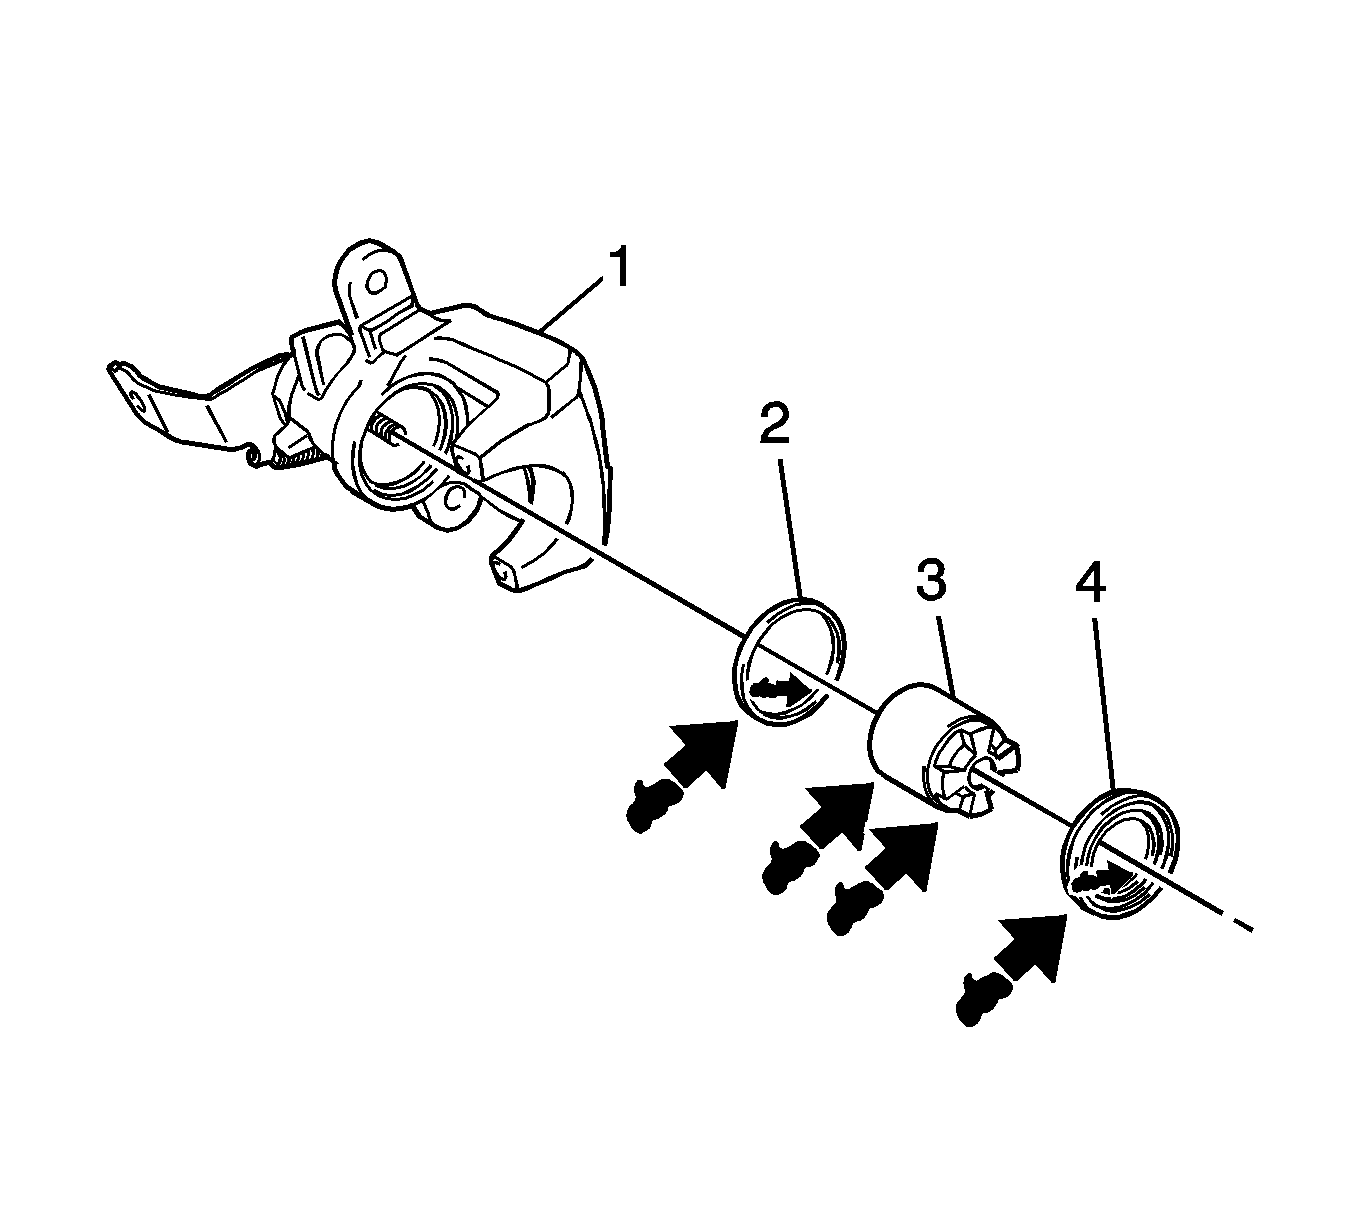
- Clean the caliper housing (1) and the caliper piston (3) in denatured alcohol or an equivalent brake parts cleaner:
- Dry the components and all the passages in the caliper housing using unlubricated, compressed air.
- Inspect the piston bore and the slide pin bores of the caliper for damage, wear or corrosion. Replace the caliper assembly if damage, wear or corrosion is evident.
- Inspect the piston and the caliper housing for damage, wear or corrosion. Replace the components if damage, wear or corrosion is evident.
Assembly Procedure
- Install the bleeder valve to the caliper.
- Install the bleeder valve cap.
- Apply lithium soap base glycol grease to the NEW piston seal (2).
- Install the piston seal into the groove of the piston bore. Verify the seal is not twisted.
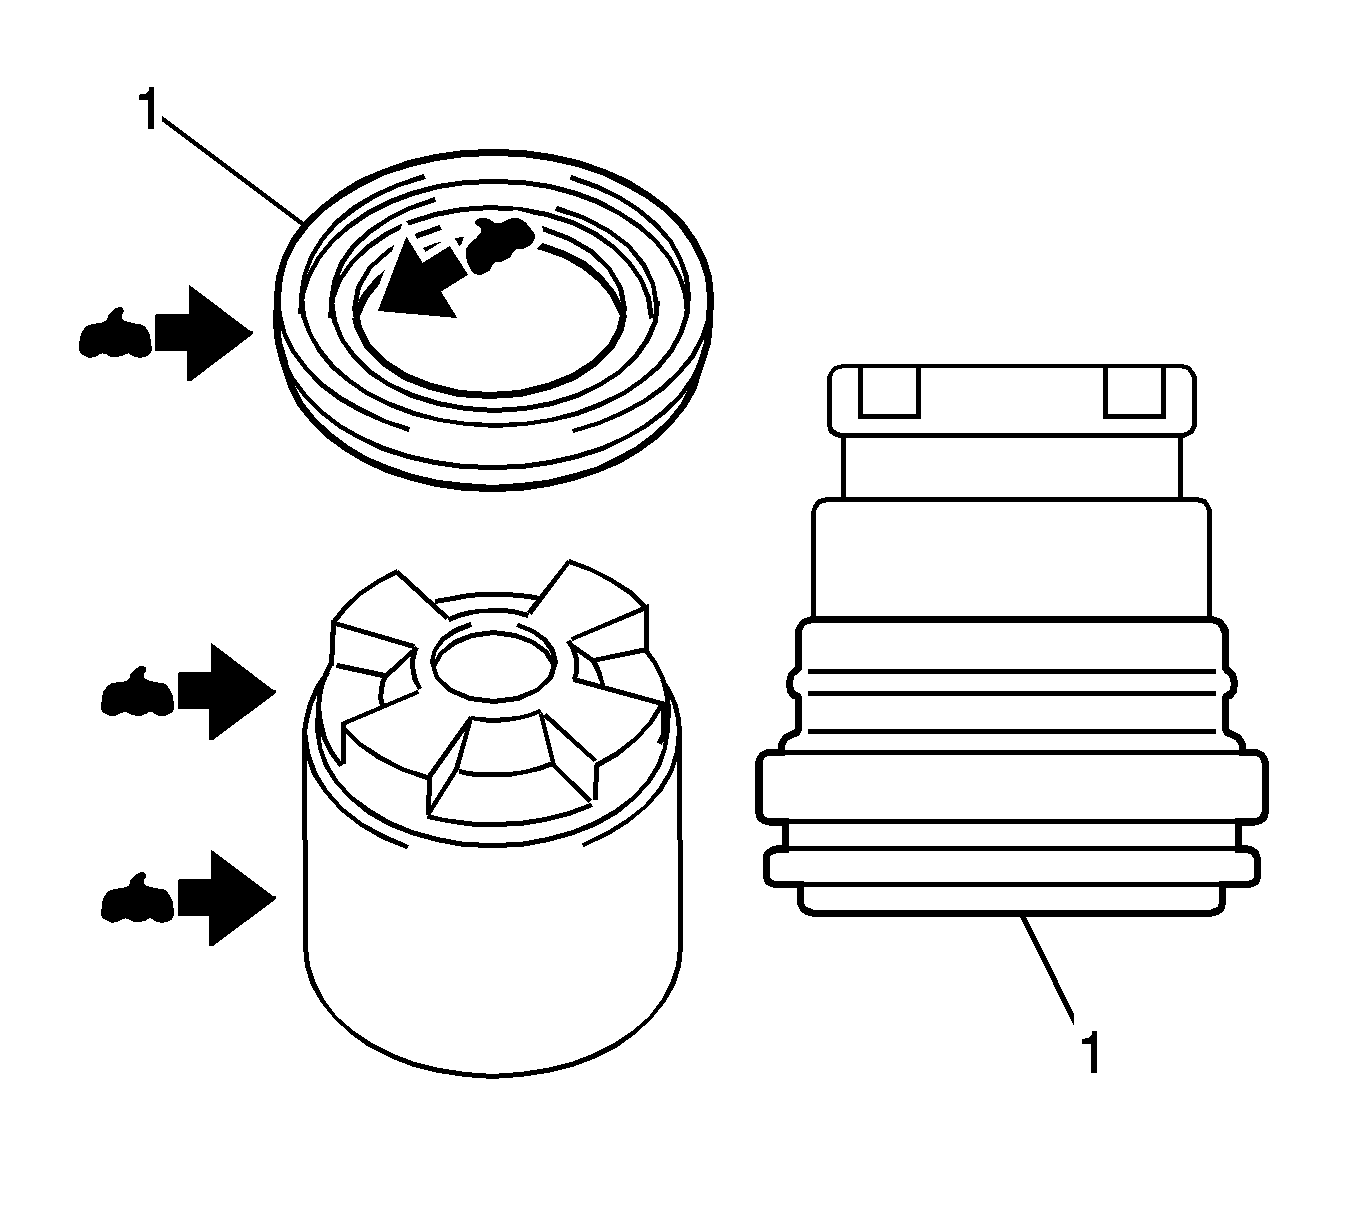
- Apply lithium soap base glycol grease to the NEW piston boot (1).
- Apply lithium soap base glycol grease to the caliper piston.
- Install the piston boot to the piston.
- Lubricate the caliper bore and the NEW set ring with Delco Supreme 11 brake fluid, GM P/N 12377967 (Canadian P/N 992667), or an equivalent DOT 3 brake fluid.
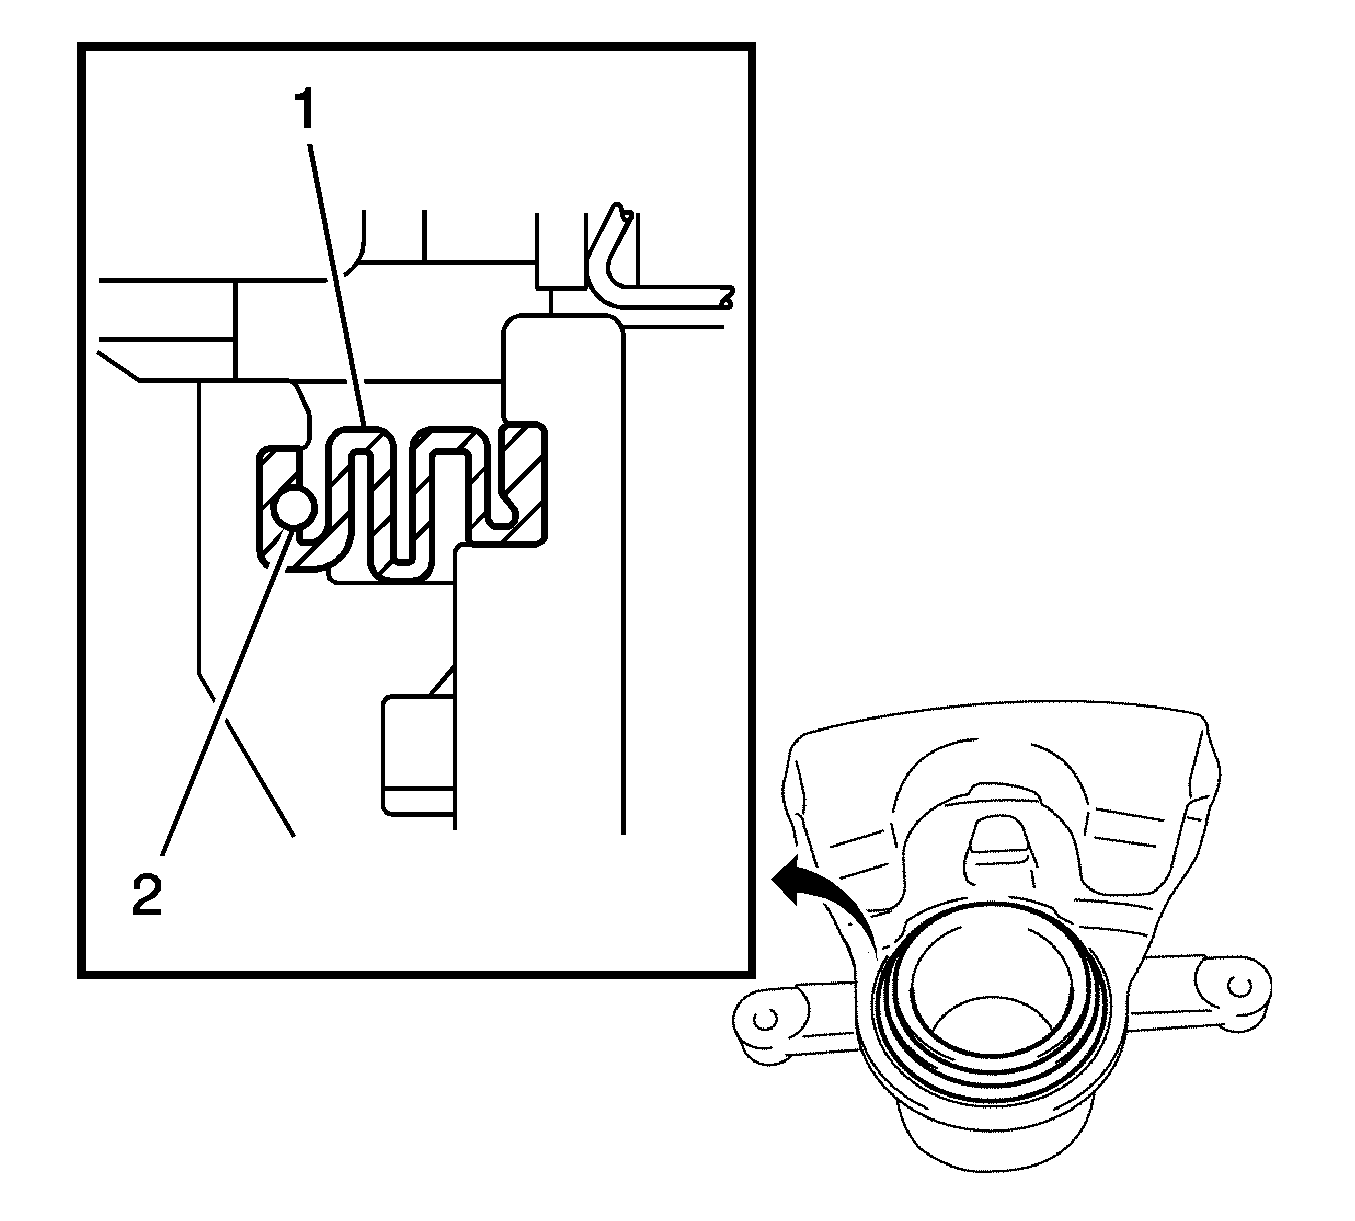
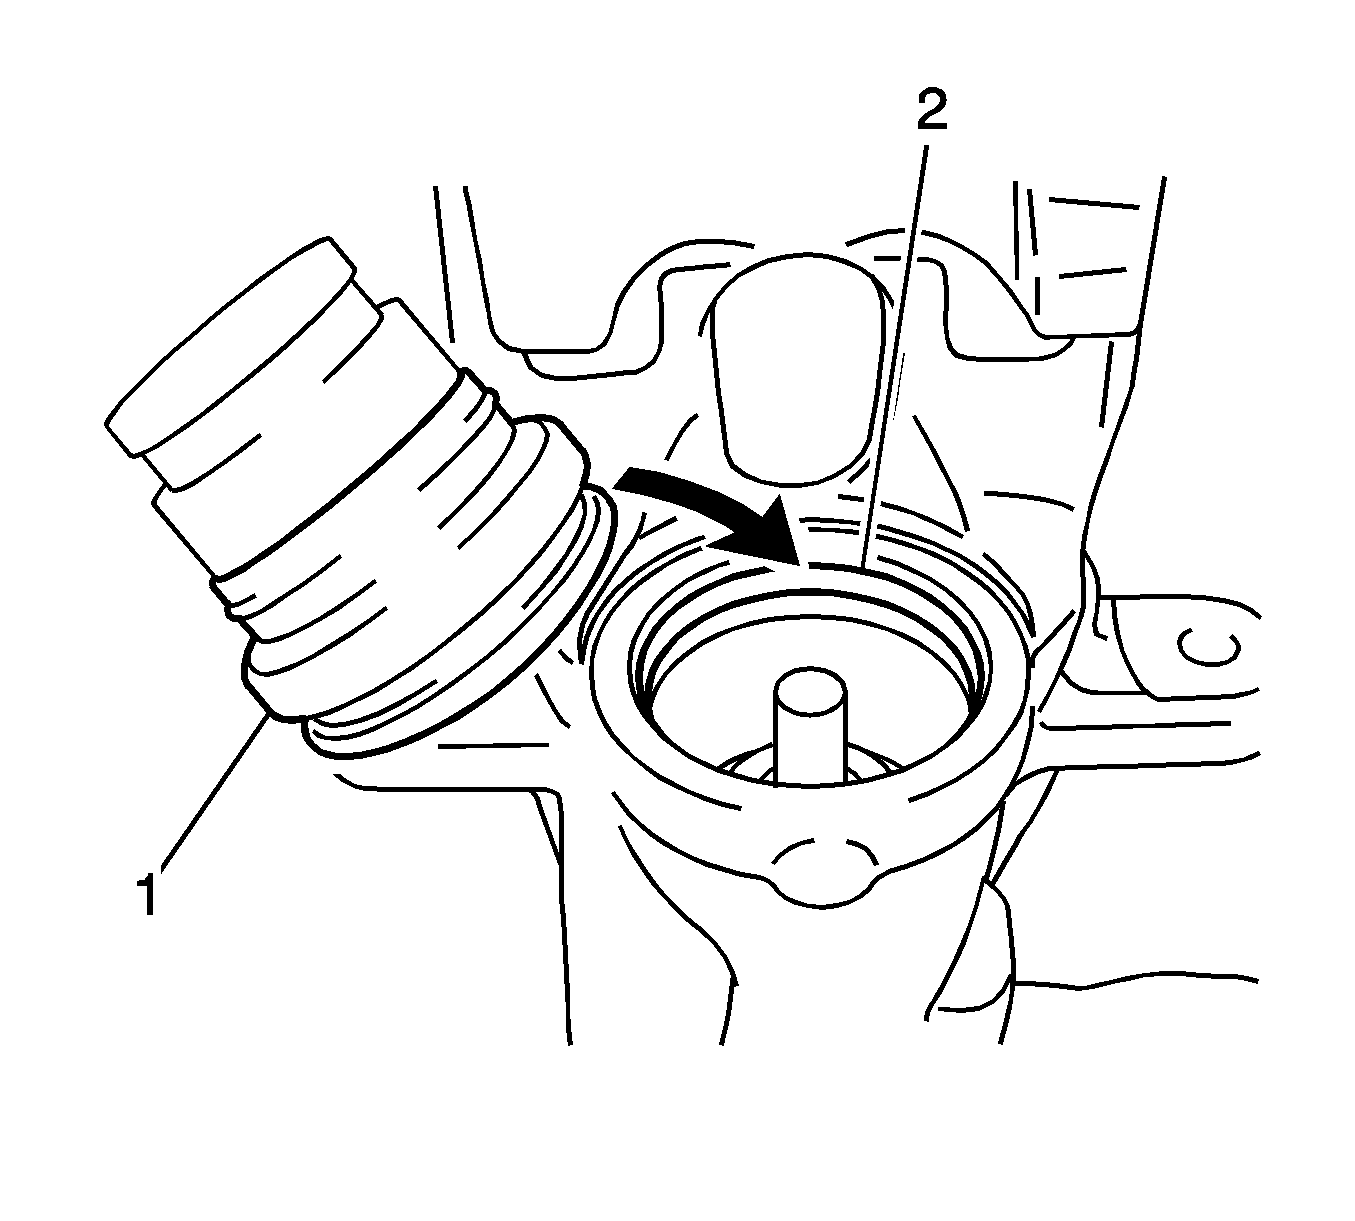
- Install the seal portion of the piston boot (1) to the grooves (2) in the piston bore.
- Use a commercially available caliper piston tool (1) in order to turn and install the piston into the caliper bore. Turn the piston in as far as possible.
- Turn the piston in order to align the piston groove 90 degrees (a) from a line between the caliper slide pin bores.
- Ensure the piston boot (1) is installed in the groove of the piston and in the groove of the piston bore.
- Install the caliper to the vehicle. Refer to Rear Brake Caliper Replacement.
Note: Do not tighten the bleeder valve yet. Tighten the bleeder valve after installing the caliper and bleeding the brake system.

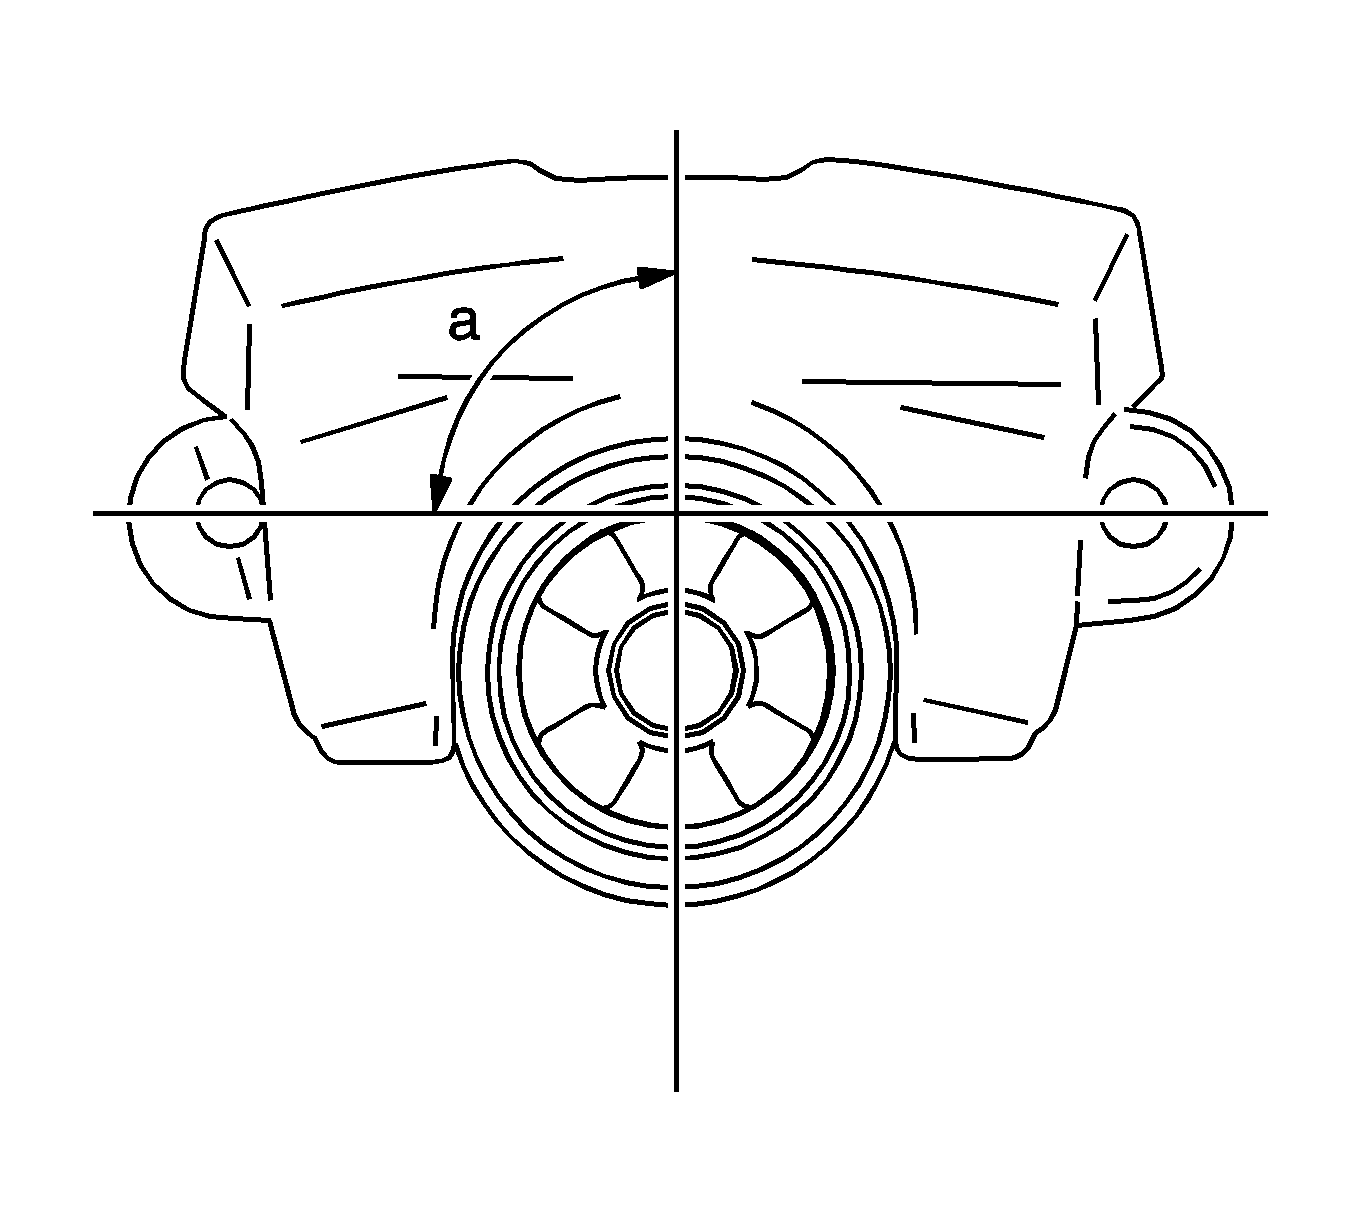
Align the piston groove with the protrusion on the brake pad.
