For 1990-2009 cars only
Disassembly Procedure
- Remove the master cylinder from the vehicle. Refer to Master Cylinder Replacement.
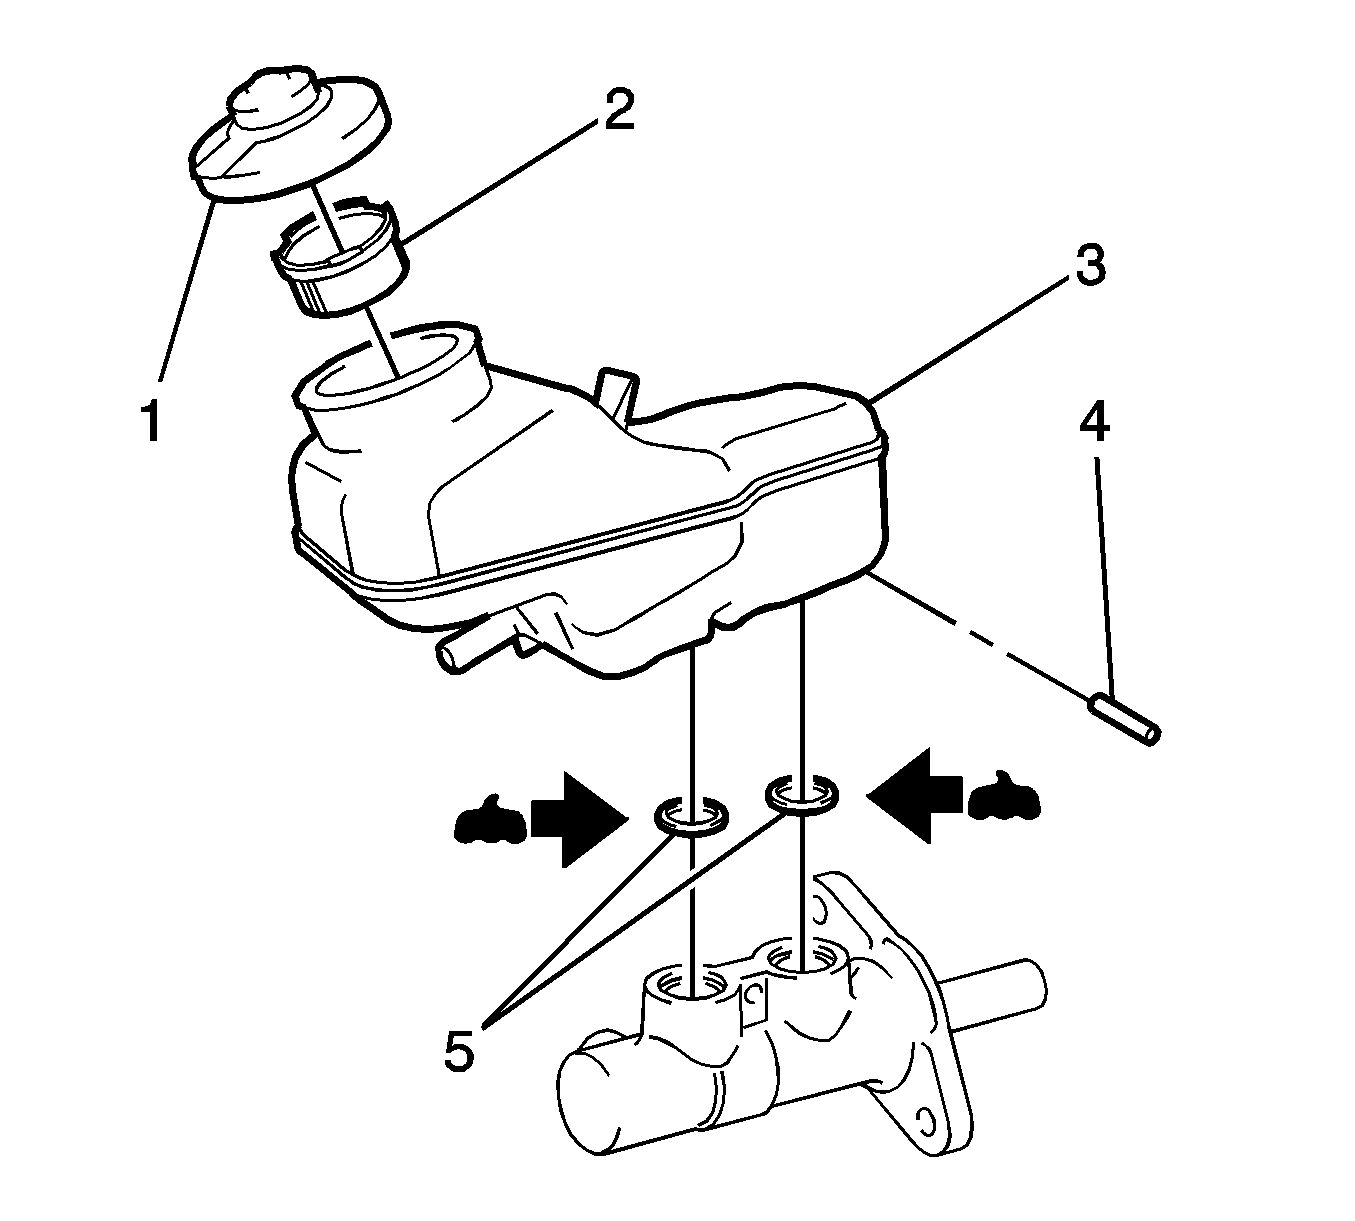
- Remove the cap (1).
- Remove the filter (2).
- Place the master cylinder in a vise.
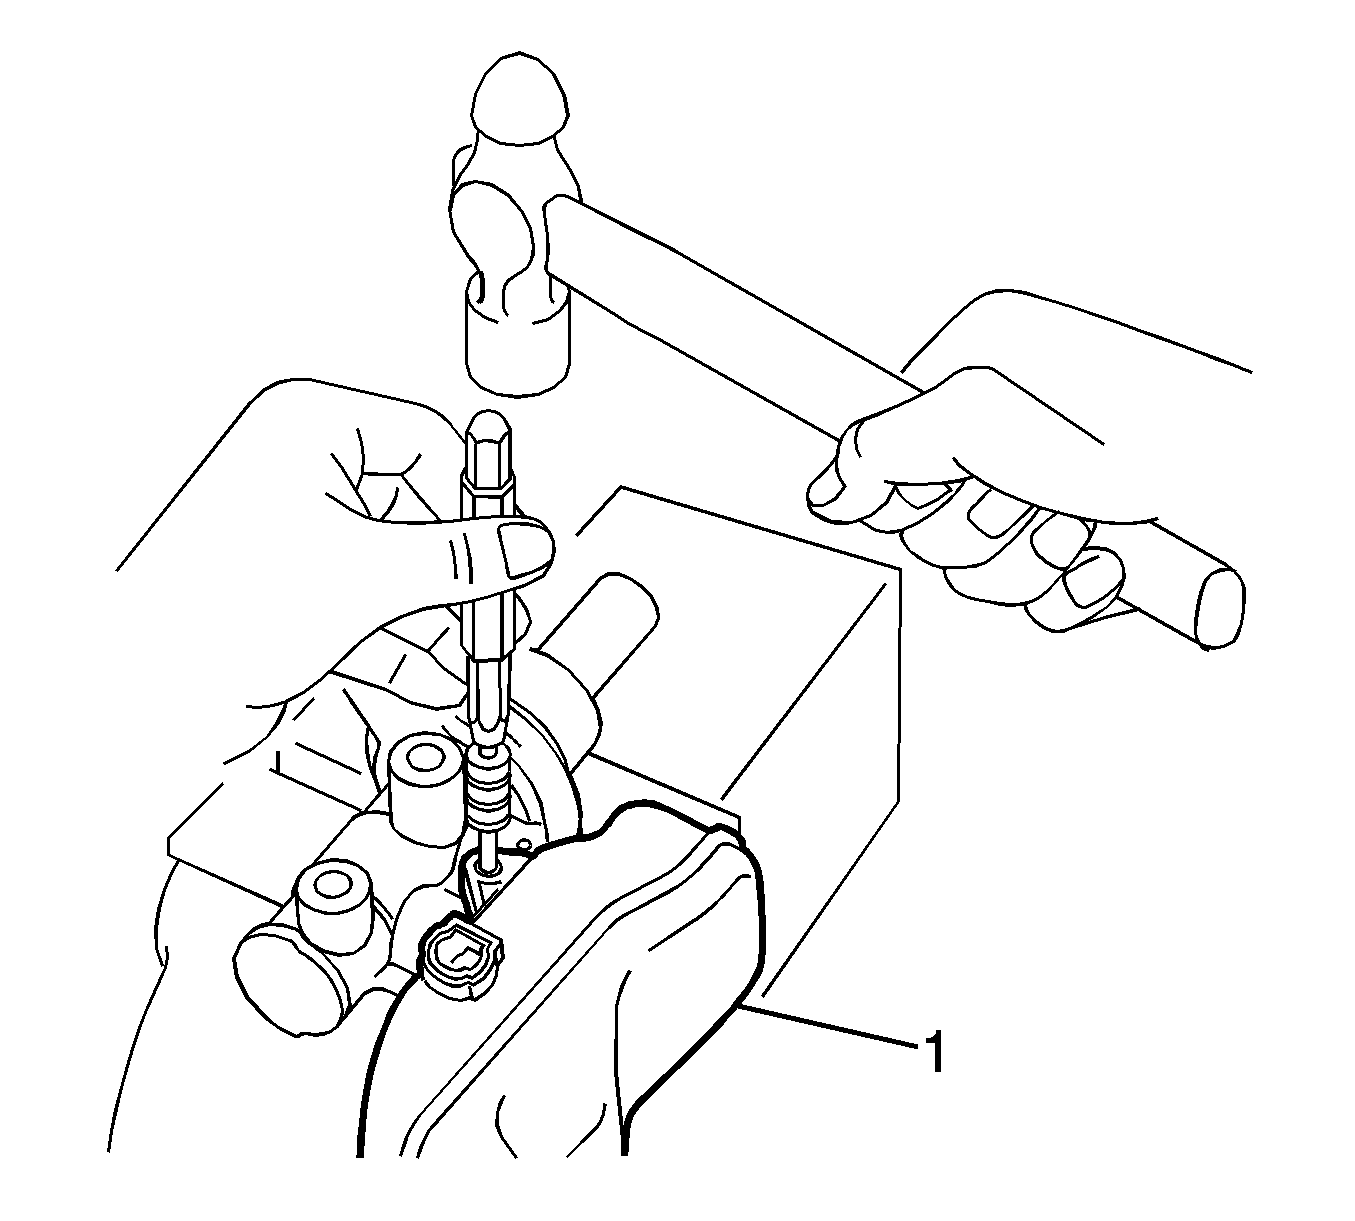
- Using a pin punch and a hammer, tap out the straight pin and remove the reservoir (1) from the master cylinder.
- Remove the 2 grommets from the master cylinder.
Warning: Refer to Brake Fluid Irritant Warning in the Preface section.
Caution: Refer to Brake Fluid Effects on Paint and Electrical Components Caution in the Preface section.
Note: Hold the master cylinder with the piston facing upward in order to prevent the piston from sliding out. The piston is not serviced separately from the master cylinder.

Caution: Do not clamp on the master cylinder body. Doing so may damage the master cylinder.

Discard the grommets.
Assembly Procedure
- Apply lithium soap base glycol grease to 2 NEW grommets (5).
- Install the 2 grommets to the master cylinder.
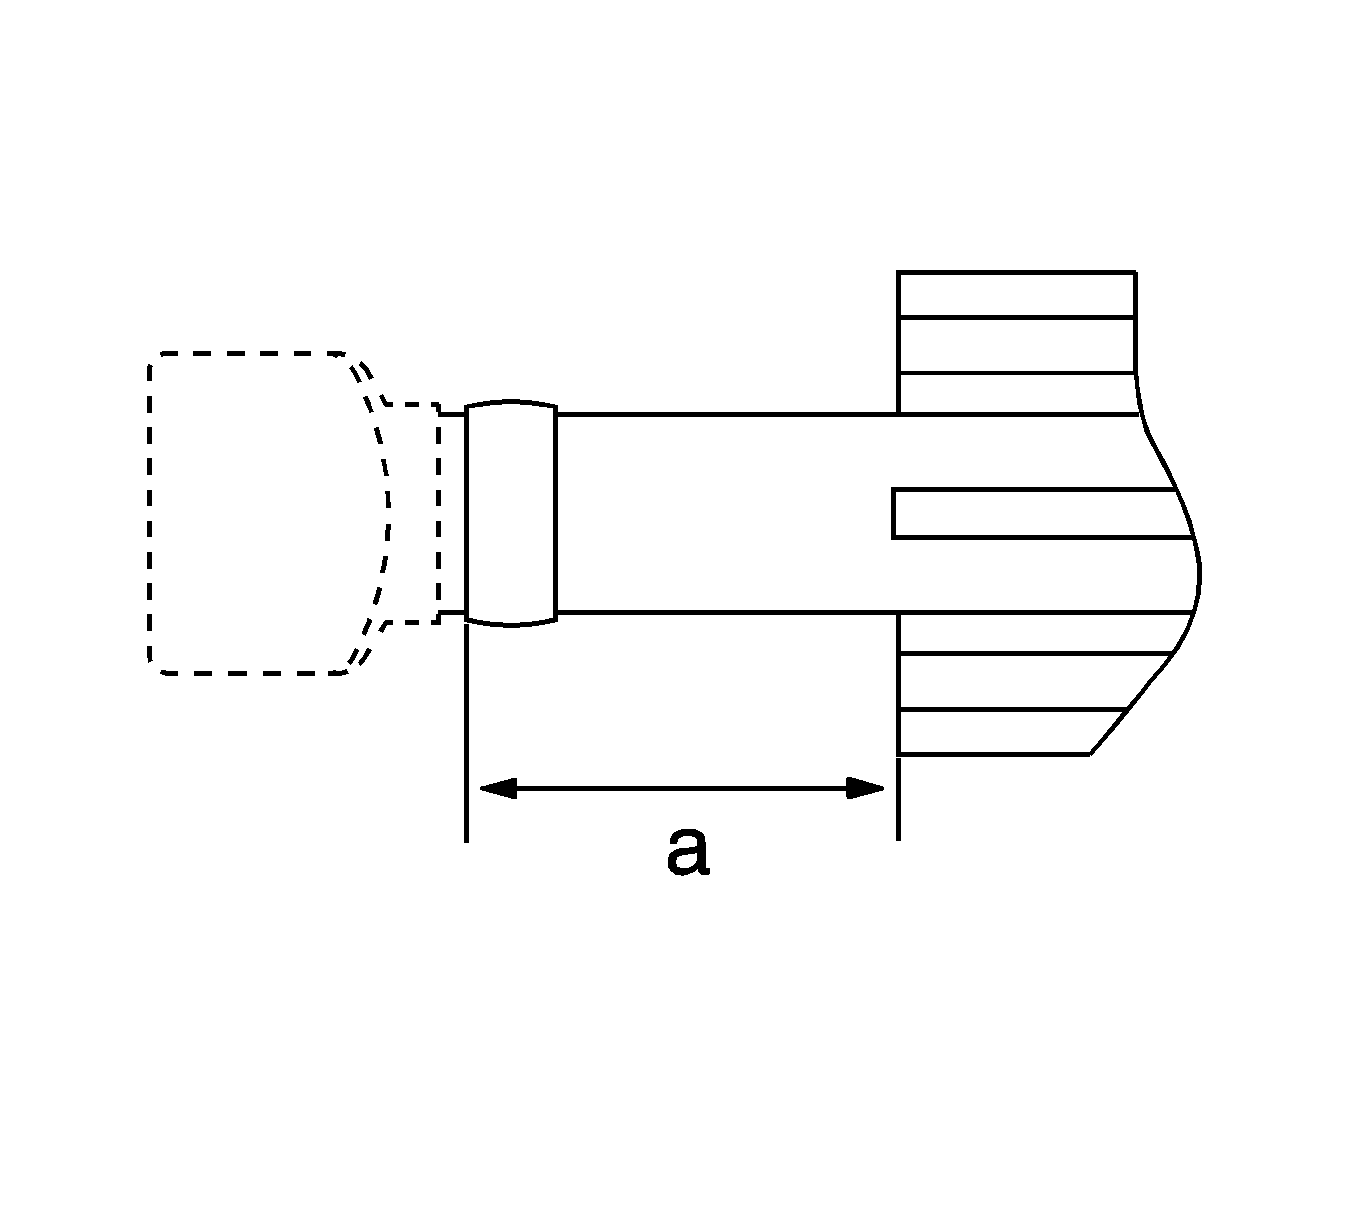
- If the vehicle has a manual transmission and you are installing a NEW reservoir, cut off the clutch tube tip from the reservoir. Ensure the fluid supply is not hindered by the cut.
- With the master cylinder in a vise, install the reservoir (1) to the master cylinder.
- Using a pin punch and a hammer, tap in the straight pin.
- Remove the master cylinder from the vise.
- Bleed the master cylinder. Refer to Master Cylinder Bench Bleeding.
- Install the filter.
- Install the cap.
- Install the master cylinder to the vehicle. Refer to Master Cylinder Replacement.


Specification
The clutch tube length (a) is 22-24 mm (0.866-0.945 in).

Warning: Refer to Brake Fluid Warning in the Preface section.
Caution: Refer to Filling the Master Cylinder Caution in the Preface section.
