For 1990-2009 cars only
Removal Procedure
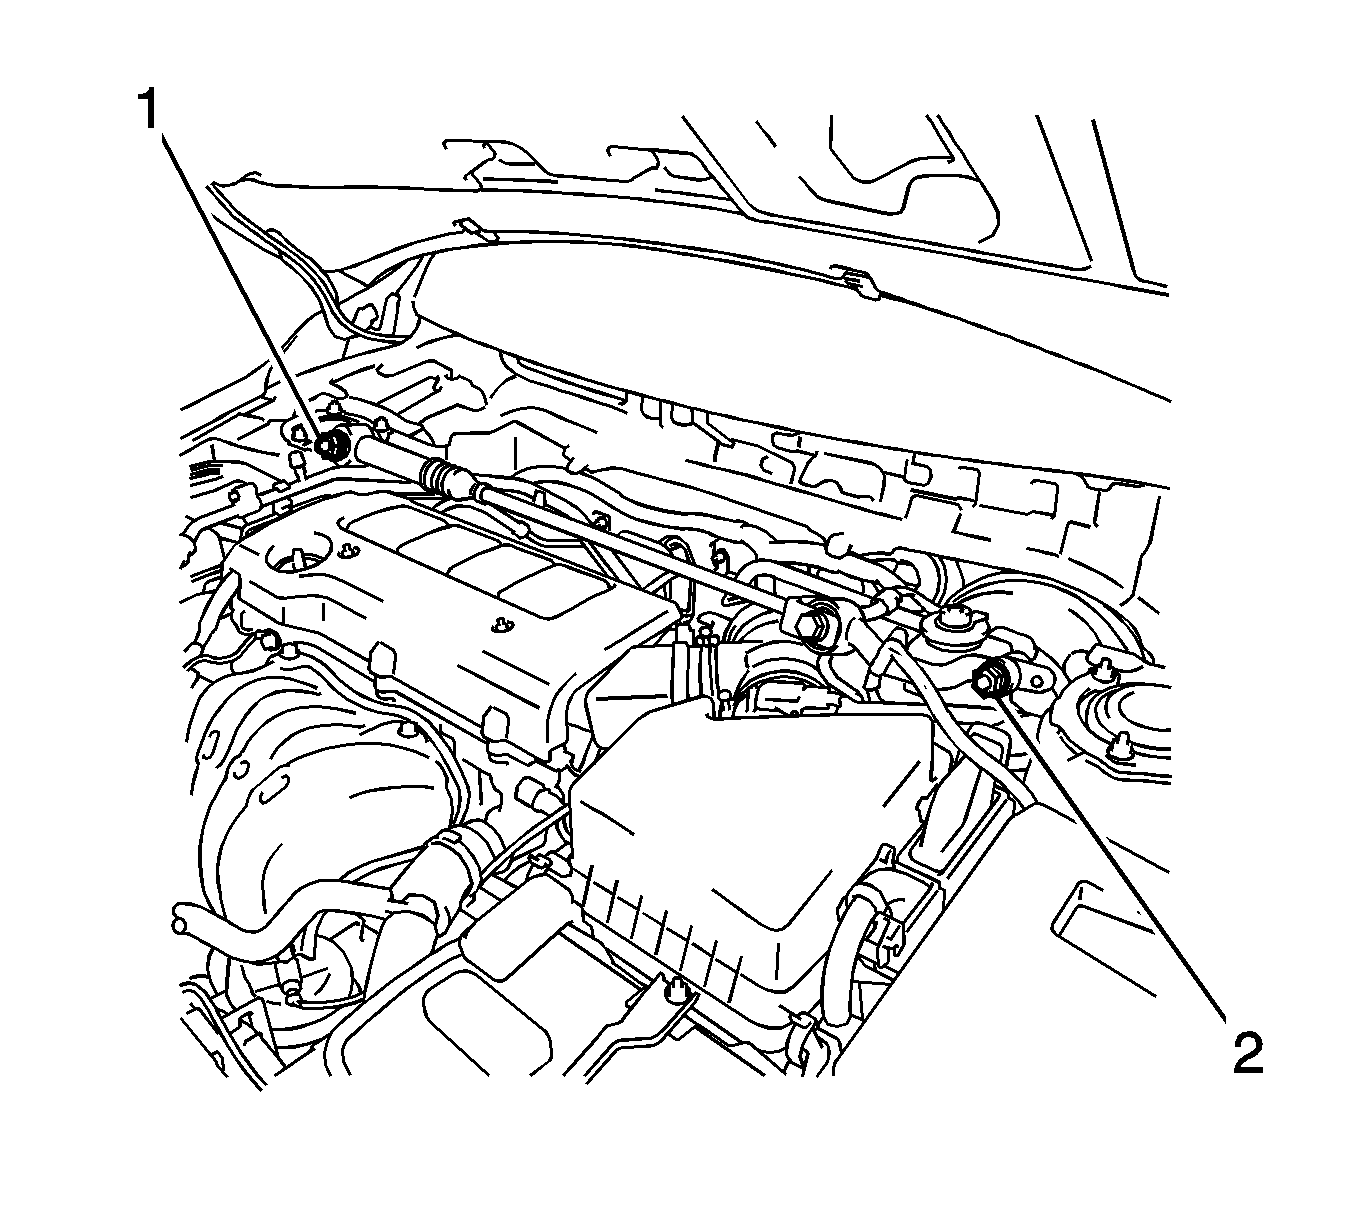
- Remove the 2 nuts (1, 2).
- Remove the damper and the tie bar.

Inspection Procedure
- Push and pull on the damper rod (1) 4 times. Test the damper for a lack of resistance or a noise.
- Inspect the damper for oil leaks.
- Inspect the tie bar assembly for bent or scratched components.
- If the damper is damaged, dispose the damper.

Disposal Procedure
- Clamp the damper in a vise horizontally with the rod completely extended.
- Make an indentation on the end of the damper (a) with a center punch.
- Drill a hole in the indentation on the damper using a 5 mm (3/16 in) drill bit. Gas and/or oil will escape when the drill bit penetrates the damper. Use shop towels in order to contain the escaping oil.
- Remove the damper from the vise.
- Hold the damper over a drain pan with the hole down. Move the rod in and out of the damper in order to drain the oil from the damper.

Warning: Use the proper eye protection when drilling to prevent metal chips from causing physical injury.
Installation Procedure
- Install the damper and the tie bar to the brackets.
- Install the 2 nuts (1, 2).
- Tighten the 2 nuts that retain the tie bar to the brackets to 52 N·m (38 lb ft).

Caution: Refer to Fastener Caution in the Preface section.
