For 1990-2009 cars only
Inspection Procedure
- Install the camshaft timing gear assembly if necessary.
- Clamp the camshaft in a vise, and make sure that the camshaft timing gear assembly does not rotate.
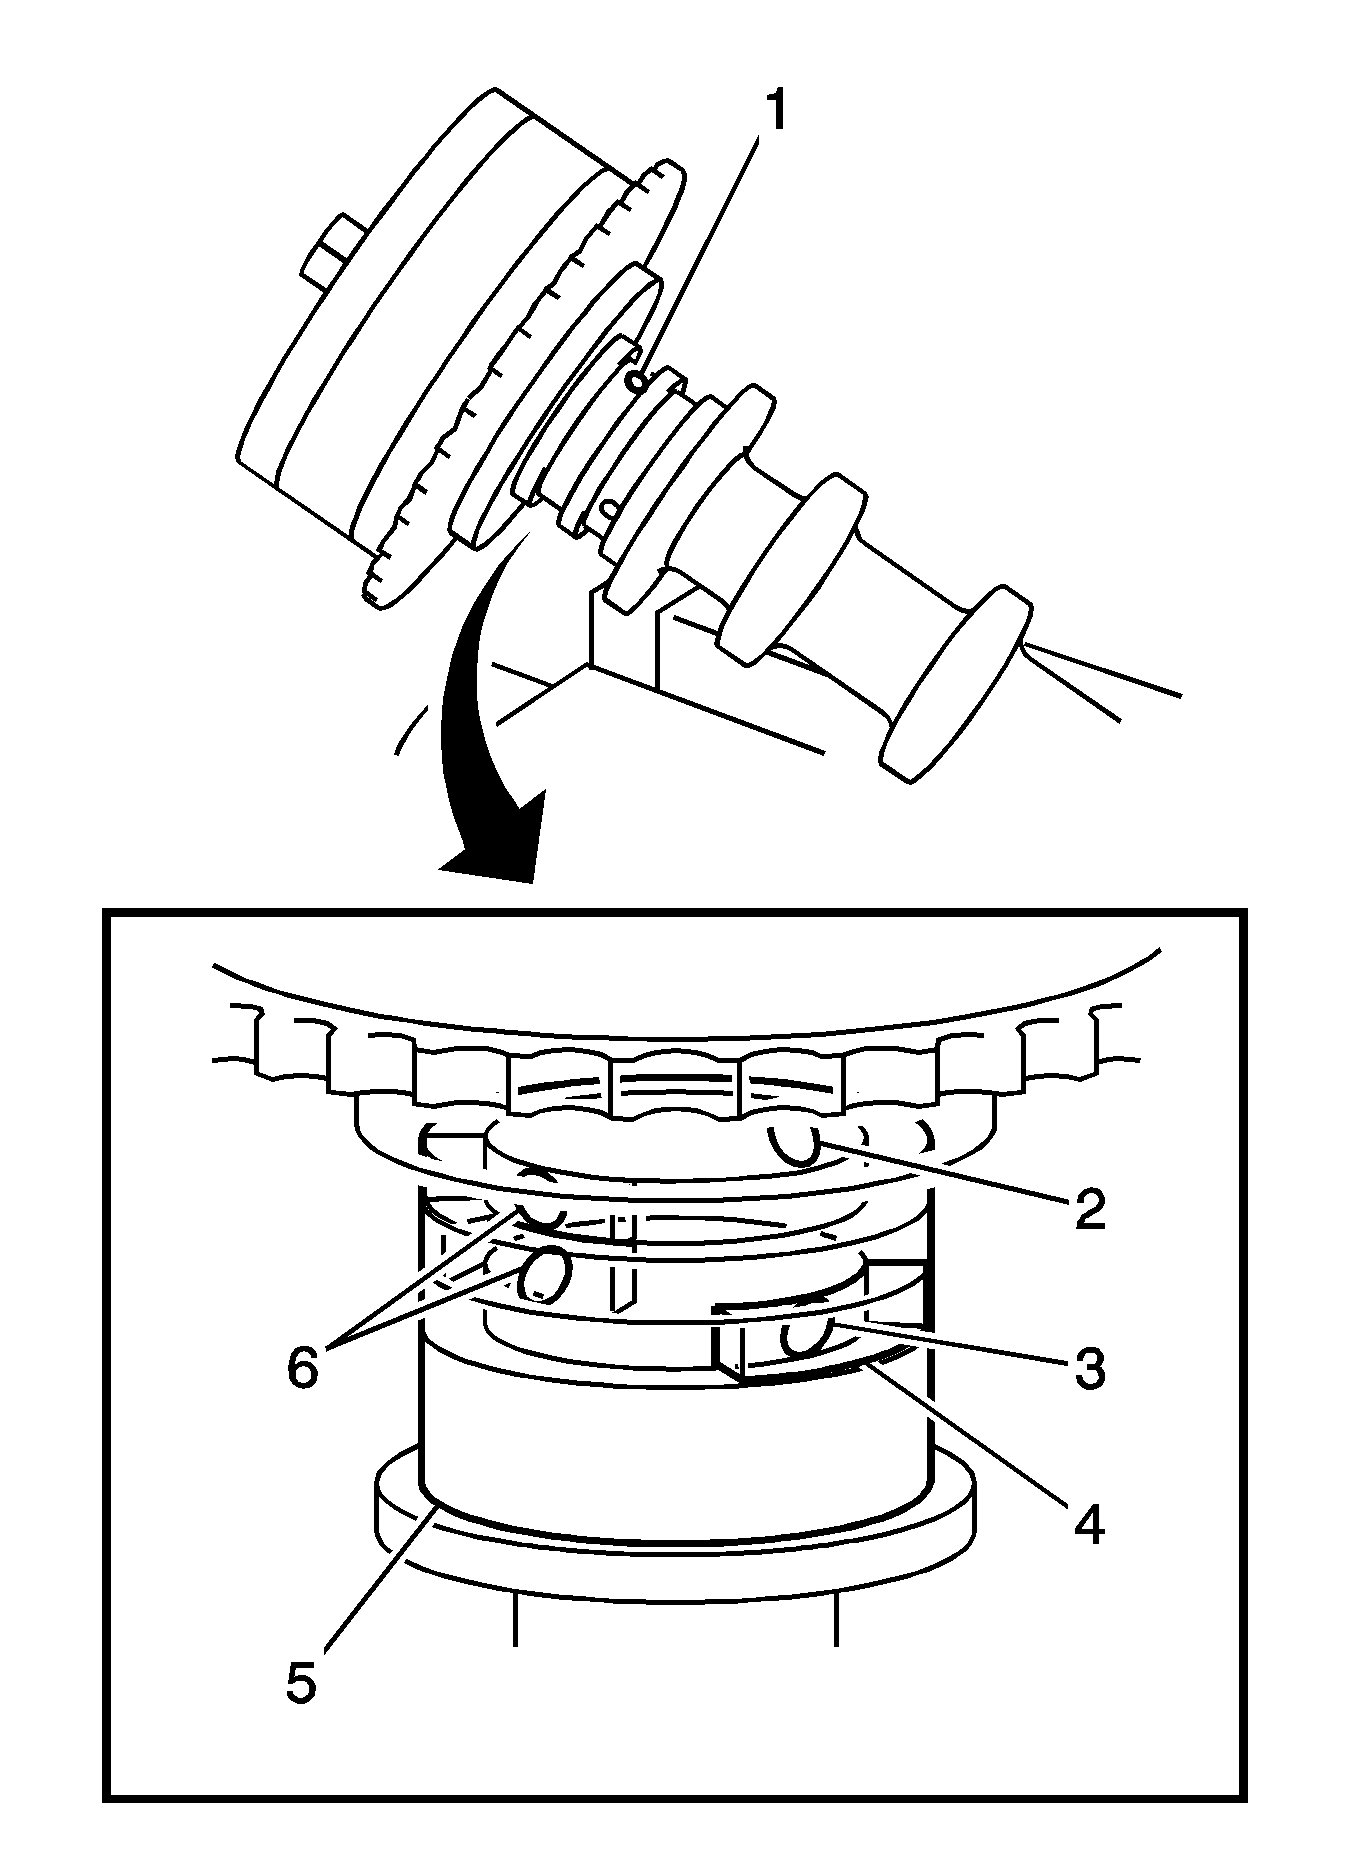
- Cover all the oil paths with vinyl tape (5) except the advance side (1) path shown in the illustration.
- Apply air pressure of 150 kPa (1.5 kgf/cm², 22 psi) to the oil path.
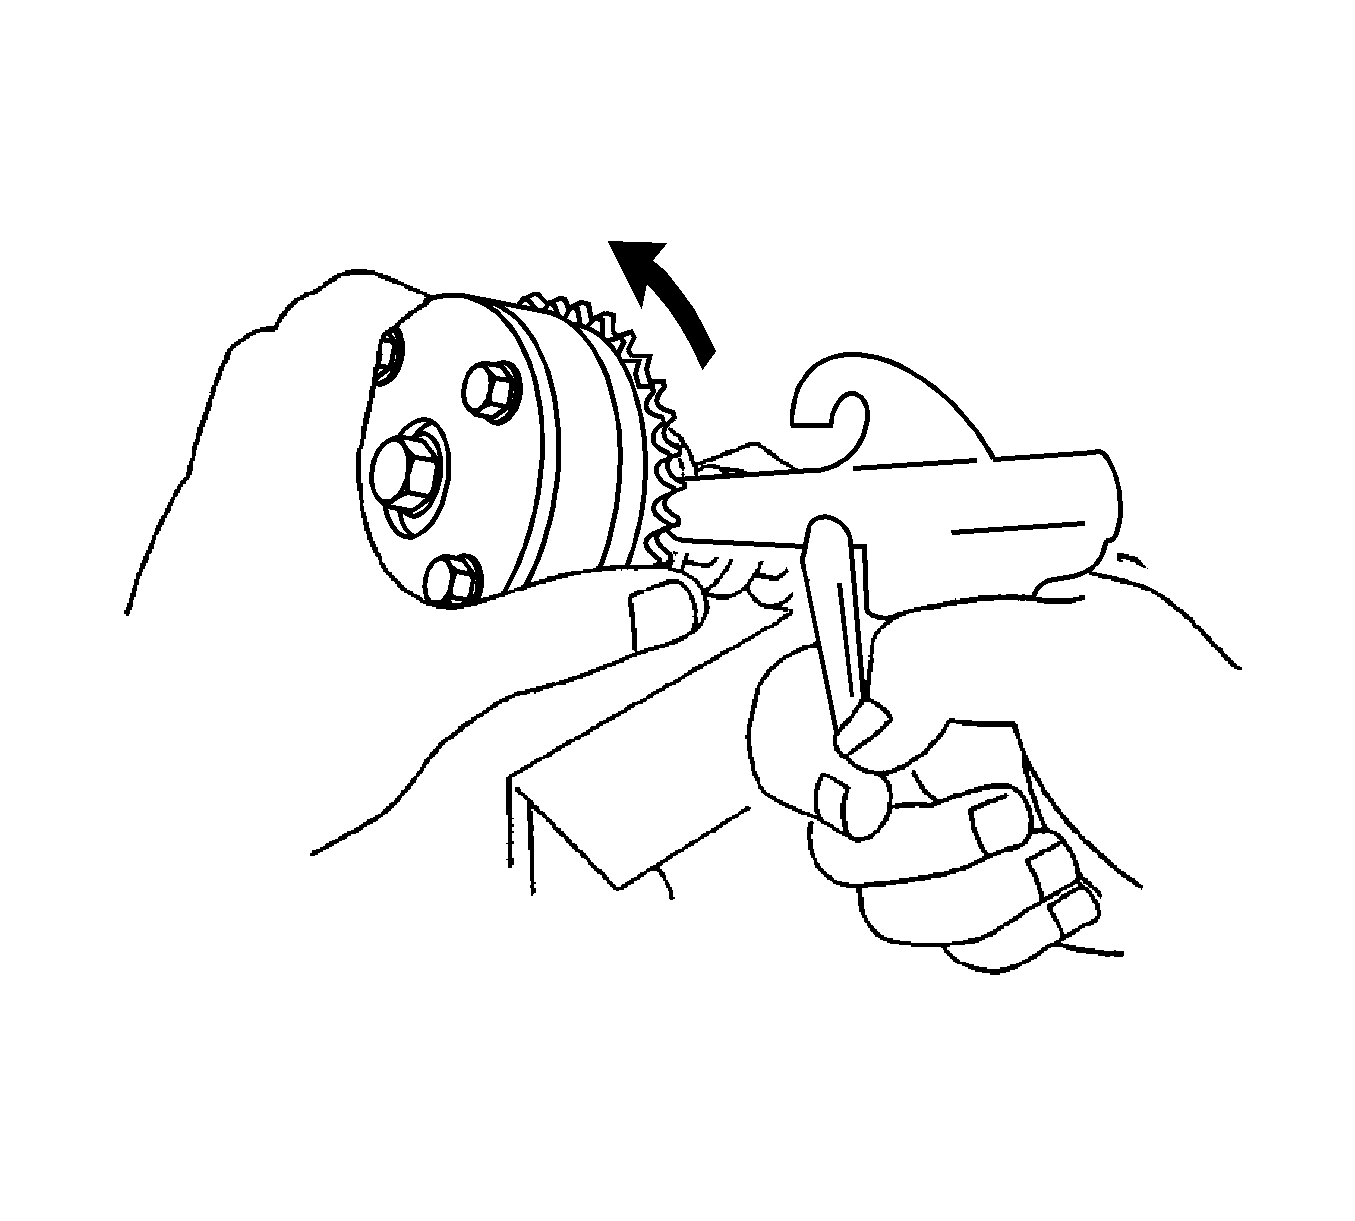
- Check that the camshaft timing gear moves in the advance direction (counterclockwise) by hand.
- Check for smooth rotation. Turn the camshaft timing gear within its movable range (21°) 2 or 3 times, but do not turn it to the most retarded position. Make sure that the gear turns smoothly.
- Check the lock in the most retarded position. Confirm that the camshaft timing gear is locked at the most retarded position.
- Remove the camshaft timing gear assembly.


Note: Cover the paths with a piece of cloth to avoid oil splashes.
Note: Depending on the air pressure, the camshaft timing gear may turn to the advance side without applying force by hand. Also, if enough air pressure cannot be applied because of air leakage from the path, releasing the lock pin may be difficult.
Note: Do not use air pressure to perform the smooth rotation check.
