For 1990-2009 cars only
Removal Procedure
- Disconnect cable from negative battery terminal. Refer to Battery Negative Cable Disconnection and Connection.
- Remove air cleaner assembly with hose. Refer to Air Cleaner Element Replacement.
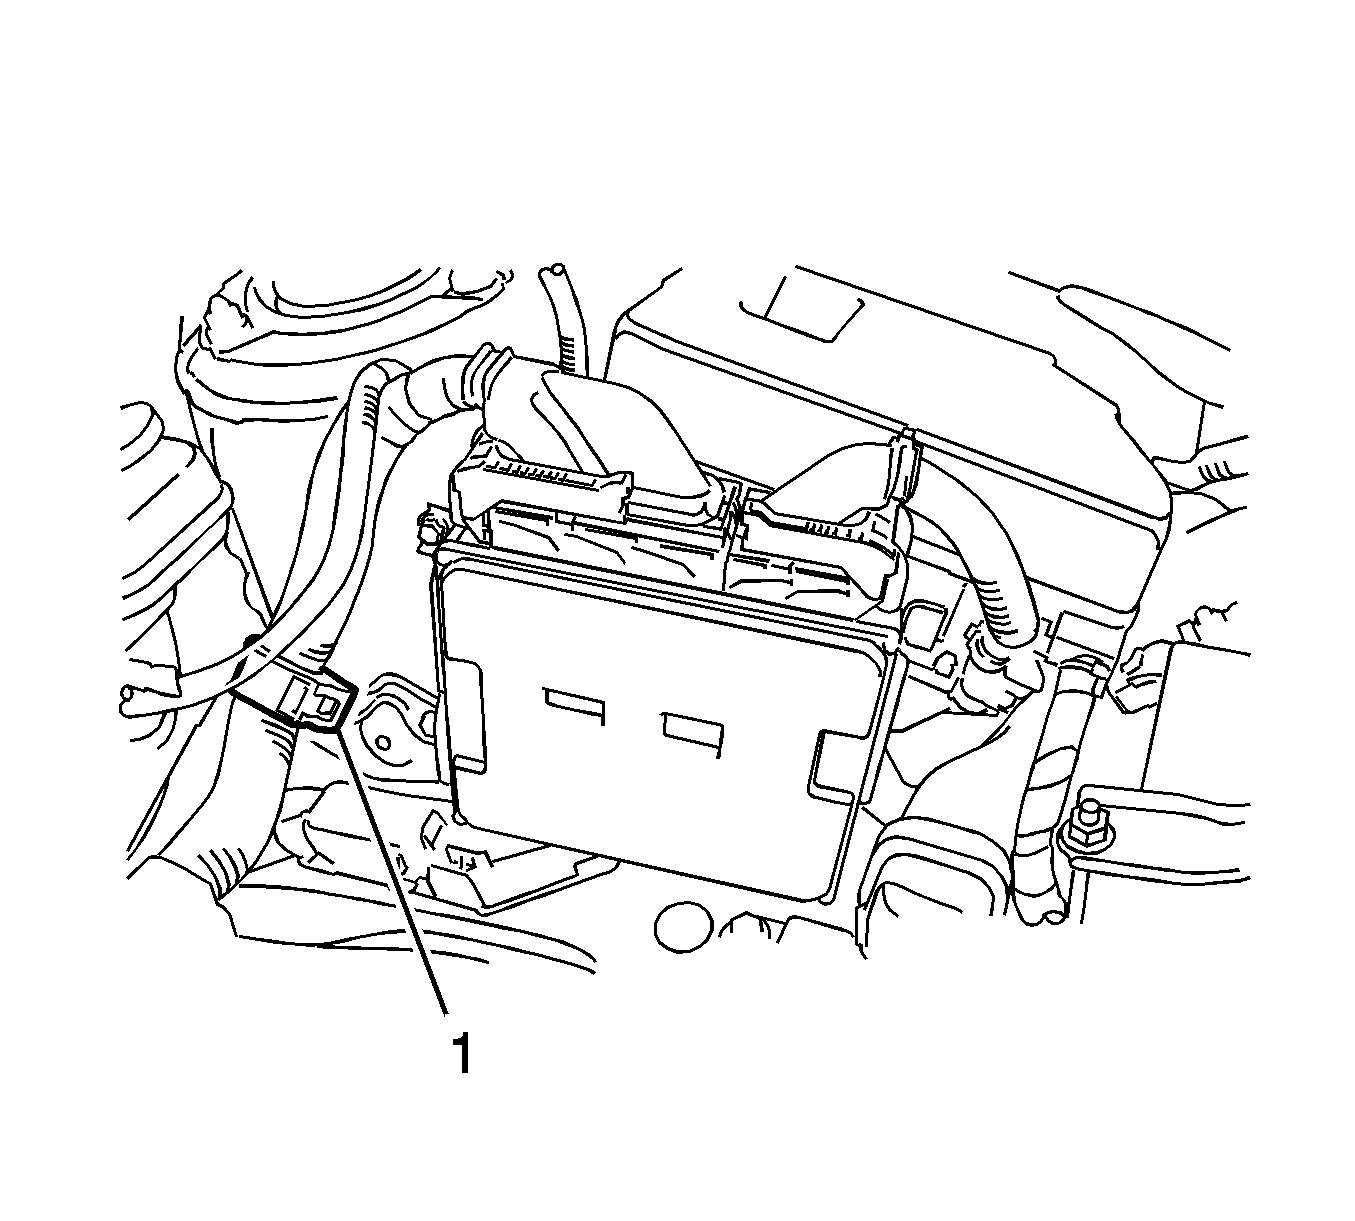
- Separate the wire harness clamp (1).
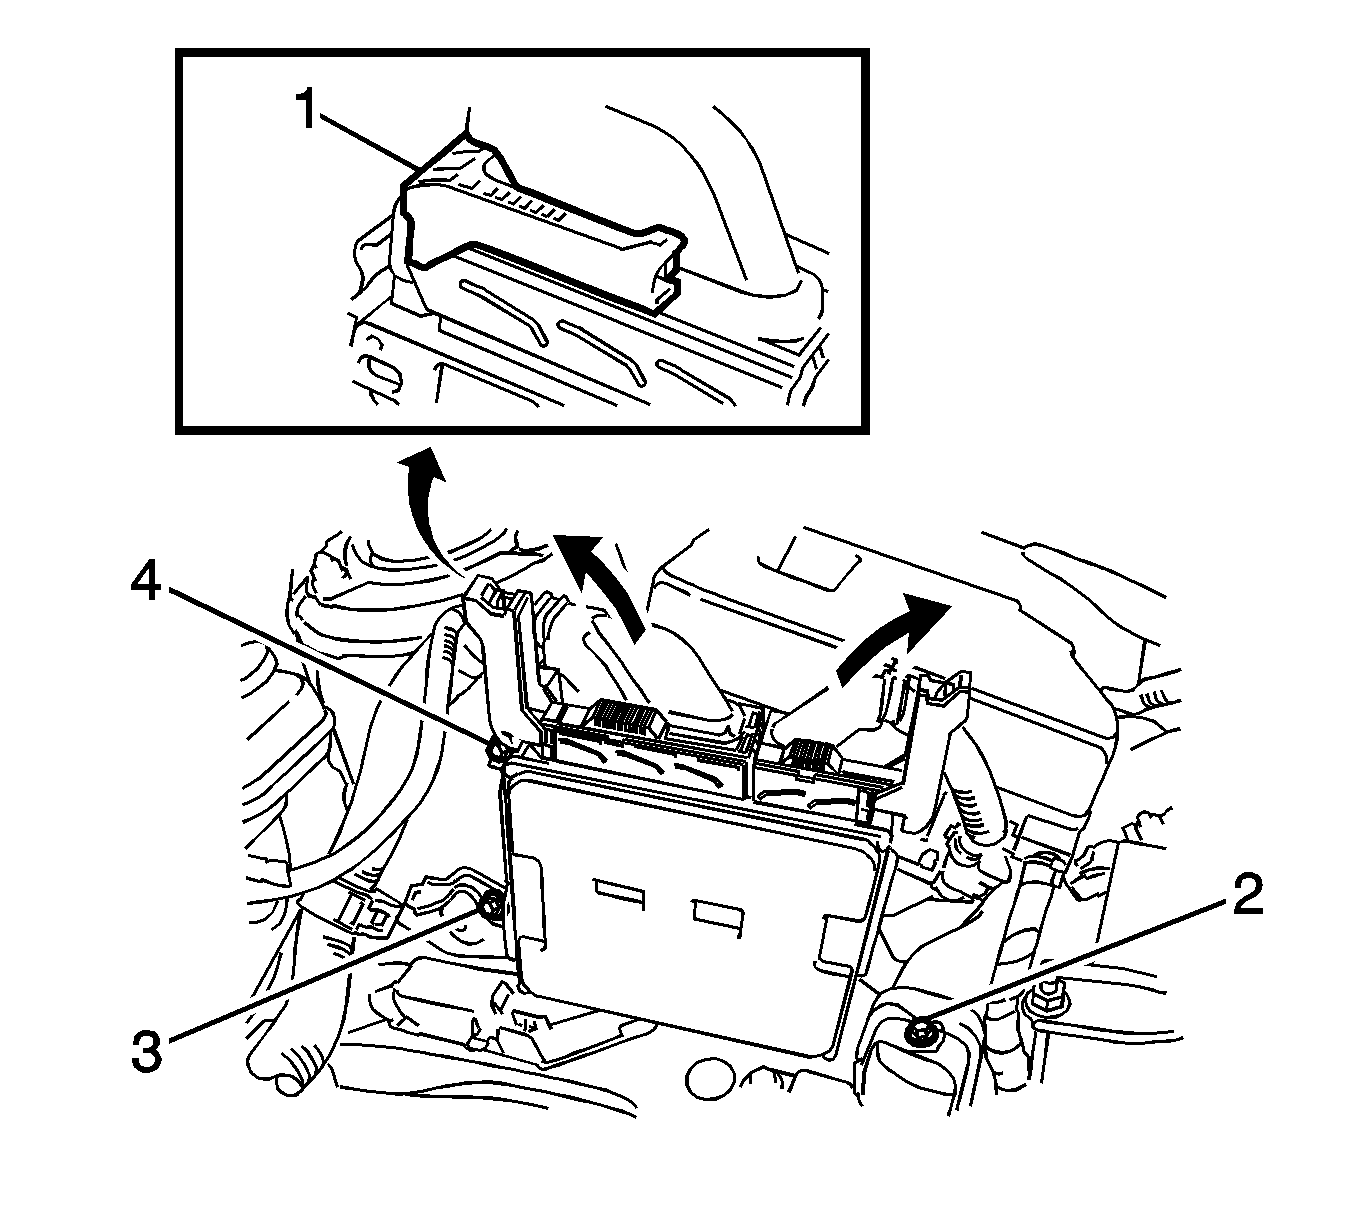
- Disconnect the 2 ECM connectors.
- Push the locks on the 2 levers (1), then raise the levers, and disconnect the 2 ECM connectors.
- Remove the 3 bolts (2, 3, 4) and the ECM.
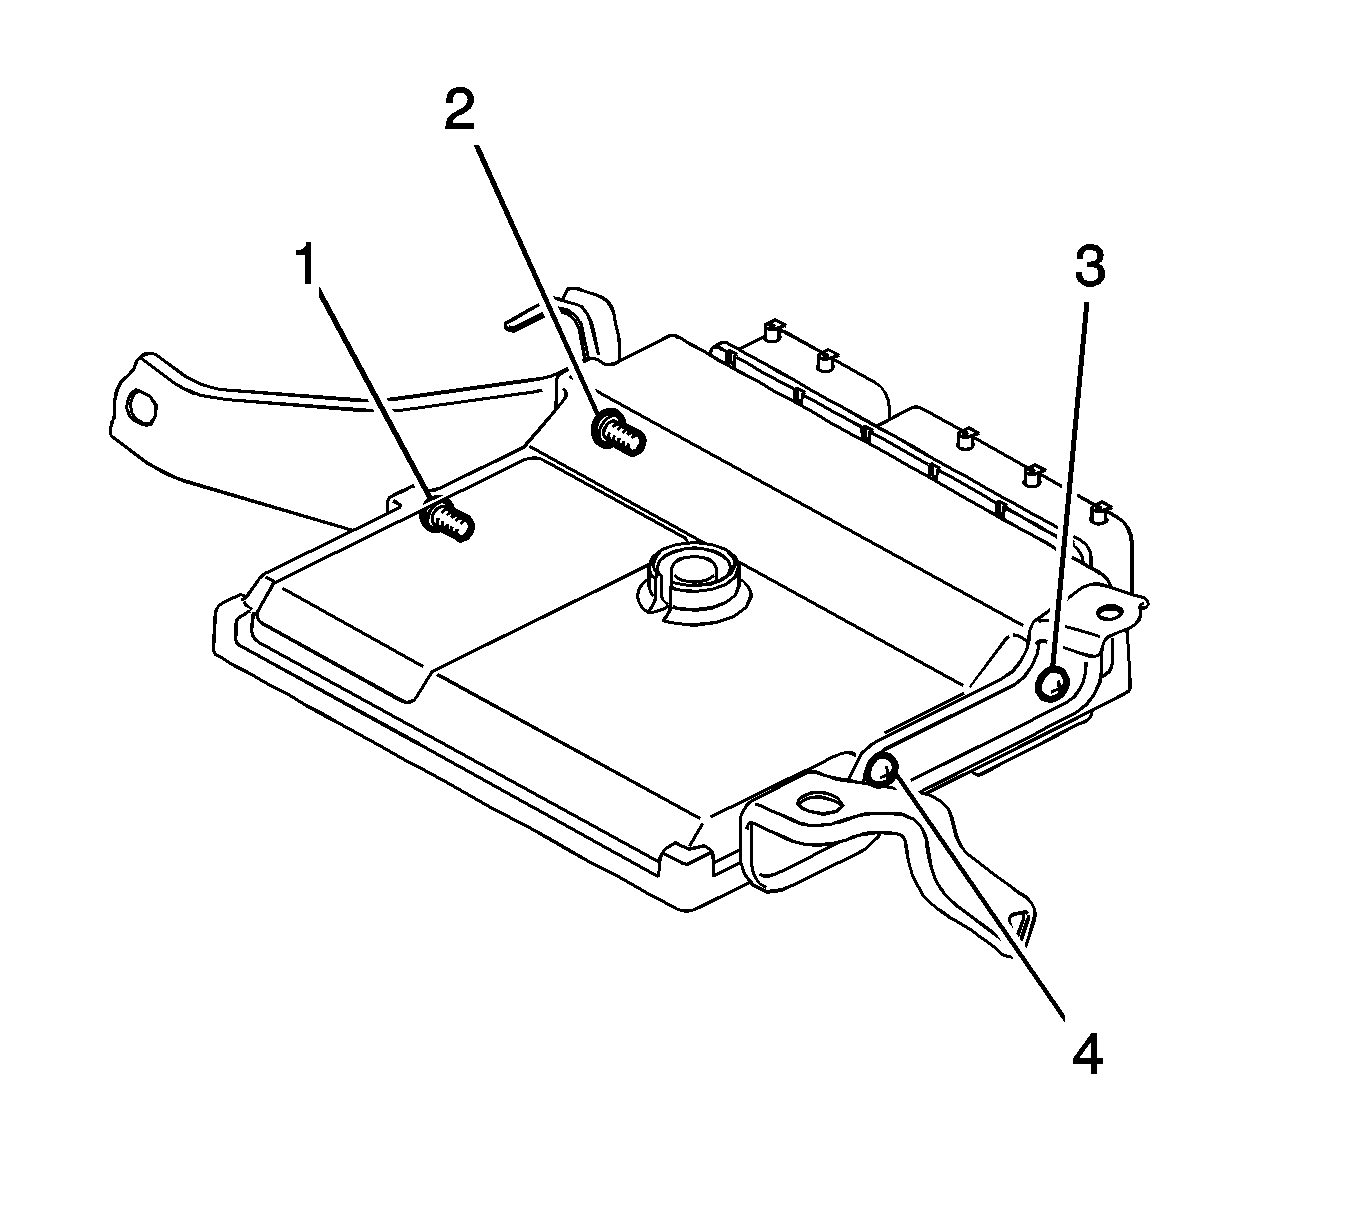
- Remove the 4 screws (1, 2, 3, 4) and 2 ECM brackets.


Note: After disconnecting the connectors, make sure that dirt, water or other foreign matter does not contact the connecting parts of the connectors.

Installation Procedure
- Install the 2 ECM brackets onto the ECM with the 4 screws (1, 2, 3, 4) and tighten to 3.2 N·m (28 lb in).
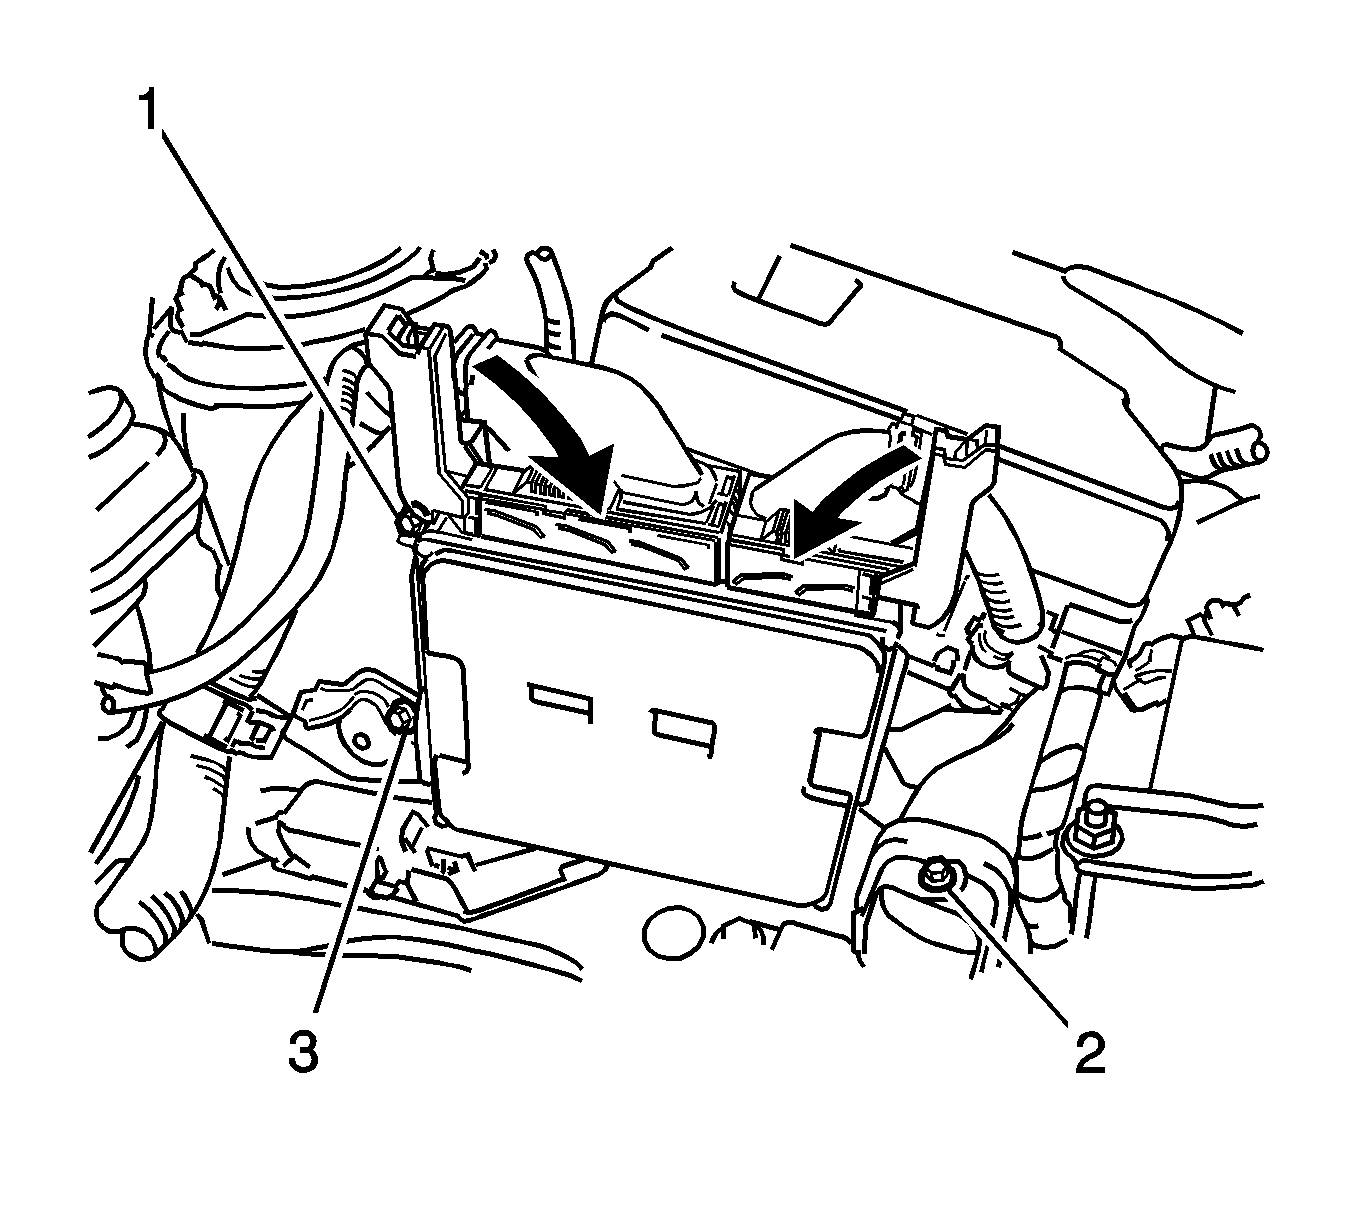
- Install the ECM with the 3 bolts (1, 2, 3) and tighten to 8.0 N·m (71 lb in).
- Connect the 2 ECM connectors and lower the 2 levers.
- Install the wire harness clamp (1).
- Install air cleaner assembly with hose. Refer to Air Cleaner Element Replacement.
- Connect cable to negative battery terminal.
- Perform the REGISTRATION (VIN registration) when replacing the ECM. Refer to Control Module References.
Caution: Refer to Fastener Caution in the Preface section.


