For 1990-2009 cars only
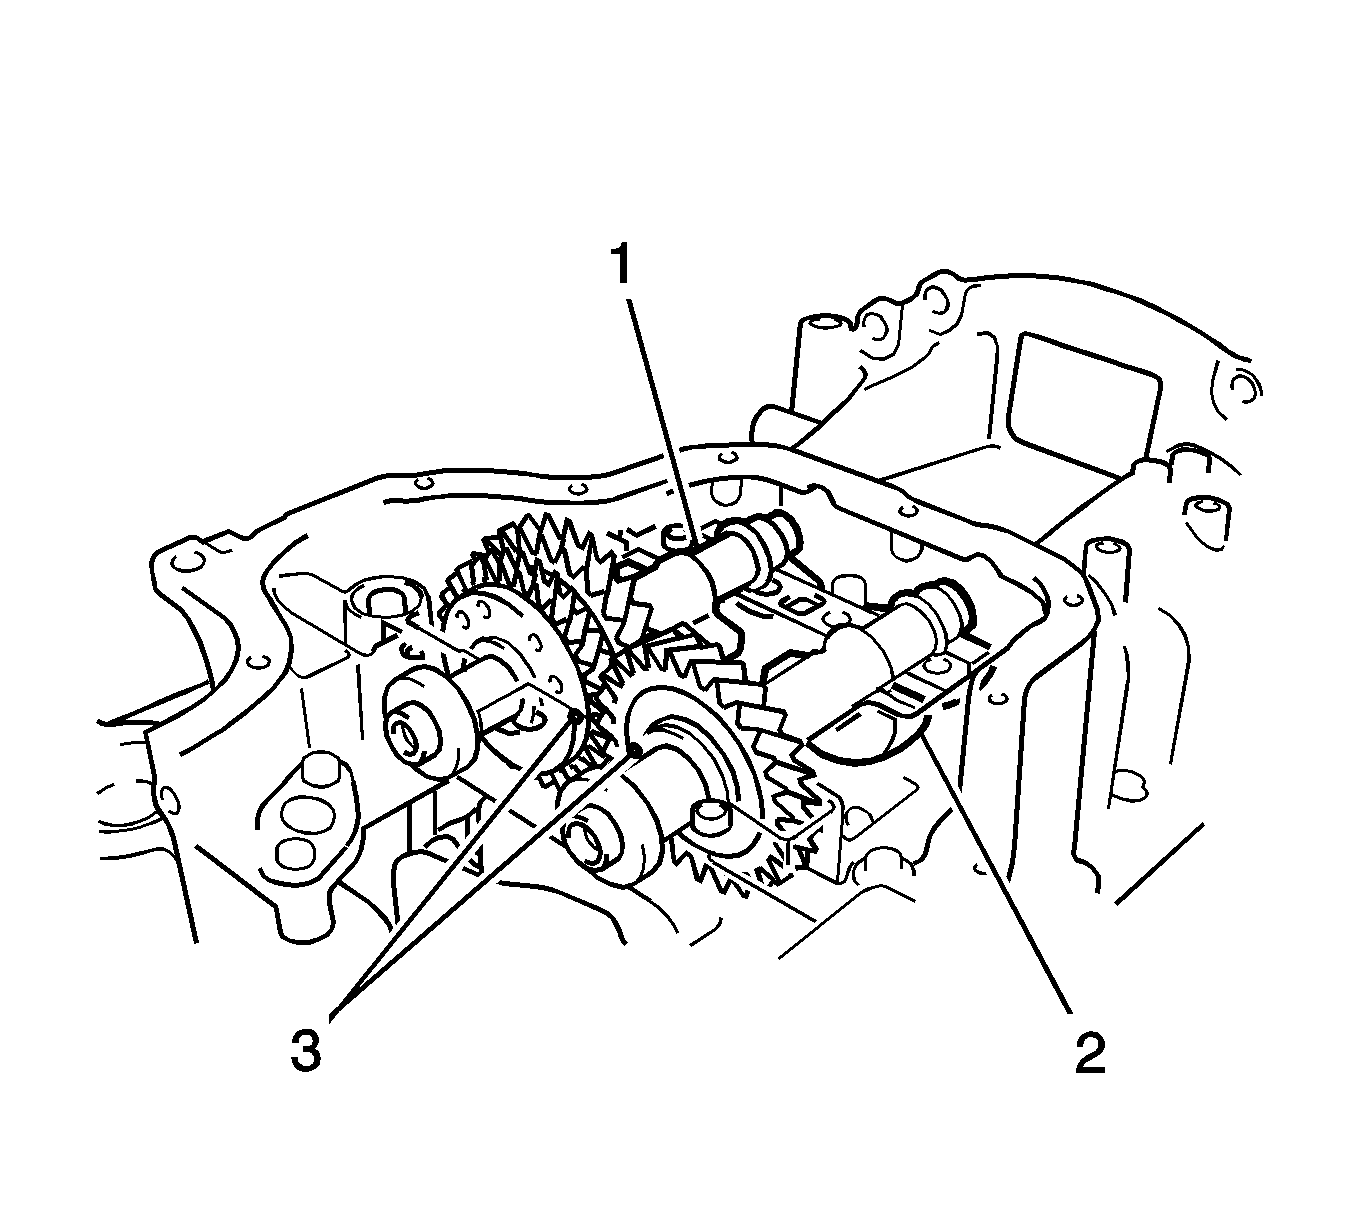
- Install the balanceshafts.
- Rotate the driven gear of the balanceshaft in the rotating direction until it hits the stopper.
- Confirm that the timing marks on the balanceshafts (3) are aligned.
- Align the timing marks (3) on the balanceshafts as shown in the illustration.
- Place the balanceshafts onto the crankcase.
- Apply a light coat of engine oil to the threads and under the heads of the bolts.
- Using several steps, uniformly install and tighten the 8 bolts in the sequence shown in the illustration.
- Mark the front of the bolts with paint (1).
- Further tighten the bolts by 90 degrees (a) as shown in the illustration.
- Check that the paint mark is now at a 90-degree angle to the front.

Note: Confirm that the matchmarks (3) on the driven gears are matched.


Caution: Refer to Fastener Caution in the Preface section.

Tighten
Tighten the bearing cap bolts to 22 N·m (16 lb ft).


