For 1990-2009 cars only
- Install stiffening crankcase assembly.
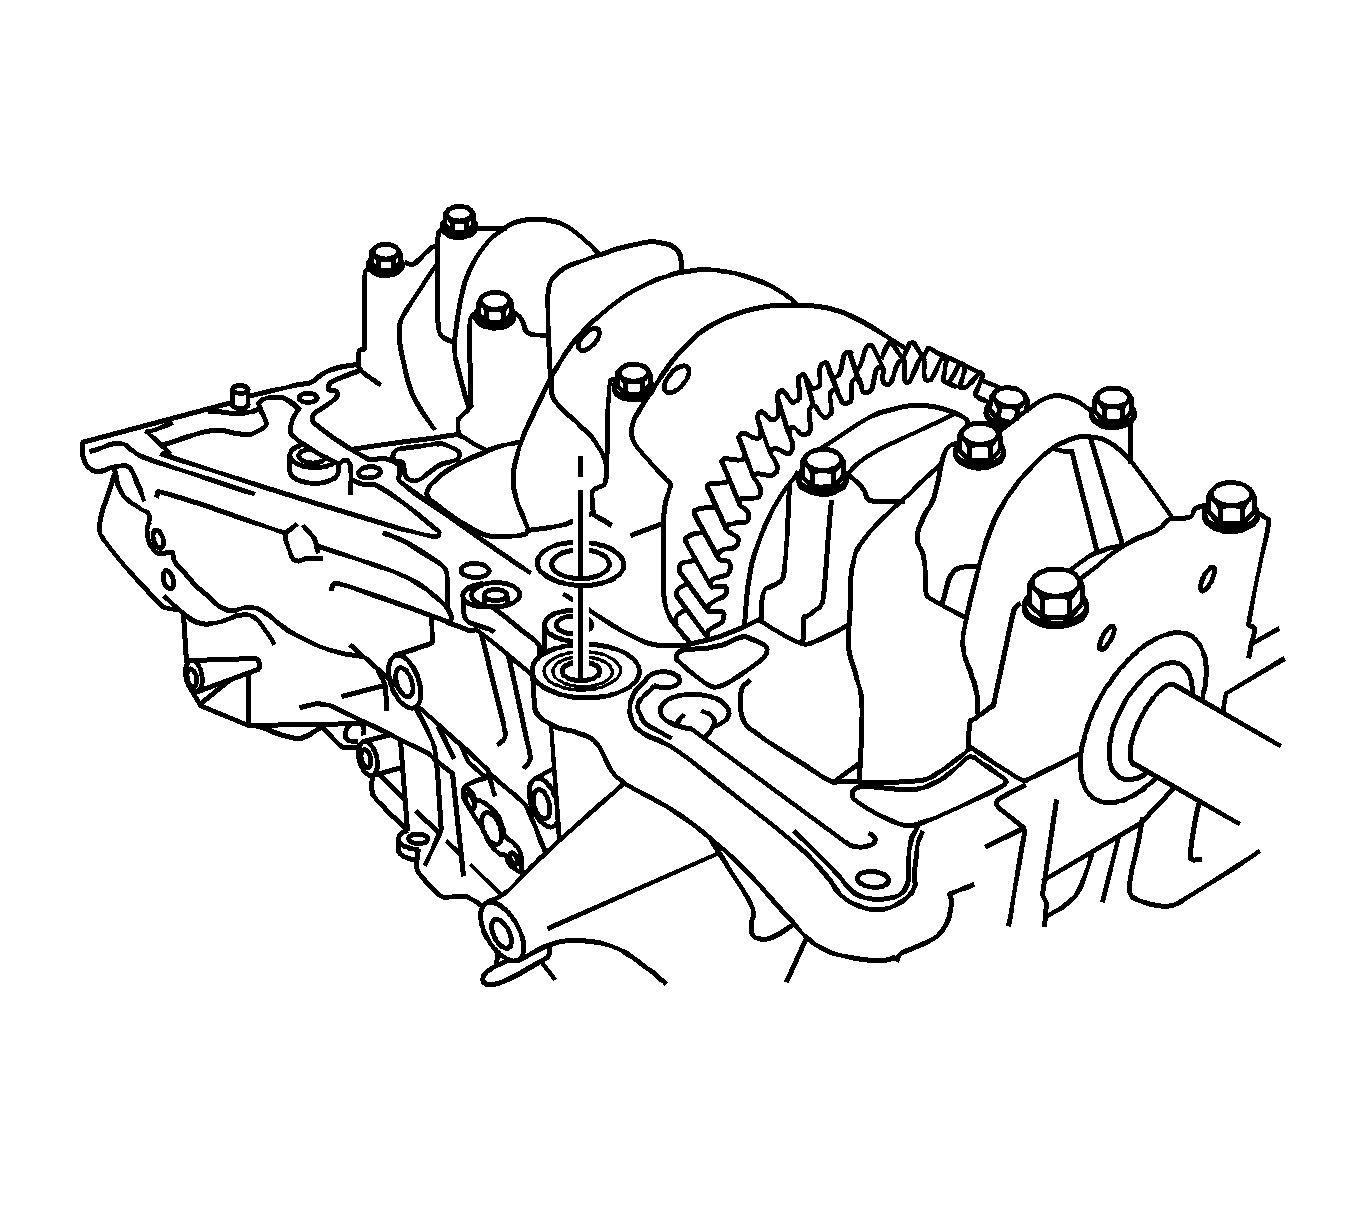
- Place a new O-ring on the cylinder block as shown in the illustration.
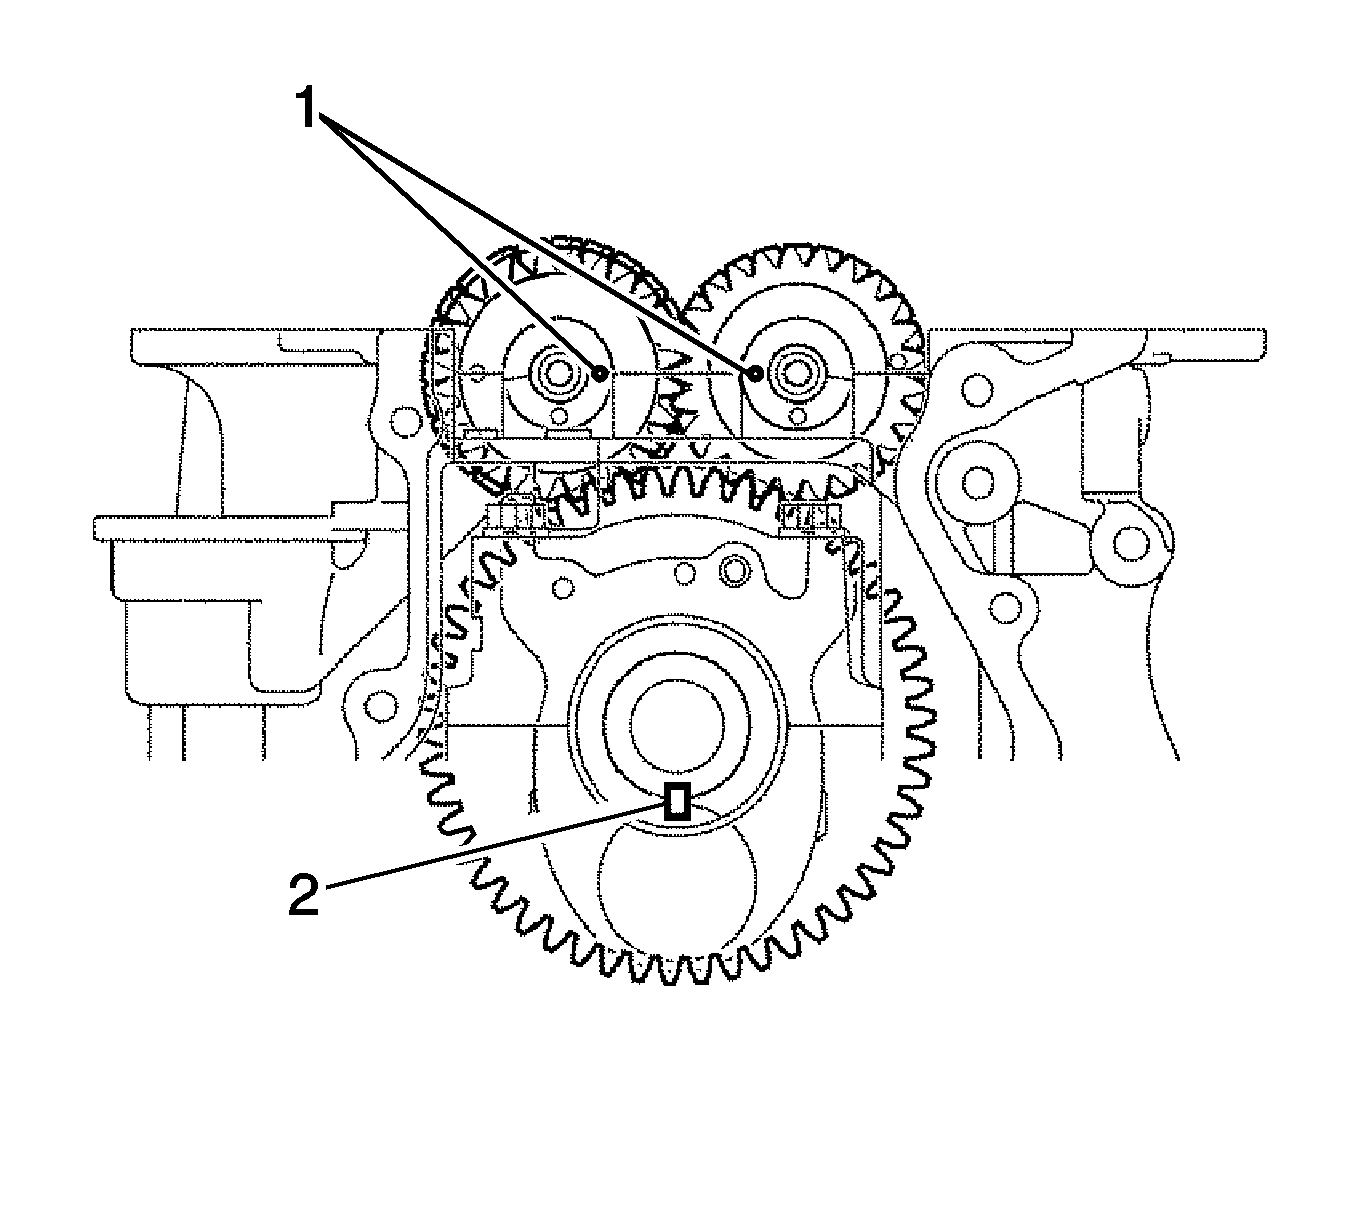
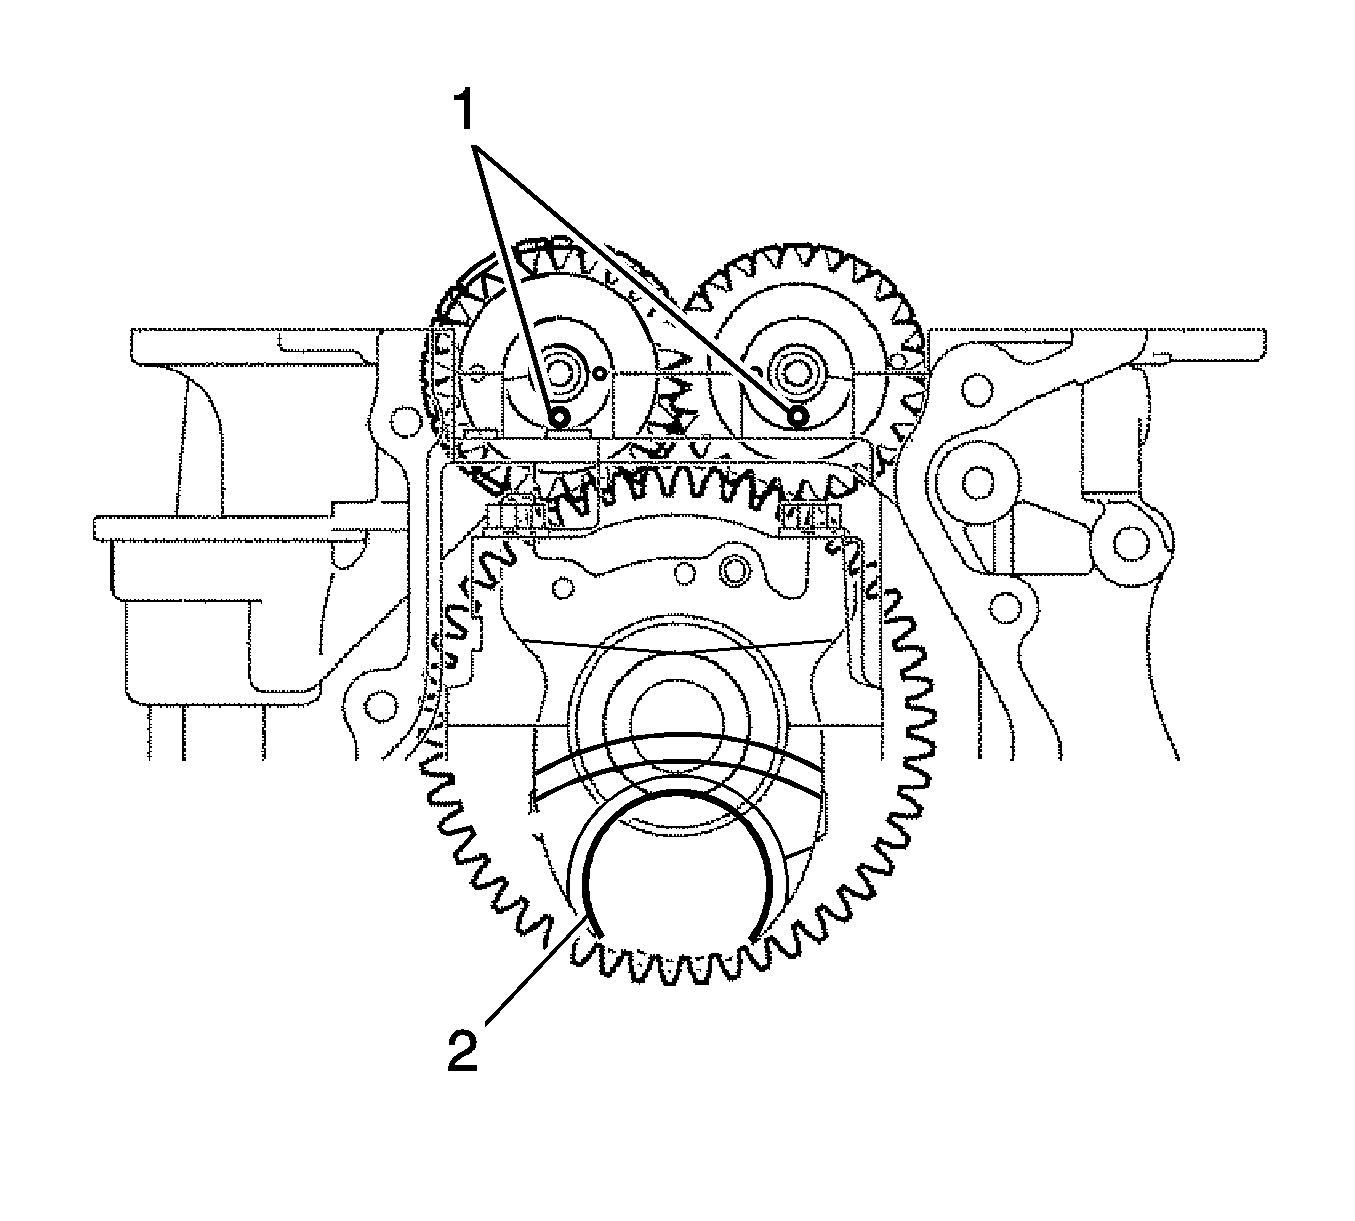
- With the No. 1 crank pin of the crankshaft placed at the 6 o'clock position, install the balanceshafts and align the adjusting holes (1) as shown in the illustration.
- Apply a continuous bead of sealant (1-4) (Diameter 2.5 to 3.0 mm (0.098 to 0.118 in)) as shown in the illustration.
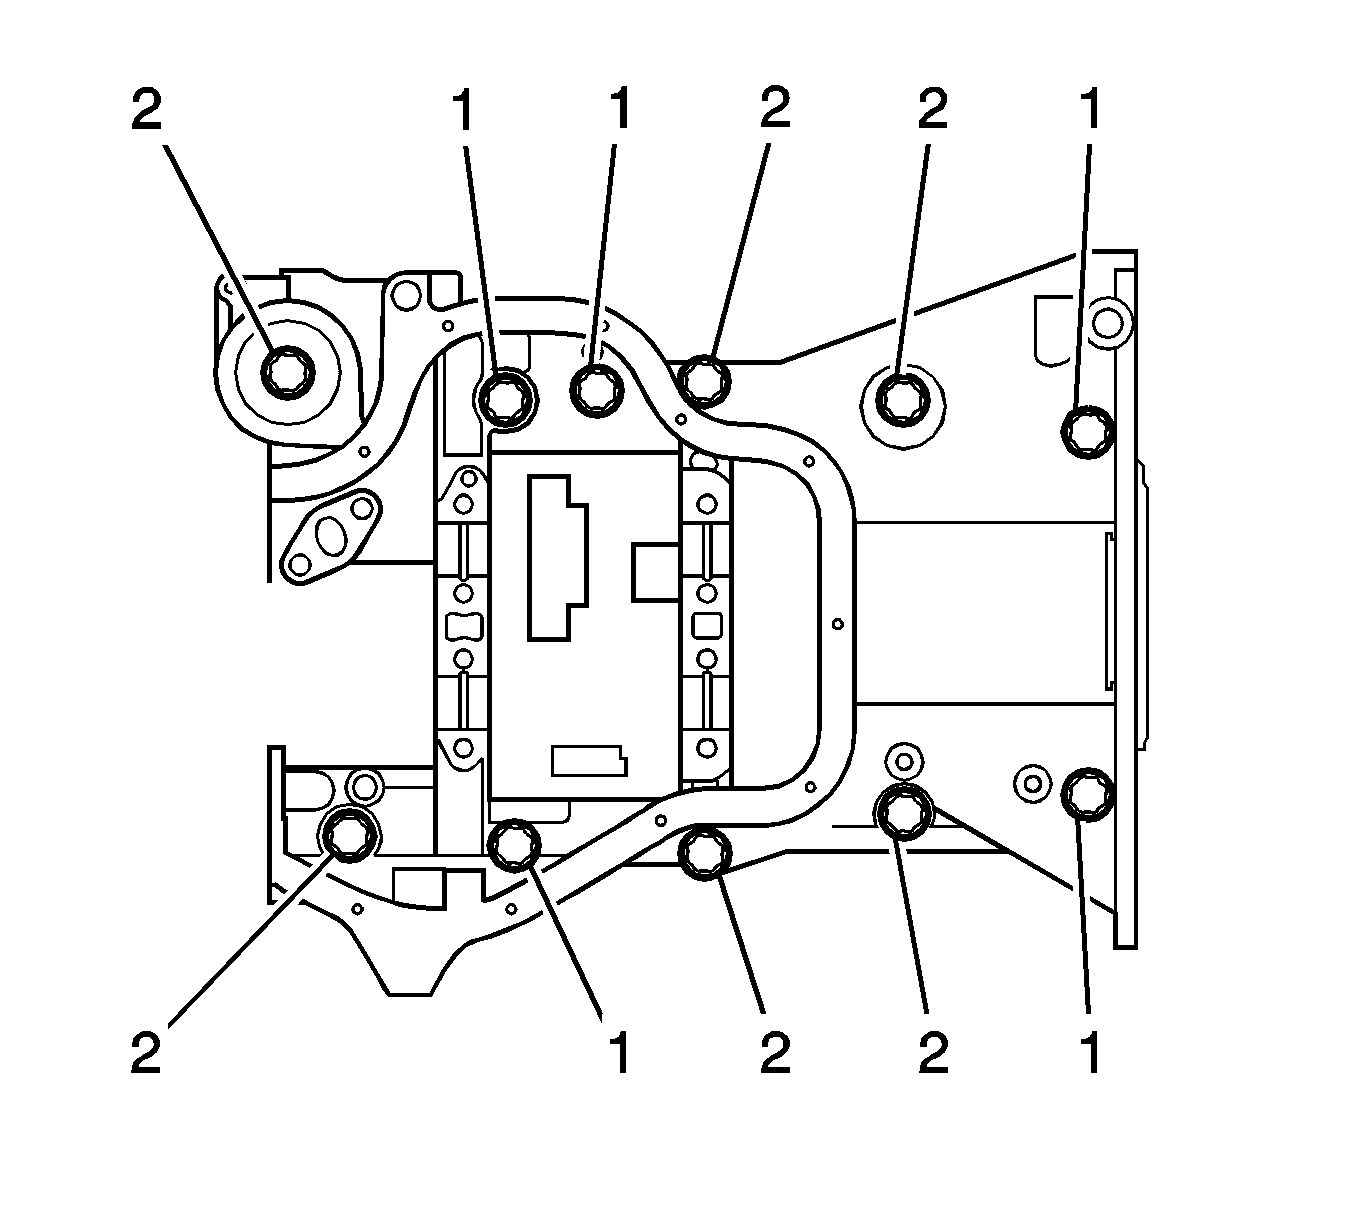
- Temporarily install the crankcase with the 11 bolts (1, 2).
- Uniformly tighten the bolts.
- Confirm that the timing marks (1) on the balanceshafts are aligned when the key groove is placed at the 6 o'clock position, as shown in the illustration.
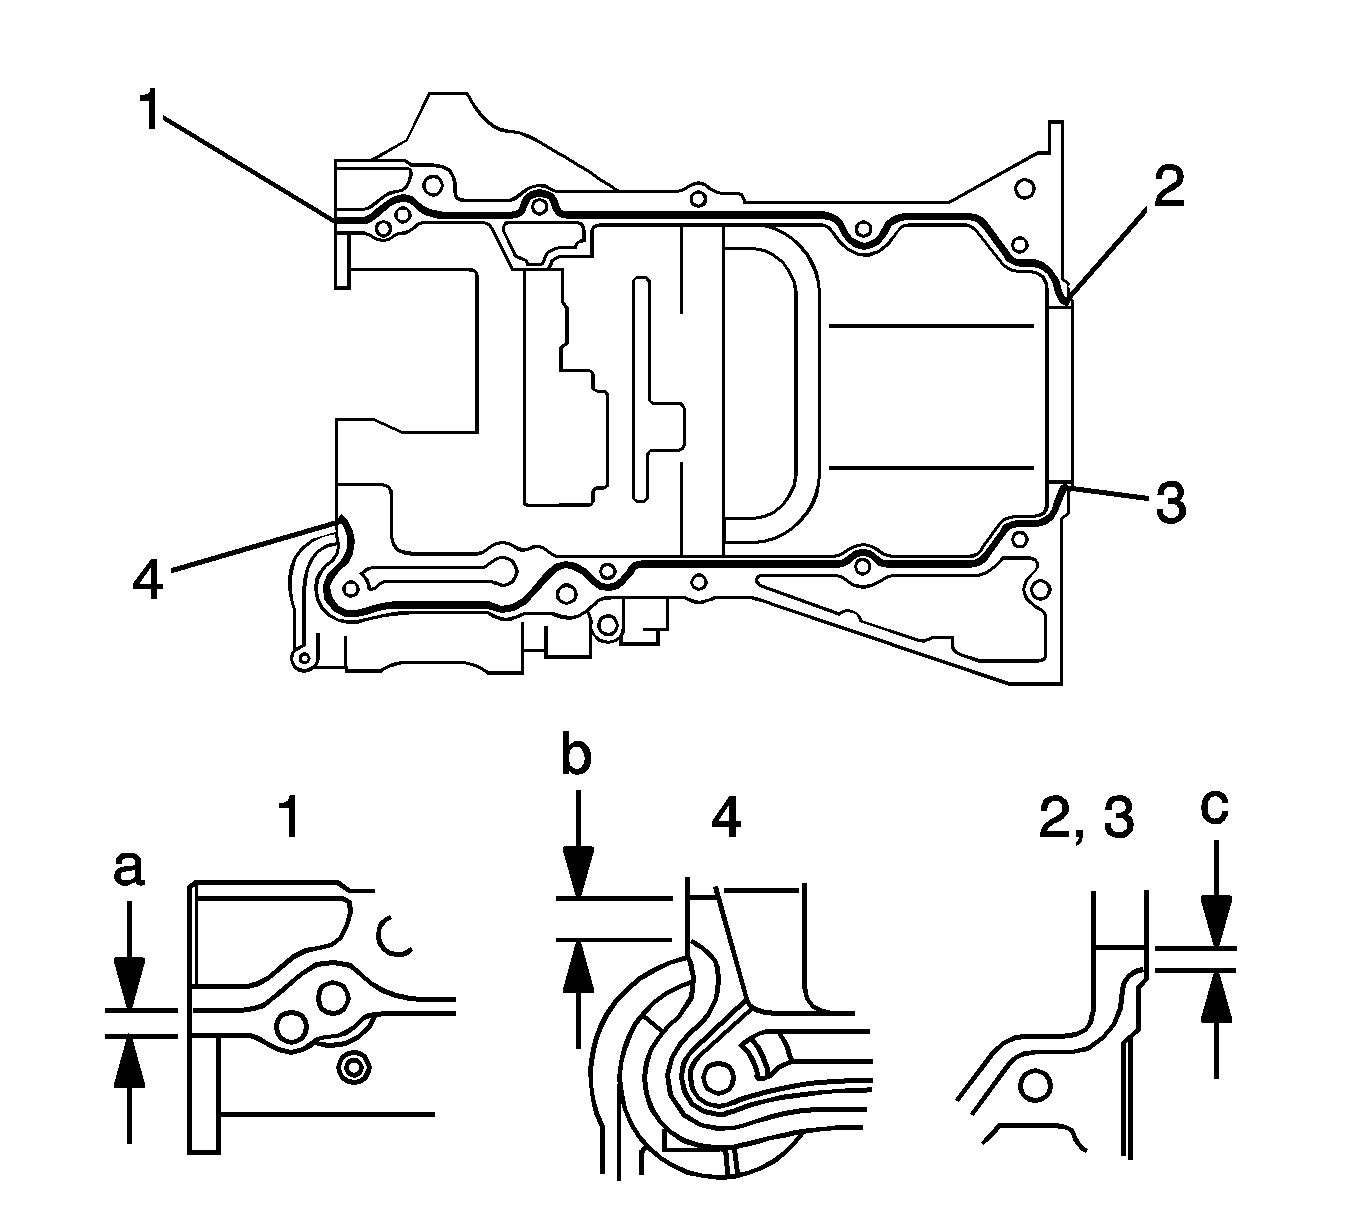
Note: Remove any oil from the contact surfaces. Install the crankcase within 3 minutes of applying seal packing. Do not add engine oil for at least 2 hours after installing the crankcase.
Caution: Refer to Fastener Caution in the Preface section.
Tighten
Tighten the bolts to 24 N·m (18 lb ft).
