For 1990-2009 cars only
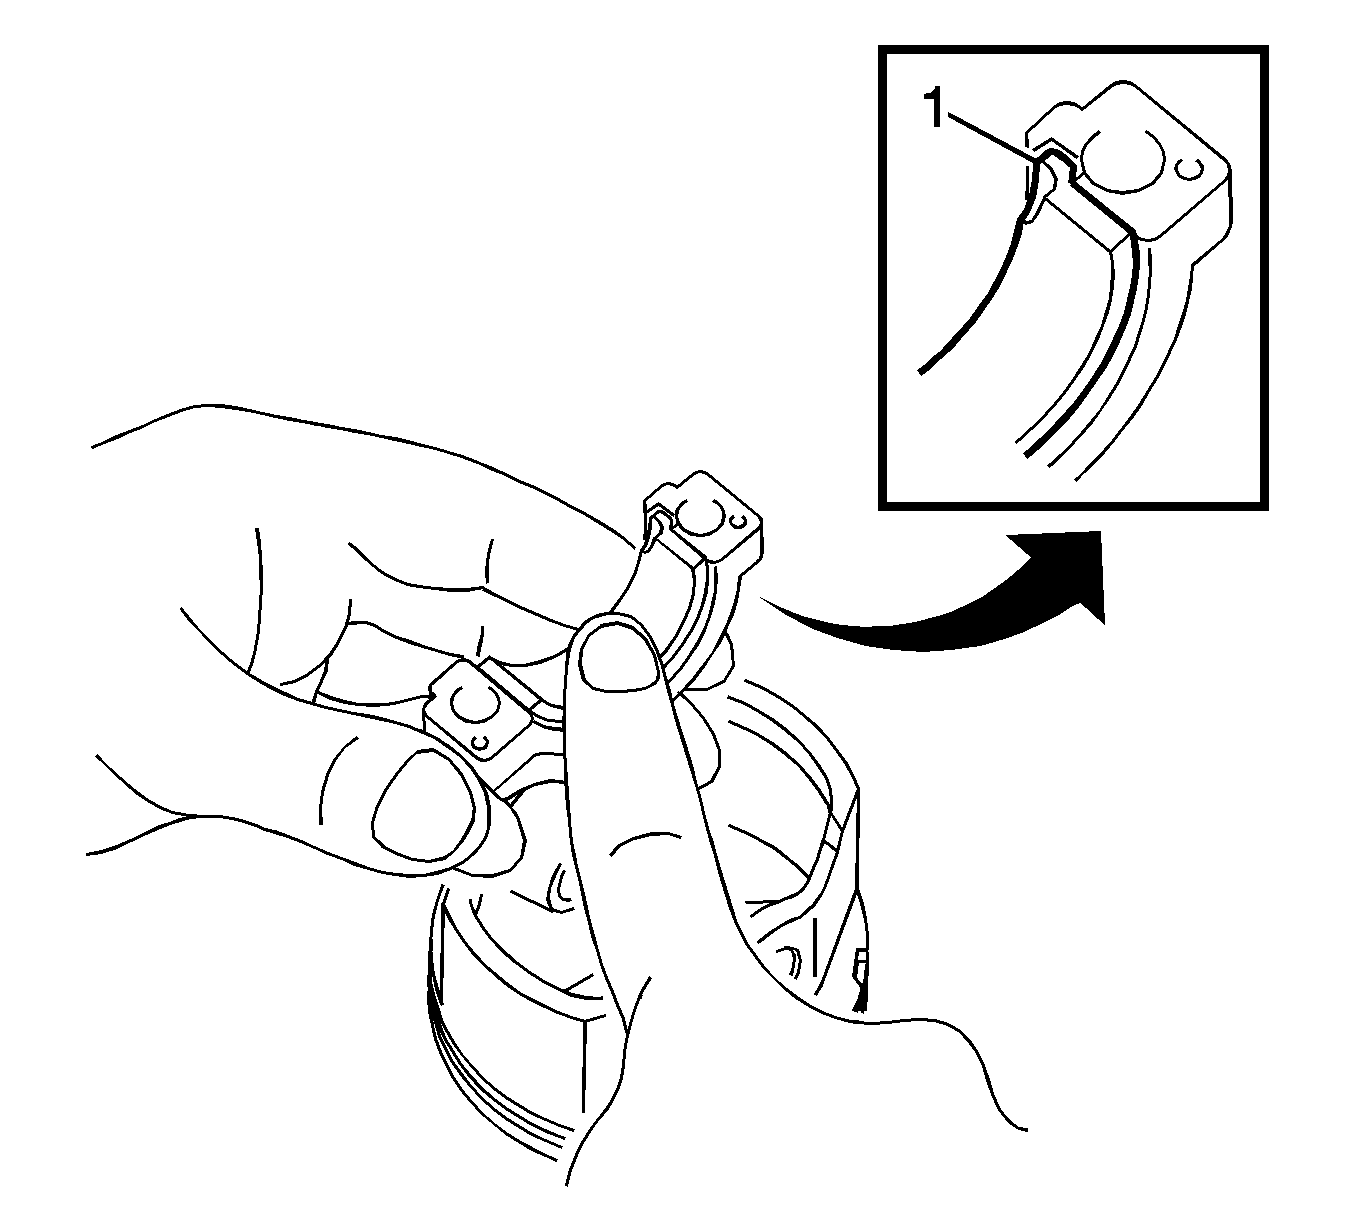
- Install connecting rod bearing.
- Align the bearing claw with the groove on the connecting rod or connecting cap.
- Install piston sub-assembly with connecting rod.
- Apply engine oil to the cylinder walls, the pistons, and the surfaces of connecting rod bearings.
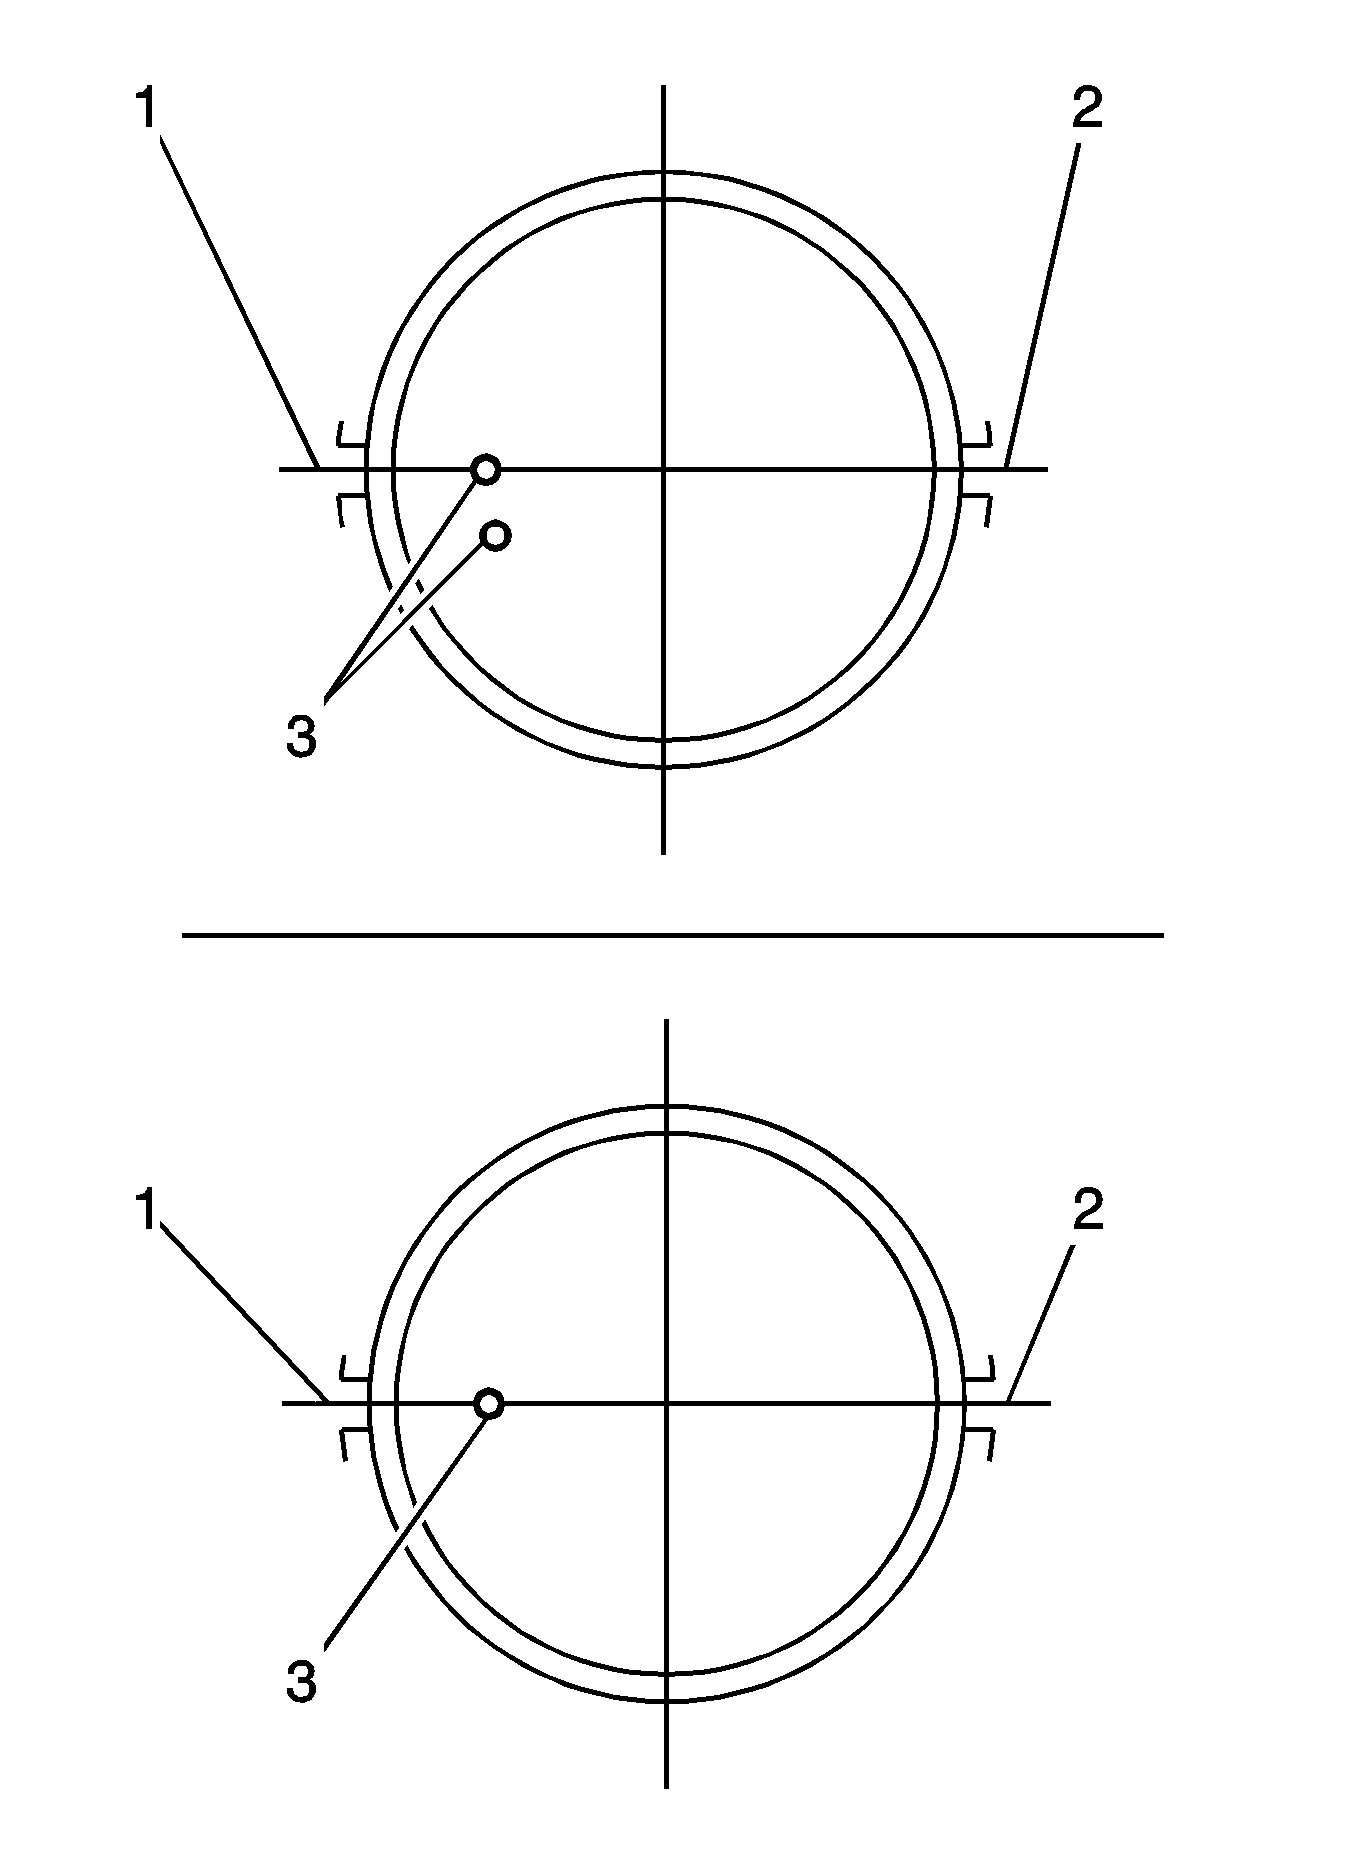
- Check the position of the piston ring ends (1, 2).
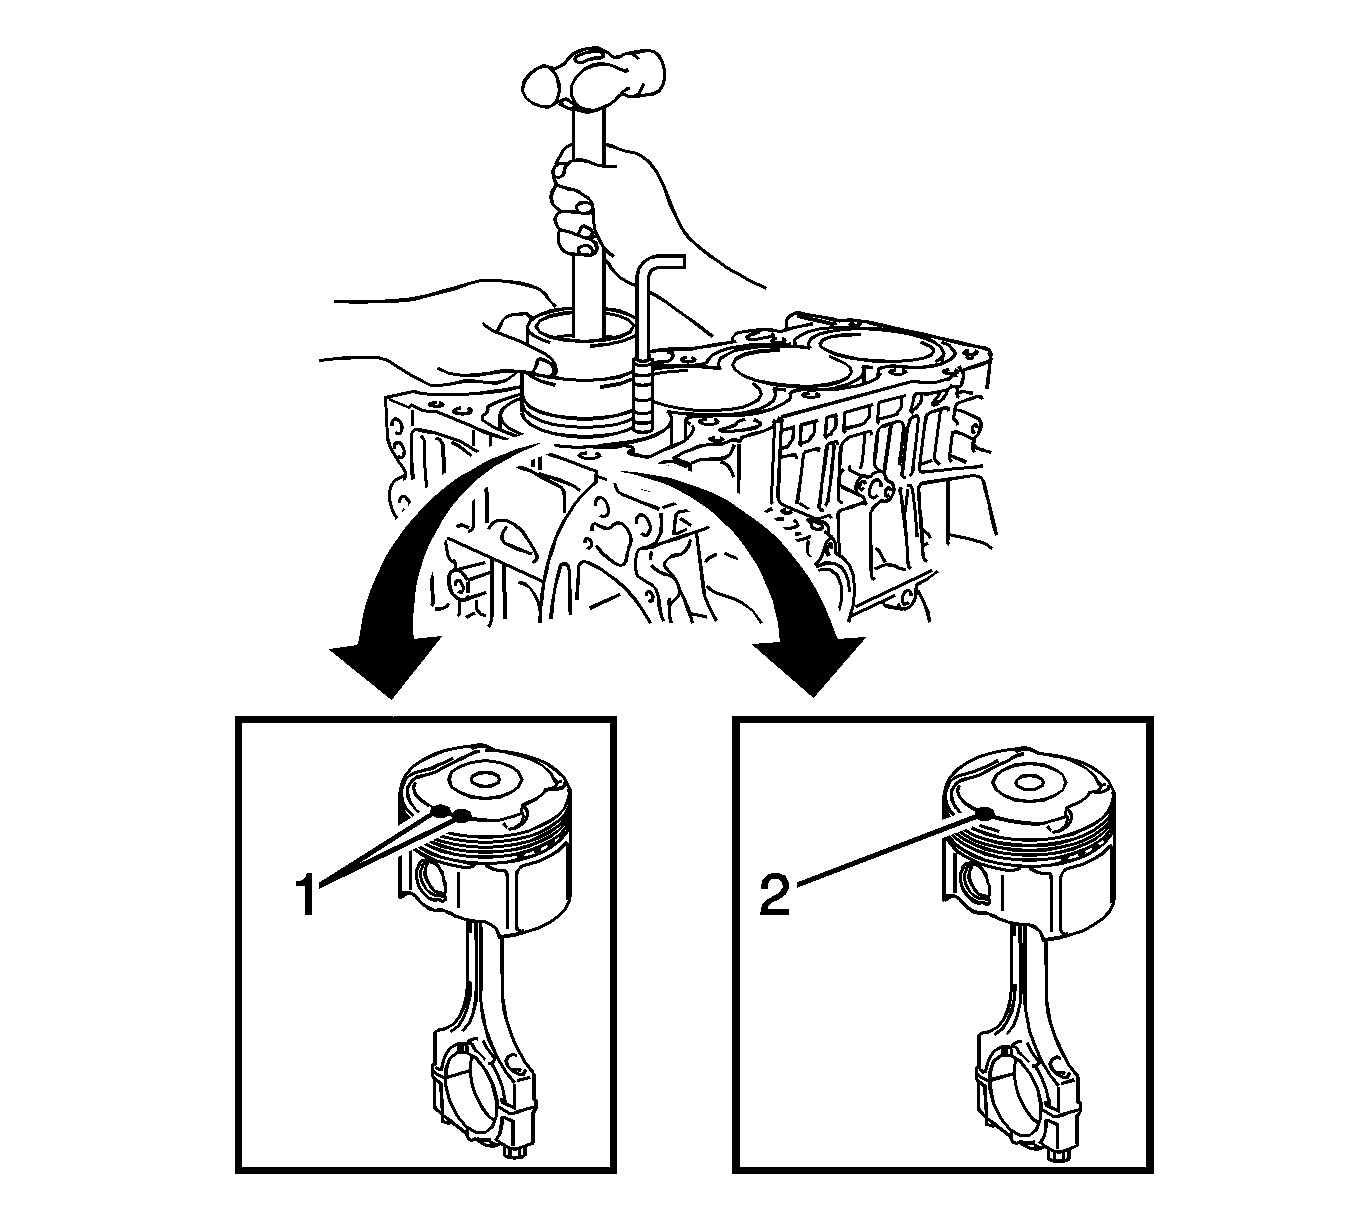
- Using a piston ring compressor, push the correctly numbered piston and connecting rod assemblies into each cylinder with the front mark (1, 2) of the piston facing forward.
- Check that the protrusion on the connecting rod cap is facing in the correct direction.
- Apply a light coat of engine oil to the threads and under the heads of the connecting rod cap bolts.
- Install the connecting cap bolts.
- Install and alternately tighten the bolts (1, 2) of the connecting rod cap in several steps.
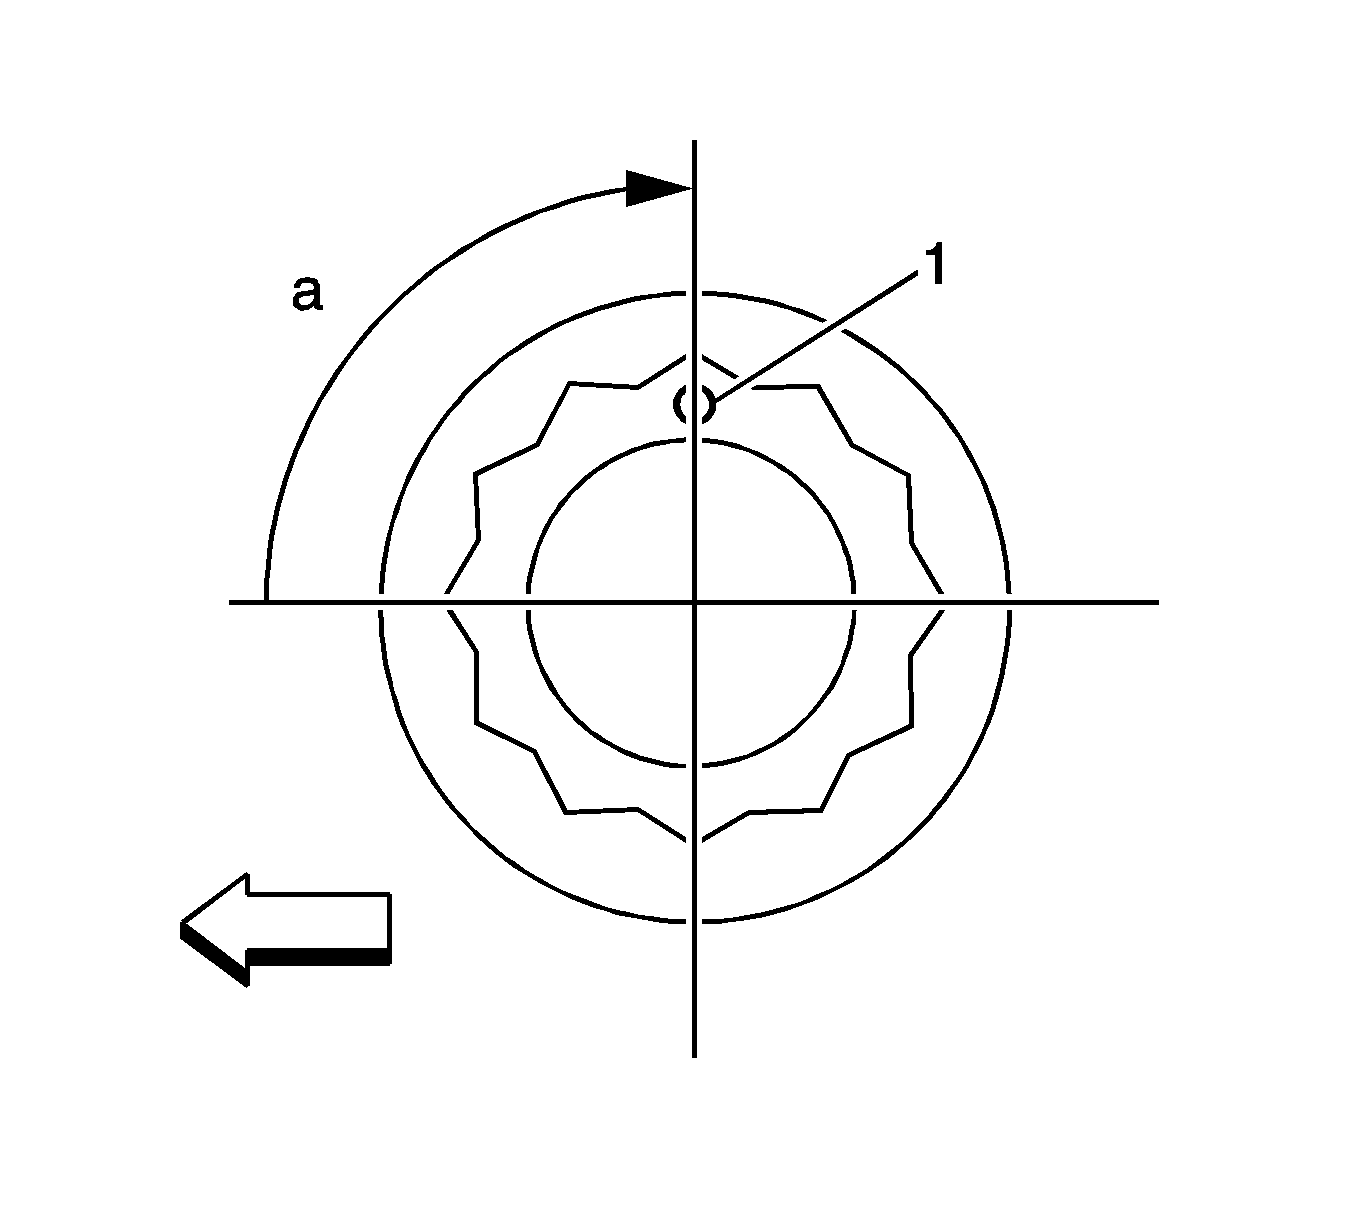
- Mark the front of the connecting rod cap bolts with paint (1).
- Retighten the cap bolts by 90 degrees (a) as shown in the illustration.
- Check that the crankshaft turns smoothly.
- Check the connecting rod thrust clearance. Refer to Piston, Connecting Rod, and Bearing Cleaning and Inspection.
Note: Do not apply engine oil to the bearings or the contact surfaces.
Note: The connecting rod cap bolts are tightened in 2 progressive steps.
Note: Match the numbered connecting rod cap with the connecting rod.
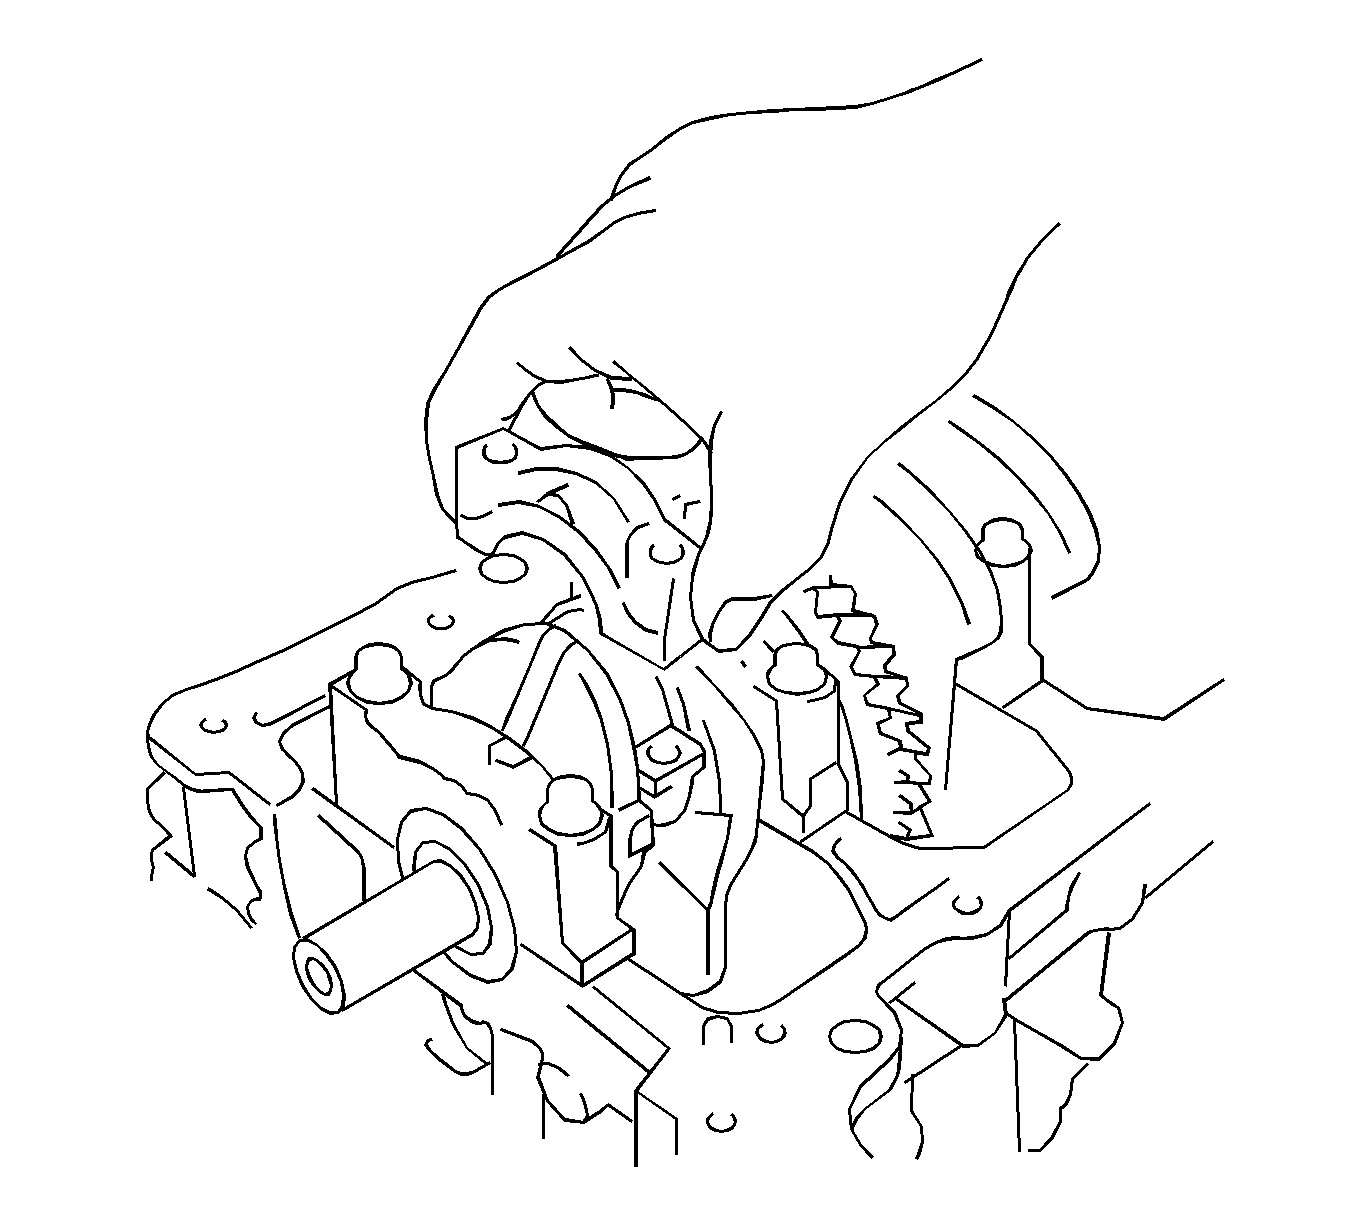
Note: The connecting cap bolts should be tightened in 2 progressive steps.
Caution: Refer to Fastener Caution in the Preface section.
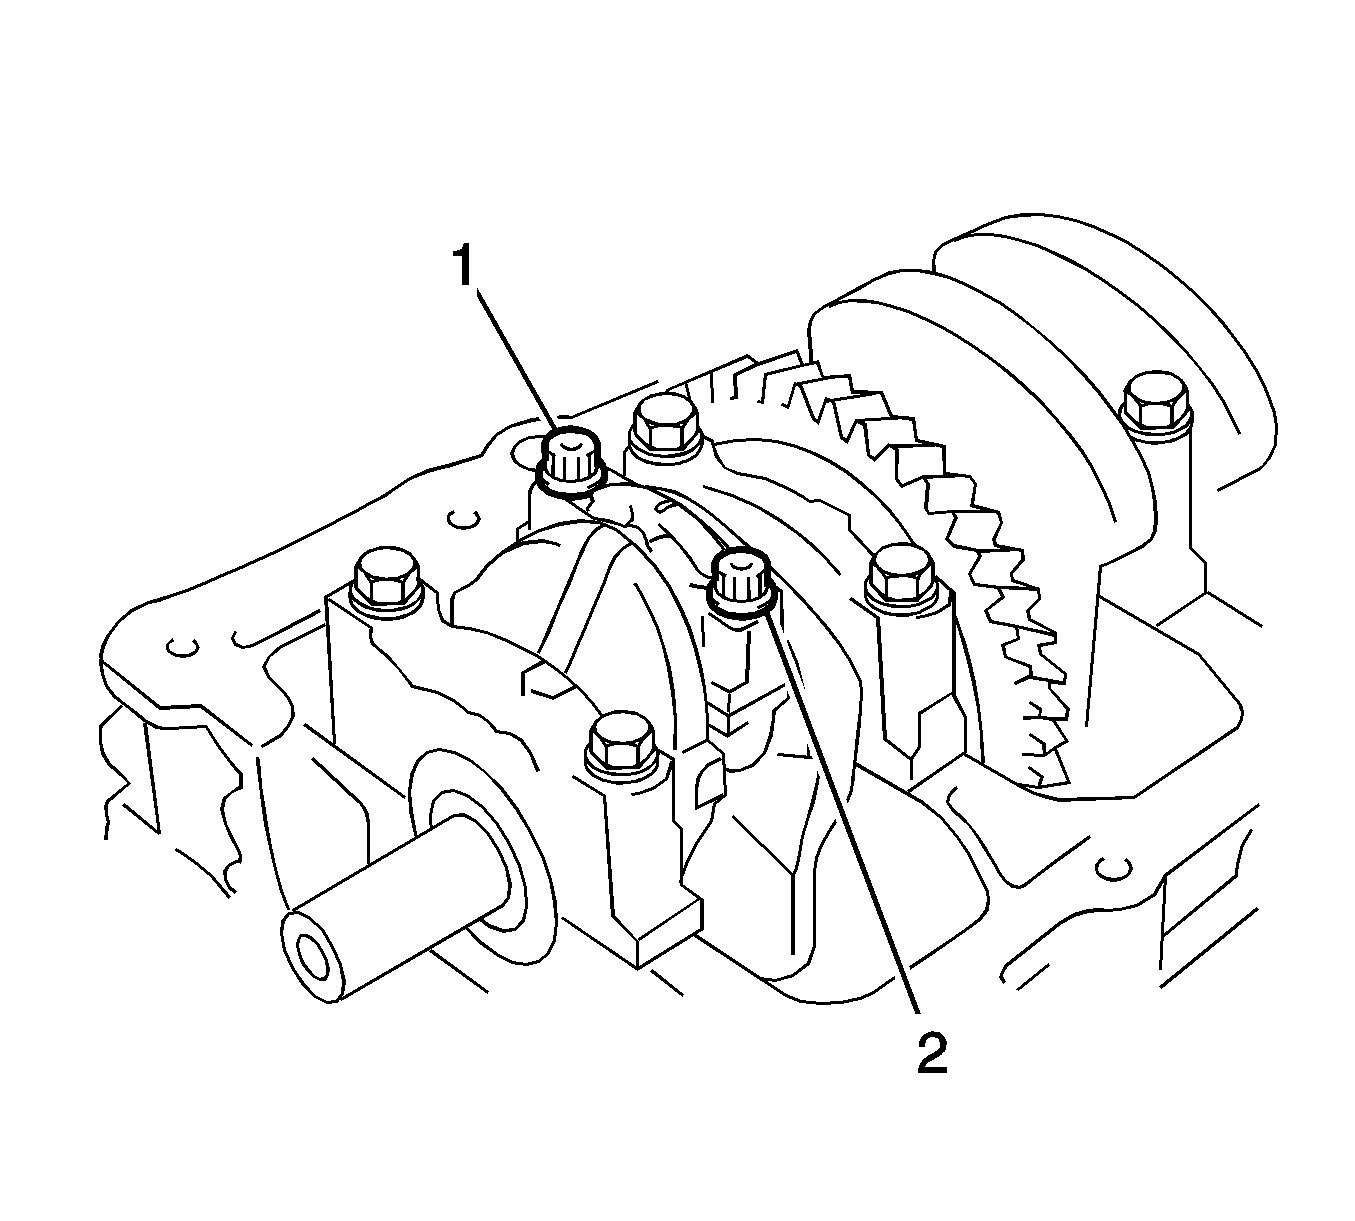
Tighten
Tighten the connecting rod cap bolts to 25 N·m (18 lb ft).
