- Inspect the camshaft chain drive assembly.
- Pull the chain with a force of 43 N·m (31.5 lb ft) as shown in the illustration.
- Using vernier calipers, measure the length of 15 links.
- Inspect the oil pump chain drive assembly.
- Pull the chain with a force of 43 N·m (31.5 lb ft) as shown in the illustration.
- Using vernier calipers, measure the length of 15 links.
- If the elongation is greater than the maximum, replace the No. 2 chain.
- Inspect oil pump drive gear.
- Wrap the chain around the sprocket.
- Using vernier calipers, measure the sprocket diameter with the chain wrapped around.
- If the diameter is less than the minimum, replace the chain and sprocket.
- Inspect oil pump drive shaft gear.
- Wrap the chain around the sprocket.
- Using vernier calipers, measure the sprocket diameter with the chain wrapped around.
- If the diameter is less than the minimum, replace the chain and sprocket.
- Inspect camshaft timing gear assembly.
- Wrap the chain around the sprocket.
- Using vernier calipers, measure the sprocket diameter with the chain wrapped around.
- If the diameter is less than the minimum, replace the chain and sprocket.
- Inspect camshaft timing gear or sprocket.
- Wrap the chain around the sprocket.
- Using vernier calipers, measure the sprocket diameter with the chain wrapped around.
- If the diameter is less than the minimum, replace the chain and sprocket.
- Inspect crankshaft timing gear or sprocket.
- Wrap the chain around the timing sprocket.
- Using vernier calipers, measure the timing gear diameter with the chain wrapped around.
- If the gear diameter is less than the minimum, replace the chain sub-assembly and crankshaft timing sprocket.
- Inspect chain tensioner slipper.
- Using vernier calipers, measure the tensioner slipper wear (a).
- If the wear is greater than the maximum, replace the chain tensioner slipper.
- Inspect No. 1 chain vibration damper.
- Using vernier calipers, measure the vibration damper wear (a).
- If the wear is greater than the maximum, replace the No. 1 chain vibration damper.
- Inspect chain tensioner plate.
- Using vernier calipers, measure the vibration damper wear (a).
- If the wear is greater than the maximum, replace the chain tensioner plate.
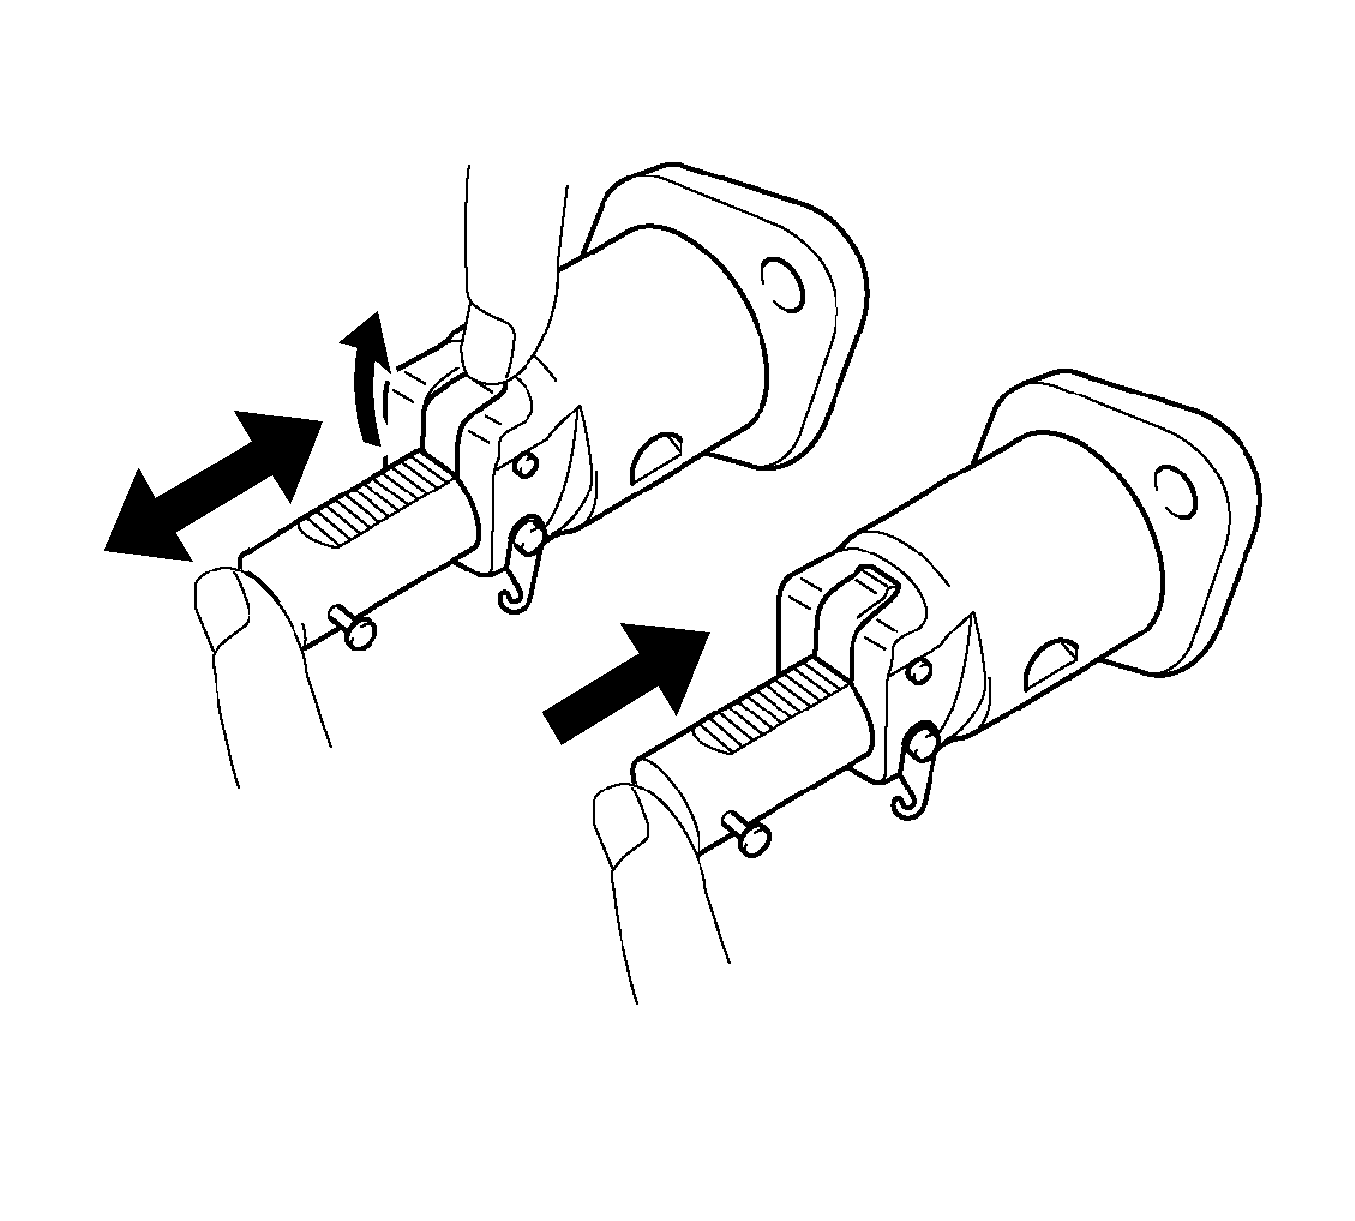
- Inspect No. 1 chain tensioner assembly.
- Check that the plunger moves smoothly when the ratchet pawl is raised with your finger.
- Release the ratchet pawl, then check that the plunger is locked in place by the ratchet pawl and does not move when pushed with your finger.
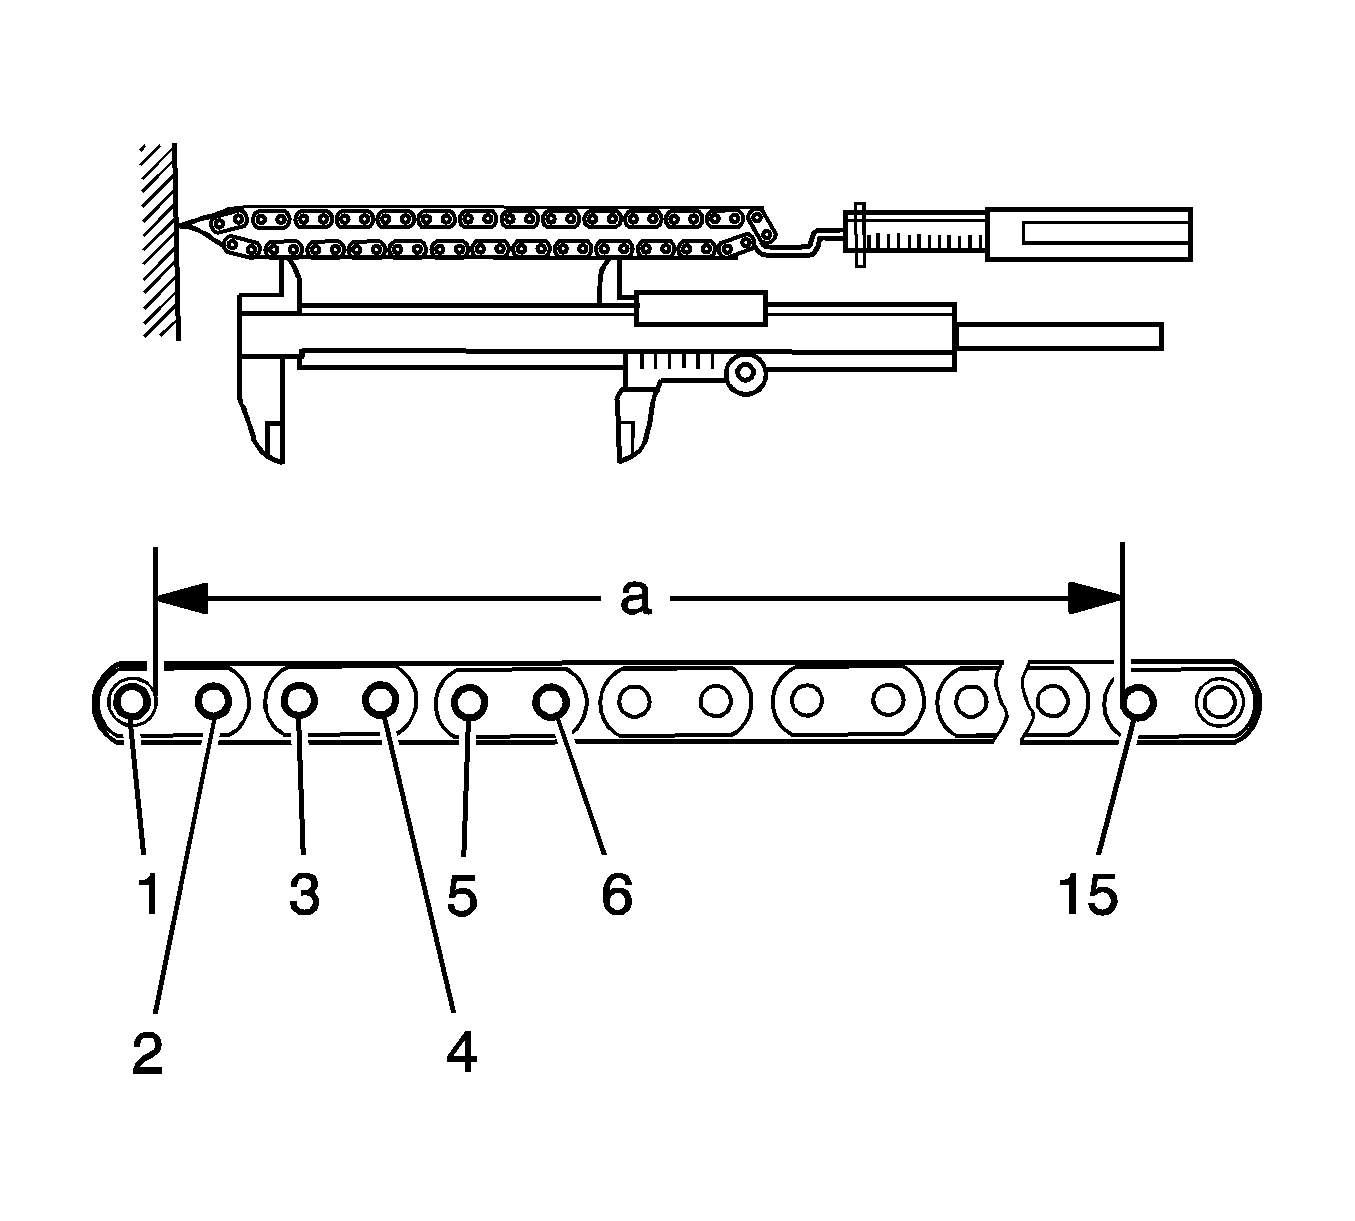
Note: Perform the measurement at 3 random places. Use the average of the measurements. If the elongation (a) is greater than the maximum, replace the chain.
Maximum Chain Elongation
114.5 mm (4.508 in)
Note: Perform the measurement at 3 random places. Use the average of the measurements.
Maximum Chain Elongation
102.2 mm (4.024 in)
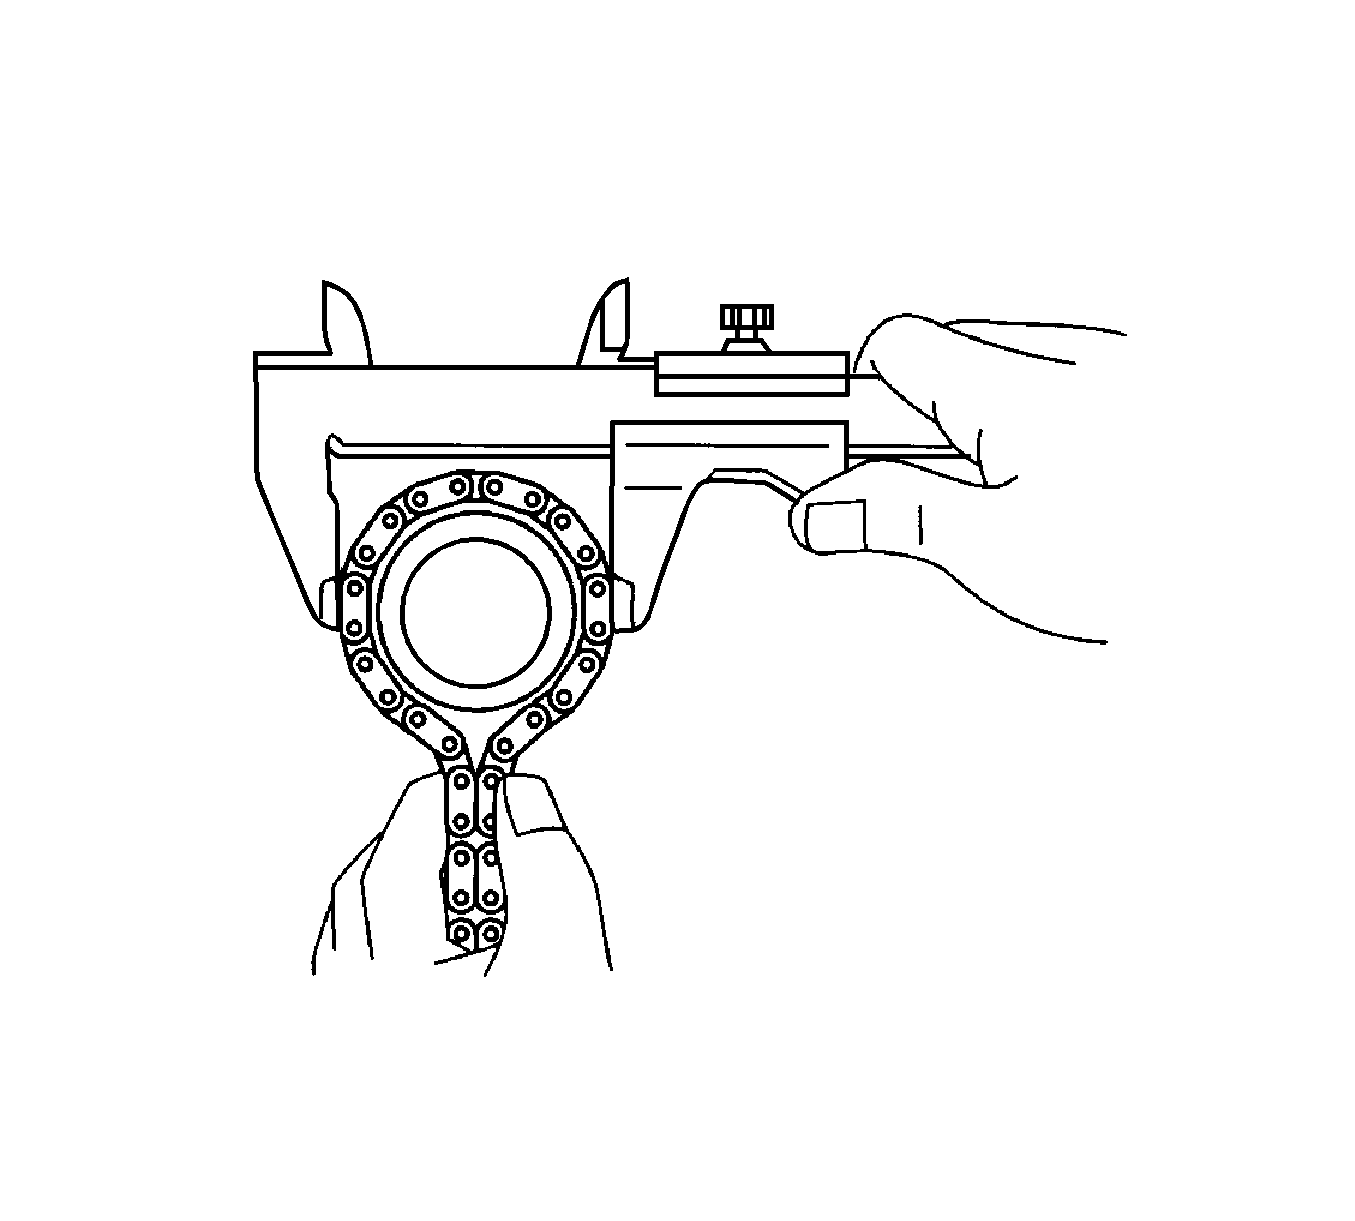
Note: The vernier calipers must be in contact with the chain rollers when measuring.
Minimum Gear Diameter (With Chain)
48.2 mm (1.898 in)
Note: The vernier calipers must be in contact with the chain rollers when measuring.
Minimum Gear Diameter (With Chain)
48.2 mm (1.898 in)
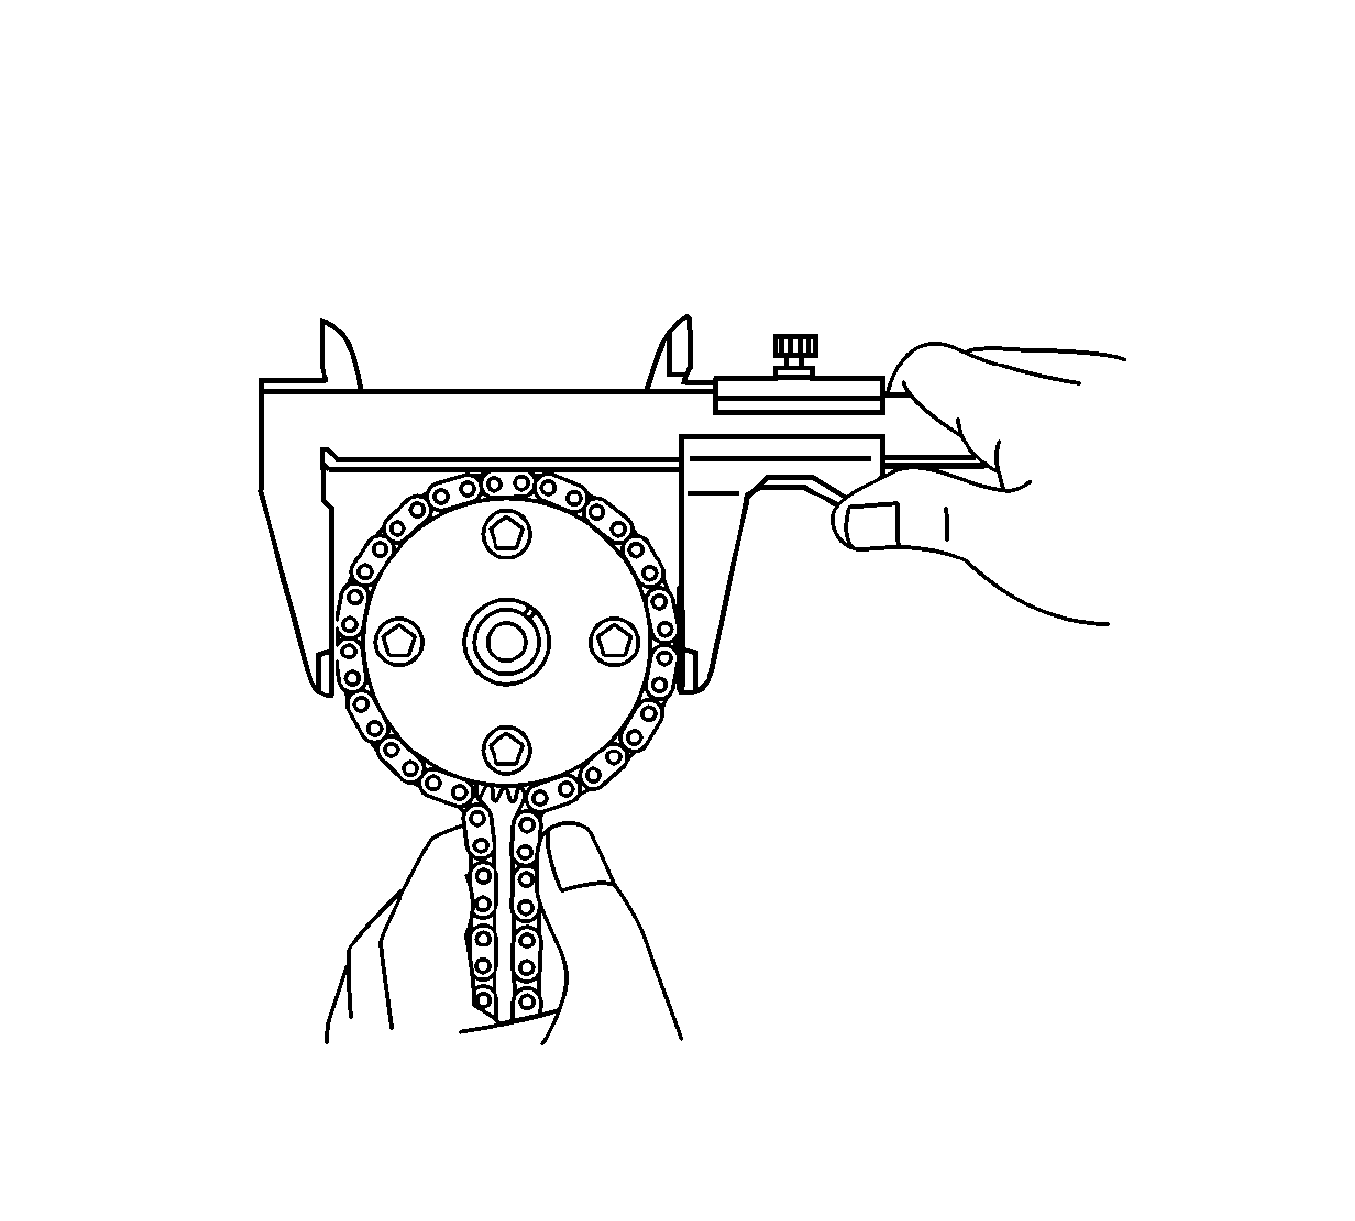
Note: The vernier calipers must be in contact with the chain rollers when measuring.
Minimum Gear Diameter (With Chain)
97.3 mm (3.831 in)
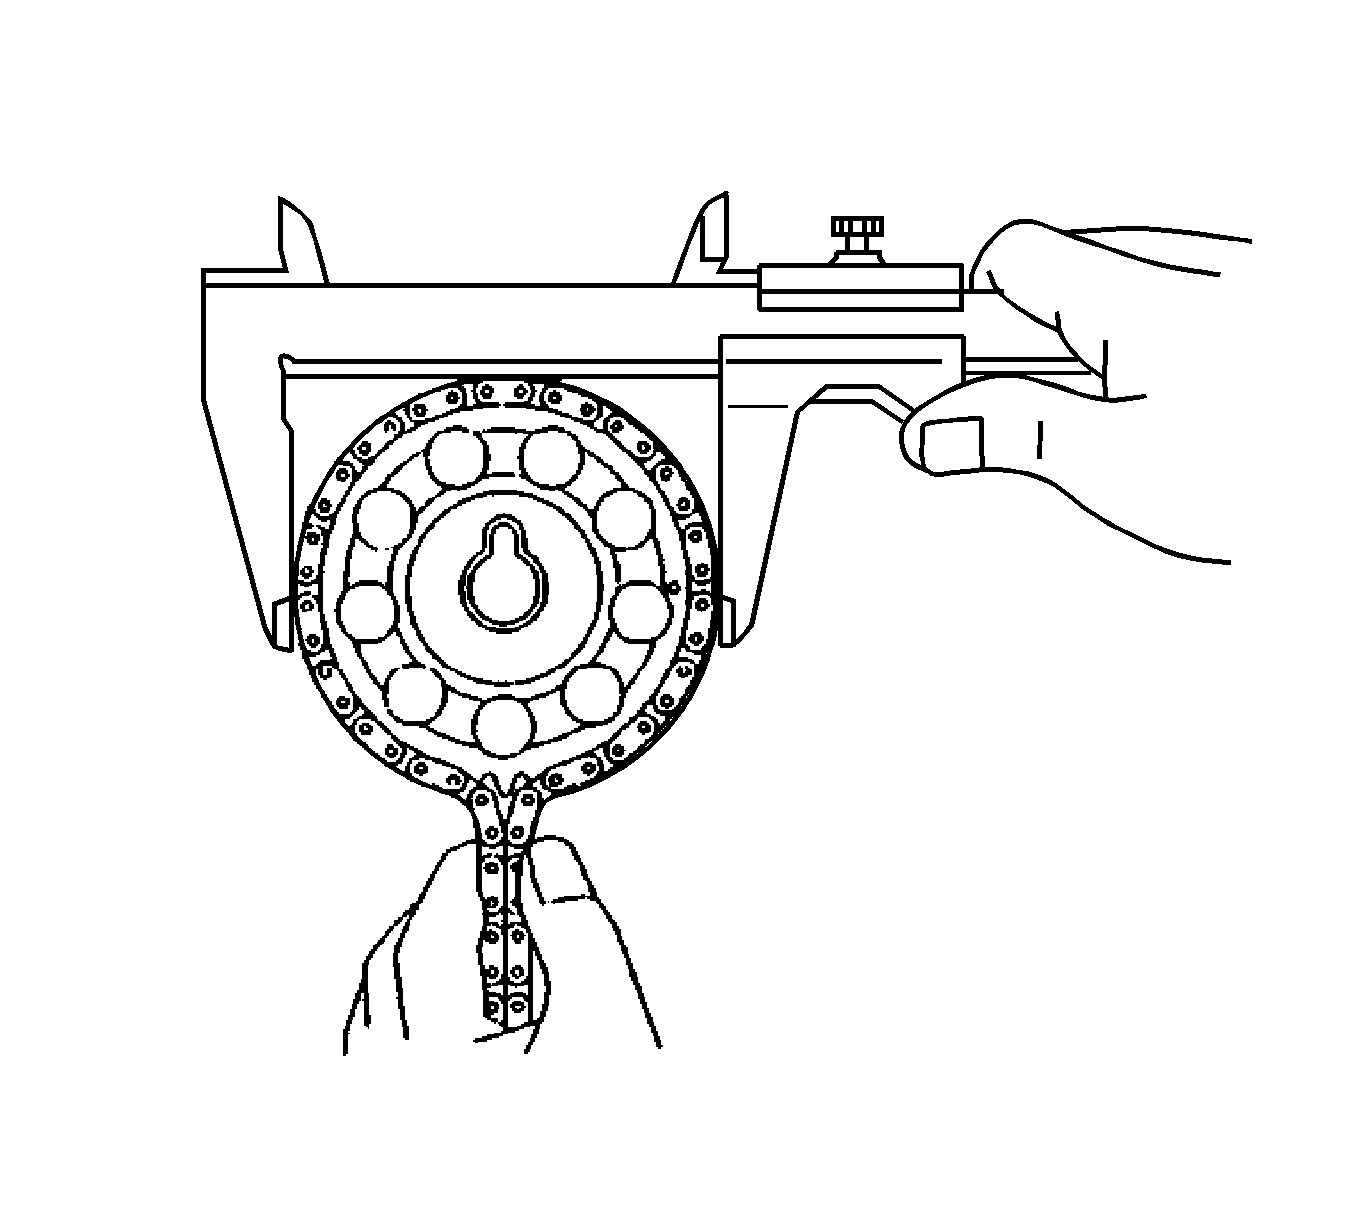
Note: The vernier calipers must be in contact with the chain rollers when measuring.
Minimum Gear Diameter (With Chain)
97.3 mm (3.831 in)

Note: The vernier calipers must be in contact with the chain rollers when measuring.
Minimum Gear Diameter (With Chain)
51.6 mm (2.031 in)
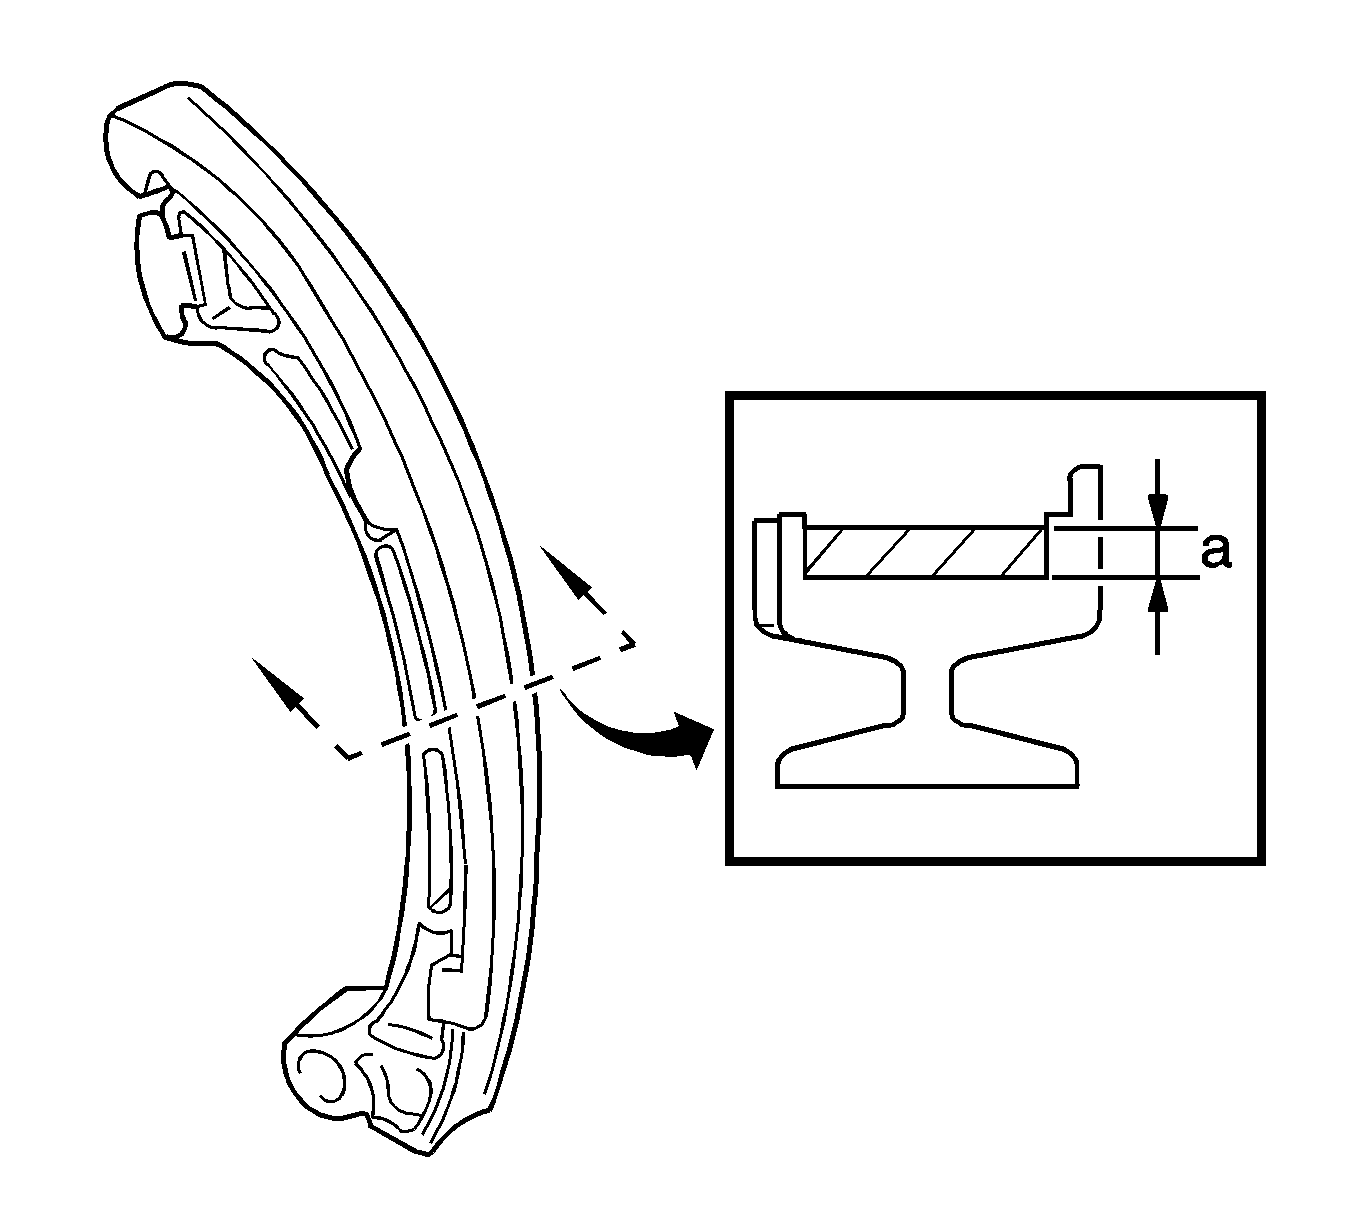
Maximum Wear
1.0 mm (0.039 in)
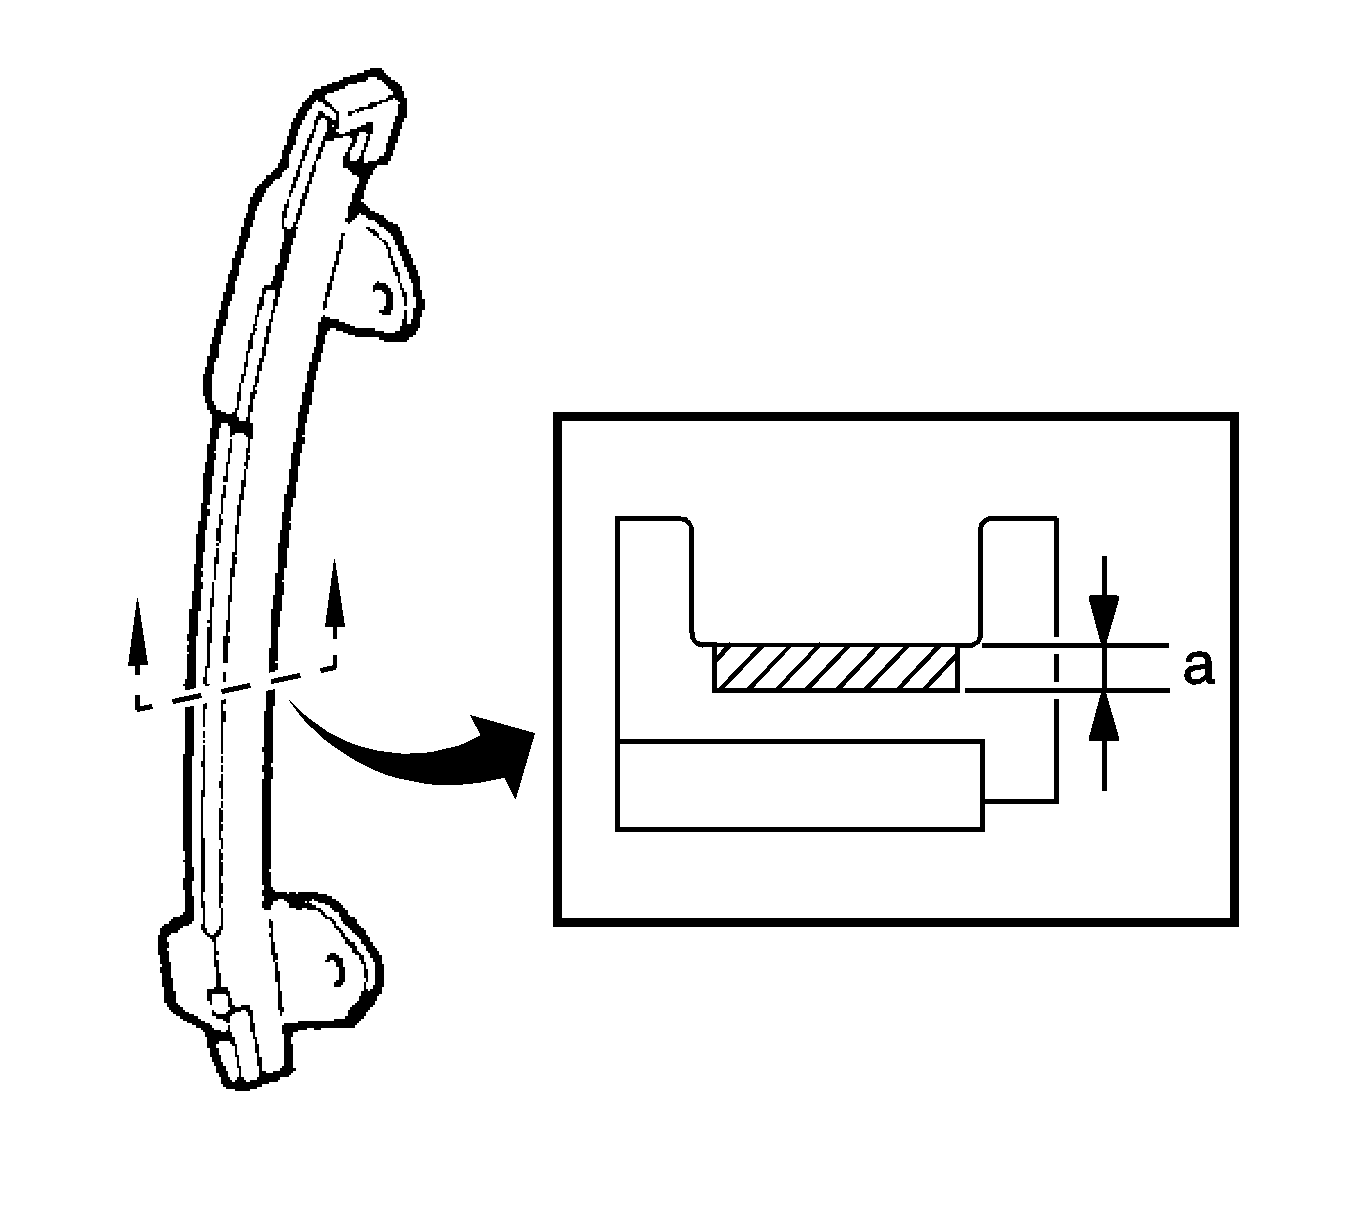
Maximum Wear
1.0 mm (0.039 in)
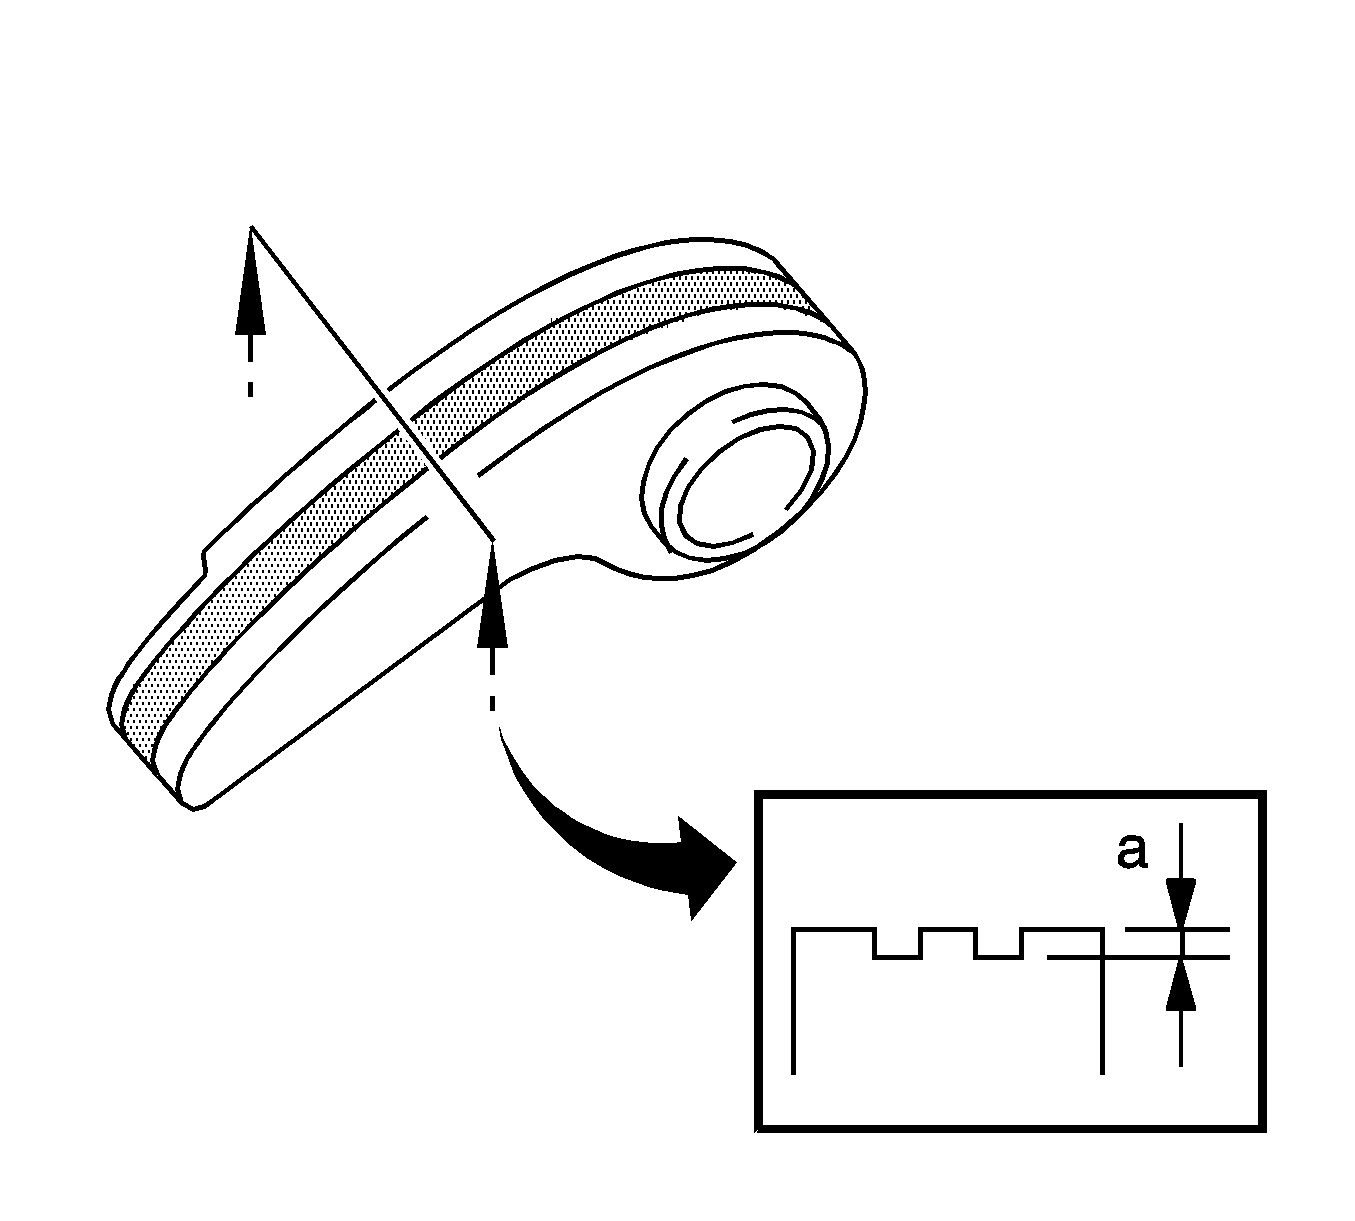
Maximum Wear
0.5 mm (0.020 in)
