For 1990-2009 cars only
- Remove the bolt (1) and camshaft position sensor.
- Remove the bolt (1) and camshaft timing oil control valve from the cylinder head.
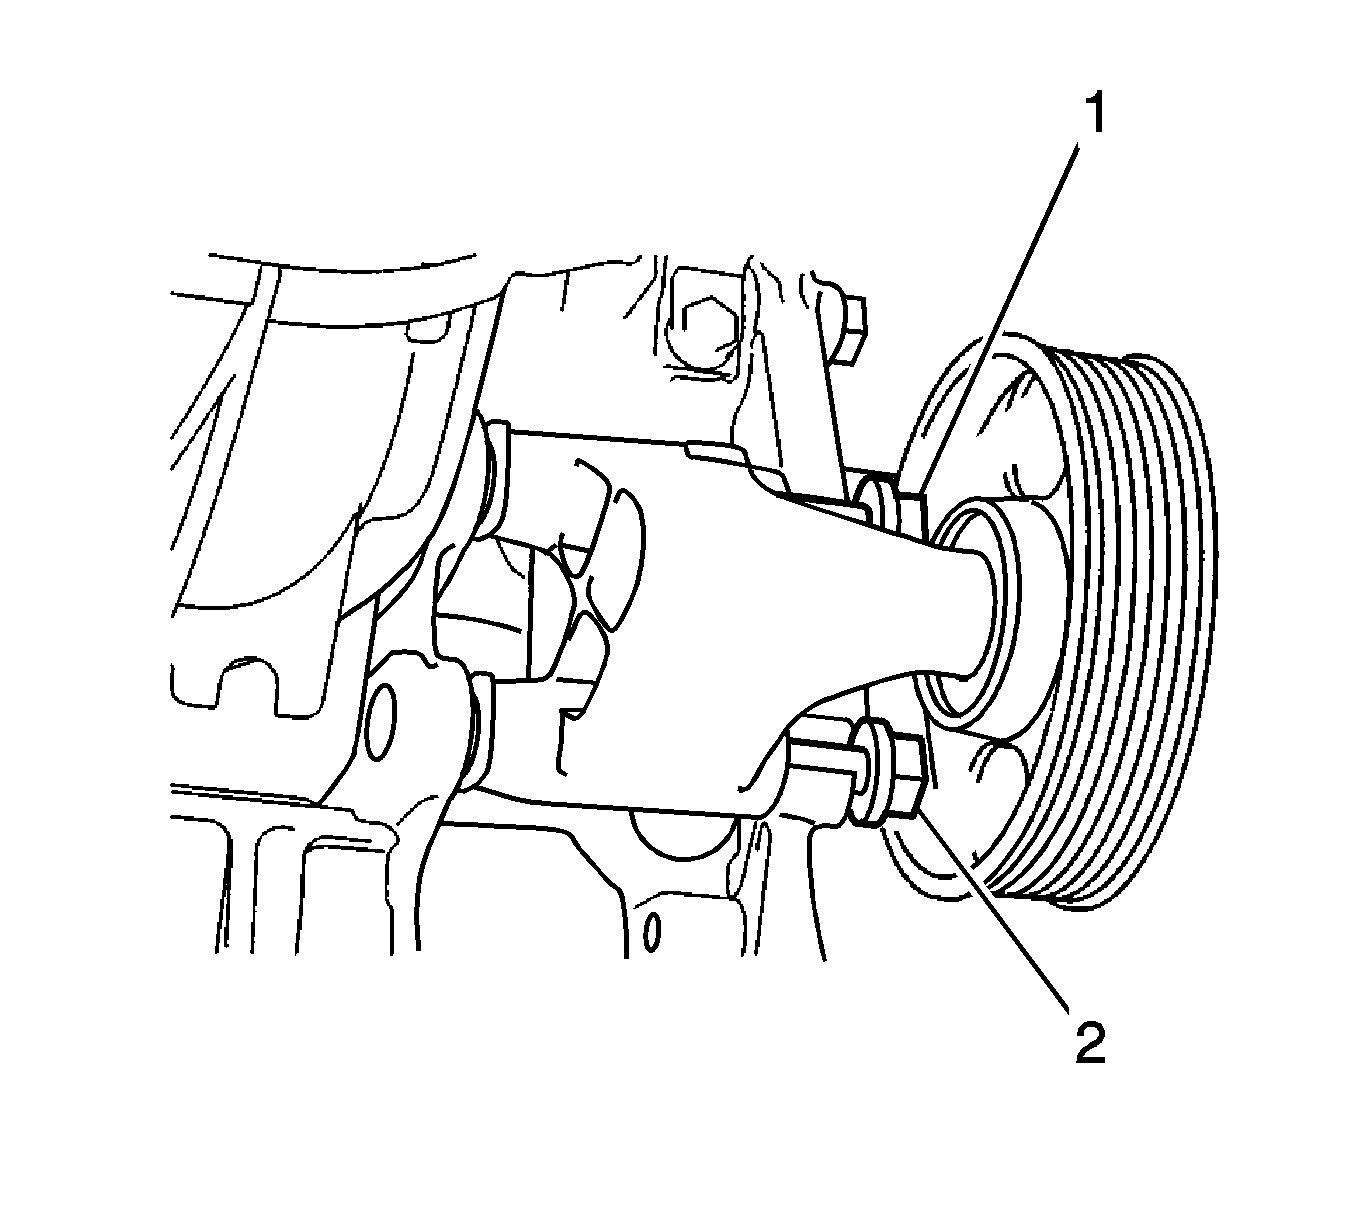
- Loosen the 2 bolts (1, 2) and remove the idler pulley.
- Set No. 1 cylinder to TDC/compression.
- Remove the crankshaft pulley.
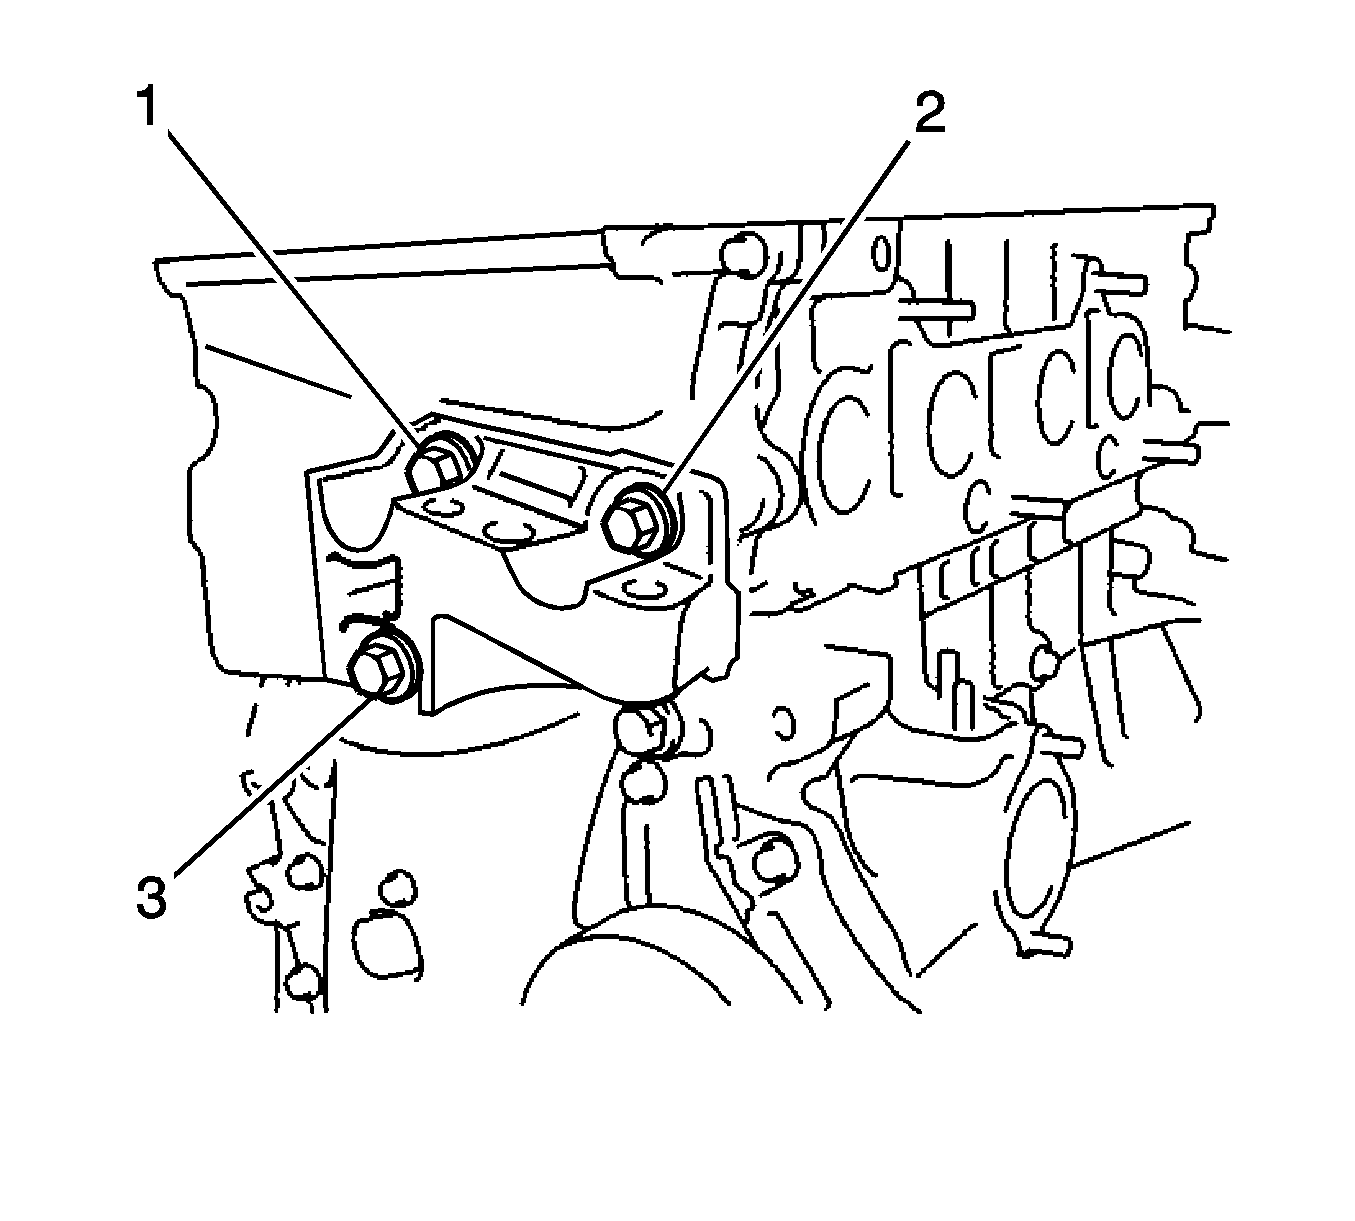
- Remove the 3 bolts (1, 2, 3) and transverse engine mounting bracket.
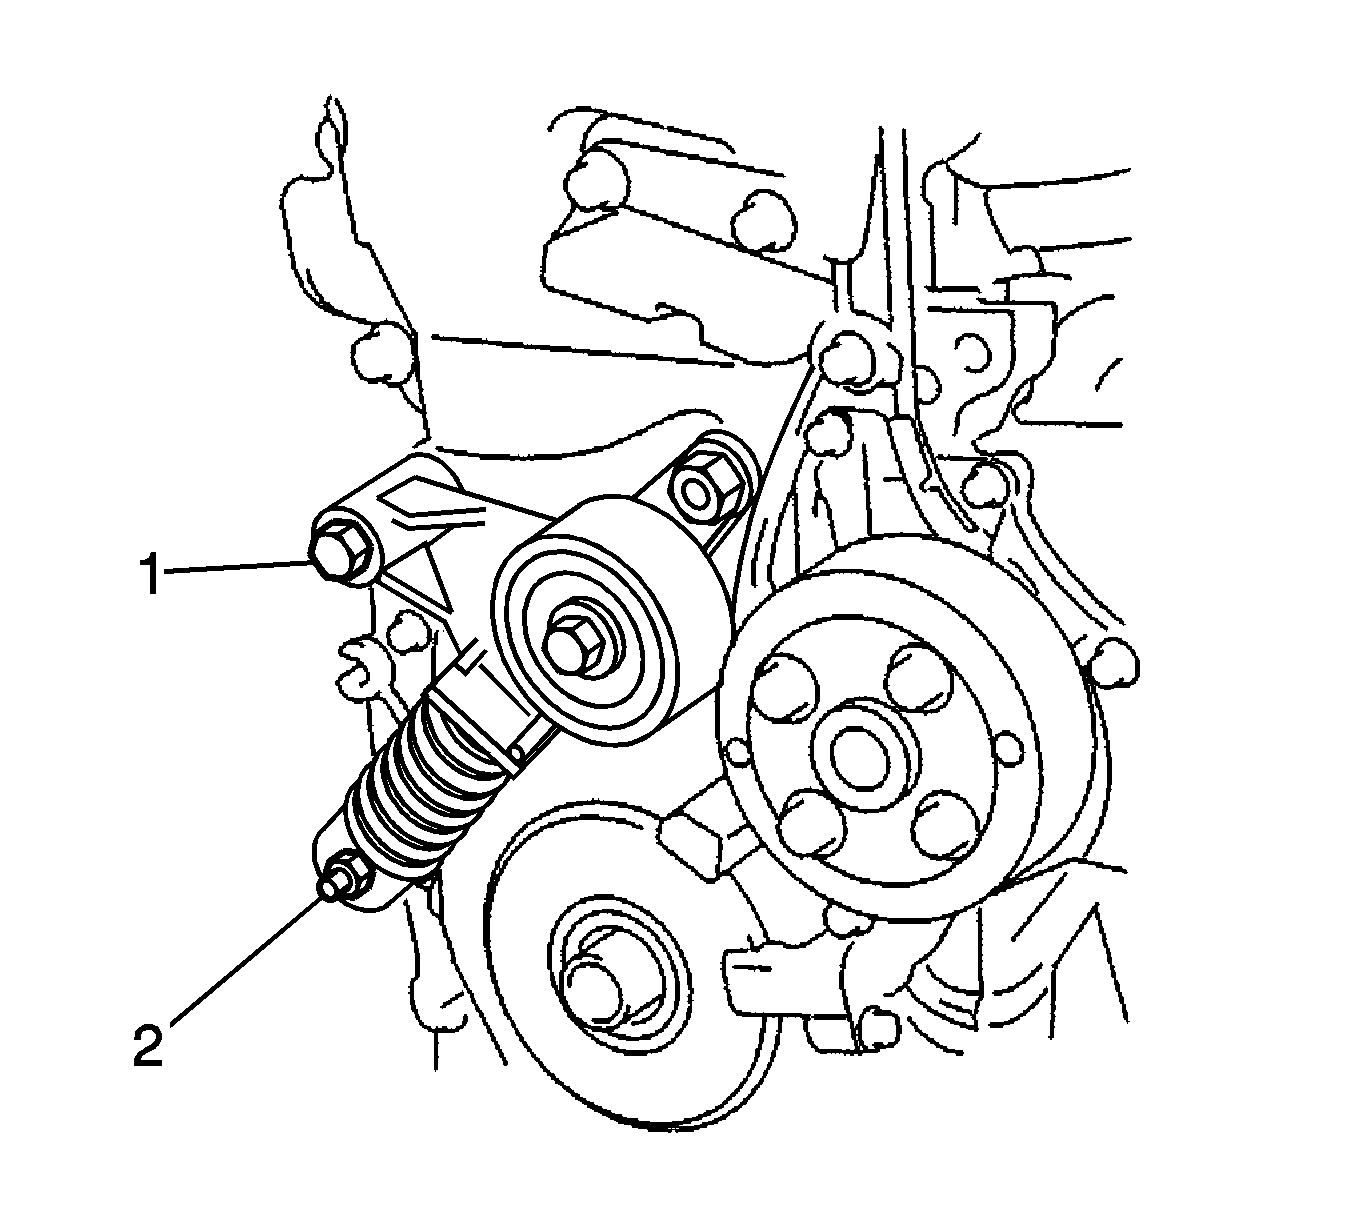
- Remove the bolt (1), nut (2) and V-ribbed belt tensioner assembly.
- Remove the crankshaft position sensor.
- Using an E10 TORX® socket, remove the stud bolt for the V-ribbed belt tensioner.
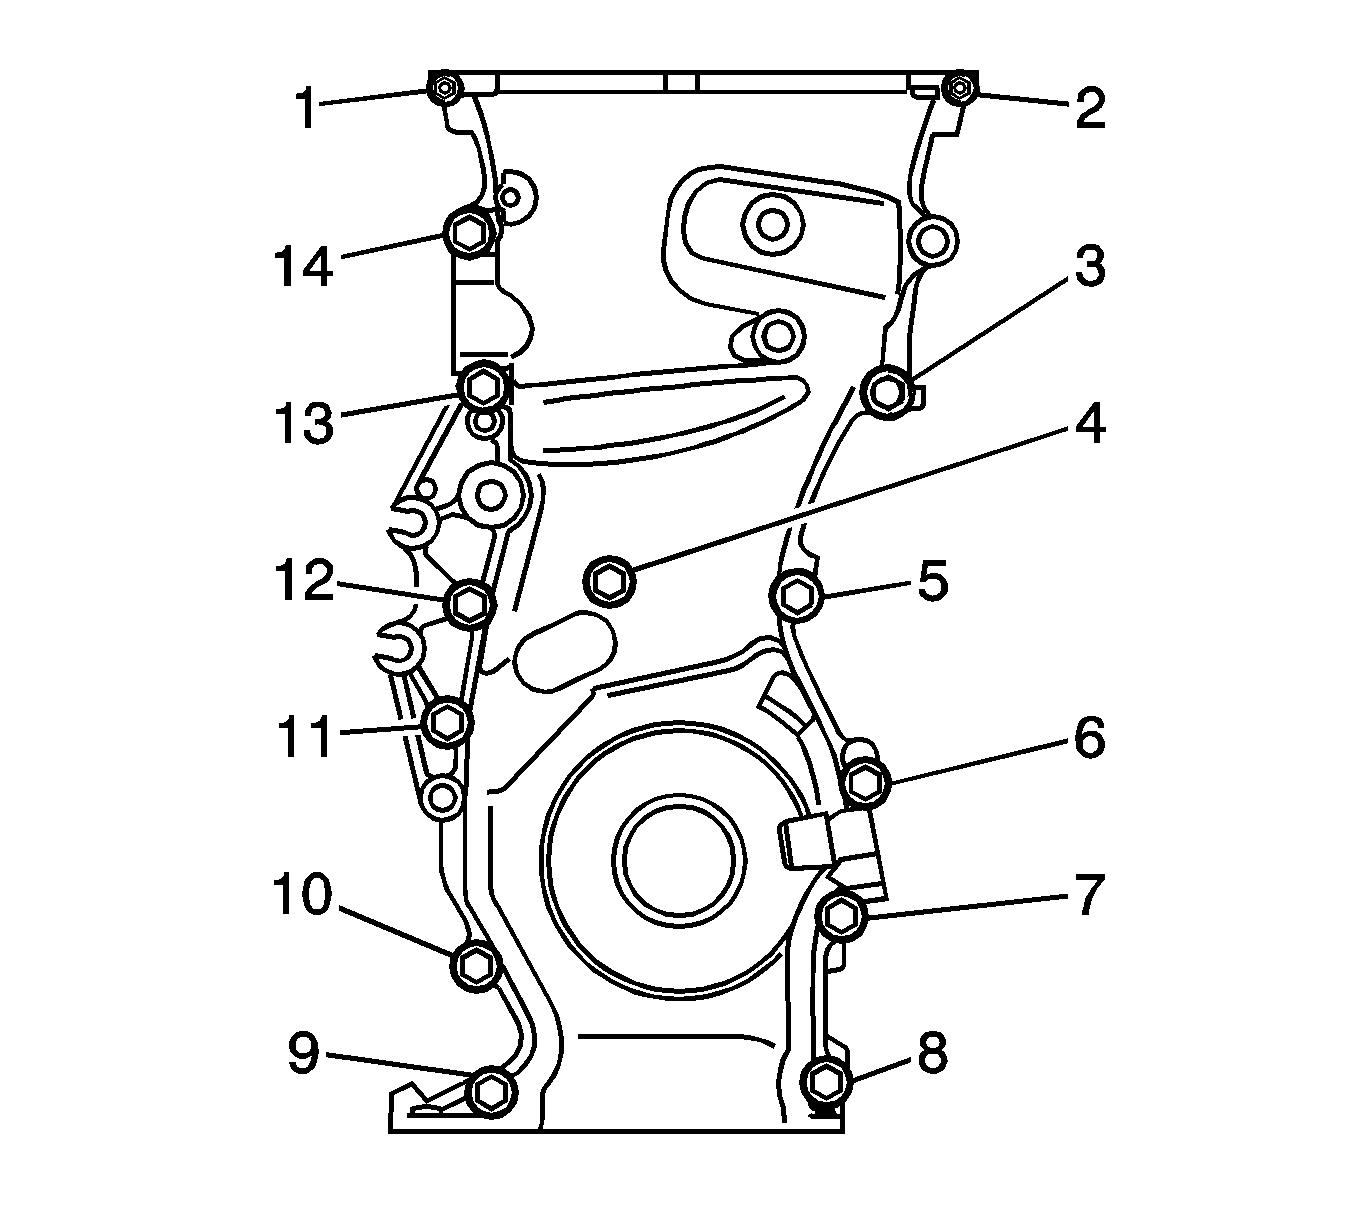
- Remove the 12 bolts (3-14) and 2 nuts (1, 2).
- Remove the timing chain cover by prying the portions between the timing chain cover, cylinder head and cylinder block with a screwdriver.
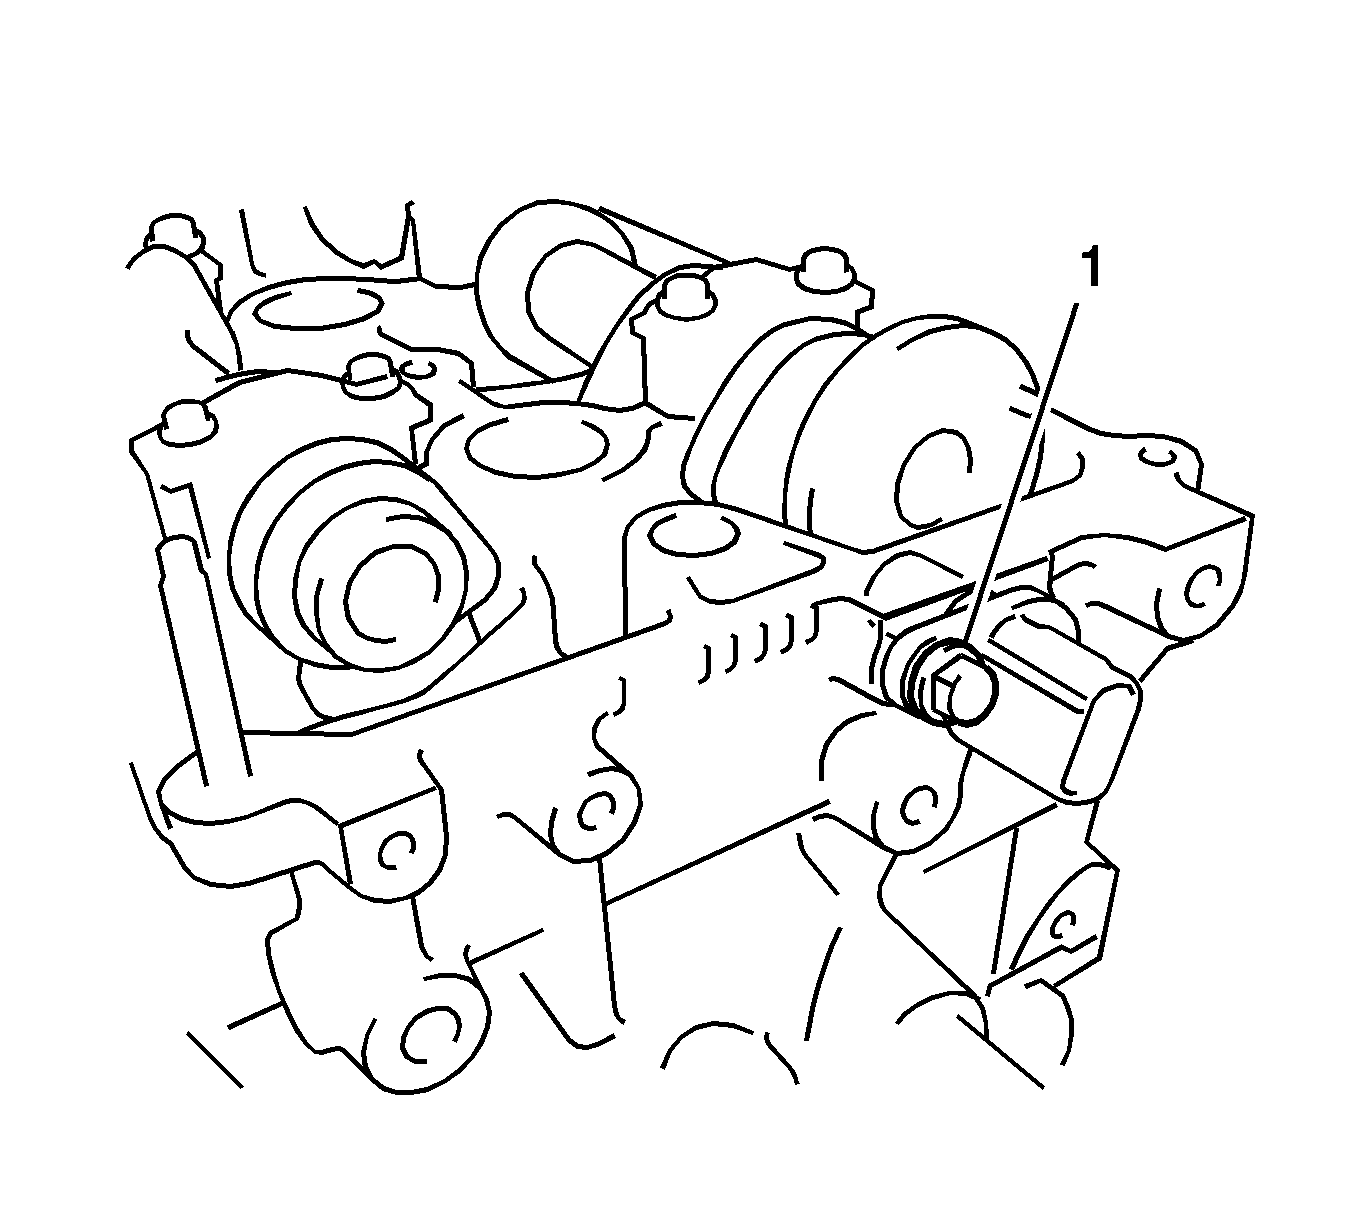
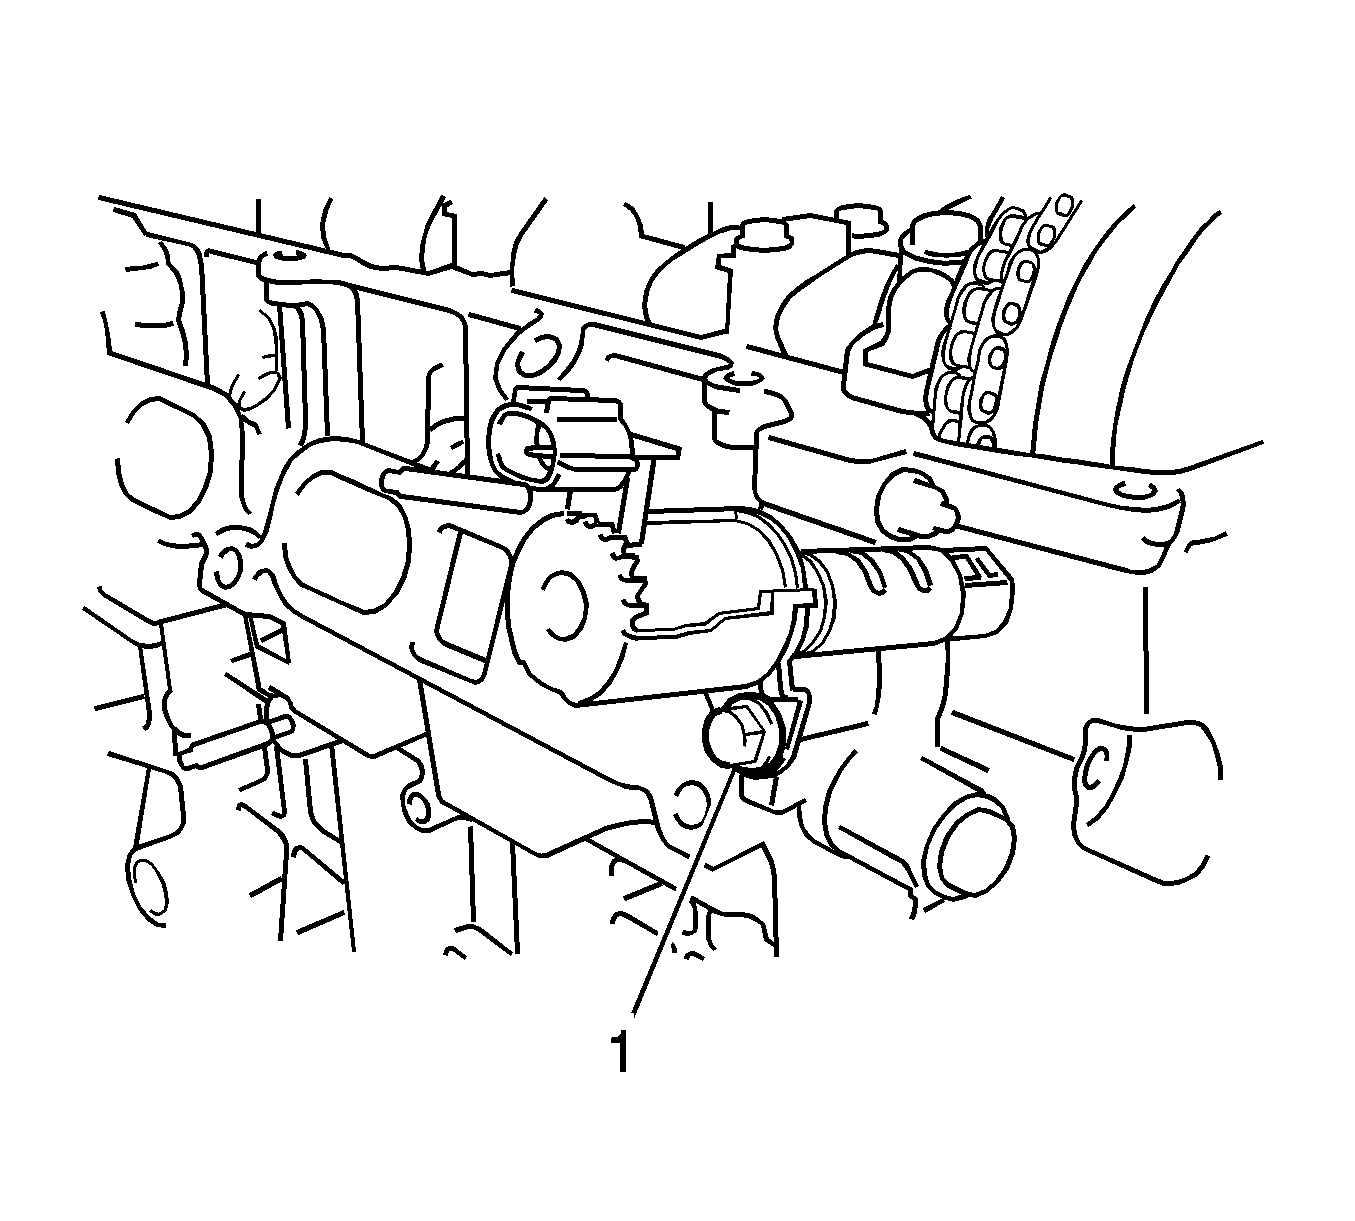
Note: The camshaft timing oil control valve may be damaged when loosening the cylinder head bolt if the camshaft timing oil control valve is not removed.
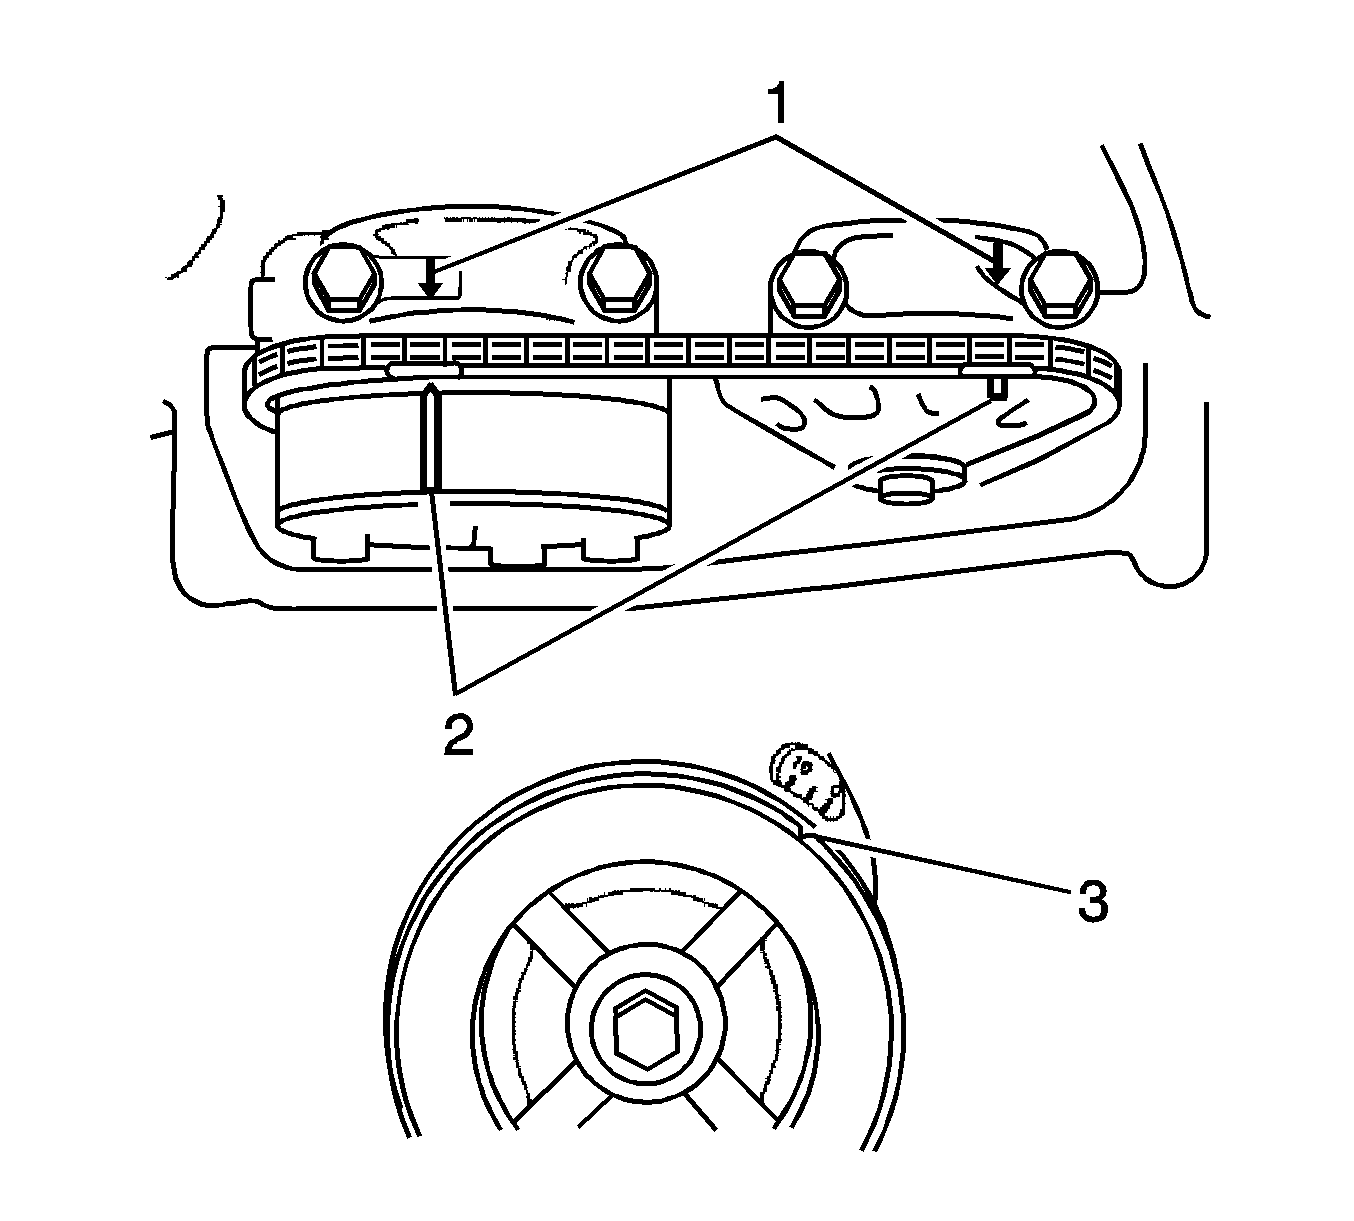
| • | Turn the crankshaft pulley until the groove (3) and the timing mark 0 on the timing chain cover are aligned. |
| • | Check that each timing mark (2) on the camshaft timing gear and sprocket is aligned with the timing marks located on the camshaft bearing caps (1) as shown in the illustration. If not, turn the crankshaft by 1 revolution (360°) to align the timing marks as above. |
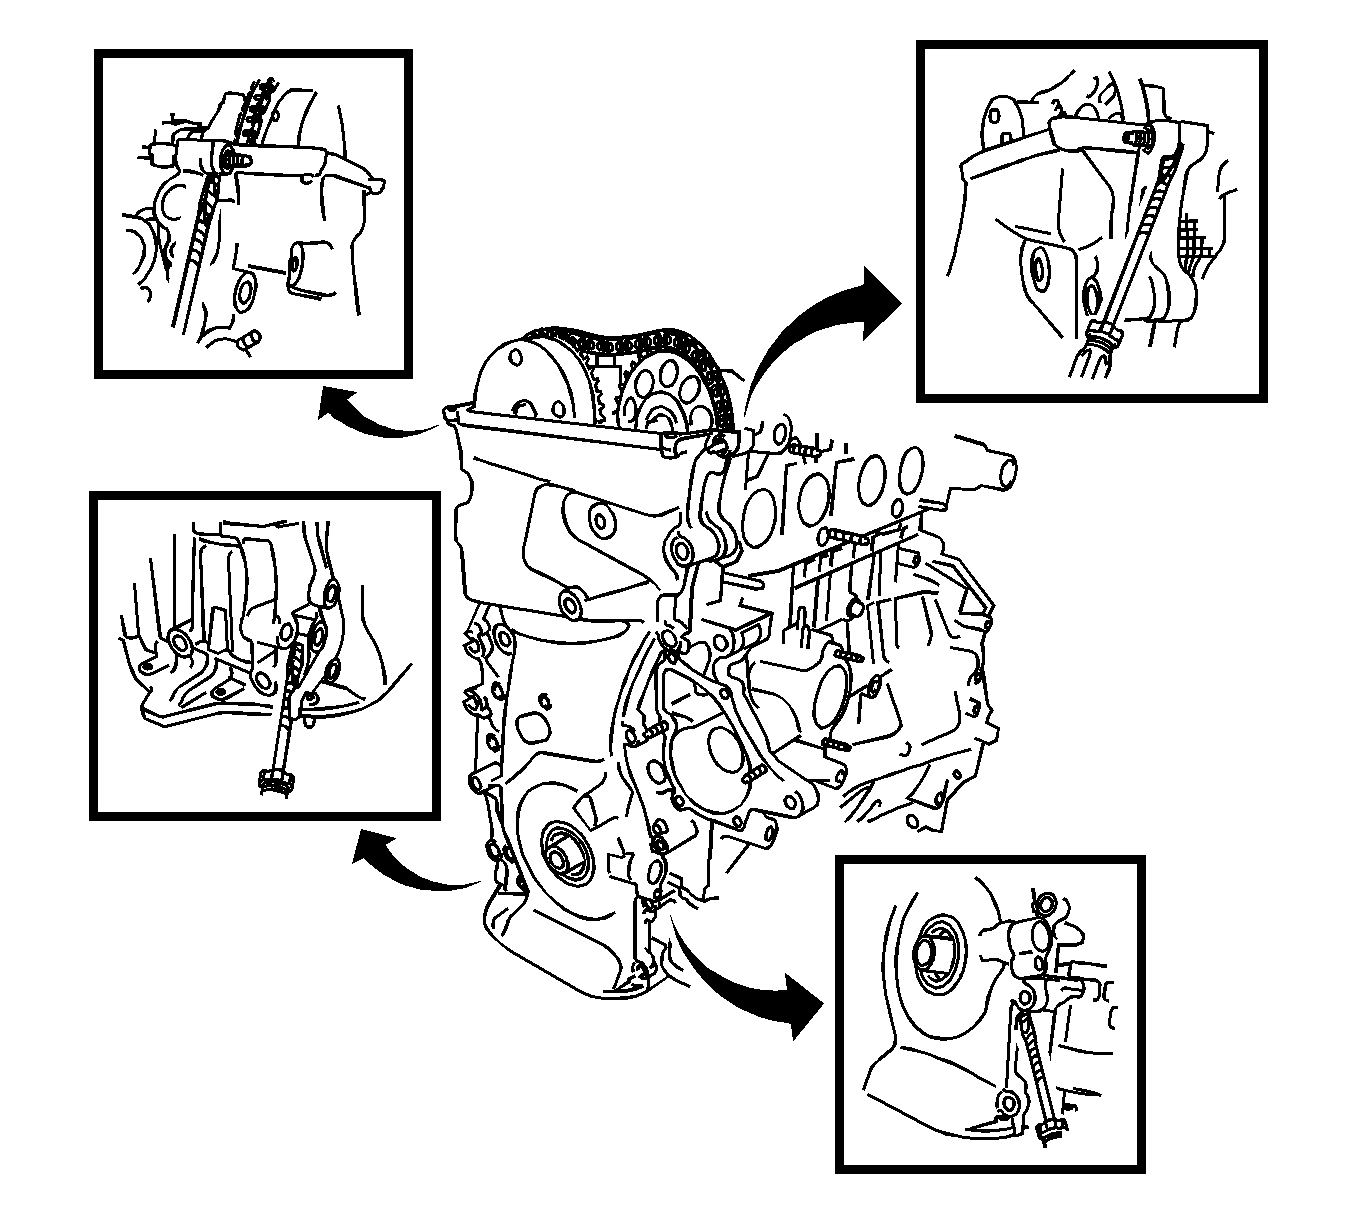
Note: Tape the screwdriver tip before use.
