For 1990-2009 cars only
- Check the engine oil level.
- Warm up and stop the engine, and then wait for 5 minutes.
- Check that the engine oil level is between the low level and full level marks on the level gauge. If low, check for leaks and add oil up to the full level mark.
- Check the oil for deterioration, water, discoloring or thinning.
- Remove the air cleaner cap sub-assembly.
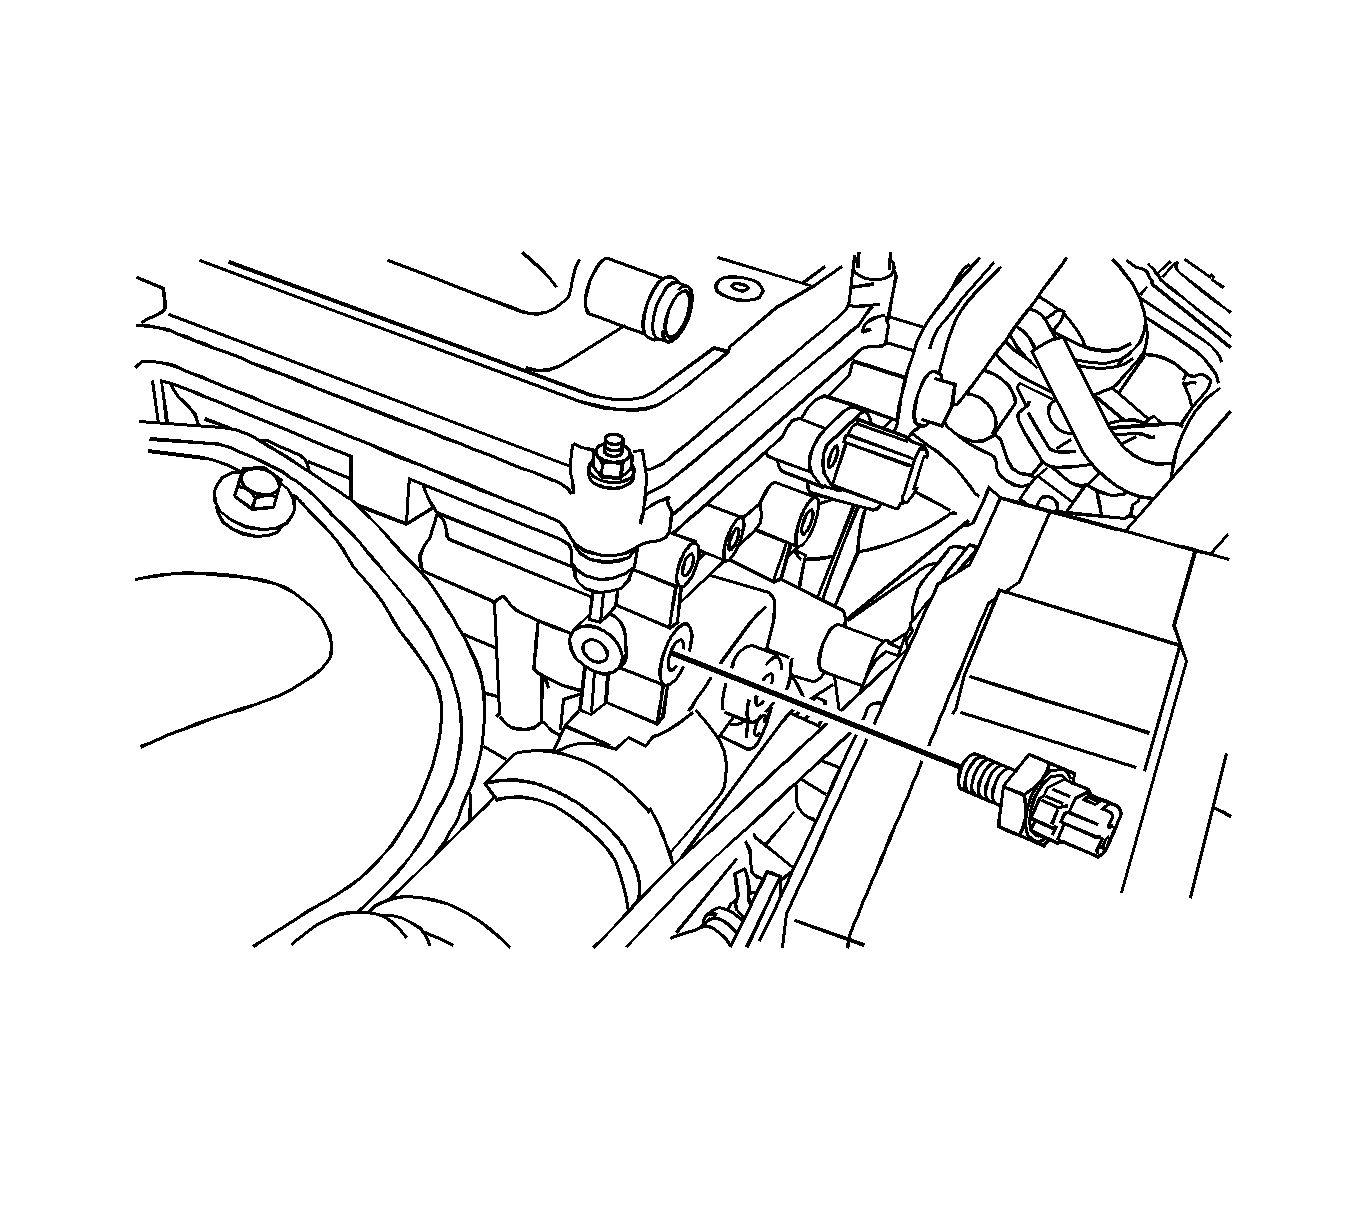
- Disconnect the oil pressure switch connector.
- Using a 24 mm deep socket wrench, remove the oil pressure switch.
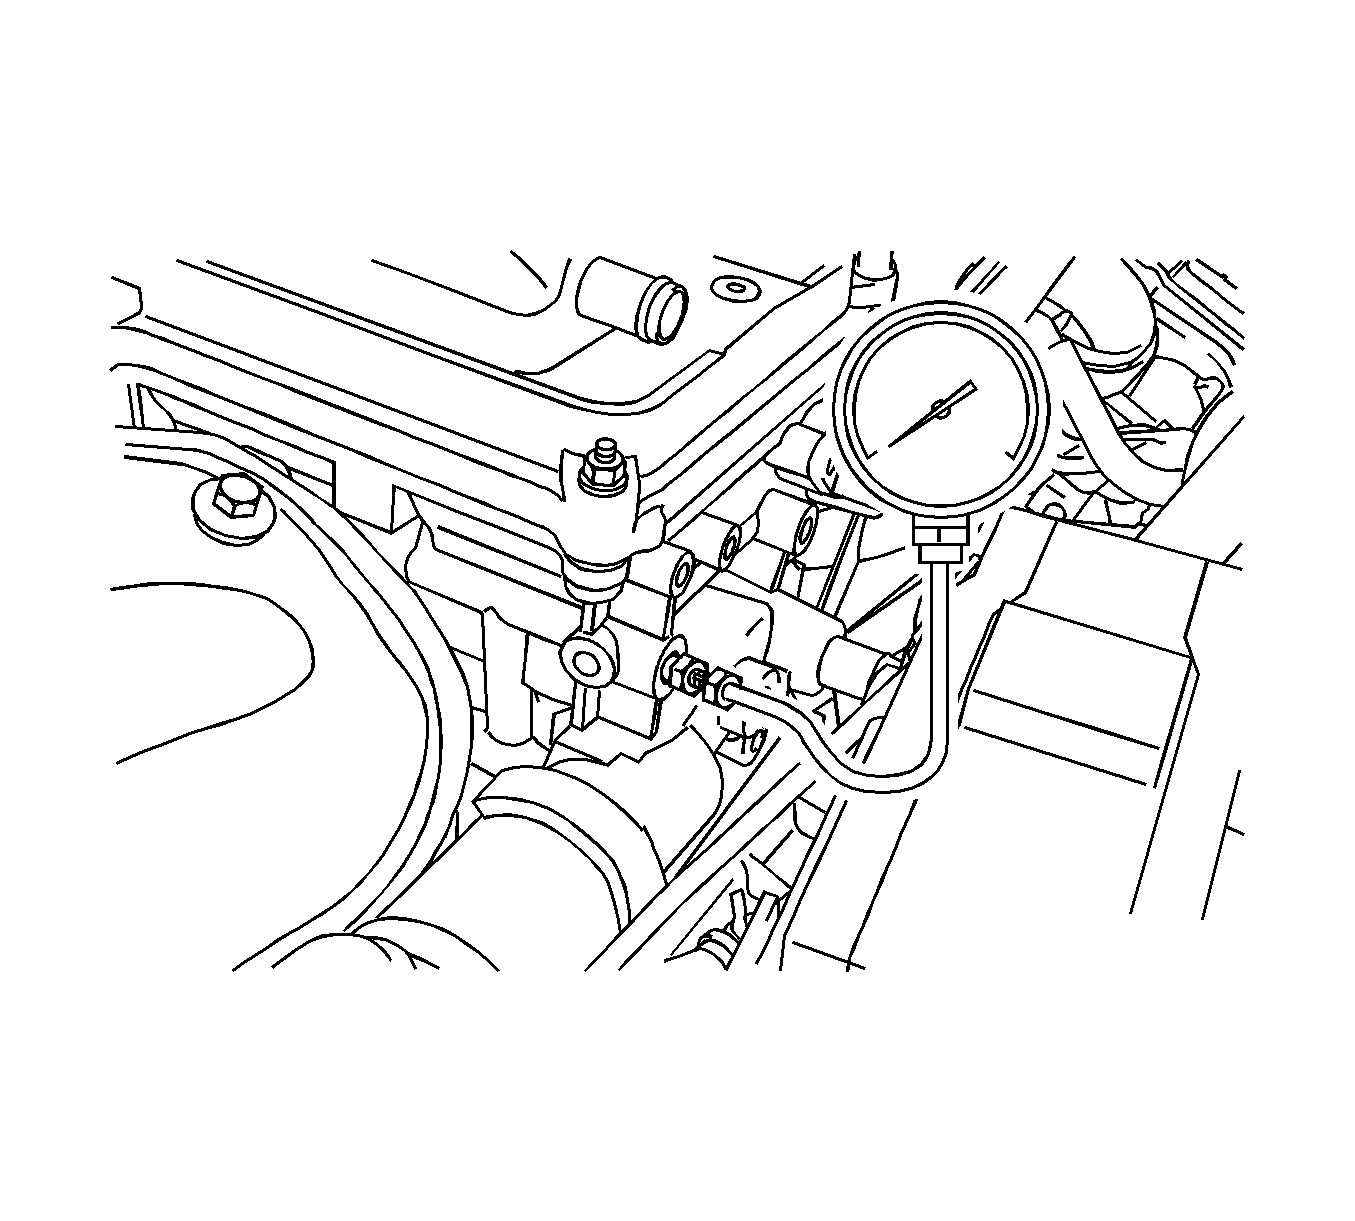
- Install the oil pressure gauge.
- Warm up the engine.
- Check the oil pressure.
- If the oil pressure is not as specified, check the oil pump.
- Remove the oil pressure gauge.
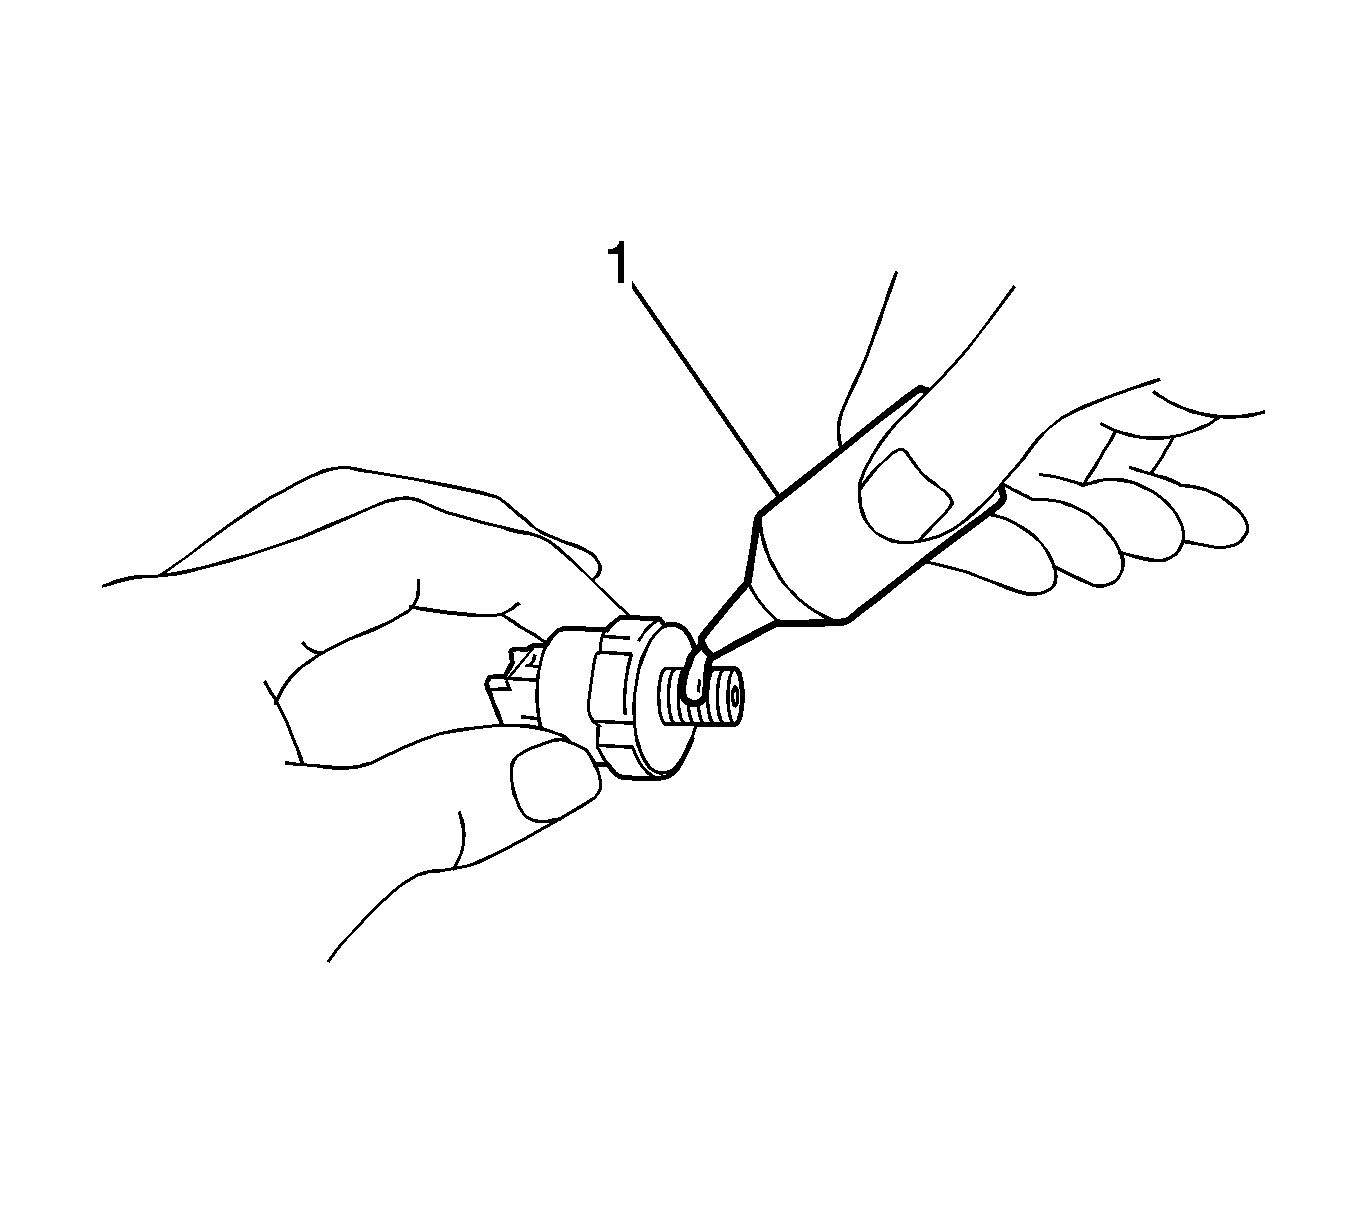
- Apply adhesive Three Bond 1344 (1) or equivalent to 2 or 3 threads of the oil pressure switch.
- Using a 24 mm deep socket wrench, install the oil pressure switch and tighten to 15 N·m (11 lb ft).
- Connect the oil pressure switch connector.
- Check for engine oil leaks.
- Install the air cleaner cap sub-assembly.
Note: Do not fill with engine oil to above the full level mark.
If the quality is visibly poor, replace the oil.


Caution: Refer to Fastener Caution in the Preface section.
Note: Do not start the engine for at least 1 hour after installation.
